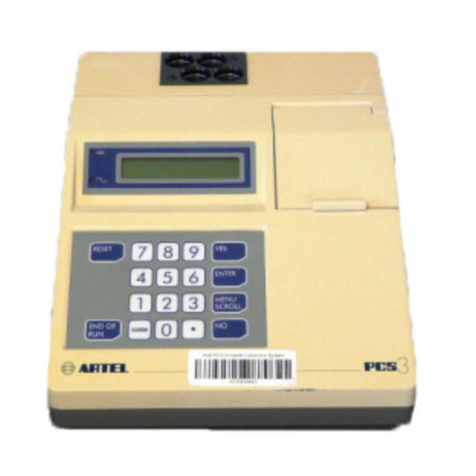
Artel MVS Operating and maintenance instructions

Quick Start Guide
Multichannel Verification System

Table of contents
Components .......................................................................2
MVS Set Up Instructions ...................
.................................
3
Connecting the Components .
...........................................
4
Powering On & Off ...........................
.................................
.5
Calibrating the Plate Reader ............................................6
Measuring the Baseline Plate .........................
...........
........7
Liquid Handler Setup ...............................
...................
.......8
Volume Verification Setup ...............................................9
Dilution Verification Setup ...............................................11
Running a Verification ......................................................12
Alternative Solution Preparation ....................................14
Alternative Solution Verification ....................................16
Batch Manager Function .................................................18
Test Reports .....................................................................20
1

Components
Plate Shaker
Portable Computer
with Data Manager
software
Plate Reader
Sample Solutions
Calibrator Plate
96- and 384-well
Verification Plates
Bar Code Reader
Mobile Workstation
2

Computer with Data Manager Software
MVS USB Hub
MVS Plate Reader
USB
Adapter
MVS Plate Shaker
RS232
MVS Barcode Reader
USB
Connection
USB 3 Port
Set Up Instructions
3

Plate Reader
• Plug one end of the power cord into the power
supply for the Plate Reader and the other end
into the power strip on the top shelf of the Mobile
Workstation cabinet.
• Connect one end of the USB cable into the Plate
Reader and the other end into the MVS USB Hub.
• Insert the remaining plug on the power supply
into the power receptacle on the back of the
Plate Reader and tighten the attached threaded
connector (do not over-tighten).
Plate Shaker
• Connect the BioShake 3000* Plate Shaker
to its power supply using the single-pronged
connector.
• Insert the standard plug of the power supply into
the attached power strip located on the top shelf
of the Mobile Workstation cabinet.
• Connect the standard serial connector to the
Keyspan USB adapter. Connect the USB adapter
to the MVS USB Hub.
*Instructions for other plate shakers may be found in the
Procedure Guide.
Connecting the Components
Computer
• Plug the three-prong end of the power supply
cord into the power strip on the top shelf of the
Mobile Workstation cabinet.
• Plug the round end of the cord into the side of
the Portable Computer.
• Plug the MVS USB Hub into a USB 3 Port on the
Portable Computer.
Bar Code Reader
• Plug the end of the cord attached to the MVS
Bar Code Reader into the MVS USB Hub.
System
Ensure that the power switch on the power strip is
o before proceeding.
• Plug the power strip located on the middle shelf
of the Mobile Workstation into a three-prong
electrical receptacle near the instrument under
test.
• Check that each individual component is
powered o, and then depress the switch to
energize the power strip.
Data Manager
4

Powering On & O
Turn on the power to the Plate Reader
by toggling the switch on the right side.
Note: Be sure that the light on the power
strip is illuminated.
Artel 800TSNB
Plate Reader
Press the power button on the
Portable Computer.
Powering On
Turn on by putting the power switch to the
ON position.
The Plate Reader will perform a 3 minute self-test
after being turned on.
The Plate Shaker automatically turns on with the
power of the system.
Wait for the Plate Reader to become ready for
operation, then click on the MVS®Data Manager
software icon on the desktop of the Portable
Computer.
The Data Manager software must be launched after
the completion of the Plate Reader self-test to ensure
communication between the components.
Powering Off
Shut down the Portable Computer (optional).
Switch the Plate Reader to OFF.
Press the power switch on the power strip on the back
of the Mobile Workstation to turn o all components
except the Portable Computer, which will continue to
run on battery power until it is shut down.
5

Initiate calibration
• Select File | Plate Reader Calibration to begin calibrating the Plate Reader. The Calibrator Plate will also be
requested if it has not been measured for the last 10 hours.
Scan the bar code on the Calibrator Plate
• Using the Bar Code Reader to scan, highlight the bar code on the Calibrator Plate until the Bar Code Reader
sounds a tone.
Check for bubbles and dirt on the Calibrator Plate
• Before testing the Calibrator Plate, position the large bubble in each of the calibrator cuvettes in the top
window of the cuvette. If the bubble is not in this position, gently tap the plate in a vertical orientation until
all bubbles rise to the top of the cuvette.
Cleaning recommendations for the Calibrator Plate
• Always use gloves when cleaning the Calibrator Plate.
• Clean smudges using the microfiber cloth included in the cleaning kit. Do not use sharp objects on the glass.
• Use the included Mira swabs to clean the edges of the glass close to the Calibrator Plate frame.
• Only use the included cleaning liquid if spots cannot be cleaned with the cloth or swabs. Use sparingly.
Read the Calibrator Plate
• Gently place the Calibrator Plate onto the Plate Reader tray and secure it into place. The label on the
Calibrator Plate will be facing up with the name reading from left-to-right. Click OK when complete.
The Plate Reader will begin taking readings at the required wavelengths.
• Data Manager software will automatically notify the operator if the readings are not within specification.
Refer to section 6.2 of the Procedure Guide for troubleshooting if the Calibrator Plate reading fails.
Calibrating the Plate Reader
6

Scan the Baseline Solution
Upon completing the Calibrator Plate reading, Data Manager will prompt the operator to scan
the Baseline Solution bar code and the bar code on the Baseline Verification Plate, if applicable.
Data Manager requires individual Baseline Plate readings for each Plate Type used.
Fill the plate with Baseline Solution and shake
Follow the next prompt and fill all wells of the microtiter plate with the requested amount of
Baseline Solution.
If filling a 384-well plate, centrifuge to remove any bubbles.
Place on the Plate Shaker. After shaking completes, examine the microtiter plate to ensure that
no splashing of liquid occurred during shaking. Reduce the speed of the Plate Shaker if needed.
If splashing occurs, discard the microtiter plate, press Cancel and repeat the test.
Read the Baseline Plate
Once the shaking step is complete, secure the Baseline-filled microtiter plate onto the Plate
Reader tray. When complete, click OK. The Plate Reader will read the microtiter plate and then
eject it. Discard this plate after use.
Measuring the Baseline Plate
7
Quick Tips:
• Calibrator Plate and Baseline Plate readings
are retained for ten hours.
• It is recommended that the Plate Reader
calibration be repeated if the temperature
changes by ±2
°
C or if the MVS is moved to
a new location.
• A Baseline Plate reading is required for each
Plate Type used, i.e., 96-well or 384-well.
• All MVS components should equilibrate to
room temperature for 1 hour before use.
To reset Plate Shaker speed:
• Select Preferences from the Options menu.
• In the Plate Shaker Settings area, adjust the
speed for the appropriate Plate Type.
• To return to default settings, click the
Default button next to the speed field.

Liquid Handler Setup
• At the main screen, select File | Liquid Handler Setup.
• The Device Manager will open.
• Click Add to open the Device Setup window (see screen image at right).
• Enter the required information for the Device ID, number of Channels and a Description.
• Click OK twice to close the Device Manager window and commit the changes to the database.
• Once a liquid handler has been added it will be saved for future verifications.
• Optional fields for Manufacturer, Bar Code and Serial Number may be completed.
• Clicking Cancel will undo any changes made to the device list since the window
was last opened.
8

Volume Verification Setup
Add a Volume Verification Plate Layout
• Enter a unique Layout ID, a Layout Description, and then select the number of
Channels and the Plate Type for the Plate Layout.
• If desired, check the boxes to calculate the Overall Run Status and/or the Overall
Channel Status. If both are unchecked, no pass/fail status will be applied.
• If desired, check the box to display the Heat Map.
Plate Layout Setup
• At the main Data Manager screen, select File | Plate Layout Setup.
• The Layout Manager will open (see screen image at right).
Red coded entries indicate volume verification layouts, while blue
coded entries indicate dilution layouts.
• Click Add and select Volume Verification Layout to display the
Layout Configuration window (see screen image below).
9

• The Dispense Direction and Device Orientation will determine how the
statistics are calculated in the Output Report. For more information, see
section 5.3.1 of the Procedure Guide.
• Begin entering Group Information: select the Target Volume, the number
of Data Points, and set the tolerance limits for Relative Inaccuracy and
Coecient of Variation.
• The Data Points drop-down list will only contain numbers which follow the
two rules for Layout Groups in Plate Layouts (not including 4-, 8-, 96-, or
384-channel devices):
1) Each must contain at least 3 data points, and
2) Each must span an entire row or column.
• In the Advanced edition of Data Manager, 1-, 8-, 12-, 16-, 24-, and 96-channel
devices can also be set up to index into a 384-well microtiter plate for Plate
Layouts.
When dispensing with 96-channel devices into 384-well plates:
- To create a custom dispense order, using the mouse, click the 4
quadrants of the large circle in the picture in the order that the liquid
dispense will occur (see screen image at right).
- Each quadrant will be highlighted with the color indicating the First,
Second, Third or Fourth Dispense, as shown in the key below the circle.
When dispensing with 8-channel devices into 384-well plates:
• Select, from the three options, the dispense order that matches the liquid handler
dispense pattern.
10
Volume Verification Setup
(continued)

Dilution Verification Setup
Plate Layout Setup
• At the Main Screen, select File | Plate Layout Setup.
• The Layout Manager will open (see screen image at right).
• Click Add and select Serial Dilution Layout to display the Layout Configuration window.
Add a Dilution Plate Layout
• Enter a unique Layout ID, a Layout Description, and then select the number of
Channels and the Plate Type for the Plate Layout.
• The Dispense Direction and Device Orientation settings are automatically set as
Left-to-Right and Vertical for the 8-channel, and Top-to-Bottom and Horizontal
for the 12-channel dilutions respectively in 96-well plates.
• The dispense direction settings must be defined when using an 8-channel dispenser
and a 384-well plate. Choose the correct dispensing pattern from the options by
clicking the button next to the appropriate icon. The settings are automatically set as
Top-to-Bottom and Horizontal for 12-channel dilutions in 384-well plates.
• In the Dilution Information section, enter a target dilution ratio and set the tolerance
limit for Relative Inaccuracy, then click Add. Repeat for each dilution step (see screen
image at right).
• The Relative Inaccuracy setting will be used for all dilutions in the Plate Layout and, if
enabled, ratios exceeding the tolerance limit will be highlighted on the Output Report.
• For Plate Layouts with multiple dilution steps and an overall dilution ratio greater than
1:4, multiple Sample Solutions and microtiter plates will be required.
• The table to the right will assist with determining which Sample Solutions will be
needed to accurately measure the target dilution ratios.
Note: Total volume in plate wells must be between 100 and 200
μ
L in a 96-well plate, or 28
and 55
μ
L in a standard 384-well plate after dilution steps have been completed.
11
Sample Solution Dilution Range
Range A 1 – 1:3.99
Range B 1:4 – 1:19.99
Range C 1:20 – 1:99.99
Range D 1:100 – 1:399.99
Range E 1:400 – 1:2048

Running a Verification
A: MVS Data Manager (Main Screen)
Select File | Start New Verification or click the green circle icon on the toolbar
to begin the verification process.
If there are no liquid handler devices entered into the program, the operator
will be prompted to add a device. Press
Enter
or click
OK
to open the Device
Manager and add a device. If the Plate Reader has not been calibrated, the
software will prompt for Calibrator and Baseline plate readings.
B: Device List Window
Highlight the device to be tested or scan the bar code on the device. Click OK.
If the Device ID is not listed, proceed to
File | Liquid Handler
Setup
and add
a new device. A Layout with the same number of channels must be created
through
File | Plate Layout Setup.
C: Verification Setup Window
Choose a Plate Layout and a Plate ID from the corresponding drop-down lists.
To select an Alternative Solution for a group in the layout, check the box at the
bottom of the window. Click OK.
To add a new Plate ID, cancel the Verification window, select
File | Plate Library
and click
Add
. To add a new Alternative Solution, cancel the Verification
window, select
File | Alternative Solution Library
and click
Add.
D: Scan the bar code on the bottle of MVS Sample Solution.
Using the Bar Code Reader, highlight the bar code on the Sample Solution bottle to
be used until a tone sounds.
The software will prompt to scan all required Sample Solution bar codes depending
on the layout and target solutions used. This prompt will be skipped if the Plate
Layout uses only Alternative Solutions.
E: Scan the bar code on the bottle of MVS Diluent Solution.
Using the Bar Code Reader, highlight the bar code on the Diluent Solution bottle to
be used until a tone sounds.
The Diluent will not be requested for groups with a Target Volume greater than
200
µ
L in a 96-well plate, or volumes equal to the total volume allowed in a 384-well
plate (55
µ
L in a 384-well Standard Profile plate, etc.).
F: Scan the bar code on the MVS Verification Plate.
Using the Bar Code Reader, highlight the bar code on the MVS Verification Plate to
be used until a tone sounds.
This prompt will not appear if a Plate ID other than “MVS Verification Plate” is chosen
in the Verification Setup window.
12

Running a Verification
(continued)
G: Scan the bar code on the approriate box of MVS Verification Plates.
Using the Bar Code Reader, highlight the bar code on the appropriate box of MVS
Verification Plates until a tone sounds.
This prompt will only appear once per lot of MVS Verification Plates.
H: Fill the (Plate ID) 1 of ___ with solutions as specified in the table below.
Using the device under test, fill the plate according to the displayed layout.
It is recommended that 384-well plates be centrifuged after filling (e.g. 1 minute
@ 1200 RPM) to remove bubbles in the wells and to flatten the menisci. On-board
mixing is also recommended for 384-well plates if using the Variomag Plate Shaker.
I: Place the plate on the Plate Shaker.
When the plate is axed to the shaker, click OK.
Check the plate to ensure that no splashing of liquid occurred during shaking
and that the liquid is thoroughly mixed. Adjust the speed of the Plate Shaker
accordingly. (Refer to the table at right for more information.)
Default Plate Shaker Speed & Duration (for Standard Profile Plates):
J: Insert the (Plate ID) into the Plate Reader.
Gently secure the plate on the Plate Reader tray with well A1 in the top-left
position of the reader. Click OK.
For 96- and 384-channel devices only: The number of data points set in the
Plate Layout will determine the number of times the software will repeat
steps H through J.
Variomag Big Bear Q. Instruments
96-
well
384-
well
96-
well
384-
well
96-
well
384-
well
Speed
(RPM)
1300 1800 1300 2700 1500 2600
Duration (s)
60 180 60 120 60 120
13

Prepare alternative solutions to mimic the liquid properties of commonly dispensed
liquids. Alternatively, other non-aqueous solutions are available as part of the
MVS Solution product line.
Use the Alternative Solution Helper to Determine Preparation Protocol:
• Launch the Alternative Solution Helper software from the desktop icon or through
the installation folder.
• Select New Solution File from the File menu and choose one of the four Plate Types.
• Enter the Target Volume to test.
• Refer to the Alternative Solution Table below for the approximate Target Volume
limits for each Plate Type.
• Enter the Lot Volume. Artel recommends a Lot Volume of at least 30 mL.
• Enter the Solvent Density. This value will also need to be entered into the Data
Manager software.
• Click DONE and a report will be generated detailing the target weights of both
the appropriate MVS Stock Solution and the solvent in order to achieve the Target
Volume entered above (see screen image at right).
• The report will include usable volume ranges for the solution in each Plate Type.
Follow the Dilution Instructions and record the actual weights that will be entered
into Data Manager.
Alternative Solution Preparation
14

Prepare Alternative Solution:
Note: Record weights, in grams, of MVS Stock Solution and solvent during
sample preparation.
• Place a clean, amber bottle with cap on the balance pan and press tare.
• Add the amount of MVS Stock Solution determined using the Alternative
Solution Helper instructions above. Replace the cap on the bottle.
• Record the weight once the balance reaches equilibrium.
• Remove the cap, place it on the balance pan and press tare.
• Add the appropriate amount of solvent determined using the Alternative
Solution Helper.
• Replace the cap on the bottle and record the weight of solvent when the
balance has reached equilibrium.
• Mix each Alternative Solution by inversion approximately 20 times.
• Label the bottle with the Stock and Solvent weights, the Solvent Density and
the date.
• Allow the solution to equilibrate to room temperature before using in any tests.
• Add the Alternative Solution to Data Manager.
Alternative Solution Volume Range per Plate Type
Plate Type
Supported
Volume Range
(µL)
MVS Stock
Solution
96 Well Standard
Profile
0.4 – 9.9
10 – 49.9
1
2
384 Well Standard
Profile
0.1 – 2.49
2.5 – 9.9
1
2
384 Round Well
Low Volume
0.05 – 1.49
1.5 – 3.99
1
2
384 Well Low
Profile
0.04 – 1.49
1.5 – 3.99
1
2
15
Alternative Solution Preparation
(continued)

Add the Alternative Solution to the Library:
• Select Alternative Solution Library from the File menu and click Add.
• Enter a unique ID and Description. Click Select Stock Solution and scan the
appropriate MVS Stock Solution with the Bar Code Reader.
• Enter the Solvent Solution density.
• Enter the weights of the solutions used to prepare the Alternative Solution
into the Stock Solution and Solvent Solution fields.
• Click Calculate to determine the appropriate volume ranges for the solution
(see screen image at right).
• Click OK twice to save changes and start a new verification, as described in
the flowchart below.
Alternative Solution Verification
16

MVS Data Manager (Main Screen):
Select Start New Verification from the file menu.
Highlight the Device ID to be tested and click OK,
or scan the bar code on the device.
Verification Setup:
Choose the Plate Layout and
Plate ID from the drop-down
lists. Check the box for “Run Ver-
ification with
Alternative Solution.”
Verification Setup:
Choose the Plate Lay-
out and Plate ID from
the drop-down lists.
Alternative Solution
Verification Setup:
Choose the target solution for
each group from the corre-
sponding
drop-down list.
Scan the MVS Solution bar codes
as requested.
If using an MVS Verification
Plate,
scan the bar code.
Fill the plate as specified,
then place on the Plate Shaker.
Insert the plate into the
Plate Reader.
Verification is complete!
(Skip if a valid Baseline reading is stored
for the selected plate type)
Scan the MVS Baseline Solution bar code.
Fill the plate as specified with the Baseline
Solution and place on the Plate Shaker.
Repeat for
the number
of plates
requested.
If using Artel DMSO
Sample Solution
If using Custom Solution
17

Note: the Plate Reader Type must be set to None/Import from file within the Preferences
window in order to see the File Prompt.
Batch Verification Setup:
• From the Batch menu, select Batch Manager.
• Click Add to open the Batch Setup window (see screen image at right).
• This window requires a unique Batch ID and a Description.
• The Calibrator Plate (Calplate), Baseline and Verification items can then be added to the
Batch File by clicking the corresponding button.
• Items can be deleted from a Batch File by selecting them from the list on the left, and
clicking Delete Selected Item.
Calibrator Plate:
Properties for the Calplate item can be modified by populating the following
fields (see screen image at left):
• Data File: Select a data file to import absorbance values.
• Bar Code: Scan and store the bar code.
• Show File Prompt: Select True to prompt for a data file at run-time.
Batch Manager Function
18

Baseline Plate:
Properties for the Baseline item can be modified by populating the
following fields:
• Plate Type: Select the Baseline Plate Type. The Plate Type must match the
Plate Type used for the corresponding verifications.
• Data File: If importing, browse for the data file.
• Baseline Bar Code: With the Bar Code Reader, scan and store the bar
code from the bottle of Baseline Solution.
• Show Plate Shaker Prompt: The property Show Plate Shaker Prompt
allows the operator to either pause the Batch to shake each plate or,
by choosing False, to skip the shaking step and run the Batch without
interruption.
• Show File Prompt: Select True to display the prompt at run-time, pausing
the run. Select False to enable the batch to import the data file at the
location set for that property.
Verification:
Properties for the Verification item can be modified by populating the
following fields:
• Device ID: Choose a Device ID from the drop-down list.
• Layout ID: Choose a Layout ID from the list of compatible layouts.
• Plate ID: Choose a Plate ID from the list of compatible plates.
• Bar Codes | Data Files: Required bar codes can be scanned in advance
and data files can be pre-selected for importing.
• Show Plate Shaker Prompt: Select True to display prompt at run-time,
or False to run the batch without interruption.
• Show File Prompt: Select True to display the prompt at run-time,
pausing the run. Select False to enable the batch to import the data file
at the location set for that property.
Save and Run:
• Click OK to save the new Batch Verification or Cancel to discard it.
• Once a Batch Verification is created, select Start Batch Verification
from the Batch menu and then choose the appropriate Batch
Verification from the list.
Notes:
• When new solutions and/or plates are used, the stored bar codes must be updated.
• The Plate Shaker Control window within the Options menu can be used to shake the
plate(s) before beginning the batch.
• Alternative Solutions and Serial Dilution Layouts are not currently supported in the
Batch Verification function.
• Any required information that is not entered will be requested during run-time.
19
Table of contents
Other Artel Laboratory Equipment manuals