GB
English - P 7
Installing your wine cabinet
Ensure, when unpacking your cabinet, that it presents no signs of impact,
buckling or exterior appearance defects).
Carefully remove any protective covering and packaging adhesive from your
wine cabinet.
Open the door and check the integrity of the different components.
Release the power cable so that it does not enter into contact with any of the
cabinet’s components.
Move your cabinet to its chosen location.
The location that you have chosen for your cabinet must:
- be unobstructed and well ventilated (not in a closed cupboard, for example),
- allow a minimum space of 10 cm between the wall and the back of the cabinet,
- not be close to any source of heat,
- not be too damp (laundry room, utility room, bathroom...),
- have a flat, stable floor,
- have access to a standard power supply (power socket compatible with the
voltage standard for the country, earthed with circuit breaker).
The use of extension leads or multi-sockets is forbidden.
Free standin
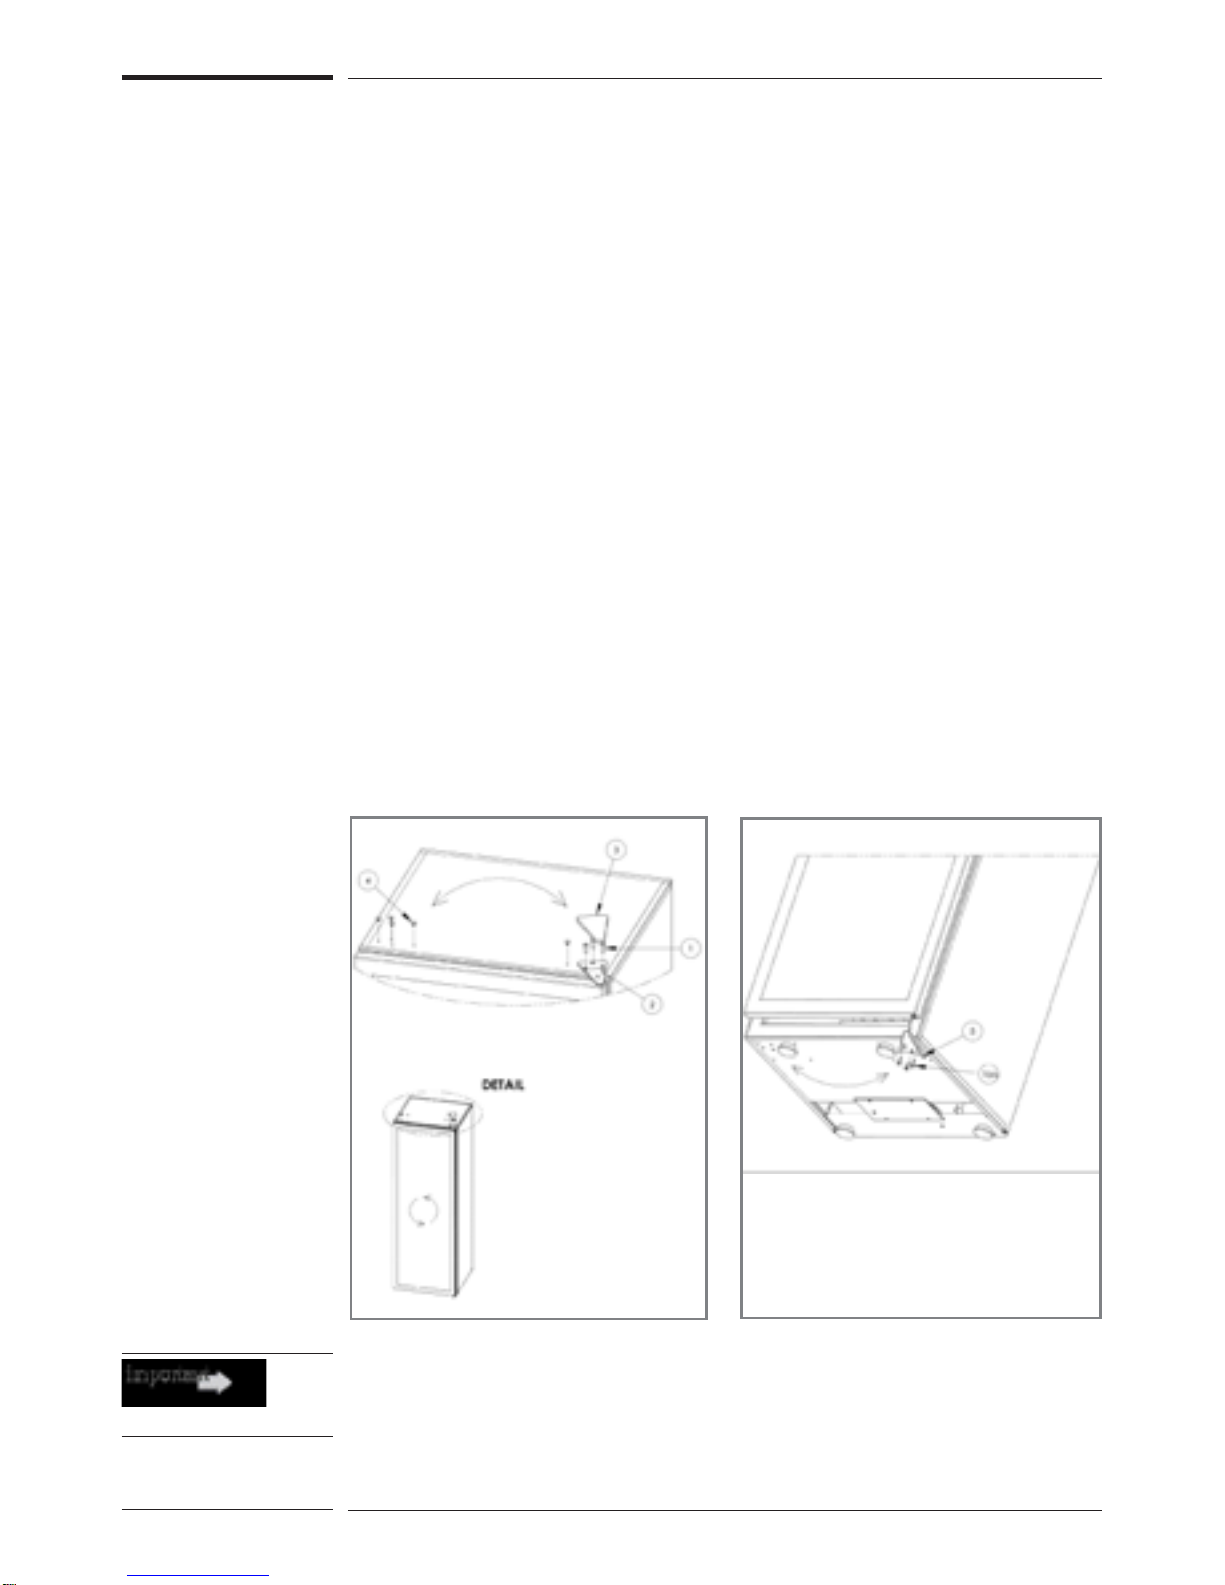
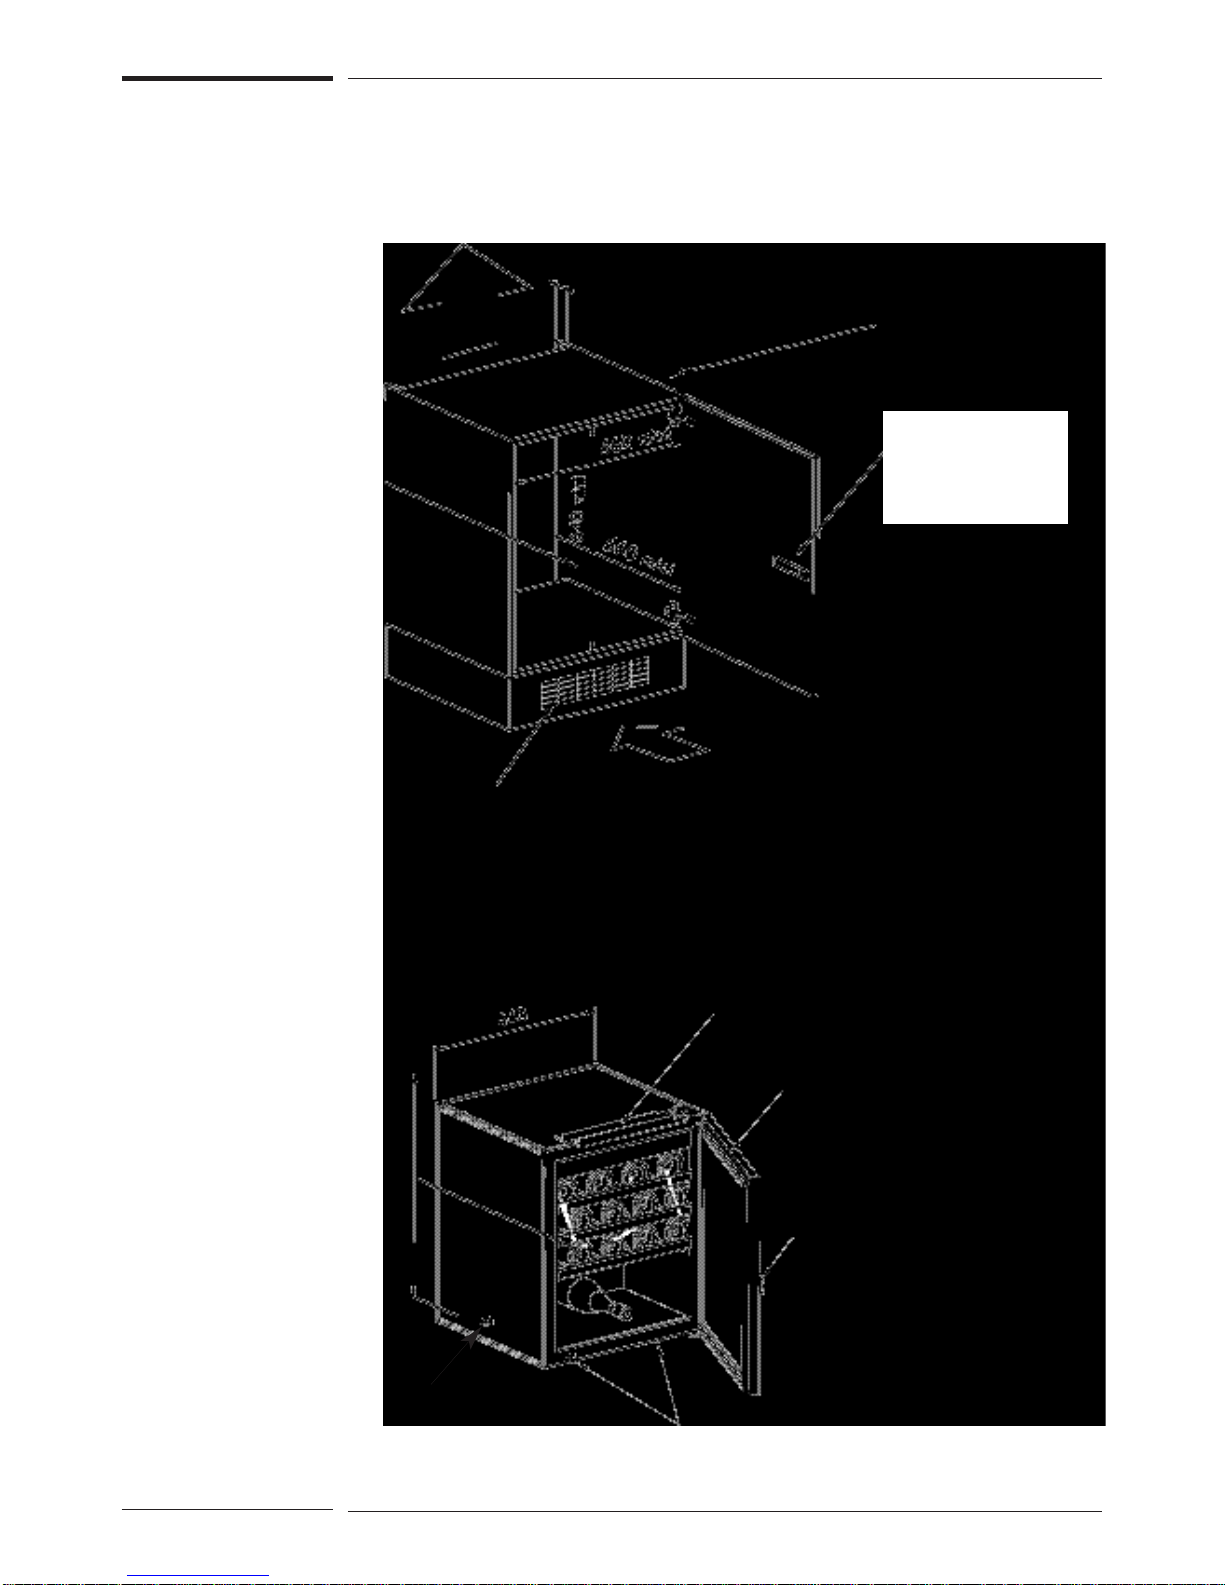
Installing the handle
Installing the handle of your wine cabinet is carried out in the following manner:
- Introduce the two spacers (B) into the holes
on the inside panel of the door.
- Add the two washers (C)
- Using a screwdriver, secure the handle (A)
with the two screws (D).
- Clip the two knobs (E) onto the washers.
As a security
measure, the lock
works on a double
movement system.
The key should be
pushed inward and
turned at the same
time.
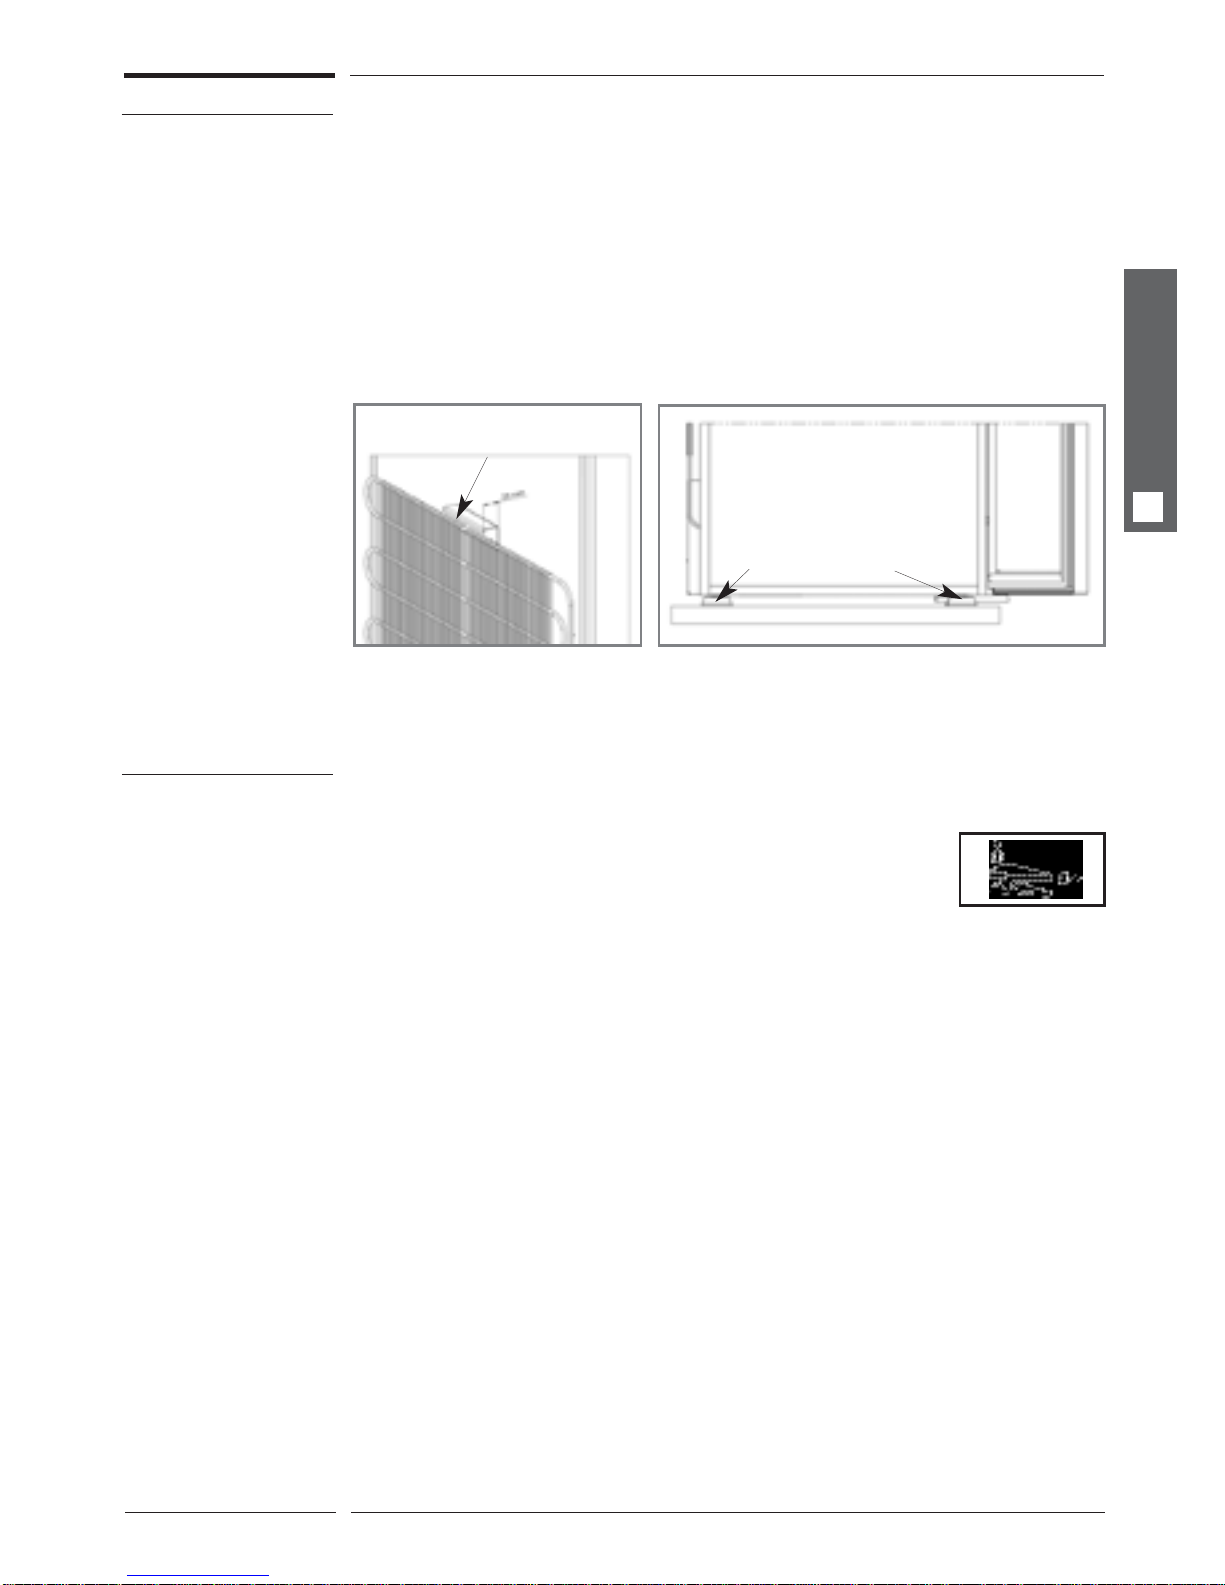
For easy levelling, your wine cabinet is fitted with 4adjustable feet.
However, we recommend that you screw down the two feet located at the
rear of the appliance and perform the adjustment using only the two feet
located at the front of the appliance.
Check the final level of your cabinet (the use of a spirit level is recommended).
WAIT 48 HOURS BEFORE PLUGGING IN YOUR APPLIANCE
When moving your cabinet never tilt it by more than 45°, and always on its
lateral side (the side where the electrical lead is located).