Make sure all connectors are tight in their sockets and make sure
that the machine is operated only if
the conditions for safe and intended
use are met (see also section 2)
Important
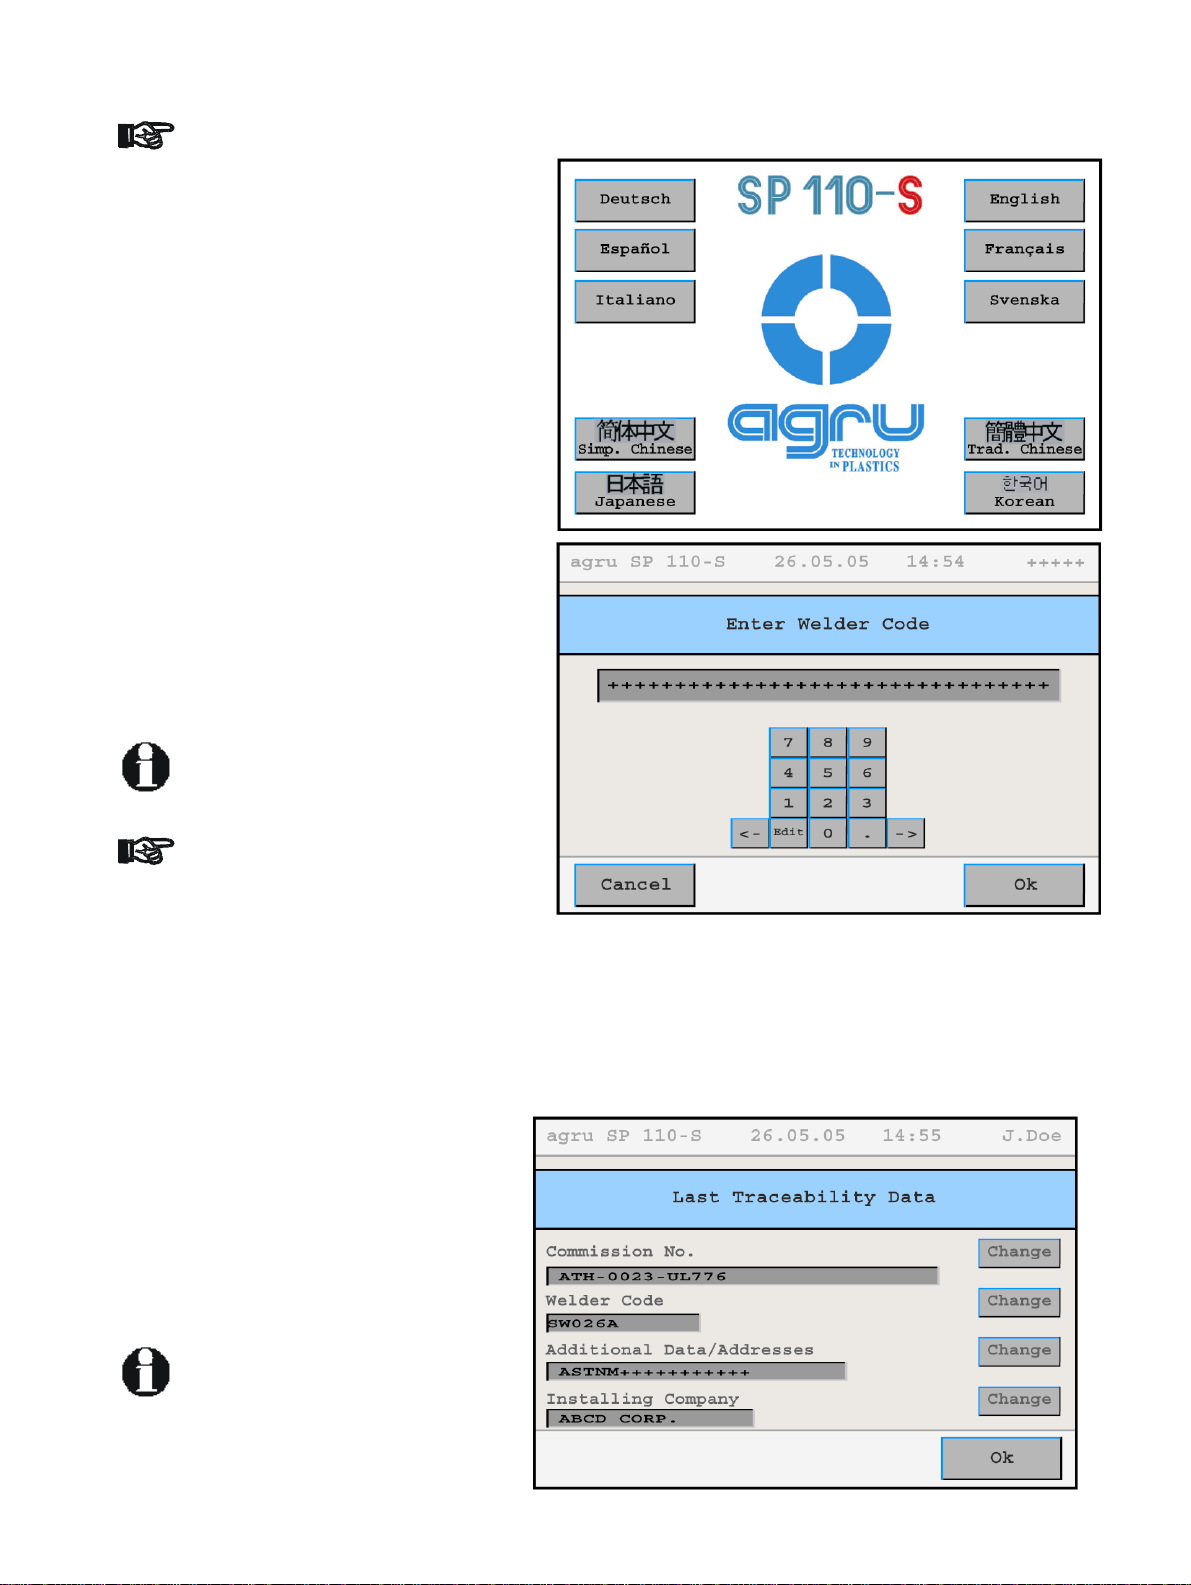
Display 1
After preparing the machine for
welding and connecting the power supply cord
to the mains power supply, the machine is
turned on using the On/Off switch. The wel-
come screen, as reproduced in Display 1, ap-
pears on the touchscreen panel. Touch the
appropriate flag to select the display language
that the machine will use.
After the language was selected, the machine
takes the user to the welder code entry
screen. Without a valid welder identification
code, it is impossible to start welding processes
on the machine, since the heating element re-
fuses to heat up unless a valid code is entered.
Info
Enter the welder identification code by typing it
on the touchscreen and saving it to memory by
touching the “Ok” button. If a bar code for the
welder code is available, you can also read it
from the bar code using the scanning wand.
All inputs for which a bar code is
available can be entered from the
bar code using a scanning wand.
Entering data on the touchscreen
must always be performed with the
bare finger. Using objects (ballpoint
pens, screwdrivers, etc.) may cause
unrecoverable damage to the surface of the touchscreen.
Display
Info
Important
4.2 Entering Traceability Data for the Joint
After the welder identification code was entered, the traceability data for the
joint have to be entered.The machine displays the traceability data for the
last joint that was welded (see Display 3), which can be re-used for the next
welding operation by simply touching the “Ok” button.
If traceability data are not the same as for the
last joint, change the data that are different
by touching the appropriate “Change” button.
Depending on the kind of data you want to
change, the machine displays either a
numeric keypad (see Display 2) or an
alphanumeric keyboard (see Display 4). To
confirm and save your data input to memory,
touch the “Ok” button.
Depending on the software
version installed in your machine,
some screens may differ slightly
on your machine from the
reproductions in this manual.
10 agru SP-110S User’s Manual Version December 2006
Display