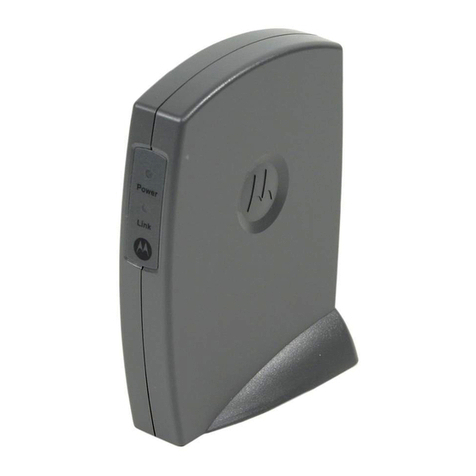
Asoka AV 9560 User manual

PlugLink®AV 9560 Wireless Adapter
User Guide
PL9560-WAP
Q
UICK
F
IND
L
OCATOR
Contact Information
Customer Service
Technical Support
Table of Contents
Installation
66-0327-00Rev.007

© 2012 Asoka USA Corporation
ALL RIGHTS RESERVED
Notice: No part of this publication may be reproduced or transmitted in any form or by any
means, electronic or mechanical, including photocopying and recording, or stored in a
database or retrieval system for any purpose without the express written permission of
Asoka USA Corporation.
Asoka USA Corporation reserves the right to make changes to this user guide at any time
without notice and assumes no responsibility for its use. Asoka USA products and services
can only be ordered under the terms and conditions of Asoka USA Corporation's applicable
agreements. All of the features described in this user guide may not be currently available.
Refer to the most recent product announcement for information about feature and
product availability.
This user guide contains the most current information available at the time of publication.
When new and/ or revised information becomes available, this entire user guide is updated
and distributed to all registered users.
Asoka, PlugLink, and the Asoka logo are registered trademarks or trademarks of Asoka USA
Corporation.
All company and product names mentioned herein are trademarks of their respective
companies. Mention of third-party products is for informational purposes only and
constitutes neither an endorsement nor a recommendation. Asoka USA Corporation
assumes no responsibility with regard to the performance or use of these products.
Revision
Date Description
66-0327-00Rev.007 Nov.2012 Changed the product images
66-0327-00Rev.006 Apr 2010 Available from v1.21.05. Factory reset is to push button 10s.
66-0327-00Rev.005 Mar 2010 Available from v1.21.03. Asoka config. Wi-Fi certified.
66-0327-00Rev.004 Sep 2009 Available from v1.12. Push button setting is 1s/4s.
66-0327-00Rev.003 Aug 2009 Available from v1.11. Add DHCP client.
66-0327-00Rev.002 May 2009 ATT Release. Modify
the
default IP / Wireless
Channel.

THE SPECIFICATIONS AND INFORMATION REGARDING THE PRODUCTS IN THIS MANUAL ARE
SUBJECT TO CHANGE WITHOUT NOTICE. ALL STATEMENTS, INFORMATION, AND
RECOMMENDATIONS IN THIS MANUAL ARE BELIEVED TO BE ACCURATE BUT ARE PRESENTED
WITHOUT WARRANTY OF ANY KIND, EXPRESSED OR IMPLIED. USERS MUST TAKE FULL
RESPONSIBILITY FOR THEIR APPLICATION OF ANY PRODUCTS.
THE SOFTWARE LICENSE AND LIMITED WARRANTY FOR THE ACCOMPANYING PRODUCT ARE
SET FORTH IN THE INFORMATION PACKET THAT SHIPPED WITH THE PRODUCT AND ARE
INCORPORATED HEREIN BY THIS REFERENCE. IF YOU ARE UNABLE TO LOCATE THE SOFTWARE
LICENSE OR LIMITED WARRANTY, CONTACT YOUR ASOKA REPRESENTATIVE FOR A COPY.
The following information is for FCC compliance of Class B devices: This equipment has
been tested and found to comply with the limits for a Class B digital device, pursuant to
part 15 of the FCC rules. These limits are designed to provide reasonable protection against
harmful interference when the equipment is operated in a commercial environment. This
equipment generates, uses, and can radiate radio-frequency energy and, if not installed
and used in accordance with the instruction manual, may cause harmful interference to
radio communications. Operation of this equipment in a residential area is likely to cause
harmful interference, in which case users will be required to correct the interference at their
own expense.
Modifying the equipment without Asoka’s written authorization may result in the equipment
no longer complying with FCC requirements for Class B digital devices. In that event, your
right to use the equipment may be limited by FCC regulations, and you may be required to
correct any interference or radio or television communications at your own expense.
You can determine whether your equipment is causing interference by turning it off. If the
interference stops, it was probably caused by the Asoka equipment or one of its peripheral
devices. If the equipment causes interference to radio or television reception, try to correct
the interference by using one or more of the following measures:
Turn the television or radio antenna until the interference stops.
Move the equipment to one side or the other of the television or radio.
Move the equipment farther away from the television or radio.
Plug the equipment into an outlet that is on a different circuit from the television or
radio. (That is, make certain the equipment and the television or radio is on circuits
controlled by difference circuit breakers or fuses.)
Modifications to this product not authorized by Asoka could void the FCC approval and
negate your authority to operate the product.
NOTWITHSTANDING ANY OTHER WARRANTY HEREIN, ALL DOCUMENT FILES AND SOFTWARE
OF THESE SUPPLIERS ARE PROVIDED “AS IS” WITH ALL FAULTS. ASOKA DISCLAIM ALL
WARRANTIES, EXPRESSED OR IMPLED, INCLUDING, WITHOUT LIMITATION, THOSE OR
MERCHANTABILITY, FITNESS FOR A PARTICULAR PURPOSE AND NONINFRINGEMENT OR
ARISING FROM A COURSE OF DEALING, USAGE OR TRADE PRACTICE.
IN THE EVENT SHALL ASOKA BE LIABLE FOR ANY INDIRECT, SPECIAL, CONSEQUENTIAL OR
INCIDENTAL DAMAGES, INCLUDING, WITHOUT LIMITATION, LOST PROFITS OR LOSS OR
DAMAGE TO DATA ARISING OUT OF THE USE OF INABILITY TO USE THIS MANUAL, EVEN IF
ASOKA HAVE BEEN ADVISED OF THE POSSIBILITY OF SUCH DAMAGES.
Contact Information
For more information about the PlugLink AV 9560 Wireless Adapter or any of
Asoka’s other leading-edge solutions, please contact us using any of the following
methods:
• Voice calls: (408) 550-8167 - We welcome your calls Monday through Friday, from
9:00 am to 5:00 pm Pacific Time. Voice mail is available during non-business
hours.
• Email: If you prefer, you can send information requests to our e-mail address:
• Web site: Our Web site contains valuable information about our products,
solutions, and services. We encourage you to visit us at
http://www.asokatech.com.
Customer Service
Available from: Monday through Friday, from 9:00 am to 5:00 pm Pacific Time, by
Technical Support
Technicalsupport is availableMonday throughFriday, from 8:00 am to 5:00 pm
Pacific Time, by calling (408) 550-8173 or through email at
tech[email protected].
Please provide the following information about the problem:
• Product name and model.
• System configuration, including a description of the devices connected to your
PlugLink AV 9560 Wireless Adapter.
• The circumstances surrounding the error or failure.
• A detailed description of the problem and what has been done to try to solve it.

Asoka® User Guide
PlugLink® AV 9560 Wireless Adapter
Page2of40
Table of Contents
Chapter
Title
Page
1
Introduction
3
2
Important Safety
Information
4
3
Learning about PL
9560-WAP
5
4
Preparing to
Install
8
5
Installing PL
9560-WAP
9
6
Logging
On
11
7
Browser-based User I
nterface
12
8
Configure the LAN IP
Setting
14
9
Understanding Basic Wireless
Configuration
15
10
PL9560-WAP
Administration
25
11
Technical Support
Information
35
12
Technical
Specifications
36
13
FCC
Statement
37
14
Warranty
Information
38

Asoka® User Guide
PlugLink® AV 9560 Wireless Adapter
Page3of40
Chapter 1
Introduction
Thank you for purchasing a PlugLink AV 9560 Wireless Adapter
(PL9560-WAP) from Asoka. This adapter lets you extend an existing
Powerline network allowing you to set up an instant wireless hotspot
simply by plugging into a power outlet. With your PlugLink AV 9560
Wireless Adapter, you can easily share your high-speed Internet
broadband, mp3, video and gaming throughout the home or home
office without pulling any new
cabling.
This unit will not interfere with other household appliances such as hair dryers,
vacuum
cleaners
or microwave ovens. Consuming 8 watts power, it is
environmentally friendly and will
not
noticeably increase your electrical bill.
It is a simple, secure and reliable choice for web
surfing,
playing games, and
complimenting your existing wireless network, mp3 streaming and even
video sharing.
This User Guide shows you how to connect your PlugLink AV 9560 Wireless
Adapter to your existing Powerline network. Setup is easy. Just follow the
instructions in this guide, your network
will
be up and running in a matter of
minutes.

Asoka® User Guide
PlugLink® AV 9560 Wireless Adapter
Page4of40
Chapter 2
Important Safety Instruction
The following precautions should be taken when using this
product:
•Read all instructions before installing and operating this
product.
•Do not open the cover or casing on this product and/or alter this
product in any
way.
•Follow common household electrical safety
practices.
If you have any questions or concerns regarding these safety measures,
please
contact
Technical Support via email at support@asokatech.com or
via phone at 408-550-8173
Monday
through Friday between 9:00 am and
5:00 pm PST (excluding
holidays.)

Asoka® User Guide
PlugLink® AV 9560 Wireless Adapter
Page5of40
Chapter 3
Learning about PL9560
Package
Contents
z PlugLink AV 9560 Wireless Adapter
(PL9560-WAP)
zQuick Installation
Guide
zInstallation Resource
CD
zWarranty and Support Information Card
IF ANY OF THE PARTS ARE INCORRECT, MISSING, OR DAMAGED, CONTACT
THE RETAILER WHERE OU MADE YOUR PURCHASE. Keep the carton,
including the original packing materials, in case you need to
return
the
unit for
repair.
The Front
Pane
l
The front panel of the PL9560-WAP Adapter contains the status lights
described
below.
Figure 3-1: PL9560-WAP Front
Panel
You can use the status lights to verify connections. Viewed from top to
bottom, left to right, the table describes the lights on the front panel of the
unit.

Asoka® User Guide
PlugLink® AV 9560 Wireless Adapter
Page6of40
Table 3-1: Status Light Descriptions
Power On Indicates Device Powered On
Off Indicates No Power
PLC Activity Blinking.
The colors act as throughput
indicators.
Indicates Activity on Powerline.
Green means good throughput.
Orange means average throughput.
Red means low throughput.
Off Indicates No Activity on Powerline
(Should blink Intermittently)
Wireless Activity Blinking Indicates Activity on Wireless
Off Indicates No Activity on Wireless
ETH Link On Indicates Ethernet Connectivity
Blinking Indicates Ethernet Traffic Indicates
Off No Ethernet Activity
The Bottom Panel
The bottom panel of the PL9560-WAP contains an Ethernet (RJ-45) port as
shown in figure 3-2.
Figure 3-2: PL9560-WAP Bottom Panel
The Rear Panel
The label on the rear panel of the PL9560-WAP Adapter contains the items
listed below.
Model number
Unique device password
PLC MAC Address
Device MAC Address
Serial number
Note: For future convenience, please write this information down in your
Warranty and Support Information Card.

Asoka® User Guide
PlugLink® AV 9560 Wireless Adapter
Page7of40
Figure 3-3: Rear Label
Buttons
The PlugLink AV 9560 Wireless Adapter device has two push buttons:
• Sec (Left) Button/ PowerlineSecurity- The Sec button allowsyou to set a
randomized Network Encryption Key (NEK) by pressing it. You can then
have additional units use the same randomized NEK by pressing their
respective Sec buttons.
• WPS (Right) Button / Wi-Fi Protected Setup Function - This button allows
you to configure wireless security by simply pushing a button. This
requires the wireless clientadapter that supports this feature.
Brief information about the Buttons’ usage:
push and press Sec Button WPS Button
for 1 second Powerline join WPS join
for 4 to 9 seconds Powerline reset WPS reset
More than 10 seconds Factory Reset to the device
Notes: You may referent the section “How to use the Sec and WPS-Push
Button” on the Chapter 10 to know more details about the buttons’ usage.

Asoka® User Guide
PlugLink® AV 9560 Wireless Adapter
Page8of40
Chapter 4
Preparing to Install
The PlugLink AV 9560 Wireless Adapter lets you set up an instant wireless
Access Point using your
existing
electrical outlets. It can also easily
compliment your existing network by connecting to
any
device with a
10/100BaseT Ethernet-capable
device.
To setup a PLC (PowerLine Communication) Network you will need
:
One (1) PL9560-WAP
device
One (1) PL9661-ETH device (sold
separately)
Standard Cable/ DSL gateway (provided by your
ISP)
Figure 4-1: Connecting PL9560-WAP with PL9661-ETH diagram

Asoka® User Guide
PlugLink® AV 9560 Wireless Adapter
Page9of40
Chapter 5
Installing PL9560
Do not connect the PlugLink AV 9560 Wireless Adapter to a
power
strip,
extension cord, uninterruptible power supply (UPS),
or surge
protector.
This may prevent the unit from working
property or degrade the
network performance.
Plug the PlugLink AV 9560 Wireless Adapter into the wall outlet
vertically (right side up).
1. Use the Ethernet cable shipped with your PlugLink HD AV Eco
Adapter
PL9661-ETH (PL9661-ETH not included; sold separately)
to a LAN port on
your
router.
2. Plug the PlugLink HD AV Eco Adapter PL9661 (PL9661-ETH not included)
into a nearby wall outlet.
Figure 5-1: Connecting the PL9661-ETH to a router.

Asoka® User Guide
PlugLink® AV 9560 Wireless Adapter
Page10of40
3. Plug the PlugLink AV 9560 Wireless Adapter into a wall outlet near the
wireless computer that you want
to connect.
Figure 5-2: Plugging the PL9560-WAP vertically into a wall outlet.
4. Wait a few seconds and the top three LEDs on the PlugLink AV 9560
Wireless Adapter will light up.
5. From your computer scan your Wireless Network Connections to look for
your PlugLink AV 9560 Wireless Adapter’s network name (SSID). The default
name (SSID) of the PlugLink AV 9560 Wireless Adapter is Asoka. You will be
prompted for your “Encryption Key”. The default Encryption Key is the last
10 digits of the serial number. The serial number is printed on the PL9560
label.
If you changed the default network name (SSID), be sure to
use
the
correct network name (SSID) you set in the PlugLink
AV 9560 Wireless
Adapter.
Wireless security is enabled by default on the PL9560-WAP. For
more
information about changing the PL9560-WAP security
settings,
see the subsection in Chapter 10 entitled Wireless
Security.
6. Verify wireless connectivity by connecting to the Internet or log into the
PL9560-WAP from a computer with a wireless adapter.

Asoka® User Guide
PlugLink® AV 9560 Wireless Adapter
Page11of40
Chapter 6
Logging on
Figure 6-1: Login Address
1. Open a web browser application (Internet Explorer or Mozilla Firefox).
2. In the address or navigation field, type 192.168.1.254 and press Enter.
Figure 6-2: Login Screen
For security, the PL9560-WAP has its own user ID and password. When prompted,
enter admin for the user ID, welcome for the password, both in lower case
letters, and press Login. To change the login password, see “Setting or
Changing the Administrative Login Information” on chapter 10.
3. Once you have entered your user ID and password, your web browser
should find the PL9560-WAP and display it.

Asoka® User Guide
PlugLink® AV 9560 Wireless Adapter
Page12of40
Chapter 7
Browser-based User Interface
When you access the browser-based user interface, the System Details page is
the first page you will see. The System Details page shows you a quick view of
the PL9560-WAP’s status and settings. All setup pages can be reached from this
page.
Figure 7-1: System Details page (the Home page)
1. Quick Main Navigation
Links
The User Interface (UI) is divided into four main logical sections and you can
navigate directly to any of the four sections by clicking on either of these links.
2. Quick Sub Navigations links
When you enter into each of the four main logical sections, a sub navigation
link that corresponds to the main logical section will appear.
3. Page Name
The page you are on is identified by its Page Name.

Asoka® User Guide
PlugLink® AV 9560 Wireless Adapter
Page13of40
4. Detailed Information
Shows you detailed information about the PL9560-WAP that includes: model
number, firmware version, hardware version, serial number, MAC address, IP
address and subnet mask. You can also find the PL9560-WAP Wireless Settings.
5. Home Button
The Home button is available on every page of the UI. Pressing this button will
take you back to the home page, which is the System Details page.
6. Glossary Button
The Glossary button is available on every page of the UI. Pressing this button will
take you to a glossary page that defines many of the technical terms used in
this UI.
7. Help Button
The Help button is available on every page of the UI. Pressing this button will
take you to a help page that provides detailed explanations and steps for
configuring your PL9560-WAP.
8. Logout Button
The Logout button is available on every page of the UI. Pressing this button will
enable you to log out of the PL9560-WAP with the press of one button.

Asoka® User Guide
PlugLink® AV 9560 Wireless Adapter
Page14of40
Chapter 8
Configure the LAN IP
Setting
LAN IP Setting is under the IP ADDRESS link in the Main menu. Select this
option to configure the
IP
ADDRESS of the PL9560-WAP. By default, the
PL9560-WAP is configured with an IP address
of:
192.168.1.254 and a subnet
of:
255.255.255.0
.
Figure 8-1: LAN IP Settings Screen
If you want the PL9560-WAP to obtain an IP automatically from your existing
router, simply select the Obtain an IP address automatically and click Apply.

Asoka® User Guide
PlugLink® AV 9560 Wireless Adapter
Page15of40
Chapter 9
Understanding Basic Wireless Configuration
To configure the wireless settings of the PL9560-WAP, click the WIRELESS link in
the Main menu. The Wireless sub navigation links appear in the sub menu.
Figure: 9-1: Wireless Status Screen
Status
The Status (“Status” Sub navigation link) page allows you to view the PL9560-
WAP current settings.
The “Close RF” option allows you to disable the device’s wireless function. And
“Access Point Mode” option makes wireless function work.
Basic Settings
To configure the PL9560-WAP wireless settings, follow these steps:

Asoka® User Guide
PlugLink® AV 9560 Wireless Adapter
Page16of40
•Select WIRELESS tab from the main menu.
•Select Basic Settings from the sub navigation link.
•Enter the appropriate settings in the fields; then click “Apply”.
Figure: 9-2: Wireless Basic Settings Screen
There are two ways to configure the PL9560’s wireless network(s), manual and Wi-
Fi Protected Setup.
Wi-Fi Protected Setup is a feature that makes it easy to set up your wireless
network. If you have client devices, such as wireless adapters, that support Wi-Fi
Protected Setup, then you can use Wi-Fi Protected Setup.
The following table describes the basic wireless settings:
1.
Basic Settings
This page allows you to configure basic settings on the PL9560-WAP. From here
you can change the Channel ID, Block the SSID Broadcasting, change the
SSID and change the Operation Mode.

Asoka® User Guide
PlugLink® AV 9560 Wireless Adapter
Page17of40
•Channel
ID:
This field determines which operating frequency will be
used. It should not be necessary
to
change the wireless channel
unless you notice interference problems with another
nearby
access
point. By default, the PL9560-WAP is set to channel 6
.
•Block SSID Broadcasting: You may use the selection to prevent your
PL9560-WAP from transmitting (Broadcast) the SSID. The PL9560-WAP
will respond to clients configured with the right SSID. When wireless
clients survey the local area for wireless networks to associate with,
they will detect the SSID broadcast by the PL9560-WAP. To broadcast
the SSID, keep the default, Enabled. If you do not want to broadcast
the SSID, then select Disabled.
•
SSID:
The SSID is also known as the Wireless Network Name. It is case-
sensitive and must not exceed 32 characters. In a setting where there
is more than one wireless
network,
different wireless network names
provide a means for separating the traffic. Any device
you
want to
participate in a particular wireless network will need to use this SSID for
that
network.
The PL9560-WAP default SSID is
Asoka
.
2.
WPS (Wi-Fi Protected Setup)
If you have client devices, such as wireless adapters, that support Wi-Fi
Protected Setup, then you can use Wi-Fi Protected Setup to automatically
configure wireless security for your wireless network(s).
The software push buttons (WPS AP Push Button & Reset WPS Network) are
equivalent to the WPS Wireless Security hardware push button. Below is a
description of the software push buttons:
•WPS AP Push Button: Press this button to allow a client to join an existing
WPS Network or have the PL9560 create a brand new WPS wireless
network with a random SSID, random wireless password using the WPA2-
Personal –AES security algorithm if the existing network was not created
by WPS.
•Reset WPS Network: Press this software push button to make the PL9560
reset an existing WPS network and create a new network with a random
SSID, random wireless password using the WPA2-Personal-AES security
algorithm. The PL9560 will then wait for 2 minutes for a client to join and
access the network.
Use this method to configure WPS Network if your client device has a Wi-Fi
Protected Setup button.
1. Click or press the Wi-Fi Protected Setup button on the client device.
This manual suits for next models
1
Table of contents
Other Asoka Adapter manuals

Asoka
Asoka PlugLink PL9661-G1 User manual

Asoka
Asoka PlugLink 500G User manual

Asoka
Asoka PlugLinK-ETH-500G User manual

Asoka
Asoka PL9571-WAP User manual

Asoka
Asoka PlugLink PL9660-Q1 User manual

Asoka
Asoka PlugLink-ETH-500 User manual

Asoka
Asoka PlugLink 9650 User manual

Asoka
Asoka PlugLink AV 9660 User manual

Asoka
Asoka PlugLink HD AV ECo PL9661-ETH User manual

Asoka
Asoka PL9667-Q1 User manual