manuals.online logo
Brands
  1. Home
  2. •
  3. Brands
  4. •
  5. Astro Pneumatic Tool
  6. •
  7. Paint Sprayer
  8. •
  9. Astro Pneumatic Tool 4008 User manual

Astro Pneumatic Tool 4008 User manual

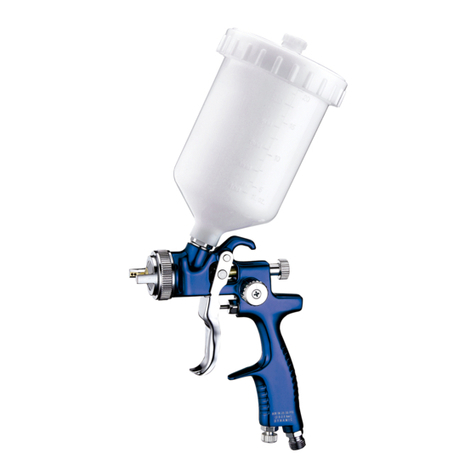
4008 SPRAY GUN WITH CUP
RED HANDLE 1.8MM NOZZLE
MODEL: PRODUCT TYPE:
Page 1
WARNING
www.astrotools.com
PLEASE DO NOT RETURN ANY PRODUCT WITHOUT CALLING
1-800-221-9705 FOR INSTRUCTIONS
PRODUCT INFORMATION:
MADE IN CHINA
Study, understand and follow all instructions provided with this
product. Read these instructions carefully before installing,
operating, servicing or repairing this tool. Keep these instructions
in a safe accessible place.
INTENDED USE OF THE TOOL
1 YEAR LIMITED WARRANTY
Before Use
When unpacking, check the parts diagram and part number
listing on page 4 to make sure all parts are included. If any
parts are missing or damaged, please call your distributor.
DO NOT DISCARD – GIVE TO USER
• All-purpose easy-to-clean paint spray gun
• Two-piece construction with gun featuring exclusive
air valve design
• Fully adjustable wide fan pattern control
• 1 quart capacity dripless cup
SPECIFICATIONS:
Nozzle Size: 1.8mm
Operation Pressure: 50-60psi
Net Weight: 2lbs. (0.91kg)
Dimensions W x H: 6-1/2" x 12"
The Astro 4008 is designed to spray enamels, lacquers, stain
and primers. Do not use this spray gun outside of the designed
intent. Never modify the spray gun for any other purpose or use.
In order to achieve the best results, surface and paint preparation
must be completed in accordance with paint manufacturer’s
instructions and recommendations. Strict compliance of
applicable local and national regulations must be followed.
• Astro Pneumatic Tool Co. warrants our products to the original user against defective
material or workmanship for a period of 1 year (except where noted on our price
schedule) from the date of 1st use. Astro reserves the right to determine whether the
product failed because of defective material, workmanship or other causes and to charge
back for missing parts. Astro Pneumatic Tool Co., at its discretion, will repair products
covered under this warranty free of charge. The distributor should direct the original user
to return the product (with the exceptions listed below) with the distributor’s name,
address, adequate proof of date of purchase or a copy of warranty card, and a short note
explaining the problem. Failures caused by accident, alteration, or misuse are not
covered by this warranty.
• Astro Pneumatic Tool Co. or its authorized service representatives must perform all
warranty repairs. Any repair to the product by unauthorized service representatives
voids this warranty. The rights under this warranty are limited to the original user and may
not be transferred to subsequent owners.
• This warranty is in lieu of all other warranties, expressed or implied, including warranties
of merchantability and fitness for a particular purpose. Some states do not allow the
exclusion of limitations of incidental or consequential damages so the
above limitations may not apply to you.
• Use of this product can expose you to chemicals including
ethylene glycol, gasoline vapors and engine exhaust, which
are known to the State of California to cause cancer, birth
defects, or reproductive harm. For more information, visit
www.P65Warnings.ca.gov. Always wear ANSI approved
safety equipment, safety glasses and clothing when using
this product. Study, understand, and follow all instructions
provided with this product. Failure to read and follow all
warnings and operating instructions may result in
damages and serious injury or death.
• Always wear ANSI approved goggles when using this
product. (Users and Bystanders).
• Never use this tool for any application other than for
which it was designed.
• Only use accessories designed for this tool.
• Never alter or modify this tool in any way.
•Improper operation and/or maintenance of the tool,
modification of the tool, or use of the tool with accessories
not designed for it could result in serious injury or death.
• Always select the correct accessories of the correct size
and design for the job that you are attempting to perform.
• Always work in a clean, safe, well-lit, organized and
adequately equipped area.
• Do not begin repairs without assurance that vehicle is in
secure position, and will not move during repair.
WARNING
Avg. Air Consumption: 7-12cfm
Air Inlet Thread NPT: 1/4"
Required Compressor: 3hp
Max. Pattern at 8" Distance: 11" (280mm)
SPRAY GUN WITH CUP
RED HANDLE 1.8MM NOZZLE
4008 SPRAY GUN WITH CUP
RED HANDLE 1.8MM NOZZLE
MODEL: PRODUCT TYPE:
Page 2
OPERATION
1. Operating the spray gun
• This air operated spray gun is designed to perform a variety
of painting, coating, and finishing applications using the
power of compressor air.
• Do not exceed the maximum air pressure of 60 psi.
• The trigger lever of this gun has a two-step design. Press the
trigger lever to the first step to connect to the air source,
ensuring that air flow fills the spray gun.
Press the trigger lever to the second step to connect the paint
material.
2. Controlling the pattern and fluid flow
• Adjust the air pressure with the trigger pulled and the air
control knob fully open. If reduced air pressure is desired for
some areas of the spray job, use the air compressor regulator
or air control to reduce pressure as necessary.
• Increase the air flow by turning the air control knob
clockwise. Reduce the air flow by turning the air control
knob counterclockwise.
• Set the pattern size to the desired shape. For a full pattern,
turn the pattern control knob counterclockwise. For a round
pattern, turn the pattern control knob clockwise.
• Turn the fluid control knob fully clockwise until closed to
control the fluid.
3. Preparing and loading the paint
• Thoroughly mix and thin the paint in accordance with the paint
manufacturer’s instructions. Most materials will spray readily if
thinned properly.
• Strain the material through cheese cloth or a paint strainer.
• Fill the paint canister to the maximum of the 3/4 full capacity
carefully.
• Set up a piece of cardboard or other scrap material to use as
a target. Adjust the spray gun for the best spray pattern and the
best atomization option.
• Test the consistency of the material by making a few strokes on
a cardboard target. If the material still appears too thick, add a
small amount of thinner. THIN WITH CARE!! Do not exceed
paint manufacturer’s thinning recommendations.
• The direction of the fan (horizontal or vertical) can by adjusted
by loosening the air cap ring and turning the air cap 90 degrees.
• Trigger a short burst while turning the fluid control knob
counterclockwise. Observe the spray pattern on the target and
adjust the fluid control knob until the desired atomization is
achieved.
3
1
2
Pattern Control
Knob
(1)
Fluid Control
Knob
(2)
Air Control
Knob
(3)
4
3
1
2
Air Cap
(1)
Air Cap Ring
(2)
Horizontal Fan
(3)
Vertical Fan
(4)
Paint too ne
(1)
Correct
(2)
Paint too coarse
(3)
INSTALLATION
4008 SPRAY GUN WITH CUP
RED HANDLE 1.8MM NOZZLE
MODEL: PRODUCT TYPE:
Page 3
4. Painting with the sprayer
• Begin spraying. Always keep the spray gun at a right angle
to the work surface.
• Keep the nozzle about 6 to 9 inches from the work surface
throughout the stroke and always keep the gun in motion while
spraying. Stopping gun movement in mid-stroke will cause a
build up of paint and result in runs. Do not fan the gun from side
to side while painting. This will cause a build-up of paint in the
center of the stroke and an insufficient coating at each end.
• Trigger the gun properly. Start the gun moving at the beginning
of the stroke BEFORE SQUEEZING THE TRIGGER. Release
the trigger BEFORE STOPPING GUN MOVEMENT at the end
of the stroke. This procedure will feather (blend) each stroke
with the next without showing overlap or unevenness.
• The amount of paint being applied can be varied by the speed
of the stroke, distance from the surface and adjustment of the
fluid control knob.
• Use a piece of cardboard as a shield to catch overspray at the
edges of the work to protect other surfaces. Use masking tape
to cover other areas if needed.
1. Cleaning the air hose
• A 1/4" air hose is required, with a maximum length of 25 ft.
• Clean the air hose of accumulated dust and moisture
before connecting it to the air supply.
Note: If a longer air hose is required, connect a 3/8" air
hose to the 1/4" air hose to ensure the spray gun has the
necessary air supply.
2. Connecting to the air supply
• Always use clean dry air. Excessive moisture and dirt will
greatly reduce the life of any air motor. We recommend the
installation of an in-line filter-regulator as close to the
tool as possible.
• Ensure all hoses and fittings are the correct size and
secured tightly.
WARNING: Lubricators should not be used with spray
guns. The use of an inline lubricator will damage
the paint finish.
Recommended Air Line Set-Up
Part Description
ASpray Gun
B Regulator
CQuick Plug
DQuick Coupler
E Air Hose
F In-line Filter
GAir Compressor
4008 SPRAY GUN WITH CUP
RED HANDLE 1.8MM NOZZLE
MODEL: PRODUCT TYPE:
Page 4
PARTS BREAKDOWN
PARTS LIST
372 Old US Highway 52 South
Mount Airy, NC 27030
Call 1.800.221.9705 for questions concerning performance of the product
or other inquiries.
2
3
4
5
6
7
8
9
10
11
12
13
14
15
16
17
18
19
20
21
22
23
24
25
26
27
1
1
1
1
1
1
1
1
1
1
1
1
1
1
1
2
1
1
1
1
1
1
1
1
1
1
4008-A02
4008-A03
4008-A04
4008-A05
4008-A06
4008-A07
4008-A08
4008-A09
4008-A10
4008-A11
4008-A12
4008-A13
4008-A14
4008-A15
4008-A16
4008-A17
4008-A18
4008-A19
4008-A20
4008-A21
4008-A22
4008-A23
4008-A24
4008-A25
4008-A26
4008-A27
Air Cup Assembly
Nozzle
Nozzle Packing Gasket
Baffle
Trigger Stud
Needle Packing
Needle Packing Screw
Pattern Adj. Valve Set
Packing
Bolt
Needle Sleeve
Beedle
Spring
Fluid Adj. Screw
Air Valve Packing Screw
Air Valve Packing
Air Valve Seat
Gasket
Air Valve
Spring
Trigger
Fluid Connector
Paint Cup Set
Gun Body
Air Connector
Air Afj. Valve Set
Index # Part # Description Qty
902

Other Astro Pneumatic Tool Paint Sprayer manuals

Astro Pneumatic Tool 4550 User manual

Astro Pneumatic Tool

Astro Pneumatic Tool 4550 User manual

Astro Pneumatic Tool EUROHV103 User manual

Astro Pneumatic Tool

Astro Pneumatic Tool EUROHV103 User manual

Astro Pneumatic Tool EUROHE103 User manual

Astro Pneumatic Tool

Astro Pneumatic Tool EUROHE103 User manual

Popular Paint Sprayer manuals by other brands

Flo-tech DK345-000 Repair instructions

Flo-tech

Flo-tech DK345-000 Repair instructions

OneTech NT10-RG-7 instruction manual

OneTech

OneTech NT10-RG-7 instruction manual

Central Pneumatic 93506 Assembly and operating instructions

Central Pneumatic

Central Pneumatic 93506 Assembly and operating instructions

OneTech NT10-R-77S-12 Manual instruction

OneTech

OneTech NT10-R-77S-12 Manual instruction

Solo 305 A Original instructions

Solo

Solo 305 A Original instructions

Vector Fog bm100 quick start guide

Vector Fog

Vector Fog bm100 quick start guide

Firestone W563581081 Technical Information Sheet

Firestone

Firestone W563581081 Technical Information Sheet

CO/Tech JS-910FA-UK Original instructions

CO/Tech

CO/Tech JS-910FA-UK Original instructions

OneTech NT10-R-77Z-20 Manual instruction

OneTech

OneTech NT10-R-77Z-20 Manual instruction

Foamit X-FOGCS-10G user manual

Foamit

Foamit X-FOGCS-10G user manual

Sam Horizon Operator's manual

Sam

Sam Horizon Operator's manual

EINHELL NEW GENERATION NDS 5 operating instructions

EINHELL

EINHELL NEW GENERATION NDS 5 operating instructions

FoamPRO Turbo Stream S108-4008 Installation and operation manual

FoamPRO

FoamPRO Turbo Stream S108-4008 Installation and operation manual

AG SPRAY GOLD15 owner's manual

AG SPRAY

AG SPRAY GOLD15 owner's manual

SATA SATAjet 1000 Series operating instructions

SATA

SATA SATAjet 1000 Series operating instructions

Yard force LP C04A Original instructions

Yard force

Yard force LP C04A Original instructions

Birchmeier Clean-Matic 5 P operating manual

Birchmeier

Birchmeier Clean-Matic 5 P operating manual

DeVilbiss JGHV Quick start and cleaning guide

DeVilbiss

DeVilbiss JGHV Quick start and cleaning guide

manuals.online logo
manuals.online logoBrands
  • About & Mission
  • Contact us
  • Privacy Policy
  • Terms and Conditions

Copyright 2025 Manuals.Online. All Rights Reserved.