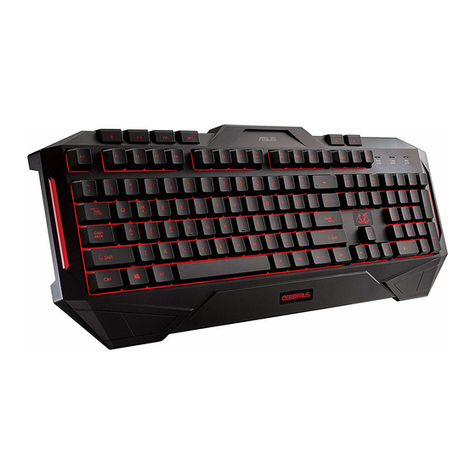
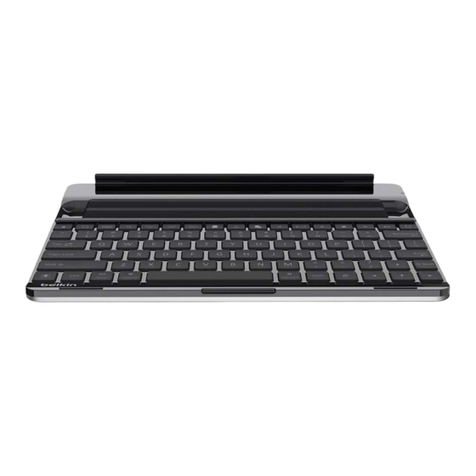
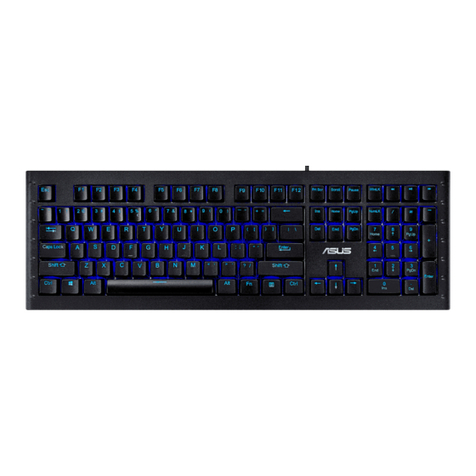
Asus GK1050 User manual

User Guide
ASUS GK1050 Keyboard

2
English
E11797
First Edition (V1)
June 2016
Copyright © 2016 ASUSTeK Computer Inc. All Rights Reserved.
No part of this manual, including the products and software described in it, may be reproduced,
transmitted, transcribed, stored in a retrieval system, or translated into any language in any form
or by any means, except documentation kept by the purchaser for backup purposes, without the
express written permission of ASUSTeK Computer Inc. (“ASUS”).
Product warranty or service will not be extended if: (1) the product is repaired, modified or altered,
unless such repair, modification of alteration is authorized in writing by ASUS; or (2) the serial
number of the product is defaced or missing.
ASUS PROVIDES THIS MANUAL“AS IS”WITHOUT WARRANTY OF ANY KIND, EITHER EXPRESS
OR IMPLIED, INCLUDING BUT NOT LIMITED TO THE IMPLIED WARRANTIES OR CONDITIONS OF
MERCHANTABILITY OR FITNESS FOR A PARTICULAR PURPOSE. IN NO EVENT SHALL ASUS, ITS
DIRECTORS, OFFICERS, EMPLOYEES OR AGENTS BE LIABLE FOR ANY INDIRECT, SPECIAL, INCIDENTAL,
OR CONSEQUENTIAL DAMAGES (INCLUDING DAMAGES FOR LOSS OF PROFITS, LOSS OF BUSINESS,
LOSS OF USE OR DATA, INTERRUPTION OF BUSINESS AND THE LIKE), EVEN IF ASUS HAS BEEN
ADVISED OF THE POSSIBILITY OF SUCH DAMAGES ARISING FROM ANY DEFECT OR ERROR IN THIS
MANUAL OR PRODUCT.
SPECIFICATIONS AND INFORMATION CONTAINED IN THIS MANUAL ARE FURNISHED FOR
INFORMATIONAL USE ONLY, AND ARE SUBJECT TO CHANGE AT ANY TIME WITHOUT NOTICE, AND
SHOULD NOT BE CONSTRUED AS A COMMITMENT BY ASUS. ASUS ASSUMES NO RESPONSIBILITY OR
LIABILITY FOR ANY ERRORS OR INACCURACIES THAT MAY APPEAR IN THIS MANUAL, INCLUDING THE
PRODUCTS AND SOFTWARE DESCRIBED IN IT.
Products and corporate names appearing in this manual may or may not be registered trademarks or
copyrights of their respective companies, and are used only for identification or explanation and to
the owners’benefit, without intent to infringe.
English
3
Contact Information
ASUSTeK COMPUTER INC.
Address 15 Li-Te Road, Peitou, Taipei, Taiwan 11259
Telephone +886-2-2894-3447
Fax +886-2-2890-7798
E-mail [email protected]
Web site http://www.asus.com/tw
Technical Support
Telephone +86-21-38429911
Online support http://www.asus.com/tw/support/
ASUS COMPUTER INTERNATIONAL (America)
Address 800 Corporate Way, Fremont, CA 94539, USA
Telephone +1-510-739-3777
Fax +1-510-608-4555
Web site http://www.asus.com/us/
Technical Support
Telephone +1-812-282-2787
Support fax +1-812-284-0883
Online support http://www.service.asus.com/
ASUS COMPUTER GmbH (Germany and Austria)
Address Harkort Str. 21-23, D-40880 Ratingen, Germany
Fax +49-2102-959931
Web site http://www.asus.com/de
Online contact http://eu-rma.asus.com/sales
Technical Support
Telephone (Component) +49-2102-5789555
Telephone Germany (System/Notebook/Eee/LCD) +49-2102-5789557
Telephone Austria (System/Notebook/Eee/LCD) +43-820-240513
Support Fax +49-2102-959911
Online support support.asus.com

4
English
Contents
Notices.............................................................................................5
Package Contents ...........................................................................7
System Requirements ....................................................................7
Specifications Summary ................................................................7
Installing your GK1050 Keyboard .................................................8
Replacing the Key Caps..................................................................8
Hot Keys...........................................................................................9
Customizing your Keyboard (NKRO Setting, Button Setting,
Profiles, Lighting and Macro) ..................................................... 10
Taskbar Menu............................................................................... 20
Safety and Maintenance ............................................................. 21

English
5
Notices
Safety Certifications
China RoHS EFUP
Labeling - 10 Years
BSMI Certification C-Tick
Federal Communications Commission Statement
This device complies with Part 15 of the FCC Rules. Operation is subject to the following two
conditions:
• Thisdevicemaynotcauseharmfulinterference,and
• Thisdevicemustacceptanyinterferencereceivedincludinginterferencethatmaycause
undesired operation.
This equipment has been tested and found to comply with the limits for a Class B digital device,
pursuant to Part 15 of the FCC Rules. These limits are designed to provide reasonable protection
against harmful interference in a residential installation. This equipment generates, uses and can
radiate radio frequency energy and, if not installed and used in accordance with manufacturer’s
instructions, may cause harmful interference to radio communications. However, there is no
guarantee that interference will not occur in a particular installation. If this equipment does cause
harmful interference to radio or television reception, which can be determined by turning the
equipment off and on, the user is encouraged to try to correct the interference by one or more of the
following measures:
• Reorientorrelocatethereceivingantenna.
• Increasetheseparationbetweentheequipmentandreceiver.
• Connecttheequipmenttoanoutletonacircuitdierentfromthattowhichthe
receiver is connected.
• Consultthedealeroranexperiencedradio/TVtechnicianforhelp.
CAUTION: Any changes or modifications not expressly approved by the grantee of this device could
void the user’s authority to operate the equipment.
CE Mark Warning
This is a Class B product, in a domestic environment, this product may cause radio interference, in
which case the user may be required to take adequate measures.
Complies with 21 CFR 1040.10 and 1040.11 except for deviations pursuant to Laser
Notice No. 50, dated June 24, 2007.

6
English
DO NOT throw the keyboard in municipal waste. This product has been designed to
enable proper reuse of parts and recycling. This symbol of the crossed out wheeled bin
indicates that the product (electrical and electronic equipment) should not be placed in
municipal waste. Check local regulations for disposal of electronic products.
REACH
Complying with the REACH (Registration, Evaluation, Authorisation, and Restriction
of Chemicals) regulatory framework, we published the chemical substances in our
products at ASUS REACH website at http://csr.asus.com/english/REACH.htm.
ASUS Recycling/Takeback Services
ASUS recycling and takeback programs come from our commitment to the highest
standards for protecting our environment. We believe in providing solutions for you
to be able to responsibly recycle our products, batteries, other components, as well
as the packaging materials. Please go to http://csr.asus.com/english/Takeback.htm for
the detailed recycling information in different regions.

English
7
Check your ASUS GK1050 Keyboard package for the following items:
• ASUSGK1050keyboardx1 •ASUSWarrantyCardx1
• QuickStartGuidex1
• Sparepartskit:keycappullerx1,extra13keycaps
( , , , , Q, W, E, R, A, S, D, F, ESC)
NOTE: If any of the above items is damaged or missing, contact your retailer
immediately.
Package Contents
Specifications Summary
System Requirements
To ensure a successful installation of ASUS GK1050 Keyboard, your computer must
meet the following requirements:
• PCwithanavailableUSB2.0port
• 150MBavailableHDDspace
• CD-ROMdrive(orDVD-ROM)driveforCDinstallation
Model Name
GK1050
Dimensions
456.5 x 148.5 x 23 mm(L x W x H)
OS Support Windows®10 / Windows®8.1 / Windows®8 / Windows®7 /
Windows®XP
Weight
1060 ± 10g (with cable)
Cable length
1610 ± 20mm
Key distance /
Key travel / Axis
19mm / 2.0 ± 0.4mm of key travel / 4.5 - 0.5mm;
55 million keystrokes' lifespan
Rating
5V ± 0.25

8
English
Installing your GK1050 Keyboard
Driver Installation
To install the driver, connect your keyboard to the USB port on your computer.
Replacing the Key Caps
To replace the key caps:
1. Use a key cap puller to take out the , , , , Q, W, E, R, A, S, D, F or ESC key
cap(s).
2. Replace with extra key cap(s).

English
9
Hot Keys
1.
Multi
media
function
FN + Previous track When selected, these buttons
become playback control buttons
in an active media player.
FN + Play/Pause
FN + Next track
2.
LED
function
FN + or LED backlight
brightness
Press to adjust the brightness of
the keyboard backlight (Level 1~4).
FN + or
LED lighting
mode rotate
frequency
Press to adjust the lighting mode
rotate frequency (Level 1~4).
3.
FN +
Press these hotkeys to switch
among the 7 preset lighting modes.
Press FN + 0 to turn off the LED.
4.
Other
functions
FN + Lock/Unlock
Windows® Key
Press to lock / unlock the Windows®
Key.
5. CapLock key Press to enable / disable the Capital
Lock function.
6. SL key Press to enable / disable the Scroll
Lock function.
7. NUM key Press to enable / disable the
Number Keypad.

10
English
Using the setup utility
Do either of the following to launch the setup utility:
• ClickStart > All Programs > ASUS Sagris Gaming Keyboard > ASUS Sagris
Gaming Keyboard.
• Right-clicktheicon from the Windows® taskbar, then select Open.
On Windows® 8, click ASUS Sagris Gaming Keyboard from the Start screen.
Customizing your Keyboard (NKRO Setting, Button Setting,
Profiles, Lighting and Macro)

English
11
Main menu
Items Descriptions
1. Click to enter NKRO settings.
2. Click to enter button settings.
3. Click to edit profiles.
4. Click to enter lighting configurations.
5. Click to edit Marcos.
6. Click to download and upgrade firmware.
7. Click to minimize the window.
8. Click to exit the program.
9. Click to load the default settings.
10. Click to save and exit the configurations.

12
English
NKRO Setting tab allows you to enable or disable NKRO (N-Key Rollover).
To set NKRO function, click the NKRO Setting tab and click Open NKRO > Okay to
enable the NKRO function or click Close NKRO > Okay to disable the NKRO function.
NKRO Setting
Button Setting

English
13
Button Setting tab allows you to customize the key functions.
To assign function to a key:
1. Select and click a key from the keyboard illustration.
2. Click Default on the left side menu to show the drop-down list and select a
function that you want to assign to the key.
Category Items Descriptions
Mouse
Function
L-Button Simulates the function of the left mouse button.
R-Button Simulates the function of the right mouse button.
M-Button Simulates the function of the middle mouse
button.
Double Click Simulates the function of double click of the left
mouse button.
Forward When selected, press the button to go to the next
page you viewed.
Backward When selected, press the button to go to the
previous page you viewed.
Scroll Up Click to change the Scroll Up settings.
Scroll Down Click to change the Scroll Down settings.
Computer
Function
Cut When selected, press the button to cut.
Copy When selected, press the button to copy.
Paste When selected, press the button to paste.
Delete When selected, press the button to delete.
Undo When selected, press the button to undo.
Redo When selected, press the button to redo.
Zoom In When selected, press the button to zoom in.
Zoom Out When selected, press the button to zoom out.
Default Zoom When selected, press the button to zoom by
default.
Close When selected, press the button to close.
Maximize Window When selected, press the button to maximize the
window.
You can assign the keys to the following functions:

14
English
Category Items Descriptions
Computer
Function
Minimize Window When selected, press the button to minimize the
window.
My Computer When selected, press the button to open Computer
window.
Calculator When selected, press the button to launch the
Calculator application.
Email When selected, press the button to launch your
default E-mail application.
Control Panel When selected, press the button to launch the
Control Panel.
Start Button When selected, press the button to launch the
Start menu.
Launch Program When selected, press the button to quickly launch
a link or a program.
Screen Lock When selected, press the button to turn the
computer to Screen Lock Mode.
Add a Desktop When selected, press to add a Windows® Desktop
Mode.
Close a Desktop When selected, press to close a Windows® Desktop
Mode.
Action Center When selected, press to launch the Windows® 10
Action Center.
Connect When selected, press to launch the Connect
function.
Share Charm When selected, press to share the Windows® 10
Setting Charm.
Internet
File Explorer When selected, press the button to open the file
explorer.
User Folder When selected, press the button to open the
default user folder.
New Window When selected, press the button to open a new
browser window.
Page Forward When selected, press the button to go to the next
page you viewed.
Page Backward When selected, press the button to go to the
previous page you viewed.

English
15
Category Items Descriptions
Media
Function
Volume Up When selected, press the button to increase the
system volume.
Volume Down When selected, press the button to decrease the
system volume.
Mute When selected, press the button to turn the volume’s
mute mode on/off.
Play/Pause When selected, press the button to play/pause the
media.
Stop
When selected, these buttons become playback
control buttons in an active media player.
Previous
Next
Media Player When selected, press the button to launch the default
media player of your system.
Macro
Execute Once When selected, press the button to execute once.
Press to Execute Select to perform the selected Macro profile when
pressing down the button and release the button
to stop.
Execute repeat Select to repeat performing the selected Macro profile
when pressing the button.

16
English
Profiles
A profile allows you to store settings such as button function assignments.
Items Descriptions
1. Double click to rename the profile name.
2. Click to add a new profile.
3. Click to remove a profile that is not in use.
4. Click to import a profile from your computer.
5. Click to export a profile to your computer.
6. Click to save the changes.

English
17
Lighting
The keyboard provides eight preset LED modes. You can also change the settings of
brightness, LED on/off delay time, breathing LED effect and the frequency of the LED
effects.
Regular Key Lighting
Locking Key Lighting

18
English
Items Descriptions
Regular Key Lighting
1. Click LED Off and then Switch to disable the lighting effect.
2. Click All Key LED On and select the Brightness level to set the LED
brightness of all the keys. Click Switch to switch to the selected mode and
press FN + 1 to select color.
3. Click Spiral and select the Brightness and Tempo level to set the spiral
lighting effect. Click Switch to switch to the selected mode.
4. Click Customization and select the Brightness level, then click Switch to
switch to the selected mode. Press FN + END keys, and then press any key
to apply.
5. Click Color Rotation and select the Tempo level to set the lighting
rotation frequency. Click Switch to switch to the selected mode.
6. Click Fading Out and select the Brightness and Tempo level to set the
LED brightness and the fading out speed of the pressed key. Click Switch
to switch to the selected mode, and then press FN + 5 to select color.
7. Click Stary Sky and select the Brightness and Tempo level to set the
lighting effect of the stary sky. Click Switch to switch to the selected mode,
and then press FN + 6 to select color.
8. Click Laser and select the Brightness and Tempo level to set the laser
lighting effect. Click Switch to switch to the selected mode.
9. Click to set the brightness and/or tempo in each mode.
10. Click to customize the LED illumination in seven preferable colors.
11. Click to switch to the selected mode.
Locking Key Lighting
12. Click the color block(s) to set the color for the four key(s).
13. Click Reset Color to reset to the default color.
14. Click Okay to apply the changes.

English
19
The Macros tab allows you to create macro profiles with different keystrokes and
button presses. It also allows you to create numerous macros and long macro
commands.
Creating a Macro
To create a macro command, click the button Start to record all your keystrokes and
button presses in the macro window automatically. Click the button Stop to end the
macro command.
The Macro tab contains two delay options for creating macros:
Timing - When enabled, it records the actual delay between commands.
Instruction cycle time - It records the macro according to the fixed delay time you
selected.
Editing a Macro
The macro commands of keystrokes or button presses are listed sequentially. Click
Clear to clear all the commands and click Delete to remove a command. Click Move
up or Move down to move the command up or down.
Macro

20
English
Select one of the following ways to add an additional command in a macro:
1. Tick Insert on the top of the menu.
Select the command that you want to insert before, click Start to create new
macro commands and click Stop to end.
2. Click Start button to record a new set of sequences.
Items Descriptions
1. Click to launch the main menu of the GK1050 keyboard setup utility.
2. Click to exit the setup utility.
Taskbar Menu
Table of contents
Other Asus Keyboard manuals

Asus
Asus Cerberus User manual

Asus
Asus EK1542 User manual

Asus
Asus ROG STRIX SCOPE User manual

Asus
Asus W4500 User manual

Asus
Asus Cerberus User manual

Asus
Asus GK1100 User manual

Asus
Asus My Cinema U-3000 User manual

Asus
Asus ROG Strix Scope RX TKL Wireless Deluxe User manual

Asus
Asus Cerberus MKII User manual

Asus
Asus W4500 User manual

Asus
Asus Cerberus User manual

Asus
Asus ROD STRIX SCOPE TKL GUNDAM LTD User manual

Asus
Asus ROG STRIX SCOPE TKL User manual

Asus
Asus TUF GAMING K1 User manual

Asus
Asus EeeKeyboard PC EK1542 User manual

Asus
Asus Cerberus User manual

Asus
Asus Strix Tactic Pro User manual

Asus
Asus ROG STRIX SCOPE RX User manual

Asus
Asus My Cinema U-3000 User manual

Asus
Asus Cerberus User manual