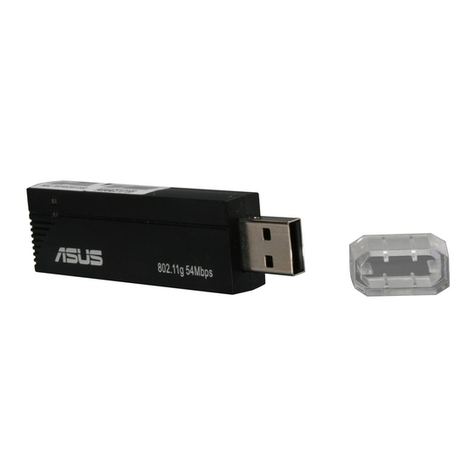
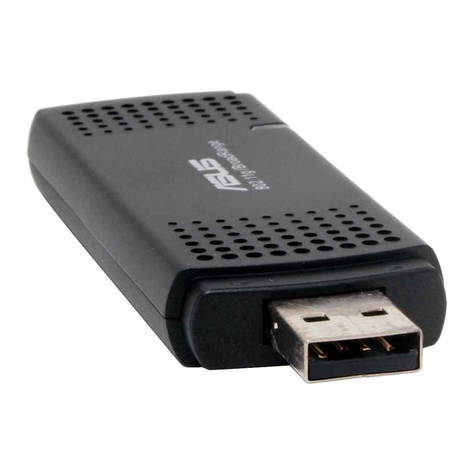
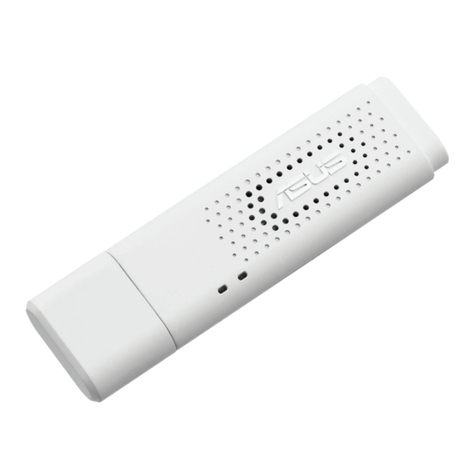
Asus USB-N66 User manual

User Manual
USB-N66
Dual-band Wireless-N AdapterWireless-N Adapter
(For 802.11a/b/g/n Wireless Networks)
®

Copyright © 2012 ASUSTeK Computer Inc. All Rights Reserved.
No part of this manual, including the products and software described
in it, may be reproduced, transmitted, transcribed, stored in a retrieval
system, or translated into any language in any form or by any means, except
documentation kept by the purchaser for backup purposes, without the
express written permission of ASUSTeK Computer Inc. (“ASUS”).
Product warranty or service will not be extended if: (1) the product is
repaired, modified or altered, unless such repair, modification of alteration
is authorized in writing by ASUS; or (2) the serial number of the product is
defaced or missing.
ASUS PROVIDES THIS MANUAL “AS IS” WITHOUT WARRANTY OF ANY
KIND, EITHER EXPRESS OR IMPLIED, INCLUDING BUT NOT LIMITED TO THE
IMPLIED WARRANTIES OR CONDITIONS OF MERCHANTABILITY OR FITNESS
FOR A PARTICULAR PURPOSE. IN NO EVENT SHALL ASUS, ITS DIRECTORS,
OFFICERS, EMPLOYEES OR AGENTS BE LIABLE FOR ANY INDIRECT, SPECIAL,
INCIDENTAL, OR CONSEQUENTIAL DAMAGES (INCLUDING DAMAGES FOR
LOSS OF PROFITS, LOSS OF BUSINESS, LOSS OF USE OR DATA, INTERRUPTION
OF BUSINESS AND THE LIKE), EVEN IF ASUS HAS BEEN ADVISED OF THE
POSSIBILITY OF SUCH DAMAGES ARISING FROM ANY DEFECT OR ERROR IN
THIS MANUAL OR PRODUCT.
SPECIFICATIONS AND INFORMATION CONTAINED IN THIS MANUAL ARE
FURNISHED FOR INFORMATIONAL USE ONLY, AND ARE SUBJECT TO CHANGE
AT ANY TIME WITHOUT NOTICE, AND SHOULD NOT BE CONSTRUED AS A
COMMITMENT BY ASUS. ASUS ASSUMES NO RESPONSIBILITY OR LIABILITY
FOR ANY ERRORS OR INACCURACIES THAT MAY APPEAR IN THIS MANUAL,
INCLUDING THE PRODUCTS AND SOFTWARE DESCRIBED IN IT.
Products and corporate names appearing in this manual may or may not
be registered trademarks or copyrights of their respective companies, and
are used only for identification or explanation and to the owners’ benefit,
without intent to infringe.
E7253
First Edition
March 2012
Table of contents
1. Introduction.........................................................................4
Package contents ...............................................................................................4
System requirements........................................................................................4
Hardware ...............................................................................................................4
A quick look ....................................................................................................4
Mounting options.........................................................................................5
Operating and storage environment.....................................................5
Status indicator ...................................................................................................5
2. Installing the USB-N66 driver and utilities........................6
3. Conguring USB-N66 using ASUS utility ..........................7
Connecting to a wireless network manually............................................7
Connecting to a wireless network using WPS..........................................8
Soft AP mode (Windows® XP/Vista/7).........................................................10
4. Software information........................................................12
ASUS WLAN Control Center ............................................................................12
ASUS WLAN Adapter Setting Utility.............................................................12
ASUS WLAN Adapter Setting Utility.......................................................12
Survey ...............................................................................................................13
Conguration- Basic ....................................................................................14
Conguration - Encryption........................................................................15
Conguration - Advanced .........................................................................16
5. Conguring USB-N66 using Windows®WZC service .......17
6. Troubleshooting................................................................18
7. Glossary..............................................................................20
Notices ......................................................................................30

USB-N66 WLAN Adapter User Manual
4ASUS WLAN adapter
1. Introduction
System requirements
Before using the USB-N66 WLAN Adapter, check if your system meets the
following requirements:
NOTE: If any of the above items is damaged or missing, contact your
retailer immediately.
ASUS USB-N66 x1 Warranty card x1
Quick Start Guide x1 USB cable x1
Support CD x1
Package contents
• Windows®XP/ Vista/7 • USB 2.0 portUSB 2.0 port
• 512MB system memory or larger512MB system memory or larger • Optical disk driveOptical disk drive
A quick look
2
3
1
45
6
1) High/Standard Power Switch
(slide the switch to the left or to the right to use standard power or high
power)
2) USB port
3) LED indicator
4) Air vents
5) Mounting hole
6) WPS button

USB-N66 WLAN Adapter User Manual
5
ASUS WLAN adapter
LED Status Description
Link High The USB-N66 has connected to a wireless network successfully.
Low The USB-N66 is not connected.USB-N66 is not connected.is not connected.
Blinking WPS function is enabled. Wait for about two minutes for WPS
function to establish the connection.
Enabling the WPS (for Windows®OS only)
To enable the WPS feature, you may either press the WPS button on the USB-
N66 or select Use the WPS button in the USB-N66’s web interface.
Status indicator
Mounting options
Out of the box, the ASUS USB-N66 is designed to sit on a
raised at surface like a le cabinet or book shelf. The unit
may also be converted for mounting to a wall or ceiling.
1. Look on the underside for the mounting hook.
2. Mark an upper hole in a at surface.
3. Tighten one screw until only 1/4’’ is showing.
4. Latch the hook of your USB-N66 onto the screw.
NOTES:
• Re-adjust the screw if you cannot latch USB-N66 onto the screw or if
it is too loose.
• The screw is not included in the USB-N66 package contents.
Operating and storage environment
1. Operating temperature: ambient temperature between 0˚C ~ 40˚C
2. Storage temperature: ambient temperature between -10˚C ~ 70˚C
3. Humidity: 5% ~ 90% (non-condensing)

USB-N66 WLAN Adapter User Manual
6ASUS WLAN adapter
To install the driver and utilities for your ASUS USB-N66:
1. Place the bundled Support CD into the optical drive. An Autorun screen
appears if the Autorun function is enabled on your computer.
NOTE: If the Autorun function is not enabled on your computer,
double-click SETUP.EXE from the root directory to run the Support
CD.
2. Installing the USB-N66 driver and
utilities
2. From the Autorun screen, select
your language and click Install
Utilities/Driver.
3. An InstallShield Wizard screen
appears. Click Next to continue.
IMPORTANT: Install the ASUS USB-N66 into your computer before
installing the driver and utilities from the bundled Support CD.
4. Select Use ASUS WLAN Utilities.5. Click Install to start the
installation.

USB-N66 WLAN Adapter User Manual
7
ASUS WLAN adapter
Connecting to a wireless network manually
To connect USB-N66 to a station (Ad Hoc mode) manually:
2. �ou may click�ou may click Survey > Search to
search for the wireless networks.
Select an Access Point (AP) from
the network list and then click
Connect.
1. Right-click the ASUS WLAN
Adapter Setting Utility icon in the
Windows®system tray, then select
Wireless Setting.
3. Conguring USB-N66 using ASUS
utility
6. Click Finish to complete the
installation.

USB-N66 WLAN Adapter User Manual
8ASUS WLAN adapter
Setup is completed. The Status
page displays information such as
the association state, current data
rate, and radio state.
3. If Security is enabled on the AP
or station, do the same security
settings on your WLAN adapter as
those on the AP or station. Click
Save.
Connecting to a wireless network using WPS
ASUS USB-N66 supports the WPS function that helps you set up a secure
wireless network easily.
To connect USB-N66 to a WPS-enabled AP using the WPS push button:
IMPORTANT: Ensure that the AP you are trying to connect to supports
the WPS function.
2. Select Use the WPS button, then
click Next.
1. Click the WPS tab.

USB-N66 WLAN Adapter User Manual
9
ASUS WLAN adapter
3. Press the WPS button on the AP
or station to establish a wireless
connection.
4. ClickClick Finish.
3. Click Finish.
1. Select Use PIN code.2. Key in the AP’s eight-digit PIN code
and click Next.
To connect USB-N66 to a WPS-enabled AP or station using the PIN code:

USB-N66 WLAN Adapter User Manual
10 ASUS WLAN adapter
2. Click General tab and then click
ICS. The Available Networks table
displays the current networks that
can serve as Soft AP’s internet
network access.
Select a network (station) from the
available network list, then click
Apply.
To switch to the Soft AP mode:
1. Click AP to switch to the Soft AP
mode. The right picture indicates
that your WLAN adapter has
switched to the Soft AP mode
successfully.
The General tab displays the
wireless clients that are currently
connecting to the USB-N66 in Soft
AP.
Soft AP mode (Windows® XP/Vista/7)
ASUS USB-N66 supports the Soft AP mode. In this mode, the USB-N66 acts as a
virtual AP.
The picture indicates that you
have set ICS (Internet connection
Sharing) successfully.
IMPORTANT: Before conguring the Soft AP mode, connect your host
computer to a wired network to provide internet network access for
your wireless clients.
NOTE: In the Soft AP mode, the ASUS WLAN Adapter Setting Utility
icon in the system tray switches to .

USB-N66 WLAN Adapter User Manual
11
ASUS WLAN adapter
To disable the access control function, select Disable in the Access Control
Policy page, then click OK.
To allow a wireless client to associate with the USB-N66:
1. Select Enable in the Access Control Policy page, then click Access tab.
2. Key in the client’s MAC address, then click Add MAC.
3. Click OK.
Only the wireless clients on the Accept list are allowed to associate with the
USB-N66.
To prevent a wireless client from associating with the WLAN adapter:
1. Select Enable in the Access Control Policy page, then click Reject tab.
2. Key in the client’s MAC address, then click Add MAC.
3. Click OK.
The wireless clients on the Reject list are not allowed to associate with the USB-
N66.
In the Soft AP mode, you can limit the wireless clients that associate with the
USB-N66 through the access control function. Click Conguration > Edit
Cong > Wireless Mode.
�ou can limit the wireless clients that associate with the WLAN adapter through
the access control function. Click Conguration > Edit Cong > ACL.

USB-N66 WLAN Adapter User Manual
12 ASUS WLAN adapter
ASUS WLAN Control Center
ASUS WLAN Control Center includes ASUS WLAN Adapter Setting Utility
(Station mode) and ASUS Wireless Access Point Utility (Soft AP mode) which
help you manage your WLAN adapter easily.
ASUS WLAN Adapter Setting Utility
ASUS WLAN Adapter Setting Utility provides you with an easy interface to
set up wireless connections. This section explains the buttons, elds, and
conguration options on the user interface.
To launch WLAN utility, click Start > All Programs > ASUS Utility > USB-N66
WLAN Adapter Utilities > ASUS USB-N66 WLAN Control
Center.
In the default Station mode, the ASUS WLAN Adapter Setting
Utility icon displays as shown on the right.
4. Software information
ASUS WLAN Adapter Setting Utility
Right-click the ASUS WLAN Adapter Setting Utility system tray icon to display
the following options:
• Wireless Settings - Launches the ASUS WLAN Adapter Setting Utility.
• Activate Conguration - Activates a preset prole.
• Help - Launches the help le.
• WPS - Launches the WPS wizard.
• About Control Center - Displays the version of your Control Center.
• Exit Control Center - Closes the ASUS WLAN Control Center.
Left-click the ASUS WLAN Adapter Setting Utility system tray icon to display the
following options:
• Wireless Radio On - Turns the wireless radio ON.
• Wireless Radio O - Turns the wireless radio OFF.
• Search & Connect - Displays the available wireless
networks.
Double-click the icon to launch the ASUS WLAN Adapter Setting utility.

USB-N66 WLAN Adapter User Manual
13
ASUS WLAN adapter
Survey
Survey displays the connection status:
• SSID - Displays the name of the wireless network that the WLAN adapter is
connecting to.
• MAC Address - Indicates the hardware address of the WLAN adapter. A MAC
address is a unique identier assigned to networking devices. It consists
of six groups of two hexadecimal digits (0 through 9 and A through F)
separated by colons, e.g. 00:E0:18:F0:05:C0.
• Channel - Displays the channel of the wireless network.
• Current Data Rate -Displays the current data transmission rate.
• Network Type -Displays the WLAN adapter type such as infrastructure type.
• Security -Displays the encryption of the wireless networks.
• Search- Lists the wireless networks that the USB-N66 can connect to.

USB-N66 WLAN Adapter User Manual
14 ASUS WLAN adapter
• Network Type
• Infrastructure -Select
the Infrastructure
mode to establish a
connection with an AP.
• Ad Hoc - Select the
Ad Hoc mode to
communicate with
a station. An Ad Hoc
network is formed
quickly and easily
without pre-planning. For example, you can share meeting notes
among networked clients in a meeting room.
• Action mode name & Network Name (SSID) -Action mode name & Network Name (SSID) - Key in the SSID of an AP or
a station you are trying to connect to. An SSID must be valid characters and
have a maximum of 32 case sensitive characters, such as Wireless LAN.
Conguration- Basic
• Channel - Select a radio channel for your WLAN adapter. In the
Infrastructure mode, your WLAN adapter automatically selects the correct
channel required to communicate with an AP and this eld shows Auto.
In the Ad Hoc mode, you are allowed to select a channel for your WLAN
adapter. WLAN cards in the same network can communicate with each
other if they have the same channel setting.
Notes:
• For 2.4GHz band, the radio channels you can use depend on the
regulations in your country. In the United States (FCC) and Canada
(IC), channels 1 to 11 are supported. In Europe (ETSI), channels 1 to
13 are supported. In Japan (MKK), channels 1 to 14 are supported.
• For 5GHz band, the radio channels you can use vary in dierent
regions. Refer to your local regulations for details.
• Data Rate -Data Rate - Fully Auto: The WLAN adapter adjusts to the most suitable
transmission rate automatically.
• Advanced -Advanced - Launches the Advanced page. In most cases, you do not need
to change the default values.
• Next - Launches the Encryption page.
• Cancel - Cancels setting and returns to Conguration page.

USB-N66 WLAN Adapter User Manual
15
ASUS WLAN adapter
Conguration - Encryption
The Encryption page
allows you to set up the
encryption settings for your
WLAN adapter. For data
condentiality in a wireless
environment, IEEE 802.11
species a Wired Equivalent
Privacy (WEP) algorithm to
oer transmission privacy
similar to wired network. WEP
uses keys to encrypt data
packets sent and decrypt
data packets received. The
encryption process can scramble frame bits to avoid disclosure to others. Wi-Fi
Protected Access (WPA) is an improved security system for 802.11 that encrypts
data sent over radio waves. WPA is developed to overcome the weakness of the
WEP protocol.
• Network Authentication - Set up authentication for your WLAN adapter.
Options are:
• Open - Sets the network operating in the Open System mode that
disables authentication protection for the network or use the WEP
encryption for the network.
• Shared - Sets the network operating in the Shared Key mode that uses
the WEP encryption for your network.
• WPA-Personal/WPA2-Personal - Use the WPA Pre-Shared Key/WPA2
Pre-Shared Key in the Infrastructure mode for authentication.
• WPA/WPA2-Enterprise/WEP 802.1X - Set these authentication modes
in the Infrastructure mode (needs to add a RADIUS server to conrm
the user’s identity). Two Extensible Authentication Protocol (EAP) are
supported In the RADIUS environment, including PEAP and TLS/Smart
Card.
• Data Encryption - Encrypts the data before it is transmitted over the air.
In the Open and Shared authentication modes, options are Disabled and
WEP.
• Disabled - Disables the encryption protection for your WLAN adapter.
• WEP - When you select this option, the cursor appears in the eld for
Key 1. Key in 10 hexadecimal digits (0~9, a~f, and A~F) for the 64-bit
encryption.
In the WPA-PSK and WPA-Personal and WPA2-Personal authenticationand WPA-Personal and WPA2-Personal authenticationWPA-Personal and WPA2-Personal authentication
modes, options are: Temporal Key Integrity Protocol (TKIP) and Advanced
Encryption Standard (AES).
• TKIP - Dynamically generates unique keys to encrypt data packet.
• AES - Oers stronger protection and increases the complexity of

USB-N66 WLAN Adapter User Manual
16 ASUS WLAN adapter
wireless encryption. It is a symmetric 128-bit block encryption method
that works simultaneously on multiple network layers.
• Wireless Network Key - This option becomes congurable when you
select the WPA-Personal authentication mode. Key in 8 to 63 characters
in this eld.
Note: The characters can also consist of 64 hexadecimal digits.
• Wireless Network Key (WEP) - This option becomes congurable when
you select WEP in the Data encryption eld. 64-bit WEP key uses 5 ASCII
characters (10 hexadecimal digits). 128-bit WEP key uses 13 ASCII (26
hexadecimal digits).
• Key Format - Allows you to select the key format.
• Passphrase -• Passphrase -Passphrase - This eld generates the WEP keys (Key 1 - Key 4). The
passphrase can consists of a sentence, a phrase, or a sequence of alpha-
numeric characters .
• Key Length - Allows you to select the key length. For 64-bit encryption,
each key consists of 10 hexadecimal digits or 5 ASCII characters. For 128-
bit encryption, each key consists of 26 hexadecimal digits or 13 ASCII
characters.
• Select one as your Default
Key - Allows you to select
one of the four WEP Keys as
the default key.
Conguration - Advanced
This Advanced page is intended
for experienced users to set up
additional parameters for the WLAN adapter. We recommend that you keep the
default values.
• RTS Threshold (0-2347) - The Request to Send/Clear to Send (RTS/CTS)
function is used to minimize collisions among wireless stations. When RTS/
CTS is enabled, the router refrains from sending a data frame until another
RTS/CTS handshake is completed. To enable RTS/CTS, set a specic packet
size threshold. The default value (2347) is recommended.
• Fragmentation Threshold (256-2346) -Fragmentation Threshold (256-2346) - Fragmentation is used to divide
802.11 frames into smaller pieces (fragments) that are sent separately to the
destination. To enable fragmentation, set a specic packet size threshold.
If there is an excessive number of collisions on the WLAN, experiment
with dierent fragmentation values to increase the reliability of frame
transmissions. The default value (2346) is recommended for normal use.
• Preamble Mode -Preamble Mode - Select the preamble mode as Auto (default), Long or
Short.

USB-N66 WLAN Adapter User Manual
17
ASUS WLAN adapter
1. Right-click the ASUS WLAN Control
Center system tray icon, then click
Exit. ASUS WLAN Control Center
will be switched o.
Click Windows Wireless to use it.
To connect your USB-N66 to a wireless network using Windows®WZC
service:
5. Conguring USB-N66 using
Windows®WZC service

USB-N66 WLAN Adapter User Manual
18 ASUS WLAN adapter
6. Troubleshooting
This chapter provides solutions to problems which you may encounter when
installing or using ASUS USB-N66. Contact a qualied service technician
for assistance if the problem still exists after you have performed the
troubleshooting solutions.
How do I verify that my WLAN adapter is installed properly?
1. Right-click My Computer from the Start menu, then select Properties.
2. Select the Hardware tab, then click Device Manager.
3. Double-click Network adapters.
4. Double-click ASUS USB-N66 450Mbps Dual Band USB Adapter. An ASUS
USB-N66 450Mbps Dual Band USB Adapter window appears.
5. Check Device status to see if the WLAN adapter is working properly.
My WLAN adapter cannot connect to any Access Points.
• Check if Network Type is set to the Infrastructure mode.
• Check if the SSID of your WLAN adapter is the same as that of the access
point you want to connect to.
• Check if the Encryption settings of your WLAN adapter are the same as
those of the access point you want to connect to.
My WLAN adapter cannot connect to a station or WLAN
adapter.
• Check if Network Type is set to the Ad Hoc mode.
• Check if the SSID of your WLAN adapter is the same as that of the station or
the WLAN adapter you want to connect to.
• Check if the Channel of your WLAN adapter is the same as that of the
station or the WLAN adapter you want to connect to.
• Check if the Encryption settings of your WLAN adapter are the same as
those of the station or the WLAN adapter you want to connect to.
The connection quality is bad and the signal strength is weak.
• Keep your WLAN adapter away from microwave ovens and large metal
objects to avoid radio interference.
• Move your WLAN adapter closer to the access point, station, or WLAN
adapter you want to connect to.

USB-N66 WLAN Adapter User Manual
19
ASUS WLAN adapter
The TCP/IP protocol does not bind to the WLAN adapter.
This occurs when your PC already has six TCP/IP bindings in Windows®98 or ten
bindings in Windows®Me. These limits are imposed by the Microsoft®operating
system.
Solution: If your computer already has the maximum number of TCP/IP
bindings, remove one of the network adapters from the Network conguration
before installing the WLAN adapter driver.

USB-N66 WLAN Adapter User Manual
20 ASUS WLAN adapter
7. Glossary
Access Point (AP)
A networking device that seamlessly connects wired and wireless networks.
Access Points combined with a distributed system support the creation of
multiple radio cells that enable roaming throughout a facility.
Ad Hoc
A wireless network composed solely of stations within mutual communication
range of each other (no Access Point).
Basic Rate Set
This option allows you to specify the data transmission rate.
Basic Service Area (BSS)
A set of stations controlled by a single coordination function.
Broadband
A type of data transmission in which a single medium (such as cable) carries
several data at once.
Channel
An instance of medium use for the purpose of passing protocol data units that
may be used simultaneously, in the same volume of space, with other instances
of medium use (on other channels) by other instances of the same physical
layer, with an acceptably low frame error ratio due to mutual interference.
Client
A client is the desktop or mobile PC that is connected to your network.
Other manuals for USB-N66
1
Table of contents
Other Asus Network Card manuals

Asus
Asus PCI-G31 User manual

Asus
Asus USB-N13 User manual

Asus
Asus WL-130b User manual

Asus
Asus WL-120g V2 User manual

Asus
Asus PL-X31 - Bridge User manual

Asus
Asus MCB-10G-2S User manual

Asus
Asus WL-106gM User manual

Asus
Asus PCE-N15 User manual

Asus
Asus PCI-G31 User manual

Asus
Asus PCI Express x1 Network Interface PEB-G21 User manual
Popular Network Card manuals by other brands

Emulex
Emulex Adapters Maintenance manual

Patton electronics
Patton electronics 1180RC user manual

Sony
Sony SNCA-CFW5 operating instructions

Mellanox Technologies
Mellanox Technologies MetroX TX6240 Hardware user manual

Panasonic
Panasonic Micro-Imagechecker AX40 brochure

Sony
Sony SCPH-10281 instruction manual