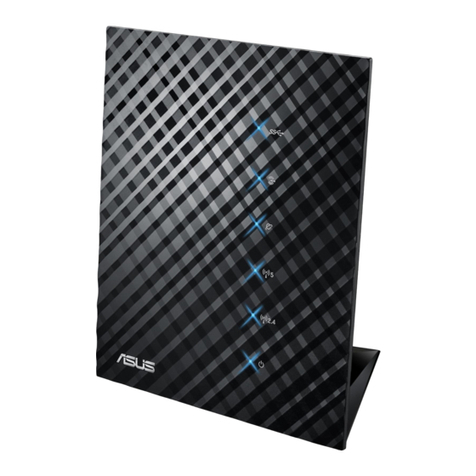
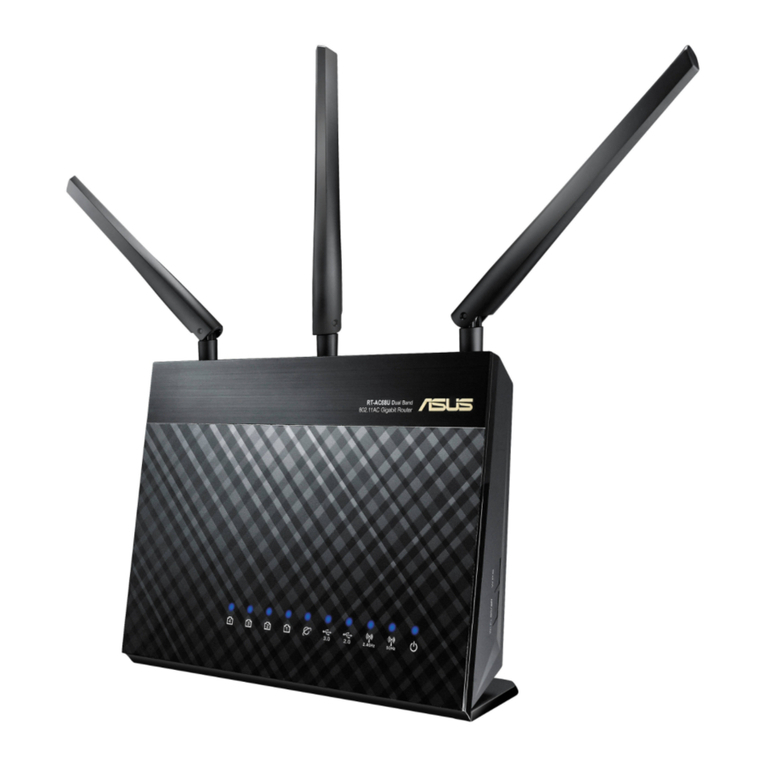
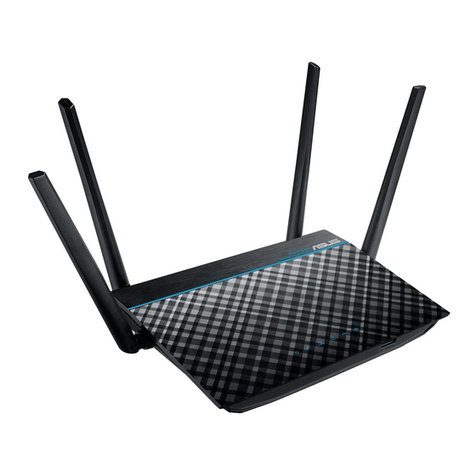
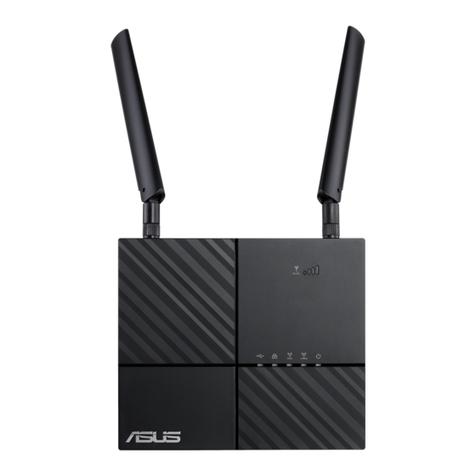
Asus RT-N65U User manual

Quick Start Guide
RT-N65U
Dual-band Wireless-N750 Gigabit Router
®
EEU7355_RT-N65U_QSG.indb 1 6/19/12 5:34:03 PM

EC Declaration of Conformity
We, the undersigned,
Manufacturer: ASUSTek COMPUTER INC.
Address, City: No. 150, LI-TE RD., PEITOU, TAIPEI 112, TAIWAN R.O.C.
Country: TAIWAN
Authorized representative in Europe: ASUS COMPUTER GmbH
Address, City: HARKORT STR. 21-23, 40880 RATINGEN
Country: GERMANY
declare the following apparatus:
Product name : Dual-band Wireless-N750 Gigabit Router
Model name : RT-N65U
conform with the essential requirements of the following directives:
2004/108/EC-EMC Directive
EN 55022:2010
EN 61000-3-2:2006
EN 55013:2001+A1:2003+A2:2006
EN 55024:2010
EN 61000-3-3:2008
EN 55020:2007+A11:2011
1999/5/EC-R &TTE Directive
EN 300 328 V1.7.1(2006-10)
EN 300 440-1 V1.6.1(2010-08)
EN 300 440-2 V1.4.1(2010-08)
EN 301 511 V9.0.2(2003-03)
EN 301 908-1 V4.2.1(2010-03)
EN 301 908-2 V3.2.1(2007-05)
EN 301 893 V1.4.1(2005-03)
EN 302 544-2 V1.1.1(2009-01)
EN 50360:2001
EN 50371:2002
EN 50385:2002
EN 301 489-1 V1.9.2(2011-09)
EN 301 489-3 V1.4.1(2002-08)
EN 301 489-4 V1.3.1(2002-08)
EN 301 489-7 V1.3.1(2005-11)
EN 301 489-9 V1.4.1(2007-11)
EN 301 489-17 V2.1.1(2009-05)
EN 301 489-24 V1.5.1(2010-09)
EN 302 326-2 V1.2.2(2007-06)
EN 302 326-3 V1.3.1(2007-09)
EN 301 357-2 V1.3.1(2006-05)
EN 302 623 V1.1.1(2009-01)
2006/95/EC-LVD Directive
EN 60950-1 / A11:2009
EN 60950-1 / A12:2011
EN 60065:2002+A1:2006+A11:2008
EN 60065:2002 / A12:2011
2009/125/EC-ErP Directive
Regulation (EC) No. 1275/2008
EN 62301:2005
Regulation (EC) No. 642/2009
EN 62301:2005
Regulation (EC) No. 278/2009
EN 62301:2005
Ver. 120601
CE marking
Declaration Date: Jun. 15, 2012
Year to begin affixing CE marking:2012
Position : CEO
Name : Jerry Shen
Signature :
__________
(
EC conformit
y
markin
g)
EEU7355_RT-N65U_QSG.indb 2 6/19/12 5:34:05 PM

EEU7355 / First Edition / April 2012
English...............................................................................................................................................4
Български........................................................................................................................................ 25
Čeština...............................................................................................................................................37
Eesti....................................................................................................................................................49
Magyar ..............................................................................................................................................61
Latviski .............................................................................................................................................. 73
Lietuvių .............................................................................................................................................85
Polski..................................................................................................................................................97
Română.............................................................................................................................................109
Русский.............................................................................................................................................121
Slovensky..........................................................................................................................................133
Українська.......................................................................................................................................145
Deutsch.............................................................................................................................................157
NOTE :
• For more details, refer to the user manual included in the support CD.
•
За повече информация, вижте ръководството на потребителя, намиращо се на
помощния CD диск.
• Podrobnější informace viz uživatelská příručka na podpůrném disku CD.
• Täpsemat teavet leiate seadmega kaasnenud tugijuhendi CD-lt.
• A további részleteket illetően tekintse meg a támogató CD-n lévő felhasználói
útmutatót.
• Detalizētāku informāciju meklējiet atbalsta CD esošajā lietotāja rokasgrāmatā.
• Išsamiau žr. vartotojo vadovą, esantį šiame pagalbos kompaktiniame (CD) diske.
• Dalsze szczegółowe informacje znajdują się w podręczniku użytkownika na
pomocniczym dysku CD.
•
Pentru mai multe detalii, consultaţi manualul de utilizare inclus pe CD-ul suport.
• Для получения дополнительной информации обратитесь к руководствуДля получения дополнительной информации обратитесь к руководству
пользователя на компакт-диске
• Viac podrobností nájdete v návode na obsluhu na CD s podporou.
• Детальніше див. посібник користувача на компакт-диску підтримки.
• Weitere Details nden Sie im Benutzerhandbuch auf der Support-CD.
EEU7355_RT-N65U_QSG.indb 3 6/19/12 5:34:06 PM

4
English
1) USB LED 6) Power LED 11) Power (DC-In) port
2) LAN LED 7) WAN (Internet)
port* 12) Power switch
3) WAN LED 8) Reset button 13) WPS button
4) 5GHz LED 9) LAN 1 ~ 4 ports*
5) 2.4GHz LED 10) USB 3.0 ports*
DCIN
ON/OFF
WPS
WPS
1
2
3
4
5
6
7
8
9
10
11
13
12
Package contents
NOTES:
• If any of the items is damaged or missing, contact ASUS for technical inquiries and
support. Refer to the ASUS Support Hotline list at the back of this guide.
• Keep the original packaging material in case you would need future warranty
services such as repair or replacement.
RT-N65U Wireless Router Network cable
Power adapter Quick Start Guide
Support CD (User Manual/utility software) Warranty card
Hardware features
EEU7355_RT-N65U_QSG.indb 4 6/19/12 5:34:08 PM

5
English
NOTES:
• *There are two LEDs in the WAN and LAN ports. Yellow LED means
Gigabit connection. Green LED means 10/100Mb connection.
• USB External HDD/Flash disk:
• The wireless router works with most USB HDDs/Flash disks up to 2TB and supports
read-write access for FAT16, FAT32, EXT2, EXT3 and NTFS.
• To safely remove the USB disk, launch the web GUI (http://192.168.1.1), then in
the Network Map page > External USB disk status > Safely Remove disk eld, click
Remove.
• Incorrect removal of the USB disk may cause data corruption.
• For the list of le system and hard disk partitions that the wireless router supports,
visit http://event.asus.com/networks/disksupport
• For the list of printers that the wireless router supports, visit
http://event.asus.com/networks/printersupport
EEU7355_RT-N65U_QSG.indb 5 6/19/12 5:34:10 PM

6
English
Positioning your wireless router
For the best wireless signal transmission between the wireless router and the network
devices connected to it, ensure that you:
• Place the wireless router in a centralized area for a maximum wireless coverage for the
network devices.
• Keep the device away from metal obstructions and away from direct sunlight.
• Keep the device away from 802.11g or 20MHz only Wi-Fi devices, 2.4GHz computer
peripherals, Bluetooth devices, cordless phones, transformers, heavy-duty motors,
uorescent lights, microwave ovens, refrigerators, and other industrial equipment to
prevent signal interference or loss.
• For the best front-to-rear coverage, place the wireless router in an upright position.
• For the best up-and-down coverage, place the wireless router in an inclined position.
• Always update to the latest rmware. Visit the ASUS website at
http://www.asus.com to get the latest rmware updates.
EEU7355_RT-N65U_QSG.indb 6 6/19/12 5:34:11 PM

7
English
Modem
a
b
Before you proceed
1. Unplug and disconnect the wires/cables from your existing modem setup.
WARNING! Ensure that your cable/ADSL modem has been turned o for at least two
minutes.
a: Unplug the AC adapter from the power outlet and disconnect it from your cable/ADSL
modem.
b: Disconnect the network cable from your cable/ADSL modem.
2. Set up your wireless environment.
DCIN
ON/OFF
Modem
a
b
c
d
a: Insert your wireless router’s AC adapter to the DC-In port and plug it to a power outlet.
b: Using the network cable, connect your computer to your wireless router’s LAN port.
IMPORTANT! Ensure that the WAN and LAN LEDs are blinking.
EEU7355_RT-N65U_QSG.indb 7 6/19/12 5:34:15 PM

8
English
c: Using another network cable, connect your modem to your wireless router’s WAN
port.
d: Insert your modem’s AC adapter to the DC-In port and plug it to a power outlet.
3. Disable some settings on your computer.
A. Disable the proxy server, if enabled.
B. Set the TCP/IP settings to automatically obtain an IP address.
C. Disable the dial-up connection, if enabled.
NOTE: For more details on disabling your computer settings, refer to Frequently
Asked Questions (FAQs).
EEU7355_RT-N65U_QSG.indb 8 6/19/12 5:34:15 PM

9
English
1. Congure your wireless settings via the wireless router’s web graphics user inter-
face (web GUI).
a: Launch your web browser such as Internet Explorer, Firefox, Google Chrome, or
Safari.
Getting started
b
a
NOTE: If QIS does not launch automatically, follow these steps to manually launch
QIS:
• On your web browser, key in http://192.168.1.1 and run the Quick Internet Setup
(QIS) Wizard again.
• Disable the proxy settings, dial-up connection, and set your TCP/IP settings to
automatically obtain an IP address. For more details, refer to the FAQs section or
use the Setup Wizard in the support CD for auto-diagnosis.
b: The wireless router’s Quick Internet Setup (QIS) feature automatically detects if your
ISP connection type is Dynamic IP, PPPoE, PPTP, L2TP, and Static IP. Key in the
necessary information for your connection type.
IMPORTANT! Obtain the necessary information about your Internet connection type
from your Internet Service Provider (ISP).
NOTE: The auto-detection of your ISP connection type takes place when you
congure the wireless router for the rst time or when your wireless router is reset to
its default settings.
EEU7355_RT-N65U_QSG.indb 9 6/19/12 5:34:17 PM

10
English
NOTE: You can assign a network name with up to 32 characters.
c: Assign the network name (SSID) and
security key for your 2.4GHz and 5GHz
wireless connection. Click Apply when
done.
d: Your Internet and wireless settings are
displayed. Click Next to continue.
e: Read the wireless network connection
tutorial. When done, click Finish.
Frequently Asked Questions (FAQs)
After following the steps, I still cannot access the wireless router’s web graphics user
interface (web GUI) to congure the wireless router settings.
A. Disable the proxy server, if enabled.
Windows® 7
1. Click Start > Internet Explorer to launch the web
browser.
2. Click Tools > Internet options > Connections tab >
LAN settings.
EEU7355_RT-N65U_QSG.indb 10 6/19/12 5:34:18 PM

11
English
3. From the Local Area Network (LAN) Settings screen,
untick Use a proxy server for your LAN.
4. Click OK when done.
MAC OS
1. From your Safari browser, click Safari > Preferences
> Advanced > Change Settings...
2. From the Network screen, deselect FTP Proxy and
Web Proxy (HTTP).
3. Cllick Apply Now when done.
NOTE: Refer to your browser's help feature for details on disabling the proxy server.
B. Set the TCP/IP settings to automatically obtain an IP address.
Windows® 7
1. Click Start > Control Panel > Network and Internet
> Network and Sharing Center > Manage network
connections.
2. Select Internet Protocol Version 4 (TCP/IPv4), then
click Properties.
EEU7355_RT-N65U_QSG.indb 11 6/19/12 5:34:20 PM

12
English
3. To obtain the iPv4 IP settings automatically, tick Ob-
tain an IP address automatically.
4. Click OK when done.
MAC OS
1. Click the Apple icon located on the top left of your
screen.
2. Click System Preferences > Network > Cong-
ure...
3. From the TCP/IP tab, select Using DHCP in the Con-
gure IPv4 dropdown list.
4. Cllick Apply Now when done.
NOTE: Refer to your operating system’s help and support feature for details on
conguring your computer’s TCP/IP settings.
EEU7355_RT-N65U_QSG.indb 12 6/19/12 5:34:21 PM

13
English
C. Disable the dial-up connection, if enabled.
D. Close all running web browsers.
NOTE: Refer to your browser's help feature for details on disabling the dial-up
connection settings.
Windows® 7
1. Click Start > Internet Explorer to launch the browser.
2. Click Tools > Internet options > Connections tab.
3. Tick Never dial a connection.
4. Click OK when done.
The client cannot establish a wireless connection with the router.
Out of Range:
• Put the router closer to the wireless client.
• Try to change the channel settings.
Authentication:
• Use wired connection to connect to the router.
• Check the wireless security settings.
• Press the Reset button at the rear panel for more than ve seconds.
EEU7355_RT-N65U_QSG.indb 13 6/19/12 5:34:22 PM

14
English
Cannot nd the router:
• Press the Reset button at the rear panel for more than ve seconds.
• Check the setting in the wireless adapter such as SSID and encryption settings.
Cannot access the Internet via wireless LAN adapter.
• Move the router closer to the wireless client.
• Check whether the wireless adapter is connected to the correct wireless router.
• Check whether the wireless channel in use conforms to the channels available in your
country/area.
• Check the encryption settings.
• Check if the ADSL or Cable connection is correct.
• Retry using another Ethernet cable.
If the ADSL“LINK”light blinks continuously or stays o, Internet access is not possible - the
Router is unable to establish a connection with the ADSL network.
• Ensure that all your cables are all properly connected .
• Disconnect the power cord from the ADSL or cable modem, wait a few minutes, then
reconnect the cord.
• If the ADSL light continues to blink or stays OFF, contact your ADSL service provider.
Network name or encryption keys are forgotten.
• Try setting up the wired connection and conguring the wireless encryption again.
• Press the Reset button of the wireless router for more than ve seconds.
• Factory default settings:
User name / Password:
admin / admin IP address:
192.168.1.1 SSID: ASUS
EEU7355_RT-N65U_QSG.indb 14 6/19/12 5:34:22 PM

15
English
Where can I nd more information about the wireless router?
• User Manual in the support CD
• Online FAQ site: http://support.asus.com/faq
• Technical Support site: http://support.asus.com/techserv
• Customer Hotline: Refer to the Support Hotline in this Quick Start Guide
SUPPORT HOTLINE
Area Hotline Number Support
Languages Availability
USA/
Canada 1-812-282-2787 English Mon. to Fri.
8:30-12:00am EST
(5:30am-9:00pm PST)
Sat. to Sun.
9:00am-6:00pm EST
(6:00am-3:00pm PST)
Brazil 4003 0988 (Capital) Portuguese Mon. to Fri.
9:00am-18:00
0800 880 0988
(demais localidades)
EEU7355_RT-N65U_QSG.indb 15 6/19/12 5:34:23 PM

16
Български
1) USB
индикатор 6) Индикатор на
захранването 11) Порт на захранването
(вход за прав ток)
2) LAN
индикатор 7) WAN (интернет)
порт* 12) Бутон за включване и
изключване
3) WAN
индикатор 8) Бутон за
нулиране 13) WPS бутон
4) 5GHz
индикатор 9) LAN 1 ~ 4
порта*
5) 2.4GHz
индикатор 10) USB 3.0
портове*
DCIN
ON/OFF
WPS
WPS
1
2
3
4
5
6
7
8
9
10
11
13
12
Съдържание на пакета
ЗАБЕЛЕЖКА:
• Ако някой от компонентите е повреден или липсва, свържете се с Вашия
търговски представител.
RT-N65U Мрежов кабел
Адаптер за променлив ток Ръководство за бърз старт
Помощен CD диск (Ръководство на потребителя/помощни програми)
Гаранционна карта
Хардуерни функции
ЗАБЕЛЕЖКА: Ако някой от компонентите е повреден или липсва,
свържете се с Вашия търговски представител.
WPS
бутон
EEU7355_RT-N65U_QSG.indb 16 6/19/12 5:34:25 PM

17
Български
ЗАБЕЛЕЖКИ:
• *Има два индикатора за WAN и LAN портовете. Жълтият индикатор
е за Gigabit връзка. Зеленият индикатор означава 10/100Mbps
връзка.
• USB Външен хард / флаш диск:
• Безжичният рутер работи с повечето USB хард дискове и флаш дискове до 2
TB и поддържа достъп четене-писане за FAT16, FAT32, EXT2, EXT3 и NTFS.
• За сигурно изключване на USB диска стартирайте потребителския
интерфейс от мрежата GUI (http://192.168.1.1), след това на страница
Network Map (Карта на мрежата) в горния десен ъгъл щракнете иконата
на USB и щракнете Eject USB 1 (Изхвърляне на USB 1).
• Неправилното изваждане на USB диска може да предизвика повреждане на
данните.
• Списъка на системните и дискови раздели, поддържани от безжичния
рутер, можете да намерите на http://event.asus.com/networks/disksupport
• Списъка на принтерите, поддържани от безжичния рутер, можете да намерите
на http://event.asus.com/networks/printersupport
EEU7355_RT-N65U_QSG.indb 17 6/19/12 5:34:27 PM

18
Български
Разположение на безжичния рутер
За постигане на максимално добро предаване на безжичните сигнали между
безжичния рутер и свързаните с него мрежови устройства трябва:
• Да поставите безжичния рутер на централно място за максимално покритие на
мрежовите устройства.
• Рутерът да е отдалечен от метални прегради и да не е изложен на слънчева светлина.
• Рутерът да е отдалечен от Wi-Fi устройства 802.11g или 20MHz, компютърни
периферни устройства 2.4GHz, Bluetooth (блутут) устройства, безжични телефони,
трансформатори, мощни мотори, флуоресцентни лампи, микровълнови печки,
хладилници и други промишлени машини за избягване на смущенията или загубите
на сигнала.
• За най-добро покритие отпред и отзад, поставете безжичния рутер в изправено
положение.
• За най-добро покритие отгоре и отдолу, поставете безжичния рутер в наклонено
положение.
• Винаги използвайте най-новите версии на фърмуера. Посетете сайта на ASUS http://
www.asus.com за сваляне на последните версии на фърмуера.
EEU7355_RT-N65U_QSG.indb 18 6/19/12 5:34:28 PM

19
Български
1.
Изключете и прекъснете връзката с жиците/кабелите на Вашaта съществуваща модемна
инсталация.
Modem
a
b
Преди започване
ПРЕДУПРЕЖДЕНИЕ: Уверете се, че Вашият кабелен/ADSL модем е бил изключен
най-малко две минути.
а
:Изключете адаптера за променлив ток от контакта и го извадете от кабелния/
ADSL модем.
б
:Извадете мрежовия кабел от Вашия кабелен/ADSL модел.
2. Конфигурирайте безжичната среда.
DCIN
ON/OFF
Modem
a
b
c
d
а: Свържете своя безжичен рутер с входа за прав ток, след което го включете в контакт.
б: С помощта на мрежов кабел, свържете компютъра си с LAN порта на безжичния рутер.
ВАЖНО! Уверете се, че WAN и LAN индикаторите мигат..
EEU7355_RT-N65U_QSG.indb 19 6/19/12 5:34:31 PM

20
Български
в: С помощта на друг мрежов кабел свържете модема си с WAN порта на безжичния рутер.С помощта на друг мрежов кабел свържете модема си с WAN порта на безжичния рутер.С помощта на друг мрежов кабел свържете модема си с WAN порта на безжичния рутер.
г: Свържете адаптера за променлив ток на модема с входа за прав ток, след което гоСвържете адаптера за променлив ток на модема с входа за прав ток, след което гоСвържете адаптера за променлив ток на модема с входа за прав ток, след което го
включете в контакт.
3. Блокирайте някои настройки на компютъра.
A.
Деактивирайте прокси сървъра, ако е активиран.
Б.
Конфигурирайте TCP/IP настройките за автоматично получаване на IP адрес.
В.
Деактивирайте комутируемата връзка, ако е активирана.
ЗАБЕЛЕЖКА: По-подробни сведения за блокирането на настройките на
компютъра ще намерите в Често задавани въпроси (FAQs).
EEU7355_RT-N65U_QSG.indb 20 6/19/12 5:34:32 PM
Other manuals for RT-N65U
5
Table of contents
Languages:
Other Asus Network Router manuals

Asus
Asus RT-AC2600 User manual

Asus
Asus RT-AC1300G PLUS User manual

Asus
Asus RT-N600P User manual

Asus
Asus RT-N66W Dual Band 3x3 User manual

Asus
Asus RT-AC88U User manual

Asus
Asus RT-AC86U User manual

Asus
Asus RT-AC65P User manual

Asus
Asus DSL-AC56U User manual

Asus
Asus ExpertWiFi EBR63 User manual

Asus
Asus RT-AC88U User manual

Asus
Asus WL 520GU - Wireless Router User manual

Asus
Asus RT-AX3000 V2 User manual

Asus
Asus DSL-AC51 User manual

Asus
Asus RT-AX56U User manual

Asus
Asus ZenWiFi XD5 User manual

Asus
Asus RT-G32 - Wireless Router User manual

Asus
Asus RT-N56U User manual

Asus
Asus RT-AC1900P User manual

Asus
Asus RT-AC66U User manual

Asus
Asus ZenWiFi XD5 User manual