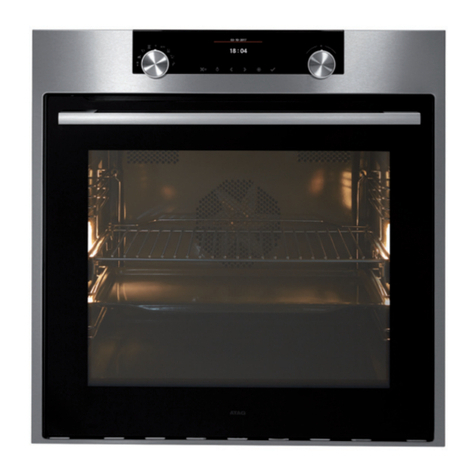
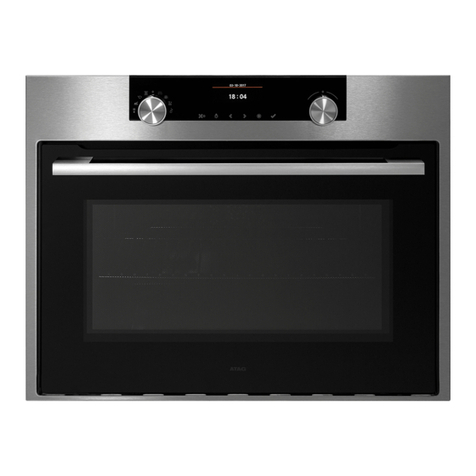
Atag DX6411L User manual

Houd, wanneer u contact opneemt met de serviceafdeling, het complete typenummer bij de hand.
En cas de contact avec le service après-vente, ayez auprès de vous le numéro de type complet.
Halten Sie die vollständige Typennummer bereit,
wenn Sie mit der Kundendienstabteilung Kontakt aufnehmen.
When contacting the service department, have the complete type number to hand.
Sørg for at have hele typenummeret klar, når serviceafdelingen kontaktes.
Ha hele typenummeret for hånden når du kontakter serviceavdelingen.
Ha det kompletta typnumret till hands när du tar kontakt med serviceavdelningen.
Adressen en telefoonnummers van de serviceorganisatie vindt u op de garantiekaart.
Les adresses et les numéros de téléphone du service après-vente se trouvent sur la carte de garantie.
Adressen und Telefonnummern der Kundendienstorganisation finden Sie auf der Garantiekarte.
You will find the addresses and phone numbers of the service organisation on the guarantee card.
Adressen og telefonnummeret til servicevirksomheden findes på garantikortet.
Du finner adresser og telefonnumre til serviceorganisasjonen på garantikortet.
Adresser och telefonnummer till serviceorganisationen hittar du på garantikortet.
Instructions for use
Oven
700005118100
DX6411L
DX6492L
DX6411Q
DX6492Q

NL
Handleiding NL 3 - NL 70
FR
Notice dútilisation FR 3 - FR 70
DE
Anleitung DE 3 - DE 70
EN
Manual EN 3 - EN 73
DA
Brugsvejledning DA 3 - DA 70
NO
Bruksanvisning NO 3 - NO 73
SV
Bruksanvisning SV 3 - SV 73
Gebruikte pictogrammen - Pictogrammes utilisés - Benutzte Piktogramme
Pictograms used - Anvendte piktogrammer - Symboler brukt
Symboler som används
Belangrijk om te weten - Important à savoir - Wissenswertes - Important information
Vigtig information - Viktig informasjon - Viktig information
Tip - Conseil - Tipp - Tips
NL BE
LU
BE
FR
AT LU
BE
DE
IE
GB
DK
NO
SE

EN 3
Control panel 5
Oven features 6
Accessories 7
Using the accessories 8
Features 10
Safety instructions 11
Installation and connection 14
Explanation of knobs and buttons 16
Before you begin
Setting the Language and the Clock 20
Using the oven
Selecting a cavity and an oven function 23
Setting the oven temperature 28
Switching the oven off 29
Setting the End time 29
Setting the End time In Double Oven 30
Setting the Cook time 31
Setting the Cook time In Double Oven 32
Setting the Delayed Start Time 33
Kitchen timer 35
Oven lamp on/off 35
Switching the Sound On/Off 36
Oven functions
1. Conventional 38
2. Top Heat + Hot air 39
3. Hot air 40
4. Large Grill 41
5. Small Grill 42
6. Bottom Heat + Hot air 43
7. Double Oven 44
CONTENTS

EN 4
8. Auto Cook Programs 46
9. Auto Cook Programs for Single Oven 47
10. Auto Cook Programs for Upper Cavity 51
11. Auto Cook Programs for Lower Cavity 52
12. Auto Cook Programs for Double Oven 53
13. Add your own programmed dishes 54
14. Choose your own programmed dish 56
15. Delete your own programmed dish 57
Cleaning and Care
Pyrolitic Self Cleaning (only for DX6411Q/DX6492Q) 58
Aqua cleaning 59
Oven door glass (only for DX6411L/DX6492L) 64
Cleaning the Top Heater (DX6411L/DX6492L) 68
Changing the lamp 69
Troubleshooting 70
Error and safety codes 71
Technical specifications 72
Disposal of appliance and packaging 73
CONTENTS

EN 5
1. CAVITY SELECT KNOB
2. WINDOW DISPLAY
3. MULTI-FUNCTION KNOB
4. BACK BUTTON
5. COOK TIME BUTTON
6. END TIME BUTTON
7. TEMPERATURE BUTTON
8. LAMP BUTTON
9. WEIGHT BUTTON
10. MENU BUTTON
11. NEXT BUTTON
CONTROL PANEL
Special features
The oven comes equipped with the following special features.
• Divider modes: when the divider is inserted, the appliance’s divider
facility enables independent cooking in two separated partitions,
enhancing energy efficiency and convenience for use.
• Aqua cleaning: the oven’s self-cleaning function uses the power of
steam to cut through grease and grime to clean the oven interior
safely.
DX6411L/DX6492L
DX6411Q/DX6492Q
145678910 11 3
2
145678910 11 3
2

EN 6
Note
• Shelf levels are numbered from the bottom up.
• The levels 4 and 5 are mainly used for grill mode.
• Please refer to the Cooking Guides in this manual to determine the
appropriate shelf levels for your dishes.
OVEN FEATURES
1. Control panel
2. Side runner
3. Catalytic enameled cover casing
4. Oven lights
5. Glass door
6. Top heating elements
7. Level 5
8. Level 4
9. Level 3
10. Level 2
11. Level 1
12. Door handle
1
2
3
4
4
5
6
7
8
9
10
11
12

EN 7
ACCESSORIES
The following accessories are provided with your oven:
Front
Baking tray
The baking tray could be used for the
preparation of cakes, cookies and other
pastries.
Front
Deep baking tray
The deep baking tray should be used for
roasting or collecting meat juices or fat
drippings.
Wire rack
The wire rack should be used for dishes,
cake tins, roasting and grilling trays.
Roast wire rack
The roast wire rack should be used for
roasting. Always use the roast wire rack in
combination with a baking tray.
Divider, for upper cavity, lower cavity and
double oven. Use inserted in
level 3. There is a divider-sensing switch
on the rear wall of the cooking compart-
ment. Insert into the back completely.
Rotisserie spit (optional) comprises a
spit, 2 prongs, a removable handle and a
cradle, which fits into the 3rd shelf from
the bottom. To use the rotisserie, fit the
spit into the hole in the rear wall of the
oven’s interior. Place the deep baking tray
on level 1 when using the spit.
1
2
3
5
4
6

EN 8
USING THE ACCESSORIES
Warning
All accessory parts and unsuitable accessories for self cleaning should
be removed for pyrolytic cleaning.
Note
• When using the deep baking tray or the baking tray to collect
drippings from cooking foods, ensure that the tray is properly
placed in the Side Runners. Allowing these accessories to contact
the bottom surface of the oven can damage the enamel of the
surface. Trays placed on level 1 should clear the bottom surface of
the oven by at least 2 cm.
• Be very carefull while removing meals and/or accessories out of
the oven. Hot meals, accessories and surfaces can burn you!
Example
Level 1: deep baking tray
Level 4: baking tray
Rotisserie spit
• Place the deep baking tray at level1 to collect the cooking juices
• Slide one of the forks onto the spit; put the piece of meat to be
roasted onto the spit;
• Parboiled potatoes and vegetables can be placed arount the edge
of the deep baking tray to roast at the same time.
• Place the cradle on the middle shelf and position with the ‘v’ shape
at the front.
• To help insert the spit, the handle can be screwed onto the
blunt end.
gap 2cm
Deep
baking tray
4
3
2
5
1
Baking tray

EN 9
USING THE ACCESSORIES
• Rest the spit onto the cradle with the pointed end towards the
back and gently push until the tip of the spit entres the turning
mechanism at the back of the oven. The blunt end of the spit
must rest on the ‘v’ shape. (The spit has two lugs which should be
nearest to the oven door so to stop the spit going forward, the lugs
also act as a grip for the handle.)
• Before cooking unscrew the handle. After cooking screw the
handle back on to help remove the spit from the cradle.
Telescopic slide guides
Telescopic slide guides and other oven accessories might get very
hot! Use kitchen gloves or other suitable protection!
Telescopic slide guides are located inside the oven to the right and to
the left in two different levels.
• To insert the baking tray or wire rack, first slide out the telescopic
guides for one particular level.
• Place the tray or wire rack on the guides. Pay attention to the
round holes in the baking tray (see illustration)! By placing the wire
rack you must push it tight between the guides. Push them back
completely into the oven. Close the oven door only after you have
pushed the telescopic guides into the oven.
Divider, wire rack, baking tray and deep baking tray
Positioning the divider
Insert the divider into level 3 of the oven.
Positioning the wire rack
Insert the wire rack at any desired level.
Positioning the baking tray or deep baking tray
Insert the baking tray and/or the deep baking tray at any desired level.
EN 10
If a cooking time is not entered, the oven will shut itself off after the
lengths of time indicated below.
Shut off times for various temperature settings
Under 105 °C 16 hours
From 105 °C to 240 °C 8 hours
From 245 °C to 300 °C 4 hours
• This oven’s electrical circuitry features a thermal shut off system.
If the oven heats to abnormally high temperatures, the system will
shut off the power supply to the heating elements for a period of
time.
Cooling fan
During cooking, it is normal for the vent to release Hot air from the
front of the oven.
The cooling fan will also continue to operate after the oven has been in
use. It will turn off when the internal cabinet temperature has dropped
to 60 °C or after 22 minutes.
Thank you for purchasing an ATAG built-in oven.
First read the user instructions carefully and completely before
starting to use the appliance, and keep them carefully for future
reference.
FEATURES

EN 11
SAFETY INSTRUCTIONS
Installation of this oven must be performed only by
a licensed electrician. The installer is responsible
for connecting the appliance to the mains power
supply in observance of the relevant safety
recommendations.
Electrical safety
• If the oven has been damaged in transport, do
not connect it.
• This appliance must be connected to the mains
power supply only by a specially licensed
electrician.
• In the event of a fault or damage to the
appliance, do not attempt to operate it.
• Repairs should be performed by a licensed
technician only. Improper repair may result in
considerable danger to you and others. If your
oven needs repair, contact the Atag Customer
Service or your dealer.
• If the supply cord is defective, it must be
replaced by a special cord or assembly available
from the manufacturer or an authorised service
agent.
• Electrical leads and cables should not be
allowed to touch the oven.
• The oven should be connected to the mains
power supply by means of an approved circuit
breaker or fuse. Never use multiple plug
adapters or extension leads.
• The rating plate is located on the inside of the
oven on the right side.
• The power supply of the appliance should be
turned off when it is being repaired or cleaned.
• Take care when connecting electrical appliances
to sockets near the oven.
• WARNING: The appliance and its accessible
parts become hot during use. Care should

EN 12
SAFETY INSTRUCTIONS
be taken to avoid touching heating elements.
Children less than 8 years of age shall be kept
away unless continuously supervised.
• This appliance can be used by children aged
from 8 years and above and persons with
reduced physical, sensory or mental capabilities
or lack of experience and knowledge if they
have been given supervision or instruction
concerning use of the appliance in
a safe way and understand the hazards involved.
Warning
• Accessible parts may become hot during use.
To avoid burns, young children should be kept
away.
• The appliance should be powered down before
replacing the lamp to avoid the possibility of
electric shock. During oven operation, the
interior surfaces become very hot.
Safety during operation
• This oven has been designed only for the
cooking of household foods.
• During use, the oven interior surfaces become
hot enough to cause burns. Do not touch
heating elements or interior surfaces of the oven
until they have had time to cool down.
• Never store flammable materials in the oven.
• The oven surfaces become hot when the
appliance is operated at a high temperature for
an extended period of time.
• When cooking, take care when opening the oven
door as Hot air and steam can escape rapidly.
• When cooking dishes that contain alcohol,
the alcohol may evaporate due to the high
temperatures and the vapour can catch fire if it
comes into contact with a hot part of the oven.

EN 13
SAFETY INSTRUCTIONS
• For your safety, do not use high-pressure water
cleaners or steam jet cleaners.
• Children should be kept at a safe distance when
the oven is in use.
• Frozen foods such as pizzas should be cooked
on the wire rack. If the baking tray is used, it
may become deformed due to the great variation
in temperatures.
• Do not pour water into the oven bottom when it
is hot. This could cause damage to the enamel
surface.
• The oven door must be closed during cooking.
• Take care when opening the door before the end
of the aqua cleaning procedure; the water on the
bottom is hot.
• Do not line the oven bottom with aluminium foil
and do not place any baking trays or tins on it.
The aluminium foil blocks the heat, which may
result in damage to the enamel surfaces and
cause poor cooking results.
• Fruit juices will leave stains, which can become
indelible on the enamel surfaces of the oven.
When cooking very moist cakes, use the deep
baking tray.
• Do not rest bakeware on the open oven door.
• Young children should be supervised to ensure
that they do not play with the appliance.
• Small amounts of food require shorter cooking
or heating time. If normal times are allowed they
may overheat and burn.
• Excess spillage should be removed before self
cleaning and all utensils should not be left in the
oven during pyrolytic self cleaning.
• During self cleaning the surfaces get hotter
than usual and children should be kept a safe
distance.

EN 14
Safety instructions for the installation
This oven may be installed only by an approved electrician. The
installer is responsible for connecting the appliance to the mains and in
so doing for observing the relevant safety regulations.
• Ensure protection from live parts when installing the oven.
• The kitchen cabinet in which the oven is built in must satisfy
stability requirements as specified in DIN 68930.
Installation in the cabinet
This is a built-in oven, which needs to be installed into an upper or
lower cabinet.
• Observe the minimum distances.
• The oven should be slid into place at the proper angle of alignment.
INSTALLATION AND CONNECTION
min. 20
min. 50
50
460
598
595
560
572
545
21
90°
min. 550
min. 560
min. 600
High Cabinet
min. 550
min. 560
min. 590 ~ max. 600
50
Low Cabinet

EN 15
1. Fix the oven on both sides using screws.
2. After installation, remove the vinyl protective film from the door to
the appliance and the protective film from the interior surfaces of
the oven.
Connecting to the mains power supply
• Electrical connections must be made as per the connection plate
fixed to the back of the appliance by an electrical fitter who must
ensure that the appliance has been connected up in accordance
with fitting instructions and local regulations.
• Where the appliance is not connected to the mains electricity
supply by a plug, an omni polar cutout device (with a contacts
gap of at least 3 mm) must be fitted on the supply side of the
connection to meet safety requirements.
Note
• When the power is connected, the electronics of the oven are
initialised; this neutralizes the lighting for a few seconds. The
electric cable (H05 RR-F or H05 VV-F, Min. 1.5 m, 1.5~2.5 mm²)
must be long enough for it to be connected to the built-in oven
standing on the floor in front of its unit. Open the back cover of the
oven at the bottom (using a flat-bladed screwdriver) and completely
unscrew the connection screw and the cable clamp before fitting
conducting wires into the appropriate terminals.
• The earth wire must be connected to the ( ) terminal of the oven.
• If the oven is connected to the power supply by a plug, this must
remain accessible once the oven has been fitted.
• We cannot accept any liability in the event of an accident resulting
from non-existent or faulty earthing.
INSTALLATION AND CONNECTION
Live
Neutral
Earth

EN 16
EXPLANATION OF KNOBS AND BUTTONS
The Menu Button
After you have pressed the Menu Button, you can choose several
settings by turning the Multi-function Knob. Choose a setting, press
the Next Button to confirm and again you can choose several settings
by turning the Multi-function Knob. In the table below you can see
the settings you can choose.
Language
Nederlands
Language is adjusted
English
Deutsch
Français
Dansk
Cleaning Aqua clean Aqua clean starts
Dishes Add See page 54 - 57
Delete
Time Hours Minutes (see page 20)
Contrast
1
Contrast is adjusted2
3
Sound On Sound is changed
Off
Auto shut off (clock) On Auto shut off is turned on (see page 21)
Off Auto shut off is turned off (see page 21)
Lamp turns on in
both parts of the
oven
Lamp turns on in upper
part of the oven Lamp turns on in lower
part of the oven Lamp turns off

EN 17
THE OVEN IS ON!
Cook time is blinking Set the cooking time Confirm, the cooking time
stops blinking
If the ‘End Time’ or
‘Temperature’ button is
pressed, those functions
will start blinking and can
be adjusted (if available)
THE OVEN IS OFF!
is blinking Set the desired time Confirm, the kitchen timer starts
and stops blinking
End time is blinking Set the end time Confirm, the end time
stops blinking
If the ‘Cook Time’ or
‘Temperature’ button is
pressed, those functions
will start blinking and can
be adjusted (if available)
Temperature is blinking Change the temperature Confirm, the temperature
stops blinking
If the ‘Cook Time’ or ‘End
Time’ button is pressed,
those functions will start
blinking and can be
adjusted (if available)
EXPLANATION OF KNOBS AND BUTTONS

EN 18
EXPLANATION OF KNOBS AND BUTTONS
Weight is blinking Change the weight Confirm, the weight stops
blinking
If the ‘Cook Time’,
‘Temperature’ or ‘End
Time’ button is pressed,
those functions will start
blinking and can be
adjusted (if available)
If you have choosen a setting with the Cavity Select Knob, you can
also choose several settings by turning the Multi-function Knob.
Lower
cavity
Hot air Press to adjust
or add the:
• Cooking Time
• Temperature
• End Time
Turn to change Press to confirm
Bottom Heat +
Hot air
Auto Cook See page 52
Double
oven
Lower (first)
Hot air Press to adjust or
add the:
• Cooking Time
• Temperature
• End Time
Turn to change Press to confirm
Bottom Heat +
Hot air
Auto Cook See page 53
Upper
(second)
Hot air Press to adjust or
add the:
• Cooking Time
• Temperature
• End Time
Turn to change Press to confirm
Top Heat +
Hot air
Large Grill

EN 19
Upper
cavity
Hot air Press to adjust
or add the:
• Cooking Time
• Temperature
• End Time
Turn to
change Press to confirmTop Heat + Hot air
Large Grill
Auto Cook See page 51
Single oven
Hot air
Press to adjust
or add the:
• Cooking Time
• Temperature
• End Time
Turn to
change Press to confirm
Top Heat + Hot air
Conventional
Large Grill
Small Grill
Bottom Heat +
Hot air
Defrost
Auto Cook See page 45 - 50
Pyrolyse
(DX6411Q/DX6492Q)
Low
Pyrolyse startsMedium
High
EXPLANATION OF KNOBS AND BUTTONS

EN 20
BEFORE YOU BEGIN
Setting the Language and the Clock
When the power is first supplied to the oven, you must set the language
and the time.
1Turn the Multi-function Knob to set the
language.
2Press the Next Button to confirm the set-
ting. The clock symbol and ‘12:’ will blink.
3Example: to set 1:30.
Turn the Multi-function Knob to set the
hour of the day.
4Press the Next Button to confirm. The
clock symbol and ‘:00’ will blink. Turn the
Multi-function Knob to set the minute of
the time.
5Press the Next Button to finish
setting the clock or wait for about
10 seconds. The clock symbol will
disappear and ‘30’ will stop blinking.
The display shows the time of day. The
appliance is now ready to use.
This manual suits for next models
3
Table of contents
Other Atag Oven manuals
Popular Oven manuals by other brands

Reeva
Reeva UBESO601SS user manual

CORBERO
CORBERO CCHF1072NAIRFRY user manual

Pelgrim
Pelgrim MAC514RVS Instructions for use

Siemens
Siemens HB272AB 0S Series User manual and installation instructions

Samsung
Samsung FQ115T001 Installation and operating instruction

Gaggenau
Gaggenau BS 260 installation instructions

Fisher & Paykel
Fisher & Paykel Wall Oven user guide

AEG
AEG COMPETENCE 3210 BU Operating and installation instructions

Whirlpool
Whirlpool RBD245PRB00 Lower Oven Parts

Whirlpool
Whirlpool ADN508 Operating and maintenance instructions

Lacor
Lacor 69342 Instructions for use and maintenance

Amana
Amana EvenAir Plus owner's manual