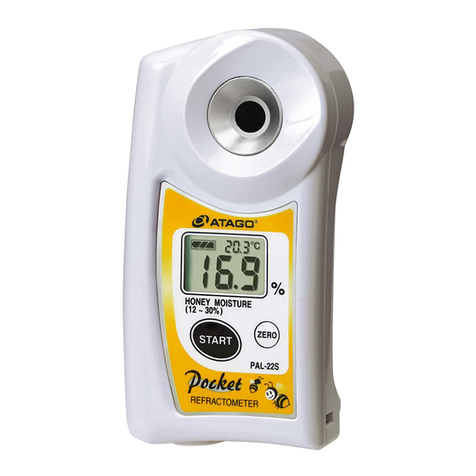
ATAGO Pen-Honey User manual

E%r-Eo,
4fl4a4ooo
lnstruction
Manual
lntroduction
Thank you for purchasing the instrument. Carefully read and follow all instructions. Keep this manual for
future reference.
Safety lnstructions
Read and follow all safety instructions before operating the instrument. Failure to comply with the
following instructions may result in personal injury or property damage.
O When measuring hazardous materials, use proper safety procedures, materials, and clothing to avoid personal
. injury. Anyone handling hazardous materials should understand their properties and safety requirements.
O lf the instrument is dropped or subjected to a strong impact, contact your supplier for inspection.
O Do not attempt to repair, modify, or disassemble the instrument.
O ATAGO may not be held liable for any injury or damage arising in connection with handling of hazardous
materials during the use of the instrument.
O lf this instrument is used to measure highly acidic samples, the prism and prism head may be damaged,
. resulting in inacc=urate mg?qurements. _ _
O The prism is made of optical glass. Metal tools and/or implements can damage! the prism-surfaie.it ttre -
surface of the prism is scratched or damaged, inaccurate rneasurements will occur.
O Before use, carefully read the instruction manual and fully understand the function and operation of the
instrument.
O Use the battery specified for this refractometer. lnsert the battery properly, paying attention to the polarities.
O Do not leave the instrument in a location exposed to direct sunlight or neir'a heat source for any extended
period of time.
O Do not change the ambient temperature of the instrument suddenly.
O Do not place the instrument where it will be subject to strong vibrations.
O Do not use the instrumenl where there is an excessive amount of dust.
O Do not store the instrument in an extremely cool area.
O Do not set or drop heavy objects on the instrument.
O Have the batteries removed during air transport.
I1-Contents
Please comfirm the following contents of the package when the unit is unpacked
I Main unit
O lnstruction
I z.Parts
I Size AAA Battery ....'..'................1
i Strage Box "i"""""""""""......1
(1) Liquid Crystal Display (LCD)
Displays the measured values.
(2) ZERO Key
Press to perform zero-setting.
(3) START Key
Press lo begin measurement.
(4) Prism head
The prism housing area that is dipped into samples.
(5) Prism
(6) Battery Case Cover
Open the lid to insert and take out the battery.
(7) Lanyard hole
(2) ZEBO Key (1) Liquid Crystal Display (LCD)
(7) Lanyard hole
(6) Battery Case Cover
(3) START Key
(4) Prism head
(5) Prism
I S.Xow to insert (or replace) the battery
(1) Open the battery case cover (Fig. 3-1 ).
(2) One AAA battery and a protective strip of tape
are lncluded with the instrument al purchase.
Remove the protective tape from the underside of
the battery case cover before use (Fig. 3-2).
(3) Close the battery case cover. A click will indicate the
cover is securely closed (Fig. 3-3).
(4) To change the battery, open the battery case cover
and depress the edge ol the battery with your finger
to remove (Fig.3-4).
(5) lnsert a new AAA alkaline battery with the negative (-)
terminal end in first.
o When the battery power is low, as displayed by [Lo]
message, replace with a new alkaline AAA batlery.
. Always check the expiration date when purchasing
and inserting new batteries.
o Perform Zero Setting after replacing the battery.
Fio.3-'l A
"@
ffi
'"-'8

(cAUTtONl
o Perform.Zero Setting each day prior to using the instrument.
: 1]9.e d$]i!!e-d or tap water that is approximat6ly the same temperature of the sample to be measured.
o lf the ELl. function displays the [nnnn] warnin-q messaqe whiie oerformino zero-settino- sharte rha nr
o lf the ELl. function displays the fnnnn]warning message whiie performing zero-setting, snaOe itie prism
head with your hand and press the ZERO key again.
. lf the LCD screen displays [AAAA], dip the piism head in water
the prism is not exposed to air. again and press the ZERO key, ensuring
(1) Wipe the prism and the prism head clean.
(2) Prepare distilled or tap water in a clean container.
(S) fgJly-rybmerge the prism head into the water and press the
START key OR press the START key and (within 10
qegg$s) fully submerge the prism head into the water (Fig.
a-11 (Fig. a-2).
(a) [cHHH] will be displayed (Fig.4-3).
Hold down the ZERO key for more than 1 second while the
pfism head is submerged in water. [0000] will flash twice
(Fig. aa) and then [cHHH] (Fig. a-3) wiil be disptayed, Zero
setting is complete.
Wipe.the prism and the prism head clean with tissue paper,
and then proceed to measuring a sample.
W,-W
ffiHHl Fio-4-4
-/,#\
tnnnnt
IUUUUI
L+
ELI Function
(The instrument is equipped with the External Light lnterference (ELI)
lunctron to ensure accurate readings> ,[ln n n
lf the instrument is subjecled to intense light, such as direct sunlight or artificial lighting, I g
when measuring a sample or zero sefting, the ELI function will diiplay the lcnnnllfiglA; warning message
immediately after the START or !!Bo key is pressed. When this happens, srraite ttie frism rrdo witn yiur
hand and press the START or ZERO key again. lf the waming
message continues to be displayed, try the following methods:
(DPlacg the sample in a non-translucent cup to measure.
@ Using a shallow container, keep the prism close to the bottom
of the container while taking measurements.
*External Light lnterference (ELl)
,WE
' lf the ELl. function displays the [nnnn] warning message while measuring a sample,
head with your hand and press ine SfRRf ke-y again.
Two different ways to measure a sample:
1 . Dip the prism head into a sample-filled container (Fig. 5-1).
2. For small sample volumes, touch the prism head into t[e
sample (Fig.5-2).
(1) Dip the prism head into the sample and press the START
key OR press the START key and (within .10 seconds)
touch the prism head into the sample.
(2) The measurement value will be displayed in approximately
2 seconds (Fig. 5-3). Thereafter, the display will update
every second showing the measurement value as the
instrument takes continuous measurements.
(3) The unit will turn itself off after 3 minutes of continuous measurement. The results displayed wlll start
blinking approximately 10 seconds before the screen is turned off. lf a longer measurement time is
desired, hold down the srART key for 1 second to resume continuous meisurement.
ffi-IpPJAIT_k"y tg. pause measurement. The last measured value will be displayed (Fig. 5-4). The unit wi1
automatieally turn off after 2 minutes in this paused state. Press the START key again to resime measurement.
is.!-3
ffitril
shade the prism
Fis'5-2&
&
Fig.5-4
t-TEjl
The following messages alert the user when an operation has failed.
@External Light lnterference (ELl) : The follo.wing warning.message will be displayed when intense light
passes through the prism.
[c] will blink on and off for the first 10 seconds it is displayed
(Fig.6-1 ). While [c] is blinking, shade the prism head with your
hand to commence with the measurement.
lf.the prism head is not shaded within 10 seconds, [c] will stop
blinking and the START key will need to be pressecl 6gain (Fig.
6-2).
Fig.6-.t. . Fig.6_2
f,t*nnl * ffi;
@Air Measurement Error :
Fig.6-3
F--l +
@Temperature Enor : The. following error message will be displayed when the temperature of the prism
; and the temperature of the sample vary gieatly.
i
The following error will be displayed when the prism is exposed to air during a
measurement.
Fis.6-4 When the STABT kefrs pressertrfcffil blink (Fig.6-g.
lf the prismhead is not adequately submerged within i 0
I t ! I I I se.conds, [c] will stop blinkin! andihe error-message [LLLL]
IL L L L I willbedisplayed(Fig.6-4). -
The START key will heed to be pressed again after
adequately submerging the prism head. -
Fis.6-6 [c] will blink on and off for the first 30 seconds it is displayed
(Fig.6-5). Keep the prism head submerged in the sarirpll, and
I L L L L I measurement will commence as soon as the difference in
IL L L l- I temperatureisnarrowed.
lI the temperature diflerence remains too wide after 30
seconds, [c] will stop blinking (Fig.66). Keep the prism head
submerged in the sample and press the START key again.
' Fio.6-5
, '6ttt_i '
@Out of Range
ffird A liquid of high concentration
exceeding the measuring
range is measured.
@Out of AutomaticTemperature Compensation Range Enor
The following error message will
be displayed when measuremenl
is conducted outside the
Automatic Temperature
Compensation range.
The image is lor reference only.
@Battery Error
@Zero Setting Error
tE H fi Hl LT.'8n",::xH:::1",'"','"1Yi'* t-l; I5,:::"#f,:-#J'llr,Lin"nnn
air, or was submerged in a battery.
solution other than water.
Error
With the instrument turned off, remove and reinsert the battery, ln the case of a low battery
replace the battery with a new alkaline AAA battery. lf the inskument continues to display
the error message, the instrument will need to be repaired.
Please contact your Authorized ATAGO Distributor for inlormation on repair.
! Z. How to Turn the Power Off
@Malfunctioning
TEFEB
The instrument will power ofl automatically atter 2 minutes of non-use. To manually turn off the
power off, press and hold the START key tor 4 seconds.
I8. Storage and Maintenance
(1)Store this instrument in a dry and shaded area. A damp storage area may cause the optical system to
mallunction or facilitate the qrowth of mold. Extended exposuie to direct Sunlioht mav cause the casin
(2)Do olmglQ.lxtglded_elposuie to direct sunlight may cause ile c4siM to warp.
fi inn?r,--6-ehzene,'gasotine,etc.lon-theiristrumeht'aG'the-ywill
severely damage the casing.
(3)Wipe off the sample, rinse with water, and wipe off the water to clean the sample stage thoroughly.
. For oily samples:
Clean oily residues with ethyl alcohol or mild soap, and then, rinse with water.
Dry the sample stage completely with dry tissues.
I g. Measurement Value
This instrument measures the Honey Moisture Content by calculating the moisture value from the
refractive index of the honey.
! tO. lutomatic Temperature Compensation
Th+reaalingsare,coffected, based on the temperature of
compensation range.
111. Specifications
the prism, within the automaiic temperature
13. CE Certification
r
,leasurement range Honey Moisture 13.0 to 30.0ol"
lesolution Honey Moisture 0.1%
$curacy Honey Moisture +0.2%
ulomatic lemperature
omDensalion ranoe 10 to 1oo'c
.iquid sampb lemperalure 10to100'C
rmbienl lemFralure range 10 to 40"c
rowersupply Size AAA alkaline batteryx'l
laltery life Approx. 8,000 measurements
(when using alkaline batteries)
meman0nat
)roteclion chss lP65 Water Resistant (Prism head: lP67l
)imensions and rleight 160(W) x 38(D) x 18(H)mm, 709
(main unit onlv\
I tZ. nepair and Warranty
Please have the serial number information
ready when contacting a service center.
The product is in conformity with the requirements
of the EMC Directive 2O04|1OB1EC.
ATAGO's instruments are rigorously inspected to
each unit meets the highest standards of
World-wide Datent and reoistration
(91anaeo co,Lro.
Hadquarters:The FrontTofler Shiba Koen, 23rd Flor
26-3 Shiba-k@n, Minato-ku, Tokyo 1054011, Japan
TEL: 81-33431-19,l3 weGeas@atagonet http:/lxw.atago.neu
d)anaeo lJ.Ei.A,rnc.
(,)afae O lNEtlA n.t"r-enE Pvt. Lrd.
TEL: 91 -22-285449'l 5 I 4071 3232
customeEeruice @ atag&india.com
(tr)araeo THAILAND c..,r-ta.
rEL:66-2194A727-9 ,66-21 1 71 549
customerseruice @ atago-lhailand,com
d)anaeo BRAsTL Lrda.
(9)araeo trALrAs.r.r.
TEL: 39 02 36557267 [email protected]
1flaree o cHl N A Gengzhou co., Ltd.
(/)araco FIUSSIA r-ta.
The instrument is warranted for one year from the date
of purchase. This wananty is void if the instrument
shows evidence of the following. Send the included
batteries as well if they are stillln use.
. Having been disassembled by unauthorized
personnel
. Damages to the prism and/or Prism head
. Water rlrmage oi having been dropped
. Having been misused and/or operited outside the
environmental specif ications
' Leakage from batteries other than those included with
the unit
Repair services are available for a fee after the
warranty expires.
Contact an ATAGO authorized service center for
service and support.
1504K Printed in Japan
This manual suits for next models
1
Table of contents
Other ATAGO Measuring Instrument manuals

ATAGO
ATAGO PAL-86S User manual

ATAGO
ATAGO PAL-Easy ACID14 User manual

ATAGO
ATAGO MASTER-S10M User manual

ATAGO
ATAGO PAL-HIKARi Ripeness User manual

ATAGO
ATAGO PAL-62S User manual

ATAGO
ATAGO PAL-89S User manual

ATAGO
ATAGO RX-5000 i-Pius User manual

ATAGO
ATAGO 4553 User manual

ATAGO
ATAGO PAL-ORANGE User manual

ATAGO
ATAGO PAL-65S User manual

ATAGO
ATAGO PAL-22S User manual

ATAGO
ATAGO PRM-2000 A User manual

ATAGO
ATAGO PAL-2 User manual

ATAGO
ATAGO PAL-Easy ACID1 User manual

ATAGO
ATAGO PAL-Easy ACID40 User manual

ATAGO
ATAGO PAL-106S User manual

ATAGO
ATAGO PAL-Easy ACID181 User manual

ATAGO
ATAGO PAL-79S User manual

ATAGO
ATAGO RePo-1 User manual

ATAGO
ATAGO PRM-100a User manual