AT&T Link User manual

Alguna de los contenidos de este manual puede tener variaciones
con el telefono dependiendo del software o de proveedor de servicio.
© 2010 AT&T Knowledge Ventures. Las empresas subsidiarias y afiliadas
de AT&T Inc. proporcionan productos y servicios utilizando la marca de AT&T.
Some of the contents in this manual may differ from your phone
depending on the software of the phone or your service provider.
© 2010 AT&T Knowledge Ventures. All rights reserved. Subsidiaries and
affiliates of AT&T Inc. provide products and services under the AT&T brand.
5U000271C0A REV.00
PANTECH Link User Guide 5U000271C0A REV.00
Alguna de los contenidos de este manual puede tener variaciones
con el telefono dependiendo del software o de proveedor de servicio.
© 2010 AT&T Knowledge Ventures. Las empresas subsidiarias y afiliadas
de AT&T Inc. proporcionan productos y servicios utilizando la marca de AT&T.
User Guide
Guía del usuario

Your phone is designed to make it easy for you to access a wide variety of content. For your protection, we want you to be aware that
some applications that you enable may involve the location of your phone being shared. For applications available through AT&T, we
oer privacy controls that let you decide how an application may use the location of your phone and other phones on your account.
However, the AT&T privacy tools do not apply to applications available outside of AT&T. Please review the terms and conditions and
the associated privacy policy for each location-based service to learn how location information will be used and protected. In addition,
your AT&T phone may be used to access the Internet and to download, and/or purchase goods, applications, and services from AT&T or
elsewhere from third parties. AT&T provides tools for you to control access to the Internet and certain Internet content. These controls
may not be available for certain devices which bypass AT&T controls.
Su teléfono está diseñado para hacerlo fácil para acceder a una amplia variedad de contenido. Para su protección, queremos que usted
esté enterado que algunas aplicaciones que le permite puede implicar la ubicación de su teléfono para ser compartida. Para aplicaciones
disponibles a través de AT&T, ofrecemos controles de privacidad que le permiten decidir cómo una aplicación puede utilizar la ubicación
de su teléfono y otros teléfonos en su cuenta. Sin embargo, el AT&T herramientas de privacidad no se aplican a las aplicaciones
disponibles fuera de AT&T. Por favor, revise los términos y condiciones asociadas y la política de privacidad para cada lugar de servicio
para saber cómo la información sobre la localización serán utilizados y protegidos. Además, su AT&T teléfono puede ser usado para
acceder a Internet y para descargar, y / o la adquisición de bienes, aplicaciones y servicios de AT&T o en otra parte de terceros. AT&T
proporciona herramientas para que usted controle el acceso a Internet ya determinados contenidos de Internet. Estos controles pueden
no estar disponibles para ciertos dispositivos de bypass que AT&T controles.

Thank you for choosing the Pantech Link, our latest 3G mobile
phone.
The Pantech Link has many features designed to enhance
your mobile experience. From its unique, stylish design and
QWERTY keypad, we know you will enjoy the entire Link
experience.
This User Guide contains important and useful information
that will maximize your familiarity with all that the Pantech
Link has to oer.
User Guide

Receiver
Display
Left/Right Soft key
Perform the functions shown at the bottom
line of the display.
Clear key
Return to previous screen or
delete characters in text mode.
Power on&o / Menu exit key / End key
Turn phone on/o, end calls, exit menus.
Delete key
Press to delete a number or letter.
Enter key
Press to move to the next row.
Space key
Press to enter a space.
Navigation
Up:Write New SMS
Down: Contact List
Left: Mobile Email
Right: IM
Center: OK / MobileWeb
Speaker Phone Key
Send Key
CAPS/Shift key
To type a single uppercase letter,
press this key then a letter.
Function key
To enter a number or a symbol,
press the function key, and
press the corresponding key.
Phoneoverview
2
3
Specifications
Design
QWERTY bar
Displays
• 262kcolorsTFTLCDwith2.4”display
• 320*240resolution
• 5linesfortextinbasicmodewith16-pointfont
• Twosoftkeysandfour-wayscrollandselection
O
keys
Melodies
.mp3, .midi, .mid, .iMelody, .wav, .mmf, .wma, .3gpa
Camera
Integrated1.3MCMOSCamera
• Resolutionupto1280x1024(1,310,720pixels)
• Mpeg4Videorecording/playingupto15f/s(QVGAsize)
• Self-timerfunction(5secondsor10seconds)
• Photoalbumandvideoalbum
Dimensions&Weight
• Weight:91g/3.2oz(withstandardbattery)
• Dimensions:115.20mmx60.90mmx9.9mm
4.5”x2.4”x0.39”
PowerManagement(Performance)
BatteryType Capacity Standby Time TalkTime
Standard
Lithium-Ion
(Li-ion) 930mAh Minimum
10days(250hrs)
Minimum
3 hrs
OperatingFrequency
• GSM850Mhz,GSM900Mhz,GSM1800Mhz,GSM1900Mhz,
UMTS850MhzandUMTS1900MhznetworksinNorthAmerica,
SouthAmerica,Europe,Africa,andAsia-Pacicwherethese
networks are supported.
• Automaticbandswitching.

Left Side key
Volumeupanddown
microSD Slot
Charger slot / Ear mic
Camera
Camera key
Internal antenna area
Speaker
4
5
Usingshortcuts
Numberedmenuitems,suchasmenus,sub-menus,andoptions
can be quickly accessed by using their shortcut numbers. In Menu
mode, Main Menus can be accessed by pressing the number keys
(
1
to
0
,
*
,
#
)correspondingtotheirlocationonthescreen.
Example:AccessingtheLanguagemenu.
1.PressMenu.
2.Pressthe
#
for Settings.
3. Press the
4
for Phone.
4.Pressthe
1
for Language.
5.PressSelectfor ScreenText.
6.Pressthe
U
or
D
scroll key to display the list of available
languages.
note: In main menu screen the number keypad is matched with the
menus as follows.
1
AddressBook
2
Messaging
3
IM
4
Mobile Email
5
MobileWeb
6
AppCenter
7
AT&TGPS
8
YPmobile
9
My Stu
9
Online Locker
*
AT&TMusic
#
Settings
Menuoverview
Address Book
My settings
AllContacts
Favorites
Groups
Messaging
Conversations
Create Message
Mobile Email
IM
Outbox
Drafts
VoiceMail
Settings
Templates
Used Space
note: Holding the device by the internal antenna area might aect the quality of all calls.

6
7
YPmobile My Stu
Applications
Audio
Games
Online Locker
Picture
Video
Tools
Other Files
Used Space
AT&T Music
Music Player
Shop Music
AT&TRadio
Shazam
MusicVideos
Make-UR-Tones
Community
MusicApps
Online Locker Settings
Proles
Display
Call
Phone
Network Connections
Connectivity
SecurityS
AT&TSoftwareUpdate
Reset
TTY
Phone Information
SSIM dependent NNetwork dependent
IM Mobile Email MobileWeb AppCenter AT&T GPS
AT&TNavigator
Where
AllSportGPS
Loopt
AT&TFamilyMap

8
9
Keys Functions
1
Quickly connect to the voice mail server if pressed and held in standby mode.
0
~
9
Enter numbers, letters or special characters. Go to the dial screen if pressed in standby mode.
B
Enter or exit from vibrate mode if pressed and held in standby mode.
q
Enteraninternationaldialingprexifpressedandheldinstandbymode.
m
Changevarioustextinputmodesifpressedatthetext-editingscreen.
Adjusttheearpiecevolumewhilemakingacall.
Control the Ringtone volume, vibrate mode and silent all mode in standby.
Mute the ringtone of an incoming call.
Q
Turn camera capture mode on.
Work as a camera shutter in capture mode.
Quick&Easy
Keys Functions
<>
Perform the functions shown at the bottom line of the display by using these soft keys.
Scroll through the menu options in Menu mode. In standby mode,
Left:AccessMobileEmailmenu
Right:AccessIMmenu
Up:AccessCreateMessagemenu
Down:AccessContactsmenu
Work inWord search mode if pressed in the Predictive text input mode.
O
Selectamenufunctionorstoreuser-inputinformation,suchasnames.Alsousethiskeyforconrmationasthe
O
key.
Launch the MobileWebdirectly if pressed in standby mode.
N
Turn on the speaker mode.
C
Delete characters from the display, or return to previous menu.
S
Send or receive a call. Show the recent call list in standby mode.
E
Complete the current call. Turn on/o the phone if pressed and held.
Cancel user input and return to main screen while in Menu mode.

10
11
Contents
Specications............................2
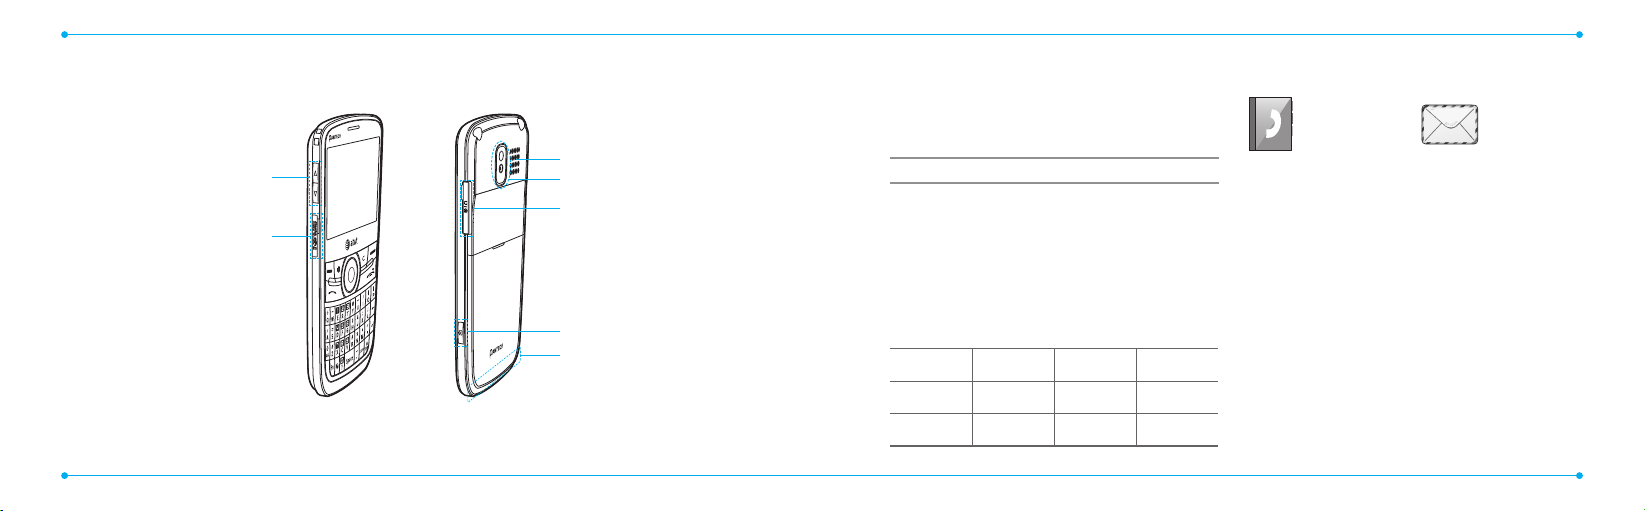
Phoneoverview ........................3
Usingshortcuts..........................5
Menuoverview..........................5
Quick &Easy ..............................8
1. GettingStarted
SIM card and battery....................14
Turning the phone on/o ............15
Keypad unlock..............................16
Essential display indications.........16
Memory card ...............................17
Assigningthemenu....................18
Updating software .......................18
Using the QWERTY keypad...........18
Using the multitask menu ...........19
2. Callsand address book
Making, receiving and ending
calls...............................................22
Using video share .........................23
Options during a call ....................24
Call settings ..................................25
Checking all calls ..........................26
Speed dialing................................27
Using the address book................27
Addressbooksettings .................28
Calleridentication......................29
Using your headset.......................29
Servicenumbersandxeddialing
..29
3. Messaging
Entering text.................................32
Receiving messages .....................32
Creating and sending text
messages......................................33
Creating multimedia messages...34
Message templates......................36
Message settings .........................37
Managing memory......................38
Email.............................................38
Using instant messenger..............38
4. Multimedia
Camera..........................................42
Photo album.................................44
Videoalbum.................................46
Audioalbum.................................47
Music player..................................48
Music player settings....................50
Media player.................................51
Otherles.....................................52
Managing memory .....................52
Playing games .............................52
5. UsefulFeatures
Alarm............................................56
Calendar........................................56
Notepad and voice memo............56
World time....................................57
Calculator, tip calculator and
converter ......................................58
Stop watch and timer...................58
Businesscard................................59
Memory information....................59
6. Connectivity
Bluetooth......................................62
Using mobile web ........................63
Using the browser ........................63
Prolesettings.............................64
7. Settings
Language......................................68
Time and date...............................68
Ring tones ....................................68
Display ..........................................68
Security.........................................69
Reset.............................................70
TTY................................................70
8. Appendix
Alertmessage...............................74
Troubleshooting checklist ............74
Safety information .......................75
Safety precautions........................76
Aboutthebatteryusage..............76
FCCHearing-AidCompatibility(HAC)
Regulations forWireless Devices..77
FCC Regulatory Compliance.........79
Warranty.......................................80

P7040
1
SIM card and battery
Turning the phone on/o
Keypad unlock
Essential display indications
Memory card
Assigningthemenu
Updating software
Using the QWERTY key pad
Using the Multitask menu
GettingStarted

02
03
04
05
06
07
08
01
14
15
SIM cardand battery
AboutyourSIMcard
When you subscribe to your network operator, you receive a SIM
(SubscriberIdentityModule)cardcontainingyourregistration
information, PIN code, etc.
Like a credit card, it should be kept secure and handled carefully.
Donotbend,scratchorexposeittomoisture.Avoidstatic
electricity.
To avoid corrupting your SIM card’s memory, always switch o
your phone before removing or inserting your SIM card.
Aboutyourbattery
YourphoneusesaLi-Ionbattery.Makesuretouseanauthorized
battery and charger only. For more details, please inquire at your
nearest dealer.
note:YourphoneispoweredbyaLithiumIon(Li-Ion)battery.Unlike
other forms of battery technology, you can recharge your battery while
some charge remains without reducing your phone’s autonomy due to the
“batterymemoryeect”inherentinthosetechnologies.
Installing/removingSIMcardand battery
1.Removethebatterycoverfromtheunit.
2.Totthebatterycover,putitonthe
guide rail and push up.
3. Insert the SIM card into the slot.The
gold contacts of the SIM card should go
against the metal contacts of the phone.
Put the contacts of the battery into the
hole located at the bottom of the unit
insert and press the upper side of the
batteryuntilyouhearthe“click”.Make
sure you align the gold contacts at the
battery end with contacts on the phone.
If the contacts at the battery are not
properly aligned, damage could occur to
the phone and the battery.
4.Toremovethebatterypushthebottom
ofthebatterytoupwards(1)and
remove(2)thebattery.PushtheSIM
card in the direction of the arrow as
shown.
Chargingyourbattery
1.Tocharge,opentheprotectivecover
on the top right side and connect the
charger adapter.
Make sure you align the connector
as shown in the image. If not, it will
damage the charging connector on
the phone and will not charge.
2.Toremovetheadapterconnection
presstheadapter’ssidebuttons(1)
andpulltheadapteraway(2).
Incorrect
Correct
Incorrect
Correct
Turningthephoneon/off
Toturnon
1.Pressandhold
E
.
Toturno
1.Pressandhold
E
.

02
03
04
05
06
07
08
01
16
17
AnEDGEsignalisavailable.Itisdisplayedwhenthereisan
active EDGE session.
microSD card is inserted.
Batterystrength.Whenthebatterychargeislow, is
displayed.
Available,Away,InvisibleStatusofAIM.
Online,Away,Busy,OineStatusofMSN.
Available,Busy,InvisibleStatusofYAHOO.
You have received one or more IM messages.
BGMisplay,pauseandbeingstopped.
N
Network dependent
Memorycard
You can use a microSD card as a memory card.
It gives you more space to save pictures, videos,
music, etc.
Insertingandremovingamemorycard
1.Openthememorycardslot.
2.Insertthecard.The icon will be displayed.
3. Press the card to remove.
Usinga memorycard
Youcansave,moveanddeletethelesbetweenyourphoneand
externalmemorycard.Youcanalsomoveandcopythelesto
computer from your phone.
Resettingamemorycard
1.PressMenu> Settings > Reset.
2.Enterthepassword>ExternalMemoryReset>Yes.
note: Thedefaultpasswordis‘1234’.
Tocopy a letothecard
1.Selectthele>Options> Copy toExternal Memory.
2.Tocopythelebacktophone,pressOptions> Copyto
Phone.
Tomovea letothe card
1.Selectthele>Options> Move toExternalMemory.
2.Tomovethelebacktophone,pressOptions> Move to
Phone.
Keypad unlock
Unlockingthe keypad
1.PressUnlock> Yes.
Essential display indications
Signal strength.The greater the number of bars, the stronger
the signal.When network is in searching mode is displayed.
Acallisbeingmade.Whenyouareinnoservicearea is
displayed.
Call forwarding
N
is active.
Incomingcallssettoringonly(Normal).
Incoming calls set to VibrateandRing.
Incoming calls set to VibrateOnly.
Incoming calls set to Silent.
FlightModeis active.
Received one or more text messages.
Received one or more multimedia messages.
ReceivedoneormoreWAPpushmessages.
Receivedoneormorecongurationmessages.
Received one or more voice messages.
Amessageisbeingsent.
Amessageisbeingreceived.
Analarmisset.
ScheduleAlarmisset.
BrowserisActive,Securedandbeingdownloaded.
Bluetoothisactive.
Bluetoothhands-freeheadsetisconnected.
BluetoothA2DPheadsetisconnected.
Bluetoothhands-free+A2DPheadsetisconnected.
DatatransferviaBluetooth.
Headset is connected.
USBisconnected.
TTY is active.
AGPRSsignalisavailable.Itisdisplayedwhenthereisanactive
GPRS session.

02
03
04
05
06
07
08
01
18
19
Key Function
</>
Perform the functions shown at the bottom line of the
display by using these soft keys.
m
Press to change text input mode.
F
Press to type a special character or number.To enter
symbols and numbers continually, press until
h
displays.
w
Enter the space character in text input mode.
T
Insert a carriage return in text input mode.
C
Delete a character to the left of the text cursor in text
editing screen.
l
Press to type a special character that is not placed on
the keypad.
UsingtheMultitask menu
Press and hold to launch the Multitask menu that can be
accessed from any active window or page on the phone.There
is no need to stop what you are doing, if you want to jump out
and activate another common feature.The idea is to allow you to
temporarily exit from your current location to access a group of
common functions such as: Call, Messaging, MobileWeb, Music
playerandGames&Apps.Thiskeykeepsyoufromhavingto
completely exit from your current task or window, whether that be
a text message, a web page, or an active call, to do something else.
Multitaskfunctions
To use the multitask function, press and hold .You can choose
from one of the following functions:
• Call:Make a voice call while using the handset for other tasks.
If Music Player is active, it is muted during the call.
• Messaging:Send a text or multimedia message while using
the handset for other tasks.
• MobileWeb:Launch the browser while using the handset for
other tasks.
• MusicPlayer:Launch the Music Player while using the handset
for other tasks. If an incoming call is received or you want to
make a call, the Music Player is muted.
• Games&Apps:AccessGamesandApplicationswhileusing
the handset for other tasks.
Todeletealefromthecard
1.Selectthelefromthecard>Options> Delete.
Tomovea lefrom thecardtothe computer
1.Connectthedatacablewithmobileandthecomputer.
2.PressMenu> Settings > Connectivity.
3. Press SelectUSBMode.
4.SelectMusicPlayer, MassStorageor AskonConnection.
5.Followtheinstructions on your computer screen.
note: Select Music Player when you want to add music to the playlist in
your device. When you select AskonConnection, it will ask you to select
either the Music Player or Mass Storage every time you connect your
device with your computer.
Assigningthe menu
You can set the most commonly used menu in Options in standby
mode.
1.PressShortcutsin standby mode > select Unassigned.
2.PressAdd.
3. Select the menu and sub menu.
Updatingsoftware
You can update your software without visiting your nearest dealer.
Toupdate thesoftware
1.PressMenu> Settings > AT&TSoftware Update.
2.PressCheckforUpdate> Yesto check whether or not you
need to update the software.
note:Afterdownloadingthesoftware,thedevicewillaskyouwhether
to update the software now or later. If you choose to update the software
now, it will restart the handset. If you postpone updating the software,
youcanselectbetween30mins,1houror4hoursintheOptions.After
selecting the updating time, you will be sent back to standby mode. If
you go to Software Update while you are in postponing, press Continue
Update.
Toviewtheversionofsoftware
1.PressMenu> Settings > PhoneInformation.
2.Press
U/D
to view SoftwareVersion.
UsingtheQWERTY keypad
Your phone has a QWERTY keypad which provides a superior
typing experience on a small handheld for easy and comfortable
texting.You can use all of the phone functions with the QWERTY
keypad.

P7040
2
Making, receiving and ending calls
Using video share
Options during a call
Call settings
Checking all calls
Speed dialing
Using the address book
Addressbooksettings
Calleridentication
Using your headset
Servicenumbersandxeddialing
Callsandaddressbook

02
03
04
05
06
07
08
01
22
23
Making, receivingandendingcalls
Makingacall
1.Entertheareacodeandphonenumber.
2.Press
S
.
Answering a call
1.Press
S
.
Endingacall
1.Press
E
.
Once the call is complete, a call summary is displayed.
Rejecting a call
1.Press
E
or Ignore.
Makingacallusingthecalllist
Yourphonelogsupto20dialed,receivedandmissedcall
numbers.
1.Press
S
to display the RecentCallslist.
2.SelectAllCalls, MissedCalls, ReceivedCalls, or Dialed
Callspressing the
L/R
.
3. Select a number.
4.Press
S
to dial the selected number.
note:To redial the last number in the Recent Calls list, press
S
.
Makingacallduringacall
1.EnterthephonenumberorlookitupinAddressBook.
2.Press
S
todialthesecondcall.Therstcallis
automatically put on hold.
Switching betweentwocalls
1.PressSwap.
Makinganinternationalcall
1.Pressandhold
q
fortheinternationalprexuntilthe‘+’
character appears.
2.Typethecountrycode,areacode,andphonenumber.
3. Press
S
.
Makinganemergencycall
You can make emergency calls even if your phone does not have
a SIM card.
1.PressEmergencyNumber,orpressSOSif your phone does
not have a SIM card.
2.Press
S
.
Replyingtoamissedcall
1.PressView to display the list of missed calls.
2.Selectanumbertocallbypressingthe
U/D
.
3. Press
S
.
Answering a secondcall
N
1.Press
S
.Therstcallisautomaticallyputonhold.
2.Press
E
to end the second call.
The call on hold is automatically reconnected.
Usingvideoshare
You can share live or recorded video while on a call.You can send
or receive video.
note:VideoShareisnotavailableinallmarkets.Bothpartiesmustbein
a 3G service area – a 3G icon must appear by the signal bars prior to a call
being placed, and both parties must remain in the 3G coverage area for
thedurationoftheVideoShare.
<Call mode> <VideoShareMode>
Makingvideosharecall
1.Entertheareacodeandphonenumber>
S
.
2.PressOptions> VideoShare.
3. Select Live or Recorded.
note:To use video share in the Recent Calls, press Options >VideoShare.
Turningothe speakerphone
1.PressNor press Options> SpeakerphoneOduring
video share mode.
2.PressOptions> Muteto mute the sound.
Increasingordecreasingthebrightness
1.PressOptions> Brightness.
2.Adjustthebrightnessbypressing
L/R
.
Zoominginandout
1.PressOptions> Zoom. It ranges from 1xto4x.
Stoppingtherecording
1.PressOptions> StopRecord.
Stoppingorendingvideoshare
1.PressStopto end the video share.

02
03
04
05
06
07
08
01
24
25
2.Itwillaskyouwhetheryouwillstopvideoshare>Yesto
stop.
note:The recorded video will be saved in My Stu >Video.
Receivingvideoshare
1.Afterreceivingvideoshare,itwillaskyouwhethertoaccept
or reject the video share > Yesto accept and Nofor reject.
2.PressOptions> Full Screentoenlargethevideotollthe
entire screen.
Optionsduringacall
Microphoneoandon
Switchingyour phone’smicrophoneo
1.PressOptions> Mute.
Switchingyour phone’smicrophonebackon
1.PressOptions> Unmute.
Talkingonspeaker
1.PressSpeakerPhone .
Puttinga callon hold and returning
N
Puttinga callonhold
1.PressOptions> Holdor press
S
.
Returningtoa held call
1.PressOptions> Unholdor press
S
again.
Multi-partycalls
N
You can talk with more than one person or have conference call.
Makingamulti-partycall
1.Calltherstparticipant.
2.Callthesecondparticipant.Therstcallisautomaticallyput
on hold.
3. Press Options> Join.
Havingaprivate conversationwithoneparticipant
1.PressOptions> Split.
2. Select the participant and press Select.
Allofthemulti-partycallparticipantscannowheareachother.
Removingoneparticipantfromamulti-partycall
1.PressOptions> End.
2.SelecttheparticipantandpressSelect.
The call ends with that participant, but you can continue to talk
to the other participants.
Searchingforanumberintheaddressbookduring
acall
1.Press
D
and press Selector press Options> ViewContacts
> AllContacts.
2.Selectanumber>
S
.
Searchingforanameorgroupintheaddressbook
EntertherstlettersofthenameforNameSearch.Theentries
aredisplayedstartingwiththerstentrymatchingyourinput.
Findinganamemanually intheaddress book
1.Pressthe
U/D
.
Viewingthedetailsofthehighlightedentry inthe
addressbook
1.PressSelect.
Fordetails onaddressbook,see page
27
.
Readinga messageduringacall
1.PressOptions> ViewMessage.
2.Selectamessage>View.
Sendinga messageduringacall
1.PressOptions> SendMessage.
Fordetails oncreatinga text message, see page
33.
Viewingthecalendarduringacall
1.PressOptions> ViewCalendar.
Makinganote during a call
1.PressOptions> Notepad.
Voicerecording
1.PressOptions> VoiceRecording.
Callsettings
Settingautoredial
1.PressMenu> Settings > Call> Auto Redial.
2.SelectOnor O.

02
03
04
05
06
07
08
01
26
27
Answering bypressingany key
1.PressMenu> Settings > Call> AnyKeyAnswer.
2.SelectAnswerwithAnyKey.
note:You can answer with any key except
E
and Ignore.
Answering bypressingsendkey
1.PressMenu> Settings > Call> AnyKeyAnswer.
2.SelectAnswerwithSendKey.
Checkingallcalls
You can view information about all RecentCalls. For more
options for all, missed, received and dialed calls press Options.
You can also view the call history simply by pressing
S
.
Viewingmissed calls
1.PressShortcutsin standby mode or press Menu> MyStu
> ToolsPress RecentCalls> MissedCalls.
Viewingreceivedcalls
1.PressShortcutsin standby mode or press Menu> MyStu
> Tools
2.PressRecentCalls> ReceivedCalls.
Viewingdialed calls
1.PressShortcutsin standby mode or press Menu> MyStu
> Tools.
2.PressRecentCalls> DialedCalls.
Viewingcallrankings
1.PressShortcutsin standby mode or press Menu> MyStu
> Tools.
2.PressRecentCalls>CallRanking.
Deletingcalllogs
1.PressShortcutsin standby mode or press Menu> MyStu
> ToolsPress RecentCalls> DeleteCallLogs.
2.SelectAllCalls> Yes.
Viewingcalltime
1.PressShortcutsin standby mode or press Menu> MyStu
> ToolsPress RecentCalls> CallTime.
2.Press
U/D
to view LastCall, ReceivedCalls, DialedCalls
and TotalCalls.
Resettingallcalltimes
1.PressShortcutsin standby mode or press Menu> MyStu
> ToolsPress RecentCalls> CallTime.
2.PressReset> Yes.
3. Enter password > OK.
note:Thedefaultpasswordis‘1234’.
Viewingdata transmittedinformation
1.PressShortcutsin standby mode or press Menu> MyStu
> ToolsPress RecentCalls> PacketCounter.
•CurrentInfo: You can view transmitted data in the
current session, in kilobytes. Sent, Receivedand Total
information are also available.
•LastInfo: You can view Sent, Received, Totaland
Durationinformation of the previous session’s transmitted
in kilobytes.
•TotalInfo:You can view all the Sent, Received, Totaland
Durationtransmitted data in kilobytes.
•ClearLogs:Thedefaultpasswordis‘1234’.
Speeddialing
Youcandialquicklyusingspeeddialing.Upto8phonenumbers
canbeprogrammedusingnumbers2to9.
1
:Voicemail
q
:Prexforinternationalcall
Settingspeeddial
1.PressMenu> AddressBook> MySettings> SpeedDial.
2.SelectanemptyentryandpressAdd.
3. Select a person and press Select.
Changingspeeddialcontact
1.PressMenu> AddressBook> MySettings> SpeedDial.
2.Selectanumber>Change.
3. Select a person > Select> Yes.
Removingfromspeeddial
1.PressMenu> AddressBook> MySettings> SpeedDial.
2.Selectanumber>Remove.
Usingtheaddressbook
Y
ou can save names, phone numbers, and information on the
SIM or phone. Number of entries can depend on the capacity of
the SIM card.
Viewingthecontactlist
1.Press
D
or press Menu> AddressBook> AllContacts.
Searchingforaphonenumber
1.Press
D
or press Menu> AddressBook> AllContacts.

02
03
04
05
06
07
08
01
28
29
2.Inputtherstletterortwooftheperson’snameandscroll
with
U/D
.
3. Press Selectto view the detailed information.
4.Toupdateinformation,pressOptions> EditContact.
Callingfromthecontactlist
1.Press
D
or press Menu> AddressBook> AllContacts.
2.Selectapersontocall.
3. Press
S
.
Forwardingcontactdetails
1.Press
D
or press Menu> AddressBook> AllContacts.
2.Selectacontact>Options> SendContact.
3. You can send the information using MultimediaMessage
or Bluetooth.
Deletingacontact
1.Press
D
or press Menu> AddressBook> AllContacts.
2.Selectacontact>Options> DeleteContact.
Addingacontact
1.PressMenu> AddressBook> AllContacts> Options>
AddNewContact.
2.Inputtheelds.
3. Press Save.
Making&Editing groups
1.PressMenu> AddressBook> Groups.
2.Toaddnewgroup,pressOptions > CreateNewGroup.
3. To edit group, press Options>EditGroup> AddMembers,
EditMembersor Remove Members.
4.Torenamegroup,pressOptions> Rename Group.
5.Todeletegroup,pressOptions> DeleteGroup.
Address booksettings
Managingmyinfo
1.PressMenu> AddressBook> Mysettings>MyInfo.
Settingthesortorder
1.PressMenu> AddressBook> Mysettings>Sortby.
2.SelectFirstNameor LastName.
SettingSyncsettings
1.PressMenu> AddressBook> Mysettings>AT&T
AddressBook.
2.SelectAuto SyncOnor AutoSyncO.
SettingSIMmanagement
1.PressMenu> AddressBook> Mysettings> SIM
Management.
Calleridentification
Calleridentication
N
1.PressMenu> Settings > Call> DisplayMyNumber.
2.SelectNetworkDefault, Showor Hide.
Usingyourheadset
You can send or receive a call using your headset.
When you connect your headset to the jack the button on the
headset works as follows.
note:You must use the headset designed for this device. It is an optional
accessory. Not all headsets will have a button.
Whileinstandbymode
1.Pressthebuttononcetolistrecentcalls.
2.Pressthebuttontwicetoredialthelastcall.
Servicenumbers andfixeddialing
C
alling yourservicenumbers
S
You can see the service number to reach the service provider.
1.PressMenu> AddressBook> MySettings> Service
Numbers.
2.Selectanumber>press
S
.
Viewingthexeddialinglist
Fixeddialingisaservicethatlimitsyouraccesstospecic
numbers in the address book list recorded on the SIM. Input the
PIN2tosetuporcancelthisservice.
1.PressMenu> AddressBook> MySettings> FDNList.
2.Selectanumber>press
S
.
note:PIN2mustbecorrectlyenteredwithin3attempts.Ifyouinputthe
incorrectcodethreetimesinarowthePIN2codewillbeblocked.Ifthe
PIN2codeisblockedpleasecontactyourserviceprovider.Your PIN2codeis
supplied with the SIM card.

P7040
3
Entering text
Receiving messages
Creating and sending text messages
Creating multimedia messages
Message templates
Message settings
Managing memory
Email
Using instant messenger
Messaging

02
03
04
05
06
07
08
01
32
33
Enteringtext
Youcanentertextwithmulti-tap,predictive,numericorsymbol.
U
sefulkeys
l
Display symbols
w
Addingspace
m
Press to change capital mode
PresstochangeabAbABandpresstochangefrommulti
to predictive to Number
Multi-tap
dbc
(allsmallcaps/rstlettercaps
/allcaps)
Predictive
gef
(allsmallcaps/rstletter
caps/allcaps)
Number
a
Fordetails onusing QWERTY keypad, seepage
18
.
Predictive mode
The predictive mode automatically compares your keystrokes
with an internal linguistic dictionary to determine the correct
word. It will display the most commonly used word rst.To save a
word not listed in phone’s dictionary, press Options> Predictive
Settings> SelectionList> On.
1.Press
m
to change the mode to predictive.
2.Press
A
to
*
to input text.
For example, to write‘hello’press
H 1 I
and press
D
4times.
Alphabetinputmode
1.Press
m
tochangethemodeasmulti-tap.
2.Press
A
to
*
to input text repeatedly.
Numericmode
You can input numbers in this mode.
1.Press
m
tochangethemodeto123.
2.Press
1
to
9
and
0
to input numbers.
Symbolmode
You can input symbols.
1.Press
l
to view the symbols.
2.Press
U/D/L/R
to select symbol and press Insert.
Receiving messages
Viewinganewmessage
1.PressView.
Readinga messagefromthe inbox
1.PressMenu> Messaging > Conversations.
2.Selectareceivedmessage>Open>View.
Savingthecontactinformationfromareceived
message
1.Selectareceivedmessage>View.
2.PressOptions> Save.
3. Select NewContactor UpdateContact.
Savingtheobjectina receivedmultimediamessage
1.Openthemultimediamessage.
2.Selectanobject.
3. Press Options> Use>Save.
It will be saved in one of the categories in the MyStufolder.
Fordetails onphotoalbum,see page
44.
Listeningtovoicemessage
1.Pressandhold
1
or press Menu> Messaging> Voice
Mail.
It will automatically call the voice mail center.
LoadingURLusingPushmessage
1.PressMenu> Messaging > Conversations> Open.
2.PressOptions> Load URL.
Savingconnectionsettingsusingcongurationmessage
1.PressMenu> Messaging > Conversations> Open.
2.PressOptions> Install.
Creatingandsendingtextmessages
S
endinganewtextmessage
1.Press
U
or press Menu> Messaging> CreateMessage.
2.Enter the message.
3. To save the message as draft, press Options>Saveto
Drafts.
4.PressSendtoand select the person to send message and
press Select.
5.PressSend.
6.Toviewsentmessage,pressMenu> Messaging>
Conversations, select a recipient > Open> View.
note:Allsuccessfullysent messages will be saved in Conversations while
the messages that failed to be sent will be saved in the Outbox.
Findingallsentmessages
1.PressMenu> Messaging > Conversations.

02
03
04
05
06
07
08
01
34
35
Replyingtoamessage
1.PressMenu> Messaging > Conversations.
2.Selectarecipient>Open.
3. Select a message > View> Reply.
Creatingmultimediamessages
You can create and send multimedia messages. Capacity is
100Kb,300Kb,600Kban error message will alert you once you
exceed the capacity.
A
ddinga savedpicturetothemessage
1.Press
U
or press Menu> Messaging> CreateMessage.
2.Enter a message.
3. Press Insert> Picture>Picture >Camera.
4.ScrolltothesavedpictureandpressSelect.
5.Topreviewthecurrentpage,pressOptions>Preview >
Current.
6.Topreviewthewholemessage,pressOptions> Preview>
WholeMessage.To go back to text editor page, press Stop.
7.Toeditthetextmessage,press
U/D
to select the text box.
8.PressSendtoand select the person to send message and
press Select.
9. Press Send.
Addinganewpicturetothemessage
1.Press
U
or press Menu> Messaging> CreateMessage.
2.Enter a message.
3. Press Insert> TakeNewPicture.
4.Focusontheobject>
O
.
5.Topreviewthecurrentpage,pressOptions>Preview >
Current.
6.Topreviewthewholemessage,pressOptions> Preview>
WholeMessage.To go back to text editor page, press Stop.
7.Toeditthetextmessage,press
U/D
to select the text box.
8.PressSendtoand select the person to send message and
press Select.
9. Press Send.
For
takingapicture
, seepage
43.
Addingasavedvideotothemessage
1.Press
U
or press Menu> Messaging> CreateMessage.
2.Enter a message.
3. Press Insert> Video> Video.
4.ScrolltothesavedvideoclipandpressSelect.
5.Topreviewthecurrentpage,press Options>Preview >
Current.
6.Topreviewthewholemessage,pressOptions> Preview>
WholeMessage.To go back to text editor page, press Stop.
7.Toeditthetextmessage,press
U/D
to select the text box.
8.PressSendtoand select the person to send message and
press Select.
9. Press Send.
Addinganewvideotothemessage
1.Press
U
or press Menu> Messaging> CreateMessage.
2.Enter a message.
3. Press Insert> RecordNewVideo.
4.Focusontheobject>
O
.
5.TostoprecordingandsavepressStop.
6.Toeditthetextmessage,press
U/D
to select the text box.
7.Topreviewthecurrentpage,press Options> Preview>
Current.
8.Topreviewthewholemessage,pressOptions> Preview>
WholeMessage.To go back to text editor page, press Stop.
9. Press Sendtoand select the person to send message and
press Select.
10.PressSend.
For
recordinga video
, seepage
44.
Addingarecordedvoicememotothemessage
1.Press
U
or press Menu> Messaging> CreateMessage.
2.Enter a message.
3. Press Insert> Sound.
4.SelectAudio> MyVoice.
5.ScrolltothesavedaudioclipandpressSelect.
6.Toeditthetextmessage,press
U/D
to select the text box.
7.Topreviewthecurrentpage,press Options>Preview >
Current.
8.PressPauseto stop listening.
9. To preview the whole message, press Options> Preview>
WholeMessage.To go back to text editor page, press Stop.
10.PressSendtoand select the person to send message and
press Select.
11.PressSend.
Addinganewvoice memotothe message
1.Press
U
or press Menu> Messaging> CreateMessage.
2.Enter a message.
3. Press Insert> RecordNewSound.
4.PressRecordto record the sound.
5.TostopandsavepressStop.
Table of contents
Languages:
Other AT&T Cell Phone manuals