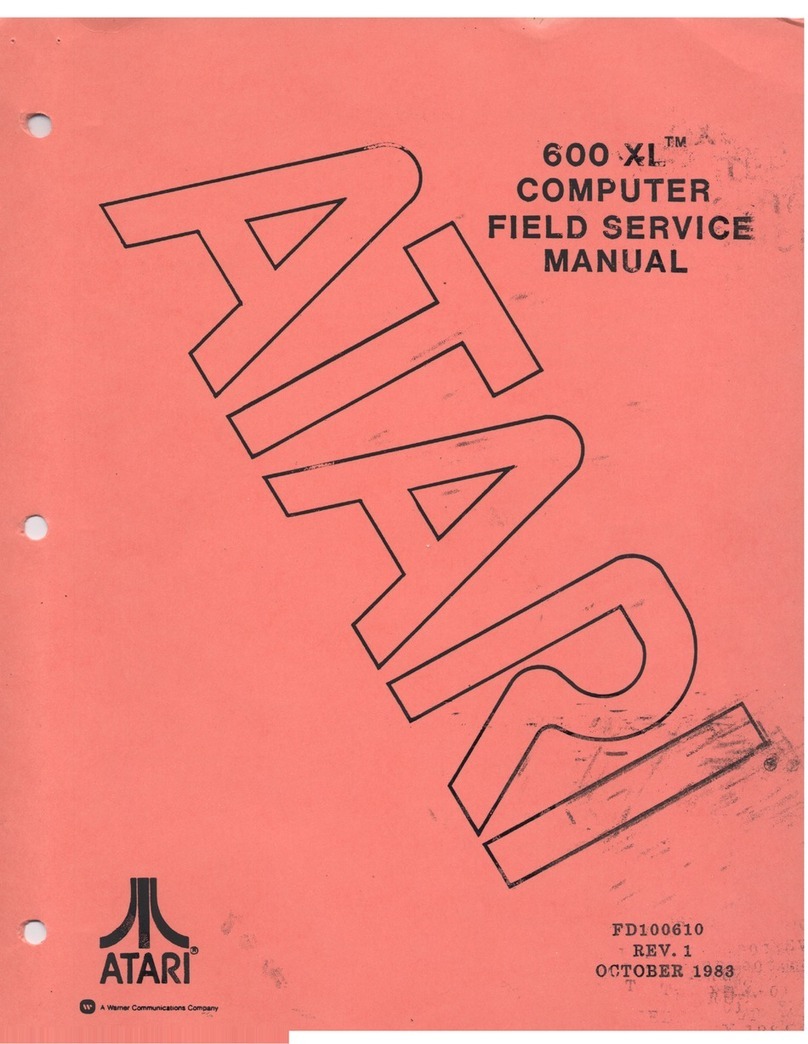
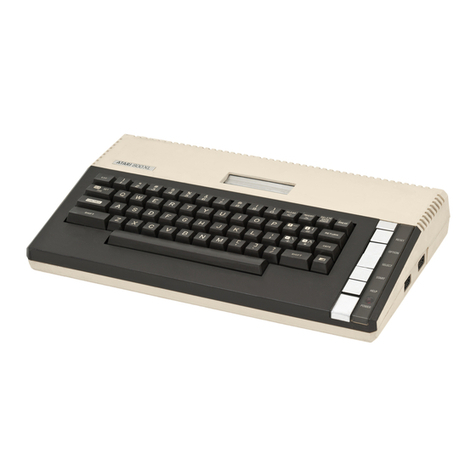
Atari 600XL Instruction manual

ATARl60GWLM
COMPUTER
1/\
AND
ATARlaoawLM
COMPUTER
1/\
CONNECTION
INSTRUCTIONS
®
FOR
PAL
TVSYSTEMS

Serial
Input/Output
Expansion Connection
Power
On
/Off Switch
Power-input
Monitor
Television

1.
CONNECTING
THE COMPUTER
TOYOUR
TELEVISION
2. CONNECTING
THE COMPUTER
TO YOUR VIDEO
MONITOR
3.
CONNECTING
THE COMPUTER
POWER SUPPLY
Disconnect the television
antenna
from the
antenna
socket on the
back
of
you
television set.
Connect
one
end
of
the
RF
Cable
to
the socket
marked
"television" on the
back
of
the computer.
Connect
one
end
of
the mon-
itor
cable
5-pin
plug
(not
included
with Purchase)
to
the socket
marked
"monitor"
on the
back
of
the
compu
ter.
Connect
the other
end
of
the
monitor
cable
lo the monitor
according
lo the instructions
provided with your monitor.
Connect
plug
from
power
adapter
lo
eleclrical outlet.
Connect
round 7-pin
plug
into the "power-in" socket on
the
back
of
the computer.
4. Turn on your television
and
lune
it
to
channel
36
(United Kingdom),
channel
4
(
Germany
),
or appropriate
station
as
indicateci
by
your
ATARI
Computer dealer.
Connect
the
other
end
of
the
RF
Cable
lo the
antenna
socket on the
back
of
your
television set.
5. Switch
"o
n" power
locateci on the right side
of
the
back
of
the
computer
console.
A
few
seconds
later the word
"Ready" will
appear
on the
television screen.
6. If you leave the
computer
on one display long
enough
,
the colors on your
TV
screen
begin
changing
periodically.
This
is
norma!
and
occurs
lo
protect your
TV
set.
Please note that
when
you
tum
oH
the computer, you
musi wait 3
to
5
seconds
before
tuming
it
back
on.
Serielle Eingabe/A
usgabe
hlussErweiterungsansc
Fernsehen
Monitor
Ein/Aus-Schalter
E.
gabe
Strom - m

1.
ANSCHLIESSEN
FÙRDENCOM-
PUTERANIHR
FERNSEHGERAT
2. ANSCHLIESSEN
FÙRDENCOM-
PUTER
AN
IHREN
VIDEOMONITOR
3.
ANSCHLIESSEN
FÙRDIE
COMPUTERSTROM-
VERSORGUNG
Die
Fernsehantenne
von
der
Antennensteckdose
hinten
am
Fernsehgerat entkoppeln.
Ein Ende des RF-Kabels
an
die
als "television" beschrif-
tete Steckdose hinten
am
Fernsehgerat anschliessen.
Ein Ende
des
mit 5-
Stiftsteckern
versehenen
Monitorkabels (b
eim
Compu-
terkauf ni
cht
inbegriffen)
an
die
als "monitor" beschriftete
Steckdose hinten
am
Com-
puter
anschliessen.
Das
andere
Ende
des
Moni-
torkabels
an
die
Videoein-
gabe
Ihres Monitors gemaJ3
Anweisung
des
Gerateher-
stellers
anschliessen
.
Den Stecker vom Strom-
adapter
an
die
Kontaktsteck-
dose
anschliessen.
Den 7-Stiftste
cker
an
die
als
"power-in" beschriftete
Steckdose
hinten
am
Com-
puter
anschliessen.
4. Ihr Fernsehgerat ein-
schalten
und
Kanal 4
(Europa)
oder
einen
anderen
passenden
Kanal, je
nach
Angaben
von
Ihrem
ATARI
Computerfach-handler;
einstellen.
Das
andere
Ende
des
RF-
Kabels
an
die
Antennen-
steckdose
hinten
am
Fern-
sehgerat
anschliessen
.
5. Den "on" Schalter hinten
rechts
an
der
Computerkon-
sole drucken. Na
ch
einigen
Sekunden
erscheint
das
Wort
"Rea
dy
" auf
dem
Fernsehbildschirm.
6. Wenn Sie
eine
Anzeige
zu
lange
auf
dem
Bildschirm
erscheinen
lassen,
andert
sich
die
Farbe auf
dem
Fern-
sehbildschirm regelmassig.
Das ist normai
und
dient als
Schutzfunktion fur
das
Fernsehgerat.
Bitte,
beachten
Sie: Beim
Ausschalten
des
Computers
mù.ssen Sie 3 bis 5
Sekunden
warten, bevor Sie
den
Computer
nochmals
einschalten.

Serie
de
Entrada y Salida
Conecci6n
de
Expansi6n
Televisi6n
Monitor
Perilla
de
Encendido y
Apagado
Entrada
de
Corriente

1.
COMO CONECTAR
EL
ORDENADOR
A
SU
TELEVISOR
2.
COMO CONECTAR
EL
ORDENADOR
A
SU
MONITOR
DE VIDEO
3.COMO CONECTAR
EL
SUMINISTRO
ELECTRICO DEL
ORDENADOR
Desconecte la
antena
de
tele-
visi6n del
enchufe
de
antena
situado
en
la parte posterior
de
su
televisor.
Conecte
un
extremo del
Cable
RF
en
el
enchufe
indi-
cado
"television"
que
se
halla
en
la
parte
posterior del
ordenador.
Conecte
un
ex
tremodel
cable
del monitor,
con
clavija
de
5
polos (no
viene
incluido
con
su
compra),
en
el
enchufe
indicado "monitor''. situado
en
la parte posterior del
ordenador.
Conecte
el otro extremo del
cable
al monitor
segun
las
instrucciones provistas con
su
monitor.
Conecte
el
enchufe
del
adap
-
tador
de
corriente
en
la salida
eléctrica.
Conecte
la clavija redonda
de
7 polos
en
el
enchufe
de
entrada
de
alimentaci6n
situado
en
la parte posterior
del ordenador.
4. Encienda
su
televisor y
sintonice el
canal
36
(Reino
Unido),
canal
4 (Europa)
o
cualquier
otra estaci6n
que
le
indique
su
distribui-
dor
de
ordenadores
ATARI.
Conecte
el otro extremo del
Cable
RF
en
el
enchufe
de
antena
situado
en
la parte
posterior
de
su
televisor.
5.
Conecte
el interruptor"on"
situado a la
derecha
de
la
parte posterior
de
la consola
del ordenador.
Unossegundosmas tardeapare-
cera
en
la pantalla del tele-
visor la palabra "Ready".
6.
Si
deja
usted
el
ordenador
en
una
misma
presentaci6n
durante
algun
tiempo, los
colores
de
su
pantalla
de
TV
comenzaran
a
cambiar
perio-
dicamente. Esto
es
normai y
ocurre
para
proteger
su
aparato
de
TV
Tenga
en
cuenta
que
una
vez
que
desconecte
el orde-
nador,
debera
esperar
de
3
a 5
segundos
antes
devolver
a
encenderlo
.

Orifice sériel Entré/Sortie
Connexion d'Extension
Télévision
Moniteur
Commutateur
Marche
/Arret
du
Courant
Entrée
du
Courant

1.
RACCORD DE
L'ORDINATEUR
A VOTRE
TÉLÉVISEUR
2.
RACCORD DE
L'ORDINATEUR
A VOTRE
MONITEUR
T.V.
3.
BRANCHEMENT
DUCOURANTA
L'ORDINATEUR
Débranchez
I'
antenne
de
té-
lévision
de
sa
prise
à
I'
arrière
de
votre récepteur.
Branchez
une
extrémité
du
Ca.ble Haute
Fréquen
ce
à la
prise
marquée
"television" à
I'
arrière
de
I'
ordinateur.
Branchez
une
extrémité
du
ca.ble
du
moniteur TV,
munie
d'une
prise ma.le à
cinq
tiges (non compris
dans
l'Achat) à
la
prise
marquée
"monitor" à
I'
arrière
de
]'
ordinateur
Branchez l'autre extrémité
du
ca.ble
sur
]'
entrée
vidéo
du
moniteur TV
Branchez la prise
de
I'
adapta-
teur
de
courant à la prise
de
couran
t.
Branchez
la
prise ronde à
sept
tiges
dans
la prise
"power-in" située à
I'
arrière
de
I'
ordinateur
4. Mettez votre téléviseur
en
marche
et réglez-le
sur
le
canal
36
(Grande-Bretagne
),
canal
4 (Europe
),
ou
sur
le
canal
approprié
indiqué
par
votre détaillant
d'Ordinateurs
ATARI.
Branchez l'autre extrémité
du
Ca.ble Haute
Fréquence
à la prise
d'antenne
située
I'
arrière
de
votre
récepteur
.
5. Enclenchez votre ordina-
teur
en
mettant
sur
"on" le
bouton
du
courant électrique
situé à l'arrière droite
de
la
console
de
I'
ordinateur.
Quelques
secondes
plus tard
le mot "Ready" appara\'t
sur
I'
écran
de
votre téléviseur.
6.
Si
vous
gardez
assez long-
temps
l'ordinateur fixé
sur
une
image, !es couleurs
sur
votre
écran
de
télévision
vont
commencer
à
changer
régulièrement.
Ceci
est nor-
mal
et
sert à
protéger
votre
téléviseur
Veuillez noter
qu'
après
avoir
éteint votre ordinateur,
il
vous
!aut attendre
de
3 à 5
secondes
avant
de
le
remet-
tre
en
marche.

Ingresso/Uscita seriale
Collegamento espansioni
Televisore
Monitor
Interruttore
Accesso
/ spento
Ingresso corrente continua

l.
COLLEGAMENTO
DEL CALCOLATORE
AL VOSTRO
TELEVISORE
2.
COLLEGAMENTO
DEL CALCOLATORE
AL VOSTRO VIDEO
MONITOR
3. COLLEGAMENTO
DEL CALCOLATORE
ALLA RETE
ELETTRICA
Disinserite
il
cavo
antenna
dalla
presa
sul retro del
vostro televisore.
Inserite
una
estremità del
cavo
schermato
nella
presa
indicata "television" sul retro
del calcolatore.
Inserite
una
estremita
del cavo monitor pentapolare
(ottenibile
come
accessorio)
nella
presa
indicata "monitor"
sul retro del calcolatore.
Collegate l'altra estremità
del cavo al monitor
secondo
le istruzioni fornite col vostro
monitor.
Inserite la spina dell'adat-
tatore in
una
presa
elettrica.
Collegate la spina a sette poli
nella
presa
d'alimentazione
sul retro del calcolatore.
4.
Accendete
il
televisore e
sintonizzatelo sul
canale
36
(Gran Bretagna),
il
canale
4 (Europa) o altra appro-
priata stazione
secondo
le
indicazioni del vostro riven-
ditore
ATARI.
Collegate l'altra estre-
mità del cavo
schermato
alla
presa
antenna
sul retro del
televisore.
5. Premete l'interruttore "on"
situato sul lato destro del retro
del calcolatore.
Dopo pochi secondi la parola
"Ready" apparirà sullo
schermo.
6.
Se
lasciate la stessa
immagine
sullo
schermo
per
un
periodo
abbastanza
lungo,
noterete
che
lo
schermocomin-
cerà
a
cambiare
colore perio-
dicamente.
Questo
ènormale
e
serve
a
proteggere
i circuiti
del vostro televisore.
Avvertenza: ricordatevi
che
quando
spegnete
il
calcola-
tore, dovete aspettare dai tre
ai
cinque
secondi prima di
riaccenderlo.

Serie invoer/ uitvoer
Uitbrei
dings
aa
nsluiting
Aan
en uit
schakelaar
Stroom invoer
Controle
Televisie

1.
AANSLUITING
VANDECOM-
PUTEROPUW
TELEVISIE
2. AANSLUITING
VANDECOM-
PUTEROPEEN
BEELDMONITOR
3. HET
AAN
-
SLUITEN
VAN
DE
ADAPTERVAN
DE COMPUTER
Maak
de
antennekabel
los
van
het
antennecontact
aan
de
achterzijde
van
uw
televisie.
Plaats het
ene
einde
van
de
RF-kabel in
de
met "televi-
sion"
aangegeven
aansluit-
bus
aan
de
achterkant
van
de
computer.
Plaats het
ene
einde
van
de
monitorkabel (apart verkrijg-
baar) met
de
5-pens
DIN
stekker in
het
met "monitor"
aangegeven
contact
aan
de
achterkant
van
de
computer.
Verbind het
andere
einde
van
de
monitorkabel met
de
ingang
van
de
monitor.
Steek
de
stekker
van
de
adapter
in het stopcontact.
Verbind
de
ronde 7-pens
DIN
stekker met het met
"power-in"
aangegeven
con-
tact
aan
de
achterkant
van
de
computer.
4. Zet
uw
televisie
aan
en
stem af op kanaal
36
(alleen
voor
U.K.),
ka
na
al 4 (Europa),
of
een
ander
k
an
aal zoals
aangegeven
doo
r
uw
ATARI
dealer.
Verbind het
andere
einde
van
de
RF-kabel met
de
antenne
bus
aan
de
ach
ter-
zijde
van
uw
televisie toestel.
5. Zet
de
scha
k
elaar
aan
de
rechte
rkant
van
de
achter-
zijde
van
de
computer
op
"ON".
Een
paar
seconden
later ver-
schijnt het woord
"READY"
op
uw
televisiescherm.
6.
Als u
de
computer
een
paar
minuten niet gebruikt,
zullen
de
kleuren op het
scherm
van
tijd tot
ti
jd
veranderen.
Dit
is
normaal
en
dien
t om
uw
televisie te
beschermen.
Als
de
computer
wordt uit-
geschakeld
moe
t 3 tot 5
seconden
worden
gewacht
voordat
hij
weer
opnieuw
mag
worden
ingeschakeld
.

Every eHort
has
been
made
to
ensure
the
accuracy
of
the
product
documentation
in the
manual. However,
because
we
are
constantly improving
and
updating our
computer
software
and
hardware
, Alari, !ne.
is
unable
lo
guarantee
the
accu-
racy
of
printed
materiai alter
the
date
of
publication
and
dis-
claims liability
for
changes,
errors or omissions.
No reproduction
of
this doc-
ument
or
any
portion
of
its
con
-
tents
is
allowed without the
spe
-
cilic written permission
of
Atari,
!ne.,
Sunnyvale
,
CA
94086.
Toutes !es
measures
possibles
on!
été
prises alin d'
assurer
J'ex-
actitude
de
la documentation
du
produit
dans
le
manuel.
Toutefois,
du
fai!
de
notre con-
stante
amélioration et mise à
jour
du
logiciel et
du
matériel
("software" et "
hardware
")
de
notre ordinateur, Alari,
!ne
.,
ne
peut
garantir J'exactitude
de
tout matériel
imprimé
après
la
date
de
publication et
décline
toute responsabilité
quant
aux
changements,
erreurs
ou
omissions.
Ce
document
ne
peut etre
reproduit
en
partie ou
en
tota
l-
ité
sans
J'
autorisation
écrite
expresse
de
Atari,
!ne
.,
Sunny
-
vale, CA
94086
USA.
Es
wurden
alle
Massnahmen
unternommen,
um
die
Richtig-
keit
der
Produktions-
dokumentation im Leitfaden zu
versichern
. Da wir
jedoch
lau-
fend
unsere
Software
und
Hardware
verbessern
und
auf
den
neuesten
Stand
bringen
,
kann
Alari,
Inc
.'
die
Richtigke
it
des
Druckmaterials
nach
dem
Veròffentl
ich
ungsdatum
nir,ht
mehr
gewahrleisten. Alari weist
weiterhin darauf hin,
dass
die
Firma hir
Anderungen
, Feh
ler
od
er
Auslassungen
nicht haftet.
Kein
Nachdruck
dieses
Textes
bzw.
eines
Ausschnittes
desselben
wird
ohne
die
vorhe-
rige schrilltiche
Genehmigung
von Alari, !ne.,
Sunnyvale
,
CA
94086
USA,
gestattet.
Al
het mogelijke is
gedaan
ten
einde
in
deze
handleiding
een
accurate
productom-
schrijving te verzekeren.
Omdat
wij
echter
steeds
bezijg
zijn onze
computer
program-
matuur
en
apparatuur
te verbe-
teren
en
bij
de
tijd te
houden
,
kan
Alari,
!ne
. niet
garanderen
dal
de
literatuur
na
de
publi-
katiedatum
nog
corree! is
en
is
daarom
niet aansprakelijk voor
veranderingen
, errata
of
weglatingen.
Reproductie
van
dii
docu-
ment
of
enig
dee!
daarvan
is
niet
toegestaan
zo
nder
de
uit-
drukkelijke schriftelijke toes-
temming
van Alari, !ne.,
Sun
-
nyvale, CA 94
086
USA.
Se
ha
hecho
lodo
lo
posible
para
asegurar
la exactitud
de
la
documentacioin
del producto
en
el manual. No
obstante
, y
debido
a
que
contii
nuamente
estamos mejorando y moderni-
zando
nuestros conjuntos
de
programas
y ordenadores,
ATARI
,
!ne
. no
puede
garantizar
la exactitud del materiai
imprese
después
de
la fecha
de
publicaciém, y no
se
hace
responsable por cambios,
errores u omisiones.
Se
prohibe
la
reproducci6n
de
este
documento
o
de
cual-
quier
parte
de
su
contenido sin
el consentimiento escrito
de
ATARI
,
!n
e.
Sunnyvale
,
California
94086.
Ogni
cura
è stata
presa
per
assicurare
l'accuratezza della
documentazione
in
questo
manuale. Dato
comunque
il
constante miglioramento e
aggiornamento
del nostro soft-
ware e hardware, Alari, !ne.
non
garantisce
l'accuratezza del
materiale illustrativo dopo la
data di pubblicazione e declina
ogni
responsibilità dovuta a
cambiamenti, errori o omissioni.
Nessuna
riproduzione di
questo
documento,
per
intero o
in
parte
, è
permessa
senza
l'au-
torizzazione scritta di Alari, !ne.,
Sunnyvale, CA
94086
, USA.


)I\.
ATAR
I®
~
AWarner Communications Company
ATARI,
!ne.
lnterna
tional
Div
ision
PO.
Box
427
,
Sunnyvale,
CA
94086
ATARI
and
Design
,
Reg
. U.S
Pat
& Tm. Off.
©
1983
Alari
!ne
.
All
Rights
Reserved
Imprimé
à
Hong
Kong
C061947
REV C
Other manuals for 600XL
4
This manual suits for next models
1
Table of contents
Languages:
Other Atari Desktop manuals

Atari
Atari 800 XL ROSE Quick start guide

Atari
Atari 400 User manual

Atari
Atari 400 Quick start guide

Atari
Atari 800 XL ROSE User manual

Atari
Atari 800 XL ROSE Quick start guide

Atari
Atari The Concise ST 68000 User manual

Atari
Atari 400 User manual

Atari
Atari STACY User manual

Atari
Atari 130XE User manual

Atari
Atari 600XL Instruction manual