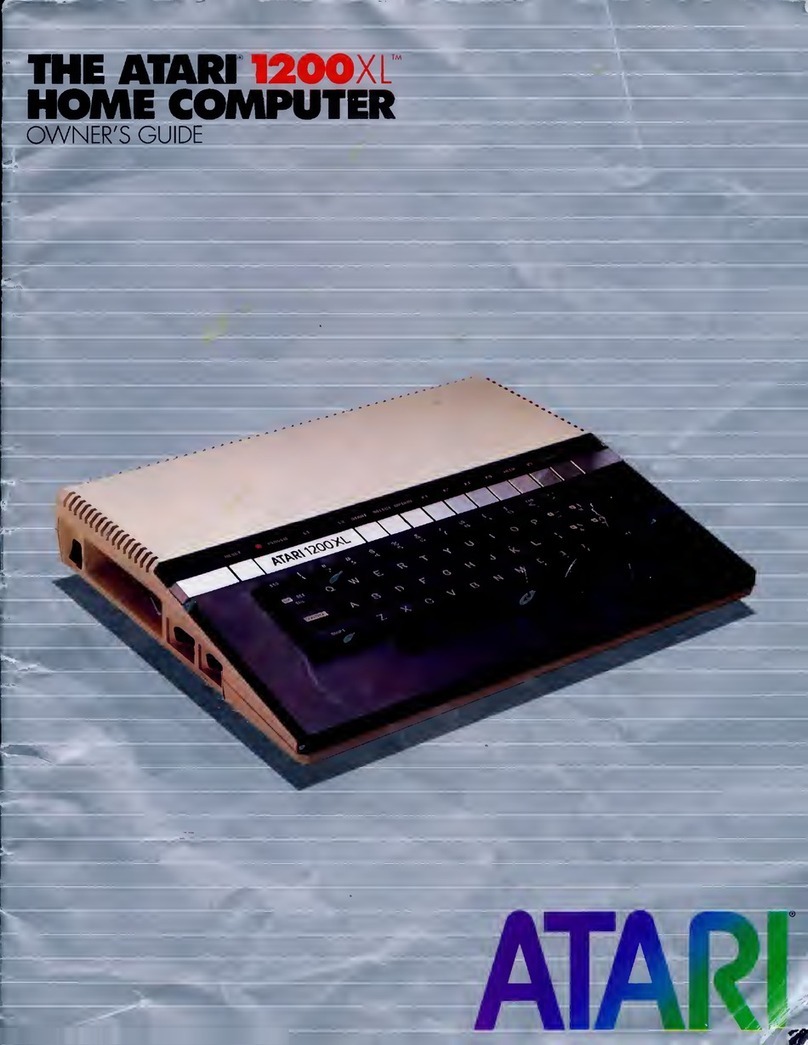
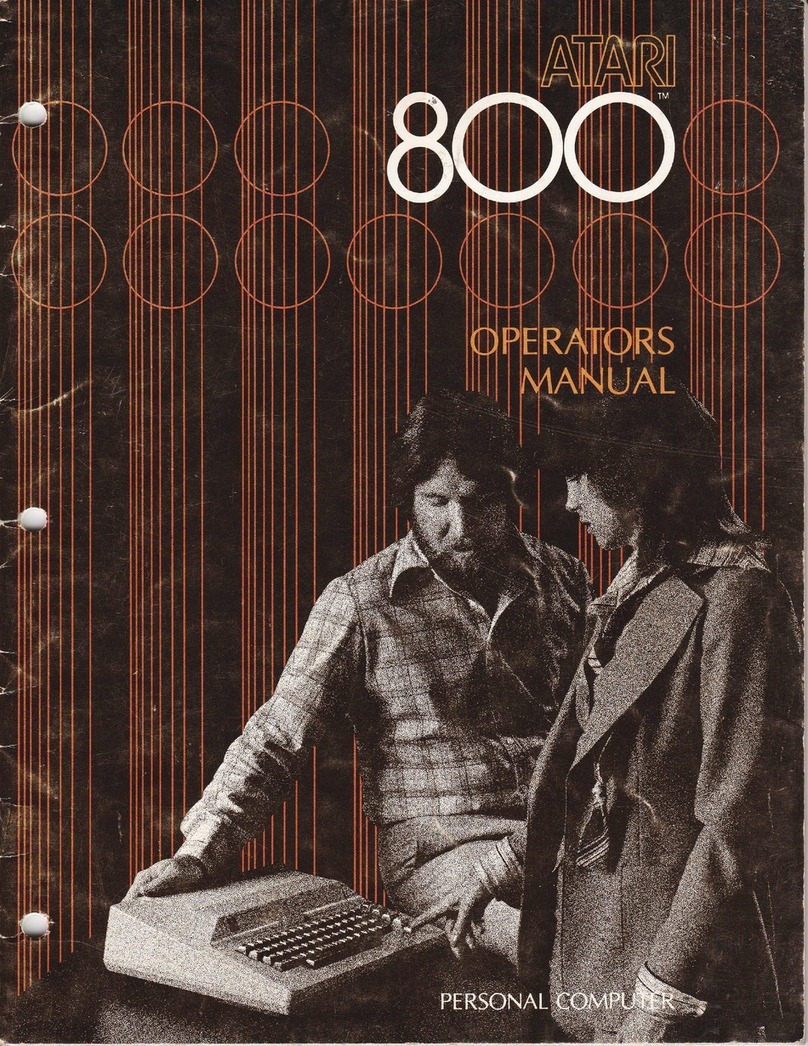
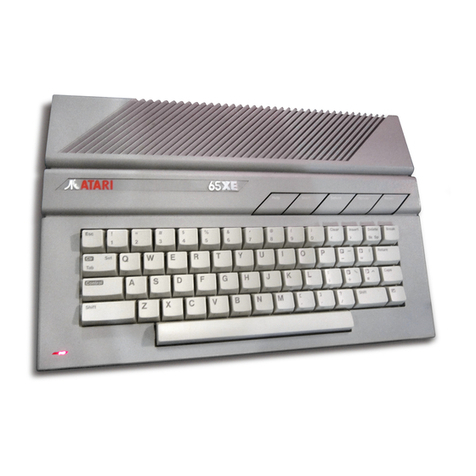
Atari 400 User manual


BY
THE
EDITORS
OF
CONSUMER
GUIDE
®
THE
USER'S
GUIDE
TO
400
·
800
·
1200XL
COMPUTERS,
SOFTWARE,
& PERIPHERALS
BEEKMAN
HOUSE
New
York

Copyright© 1983
by
Publications International, Ltd.
All
rights reserved.
This
book may
not
be reproduced
or
quoted
in
whole
or
in
part
by
mimeograph
or
any
other
printed means
or
for
presentation
on
radio, television,
videotape,
or
film
without
written
permission from:
Louis Weber. President
Publications International, Ltd.
3841 West
Oakton
Street
Skokie, Illinois
60076
Permission
is
never granted for commercial purposes.
Manufactured in the United States
of
America
10
9 8 7 6 5 4 3 2 I
Library
of
Congress Catalog Card
Number
:83-62113
ISBN:
0-517-41448-1
This edition published by:
Beekman House
Distributed
by
Crown
Publisher
s,
Inc.
One
Park
Avenue
New
York,
New
York
I
00
16
Writer:Arlan
R.
Levitan
Educational Consultant: Fred D'ignazio
Design:
Jeff
Hapner
Photography:Donna
Preis
and George
Siede
The prices listed
in
this
book
were accurate at the time
of
printing; prices are subject
to
change.

I
CONTENTS \
CHAPTER
1
WELCOME
TO
HOME
COMPUTING
By
using this book
to
learn about
your
system, you
will
be well on the
way
to
many happy
hours
of
home computing.
CHAPTER
2
GETTING STARTED
You'll learn about
what
you
need
to
assemble
your
basic computer system.Then you'll
go
step-by-step through the details
of
setting
it
up.
CHAPTER
3
MEET
THE
KEYS
Each
and every key on
your
keyboard
is
presented here, complete
with
exercises
to
teach
you
how
the keys
work
. Detailed photographs
show
you
how
your
screen
will
look
as
you
work
through the
exercises.
CHAPTER
4
PERIPHERALS-
EXPANDING
YOUR
SYSTEM
So
you
want
your
new
system
to
do
even more for
you?
Here's the background informa-
tion you need
to
decide
what
additional equipment
you
might
want
to
buy
CHAPTERS
SOFTWARE
Software programs also expand
your
system's capabilities. Here are some software pack-
ages
you
might
use
forvarious kinds
of
purposes.
CHAPTER
6
YOUR
COMPUTER'S
NETWORK
Many resources are available
to
help
you
get the most from
your
computer system.
You
can
share
all
sorts
of
information
with
other computer users and
with
national information
banks
as
well.
4
6
14
58
65
76

CHAPTER 1
WELCOME
TO
HOME
COMPUTING
Now
that
you
are the proud
owner
of
an Atari
home computer, congratulate yourself!A home
computer can eliminate a
lot
of
the drudgery
associated w
ith
manytypes
of
paperwork, such
as
writing
reports and keeping finances in order.
In addition,
your
Atari home computer can pro-
vide
your
entire family
with
stimulating enter-
tainment. In
fact
since the computer can per-
form all sorts
of
different functions, it's very likely
that
every member
of
your
family
will
be
drawn
to
some aspect
of
computing.
You
will
find
that
it
is
easy
to
use
your
Atari
home computer. A home computer
is
designed
so
that
long, difficult instructions and various
secret passwords are completely unnecessary
When you
want
to
use
your
computer for a spe-
cific purpose, such
as
typing a letter, balancing
your
checkbook, orsimply playing a game, all
you
have
to
do
is
buy
the appropriate program
(a
set
of
instructions already created foryou)
that
will
set
up
your
computer for the purpose
you
need. Onceyou are more familiar
with
your
computer,
you
may
want
to
create
your
own
simple programs. For example, you may
want
to
create a program
that
will
draw
pictures, or
graphics, on the screen.
This
is
easy
to
do once
you
know
the simple instructions, or commands,
to
use.
For the most
part
however,
it
isn't necessary
to
learn
how
to
program or
to
know
any electron-
ics
theories in order
to
use
and enjoy
your
Atari.
As
you
use
the
Atari from
day
to
day,
you
will
feel more and more comfortable
working
with
computers, and
you
will
learn aboutthe many
ways
that
your
computer can simplify
your
work
.
This User's Guidew i
ll
help
you
get
started using
your
Atari home computer.
You
will
learn
about
the basic components
of
your
computer,
how
to
hook
it
up, and
how
to
use
the keyboard
to
communicate
with
it. In addition,
you'll
learn
about
otherpieces
of
equipment
that
can en-
hance
your
computer and
about
the software
programs
that
allow
you
to
use
the computer in
different ways.
Soon
you
will
feel
like a
real
com-
puter expert!
Before
we
begin, take a
few
minutes
to
learn
about
several
of
Atari home
computers-one
of
which
you
now
own.
4
MEET
THE
ATARI
LINE
OF
HOME
COMPUTERS
All ofthe Atari home computers have a
few
things in common. When
you
use
an Atari com-
puter,
you
type
messages
to
the computer on
the keyboard.
These
messages-yours
to
the
computer and the computer's back
to
you-
appear right on the TV screen or monitor that
is
hooked
up
to
it.
One
of
the main differences in the types
of
com-
puters
is
how
much each
can
do. A computer
contains a certain number
of
memory
chips,
which
allow
it
to
store information. For com-
puters, memory
is
measured in units called bytes.
Each
byte holds one character (letter, number, or
symbol) ofinformation. One kilobyte, or Kas it
is
commonly called,
is
equal
to
approximately
1,000
bytes
of
memory. For example, if
your
com-
putercomes
with
16K
of
memory, this means
that
it
can
store approximately 16,000 characters
of
information
at
one time.
Different types
of
Atari computers come
with
different amounts
of
memory.The larger the
amount
of
memory, the more the computercan
do. In
fact
some
of
the more complex programs
you can buy for
your
computer require a certain
amount
of
memory in order
to
work
properly.
You
can buy additional units ofmemory for
your
computer ifyou need more, which
you
will learn
about later in this guide. Let's take a look at the
Atari models 400, 800, and 1200XL.
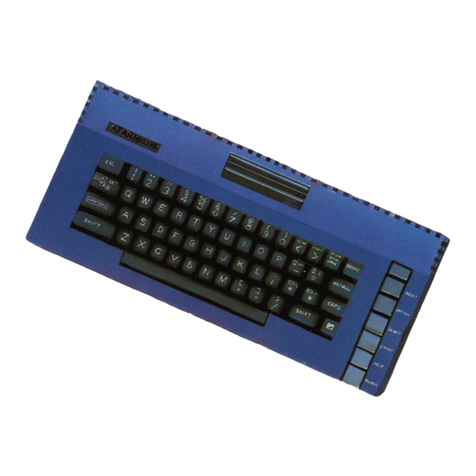
Atari
400
The
Atari 400 was introduced in late
1979.
The
first units made contained
8K
or
16K
of
memory,
while the latest models made contain
16K.
The
400 features a
flat
touch-sensitive membrane
keyboard, rather than one more like an electric
typewriter. (A membrane keyboard
is
one
that
has
a flat surface instead
of
raised keys.) While
the 400's membrane keyboard
is
not
great for
touch-typing or entering long program listings,
it
does have some advantages: since the key-
board
is
asealed flat surface,
it
is
fairly imper-
vious
to
the attacks
of
small children and
is
very
easy
to
clean.
Electrically speaking, the 400
is
almost identical
to
the more expensive Atari
800
.Even if
you
have
no
plans
to
get
into a more complicated
system
with
more accessories, the Atari 400
makes a terrific game cartridge system.
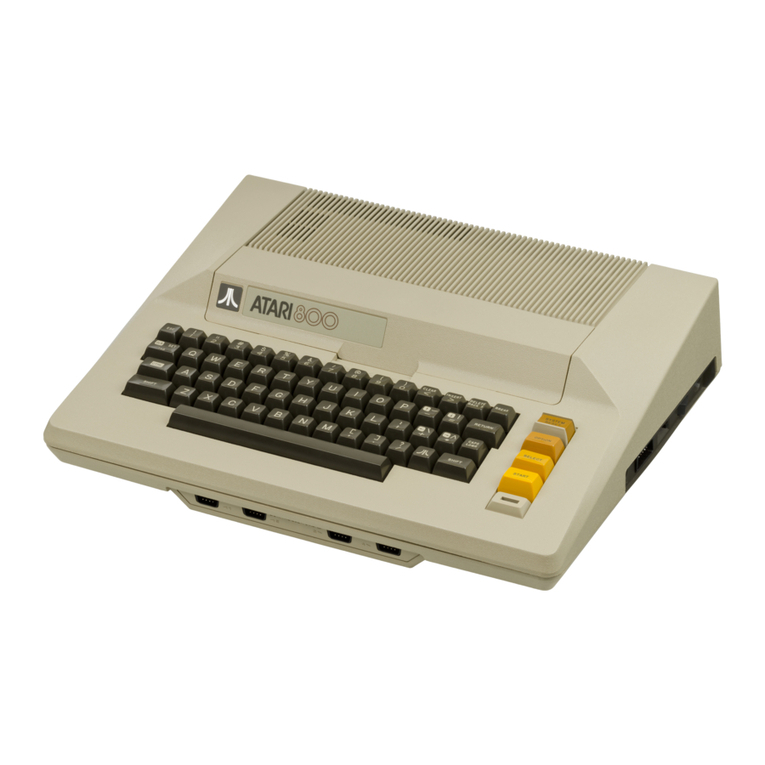
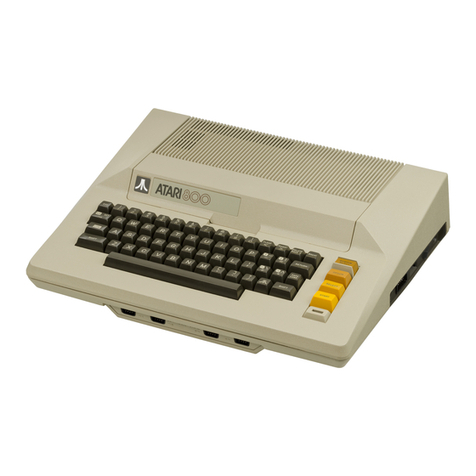
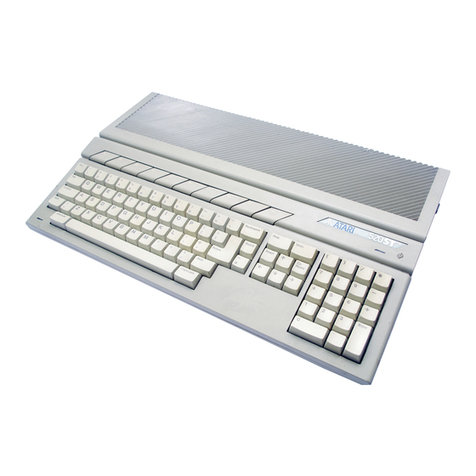
Atari
800
The
Atari 800, introduced at the
same
time
as
the 400, offers greater
ease
of
expandability
(adding equipment
to
the computer) and
use
. Its
full-stroke keyboard makes typing a pleasure.
Although the first models were offered
with
8K
or
16K
of
memory, Atari eventually made 48K
of
memory standard
with
the
800
computer.This
larger memory allows
you
to
run longer and
more complex programs.
The
800
is
the onlyAtari computer
with
two
cartridge slots.Atari'soriginal plans were for
some programs
to
use
both
slots,
but
a
way
to
get bigger programs
into
one cartridge was dis-
covered and
no
two-cartridgeAtari programs
were ever released.
The
800
has
some nice features.
The
system ex-
pansion slots,
which
make
it
possible
to
use
some specialized devices
with
the computer, can
be
easily reached
by
removing the
top
cover.
It
is
also
possible
to
hook
up the
800
computer
to
yourstereo (which makes for
truly
powerful
sound!), and the
800
will
hook
directly
into
a
color video
monitor
(which can give
you
a
bit
sharper picture than most regular televisions).
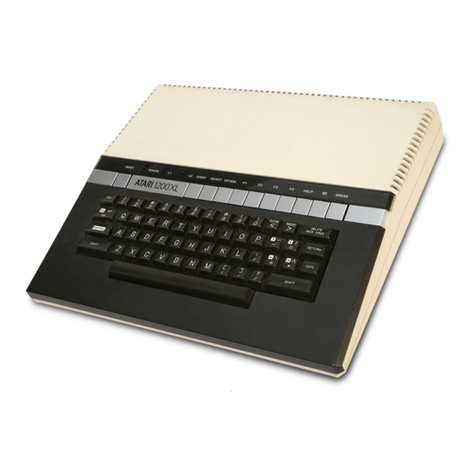
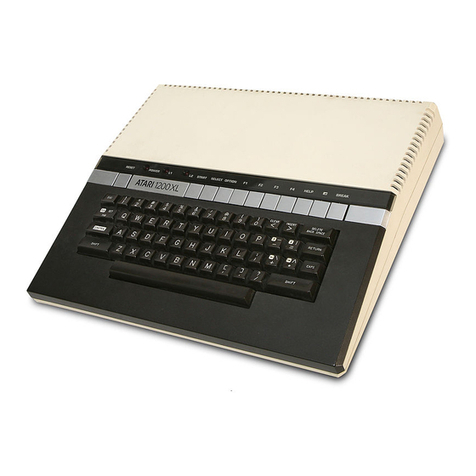
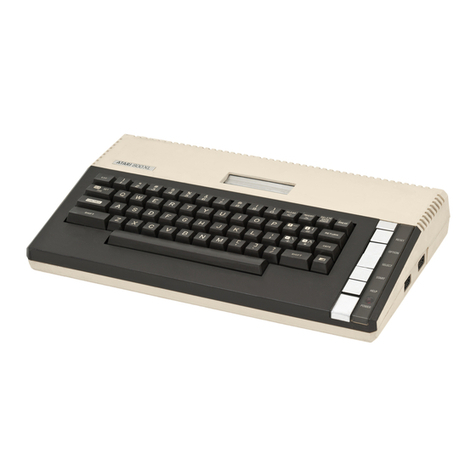
Atari
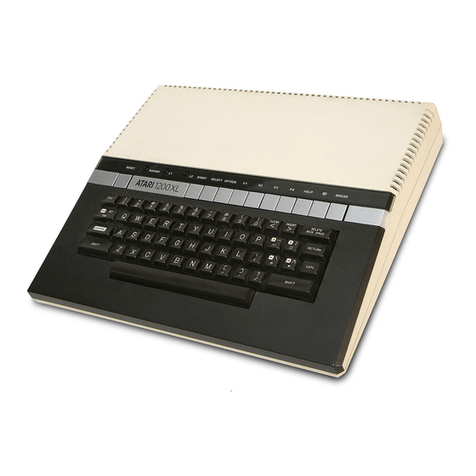
1200XL
The
Atari 1200XL was the first
of
the Atari XL
line.The 1200XL has nice styling and a very
good keyboard.
It
comes
with
64K
of
memory-
asuitable amount for many purp
oses
.
SOFTWARE
PROGRAMS
YOU
CAN
BUY
As mentioned earlier, aprogram
is
aset of in-
structions
that
tells the computer
to
do
some-
thing.
You
can either create a program yourself
by
using a computer language (such
as
BASIC),
oryou can
buy
a program
that
someone
else
has
already created. For the more complicated tasks
that a computer can perform, most people find
it
easier
to
buy
already-made programs.
Once someone has made a program, the pro-
gram
is
stored on a computer software medium,
such
as
a cartridge, a cassette tape, or a diskette
(which
you
will
learn
about
later in this guide).
The
program can then be used again and again
byanyone
who
has
a copy
of
this software.
This
is
what
you
buy
when
you
purchase a program
that someone
else
has
created.
There
is
a
wide
variety
of
programs available for
Atari home computers.
You
can
buy
a software
program
that
enables
you
to
use
your
computer
as
an
advanced electronic
typewriter
. In fact. this
type
of
program, called a
word
processing pro-
gram, lets
you
do
much more than
you
could
with
a regular
typewriter
. For example,
word
processing software lets
you
create a document
-let
'ssay a
letter-then
move
part
of
the letter
to
a different location.
You
might
want
to
move
the third paragraph
to
where
the eighth para-
graph
is
located.
Or
,
you
may
want
to
delete a
few
lines
of
tex
t.
On
your
Atari computer,
you
do
all this before
you
ever
print
the letter on a
sheet
of
paper!
Other
software programs let
you
use
the com-
puter
as
a huge, electronic spreadsheet.
You
can
set
up
your
finances on one
of
these spread-
sheets-then
let the computer perform the cal-
culations for
you!
And,
of
course, let's
not
forget the numerous
game software
you
can
buy.
You
will
spend
hours
at
a time
with
your
computer
when
you
can use
it
as
an entertainment and relaxation
too/.
You
will
learn more about game software
and
other
software programs in Chapter
5,
"Software."
COMPUTER
LANGUAGES
A computerlanguage
is
a group
of
words
(called
commands)
which
you
can
use
to
instruct the
computer
to
perform a task. While there are
many computer languages, one
of
the most
common and easiest languages
to
use
is
called
BASIC.
You
can
buy
a software cartridge
that
contains
the
BASIC
language
for
your
Atari 400,
800,
or
1200XL.
You
can insert the
BASIC
cart-
ridge directly
into
your
computer
when
you
want
to
do
some programming
of
your
own
.
Once
you
are much more familiar
with
pro-
gramming,
you
may
want
to purchase a differ-
ent
language
(a
differentset
of
commands) for
your
computer. There are other languages avail-
able, some
of
which
are more useful in different
applications. But
at
this point.
you
do
not
need
to
concern yourself
too
much
with
languages
and
programming-especially
since there are
so
many already-created programs
that
you
can
buy
and
use.
COMPUTER
LITERACY
One
of
the most important benefits
of
personal
computing
is
achieving computer literacy. Com-
puter
literacysimply means being familiar
with
computers and
knowing
how
to
use
computers
as
tools
to
perform tasks foryou.
What
we
should be concerned
about
is
how
people use computers.
You
can
use
a hammer
as
a tool
to
build
or
tear
down
things. Understand-
ing
that
computers are simply more sophisti-
cated tools used
by
people-including yourself
-will
help
you
to
feel comfortable using com-
puters
as
constructive tools
that
can help sim-
plify
many
of
your
everyday tasks.
Are
you
ready
to
learn
how
to
set
up
and
use
your
computer? Then, let's beginI
5

CHAPTER 2
GETTING
STARTED
All you need
to
start computing
is
an Atari com-
puter, a TV set
or
monitor (preferably color), and
software.
You
may also have purchased some
sort
of
device
to
load programs into the com-
puter
(such
as
a cassette recorder or a disk drive)
or
some controllers for playing games (such
as
joysticks
or
paddles).
If
you
are interested in
learning more
about
various types
of
equipment
(called peripherals)
that
you
can
use
with
your
computer,
see
Chapter 4, "Peripherals."
YOU
NEED
A
TV
OR
MONITOR
It's likely
that
you
already
own
a TV set
that
you
can
use
with
your
Atari computer. In most
cases,
any color
or
black-and-white set
will
work
fine
as
a video display for
your
games
or
other
pro-
grams.
The
only
problem
you
may run
into
is
called excessive overscan. If
it
becomes evident
that
you
aren't
seeing a
lot
of
the edges
of
the
video image
your
computer
is
generating and
the TV
is
hooked up properly,
you
have an over-
scan problem.This sometimes occurs in older TV
sets, and there's
not
much
you
can
do
about
it
otherthan buying a
new
TV All
TVs
have some
overscan; however;
if
the overscan starts
to
interfere
with
playing games
or
using other
types
of
programs,
you
may
want
to
consider
replacing
your
TV
Whether
you
use a color
or
a black-and-white
TV
or
monitor
should depend on
your
needs.
While color TVs
or
monitors make the best use
of
Atari'scolor capabilities,
you
may find a black-
and-white
screen easier on the
eyes
for reading
a lot
of
text (such
as
in
word
processing
or
for
many business
uses).
In addition,
when
using a
one-colorscreen,
you
have the option
to
display
more characters across the screen.
To
learn
more
about
these features,
see
Chapter
4,
"Peripherals."
6
YOU
NEED
SOFTWARE
If
you
use
your
Atari computer
by
itself,
you
are
using the computer's
hardware
.When
you
use
a
program
that
is
not
in the computer itself,
you
are using asoftware program. In addition,
when
you
want
to
save a program
or
other
type
of
document
that
you
have created,
you
store
it
on as
oftware
medium.
Softwa
re
comes stored in three formats: car-
tridge, cassette,and diskette.
The
software for-
mat
you
use
will depend
upon
your
needs and
the availability
of
the programs
you
wish
to
pur-
chase
in a particular format.
The
types
of
soft-
ware programs available are discussed in detail
in Chapter
5,
"Software." Right
now
,
we'll
dis-
cus
sthe three available formats
of
software and
any equipment necessary in order
to
use a par-
ticular format.
Cartridges
A cartridge contains electronic chips in which a
program
is
stored.
To
use
a cartridge-based pro-
gram,
no
special equipment
is
generally re-
quired; the cartridge plugs
right
into
your
Atari
computer.A cartridge program usuallycannot
be altered,
is
completely self-contained, and
is
automatically loaded
into
your
computer's mem-
ory
when
you
turn on
your
computer.
Cartridge programs are very reliable and rarely
ever
go
bad. Their principal drawbacks are
that
they are limited in the size
of
the programs they
can hold and are usually a
bit
more expensive
than cassette-
or
diskette-based software.
You
can't store
your
own
programs
or
other
files
that
you
create on a cartridge, either.
To
store
your
own
work,
you
will
need
to
use
a blank
cassette
or
diskette.
Cassettes
There are manysoftware programs available in
the cassette format.
You
can also
buy
blank
cas-
settes on which
to
store
your
own
work.
While a cartridge-based program
is
loaded
directly into the computer,
you
will
need a
cas-
sette recorder
to
load a cassette-based program
from the cassette
into
the computer's memory. In
comparison
to
the peripheral needed
to
load a
diskette-based program
(a
disk drive), a cassette
recorder
is
the least expensive type
of
data stor-
age and retrieval device available
for
Atari home
computers.However,
while
they
are
low
in cost
(about
S100
or
less)
, cassette recorders are very
slow
compared
to
disk drives and usually are
not
as
reliable. They also tend
to
be more prone
to
errors in loading programs.
You
must
use
an
Atari program recorder
if
you
want
to
use
cas-
sette s
oftware
. Atari recorders are discussed
in more detail in Chapter 4, "Peripherals."

Diskettes
A diskette, also
known
as
a disk, or
floppy
disk,
is
a round, thin sheet ofplastic, coated
with
magnetic oxide similar
to
the coating on a
cas-
sette tape.
This
sheet
is
sealed in a
jacket
to
protect
it
from dust and dirt. When
you
buy a
diskette-based program, the program
is
stored
on the magnetic material inside the
non-
removablejacket.
While diskette-based programs are usually more
expensive than cassette-based programs, disk-
ettes have certain advantages
over
cassettes.
Loading a program from a disk drive
is
much
faster-and
far more
accurate-than
loading a
program from a cassette recorder. In addition,
there are many more programs available on disk-
ette than cassette.Also,
when
you
store
your
own
work,
you
can store many programs (de-
pending on theirsize) on a diskette,
as
opposed
to
the recommended one program on each side
ofacassette. If
you
will
be creating
your
own
programs,
or
if
you
will
be saving files such
as
letters and reports,
you
will
find diskettes
cheaper and more manageable than cassettes.
To
use
a diskette-based program,
you
need a
disk drive.
At
present, disk drives are relatively
expensive (over $300);
however
, the speed and
versatility
of
a disk drive
unit
makes using
your
computer a
lot
easier and more enjoyable. The
ability
to
quickly
access
information makes a disk
drive a must
if
you
intend
to
use
your
computer
for medium
to
large data base applications,
extensive
word
processing programs, or other
business applications.Disk drives are discussed
in more detail in Chapter
4,
"Peripherals."
WHERE TO SET
UP
Before
you
unpack
your
equipment, think
about
where
you
'
ll
want
to
work
with
your
computer
system. If
you
are using a large TV set
('7
inches
or
more diagonally),
you
'
ll
want
to
place the
computer console (the
part
containing the key-
board) a reasonable distance from the TV screen.
Don't
put
it
in aspot
where
you'll
have
to
move
everything
when
you
want
to
watch
a regular
television program. For convenience,
you
may
even need
to
consider purchasing a small color
set
to
use
only
with
your
computer.
Reasonably priced and attractive furniture
is
now
widely
available
for
housing home com-
putersystems. While a regular desk may
do
just
fine, furniture designed especially for computer
systems
will
usually have holes for routing
cables and special shelves for specific pieces
of
computer gear.
At
the
very
least, be sure
to
have
your
computerconsole resting
on
a firm, flat
surface.
ELECTRICAL CONSIDERATIONS
If
you
have a number
of
things
that
need
to
be
plugged
into
electrical outlets, count them.
To
make
your
setup
as
safe
as
possible,
don't
string
electrical extension cords
everywhere;
instead,
purchase a UL-approved multiple AC outlet
strip.
This
will
minimize the number
of
wall out-
lets
you
use for
your
computer and generally
keep things neat.
WHAT
COMES WITH YOUR COMPUTER?
In the box
you
should find the
following
items:
• Your Atari computer console (the
part
with
the
keyboard)
•
An
AC adapter for the computer console (the
heavy little box
with
two
cords sticking
out
of
it)
• A TV switch box (the smaller
lightweight
box
with
one flat cable sticking
out
of
it)
•
An
Owner's
Guide (and possiblysome other
books
or
papers)
The next
few
pages
will
show
you
how
to
set
up
your
computer.
7


STEP 5 1300
ohm)
10
HOOKING THE
TV
SET
10
THE
COMPUTER CONSOLE
STEP 1
Unplug
your
N
set.
STEP 2
Locate the connector (or connectors) on the
back
of
the set labeled
VHF.
Remove the cable
connected there (you may need ascrewdriver
for this).
STEP 3
Attach the cable labeled N on the switch box
to
the screws labeled VHF on
your
N
set.
STEP 4
Check
whether
the cable
you
have
just
dis-
connected
is
thick and round (75 ohm)
or
flat
(300 ohm).
STEPS
Attach the cable
to
the N switch
bo
x
at
the
points labeled 75 ohm or
300
ohm (depending
on
which
type
of
cable
you
have).
STEP 6
Ifthe cable
you
disconnected in Step 2 was a 75
ohm (thick and round) cable,
you
must set
your
N
to
accept a 300 ohm signal.
See
your
N
Owner's
Manual for instructions on
how
to
set
your
television for a 300 ohm antenna.

STEP
7
Set
the switch on the switch box
to
TV
to
watch
regular television.
To
use
your
computer, set the
switch
to
COMPUTER.
Slide
the switch
to
COM-
PUTER
now.
STEPS
Set
your
computer console
where
you
plan to be
using it. Locate the switch on the computer
labeled CHANNEL and set
it
at
2
or
3.
Set
it
for
whichever channel
is
not
used
by
a TV station in
your
area
;if
both
are used, set
it
for the
weaker
of
the
two
stations.
STEP
9
Turn
the channel selector on
your
TV set
to
the
same
channel
(2
or
3).
STEP
10
Connect the signal cable from the back
of
your
computer
to
the TV switch box plug labeled
COMPUTER.
STEP"
The
TV
switch box
is
intended
to
be per-
manently positioned on the back
of
your
TV
set.
It
has a piece
of
sticky-backed tape
to
hold it in
place.
Peel
the backing
off
the tape and place
the box firmly on
your
TV
set.
STEP
12
Plug
your
TV set in. Make sure the
switch
bo
x
is
set
to
COMPUTER and the TV
is
turned
to
chan-
nel2
or 3.
STEP 7
11

12
CONNECTING
THE
COMPUTER
CONSOLE
TO
ELECTRICITY
STEP 1
Make sure the
power
switches on all
of
your
equipment are set
to
OFF.
STEP 2
Plug the AC
power
adapter for the system con-
sole into a
wall
plug or
outlet
strip.
STEP 3
Plug the small plug on the end
of
its other cord
i
nto
the hole marked POWER
IN
on the
right
side
of
the computer console. (
On
the Atari 400
the connector goes
to
aslot marked JACK.)
Now
you
'
re
ready
to
turn the system on and
get
to
work
(or play). In Chapter 3,
we
'
ll
give
you
some exercises
to
help
you
learn the keyboard.
If
you
have anyproblems,
your
Atari manual
contains a troubleshooting guide,
but
the most
common problems are loose connectors.
HOOKING
THE
ATARI
810
OR
ATARI1050
DISK
DRIVE
10
THE
COMPUTER
CONSOLE
STEP 1
Place
the disk drive next
to
your
computer con-
sole. Make sure
that
the chart on the back
of
the
disk drive
says
DRIVE CODE
NO
. J (assuming
that
this
is
your
first disk drive).
STEP 2
Locate the wedge-shaped connectors on each
end
of
the black three-foot long I/O (Inpu
t!
Output)
cord
that
came in the box
with
your
disk drive.

STEP 3
Insert one
of
the wedge-shaped connectors
into
one
of
the wedge-shaped holes labeled
I/O
CONNECTORS in the back
of
your
disk drive.
Either hole
wi"
do.
STEP 4
Insert the otherwedge-shaped connector into
the wedge-shaped hole labeled
PERIPHERAL
on
your
computer console.
This
hole
is
on the right
side
of
the 400 and
800
models and on the back
of
the J200XL
HOOKING
THE
ATARI
410
OR
ATARI1010
CASSETTE
PROGRAM
RECORDER
10
THE
COMPUTER
CONSOLE
STEP 1
Insert the wedge-shaped
I/O
(Input/Output)
plug on the end
of
the cord coming
out
of
your
computer
into
the hole labeled
PERIPHERAL
on
your
computer console.
This
hole
is
on the right
side of the 400 and
800
models and on the back
of
the J200XL model. (If
you
are also using a disk
drive, plug the wedge-shaped connector on the
cas
sette program recorder
into
the second I/O
hole on the back
of
your
disk drive.)
STEP 2
If
you
have an Atari
JOJO
cassette program re-
corder, plug the second wedge-shaped con-
nector into
tile
back
of
the recorder.
I
~
~"
''''llfrrrrr((((fII@
~
~
STEP 3
STEP 4
13


LET'S
GET
ST
ARTED
The
keyboard
is
an essential
part
of
all com-
puters, including
your
Atari.
The
computer com-
municates
with
you
by
creating sound and
graphics on
your
TV
set.
You
communicate
with
the computer
by
typing on the computer con-
sole's keyboard. Using the computer keyboard
is
aseasy
as
typing
a letter to a friend on a type-
writer, and
the
effect
is
the same-an exchange
of information takes place. Once
you
learn a
few
simple tricks
about
using the keyboard, using
your
computer
will
be easier than
you
may
think.
Take
a look at the keyboard on
your
Atari.
It
looks very much like a normal
typewriter
key-
board.
The
letter keys are arranged in the stan-
dard layout called OWERTY
This
name
is
derived from the letters on the leftside
of
the
upper
row
of
letter keys
(0,
W,
E,
R,
T,
and
Y).
In
addition
to
the letter keys, the keyboard
has
a
row
of
number keys
at
the top, a
SPACEBAR
at
the
bottom
,
two
SHIFT
keys (one on each side
of
the
SPACEBAR),
various punctuation symbols (to
the right
of
the alphabet keys), and a
RETURN
key.
There are some other keys
not
found on a type-
writer
:the editing keys
(CLEAR,
INSERT,
BACK
SPACE
/
DELETE),
the
BREAK
key.
the
CONTROL
key,
and some unusual keys labeled
ESC
and
TAB
.
ON
THE
400
AND
800, there
is
a
set
of
four keys on the right side.
ON
THE
1200XL, a
group
of
keys runs across the
top
of
the keyboard.All these keys
do
special things
that
you
will
learn
about
in this chapter.
18
USING
THE
KEYBOARD
IF
YOU HAVE
AN
ATARI400
OR
800
,
you
can
type
on
the keyboard
(without
using asoftware
program)
by
using the
Memo
Pad
Mode. (Mode
simply means a particular method
of
operation.)
On
the 400 and
800
,
you
get
the
Memo
Pad
Mode
by
turning
off
all peripherals (if
you
have
any) and removing any cartridges; then
when
you
turn
the computer on, the computer
is
auto-
matically in
Memo
Pad
Mode
.
Another
way
to
use the keyboard
ON
AN
ATARI
400
OR
800
is
to
insert theAtari
BASIC
language cartridge.
The
BASIC
cartridge lets
you
use
BASIC
commands and modifies some
of
the
functions
of
the keyboard.
IF
YOU HAVE A 1200XL,
you
cannot type on the
keyboard unless
you
have inserted either asoft-
ware program or the
BASIC
language cartridge.
The
1200XL does
not
automatically have a
Memo
Pad
Mode
when
you
turn
on
the com-
puter. If
you
want
to
type on the keyboard
with-
out
using a software program,
you
must insert
the
BASIC
language cartridge.
Other manuals for 400
14
This manual suits for next models
2
Table of contents
Other Atari Desktop manuals

Atari
Atari 400 User manual

Atari
Atari 800 User manual

Atari
Atari 400 User manual

Atari
Atari 1200 XL Quick start guide

Atari
Atari 400 The Basic Computer User manual

Atari
Atari 130XE Instruction Manual

Atari
Atari 400 User manual

Atari
Atari 800 XL ROSE Quick start guide

Atari
Atari 1200 XL User manual

Atari
Atari 600XL Instruction manual
Popular Desktop manuals by other brands

Lenovo
Lenovo ThinkCentre M75s Gen2 Hardware Maintenance Manual

Asus
Asus Essentio CM6331 user manual

Lenovo
Lenovo ThinkCentre A50p user guide

Panasonic
Panasonic CF-61 Series operating instructions

HP
HP Presario SR5400 - Desktop PC Guida alla risoluzione dei problemi e alla manutenzione

Dell
Dell OptiPlex 330 Service manual