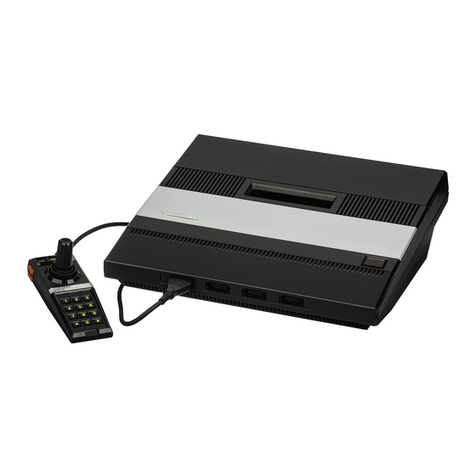
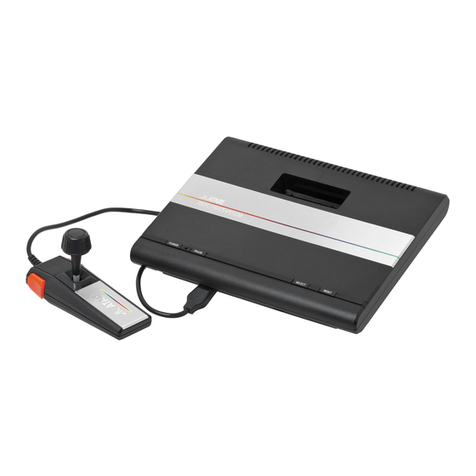
Atari 7800 ProSystem User manual


Table of Contents
Your ATARI 7800 ProSystem
Installing the
Setting Up the Console
Inserting
Using the 7800 Pro-Line™ Controllers
aGame Cartridge
TV/Game Switch Box 2-5
6, 7
To Start Play 10, 11
Returning your TV Set to Television Program Viewing .12
Maintain ing your ATARI 7800 ProSystem ,.12
Troubleshoot ng Checklist 12

Your ATARI 7800 ProSystem
Coi
of 01
Ci inpi
JUfJCI
ratulations on your purchase
le the most exciting video
systems available. This state-
e-art system features:
JARI
box. you
?rior graphics and challeng-
ing game play
Free Pole Position If game
Afull line of advanced software
Convenient pause control
Modern, sleek design
Pro-Line precision game con-
trollers JJ
Home computer expandability
Your ATARI 7800 ProSystem plays
all ATARI 2600™ cartridges
without aseparate adaptor. Just
insert acartridge and play! The
When you remove your
7800 ProSystem from the
will find)
7800 ProSystem Console
Two Pro-Line Game Controllers
TV/Game Switch Box
Power Adapter
TV Connector Cable
Printed Warranty Card
Take amoment now to fill out your
printed warranty purchase card
and register your unit with Atari.
Note: The metallic label on your
ATARI 7800 is covered with apro-
tective coating. To remove the
plastic, simply peel it off.
7800 ProSystem also lets you use
all controllers that are compatible
with the ATARI 2600 VCS™ con-
sole. We suggest you read this
Owner's Guide thoroughly before
setting up your ATAI
System.
m
w

Installing the TV/Game
Switch Box 1————
r
If you do not have aflat twin-leai
antenna wire, you may need to
buy an “impedance-matching
transformer" (also called a"balun
coil"). It is also available at a
nominal cost from your local TV
and stereo stores.
By attaching aTV/GAME Switch
Box to each television in your
home, you can easily move your
ATARI 7800 ProSystem from room to
room. Extra TV/GAME Switch Boxes
may be purchased separate y.
If Your Television Has aU-Shaped
Slider or aSlide Switch:
A.Move the U-shaped slider to
make connection between the
two screws. Or, push the slide
switch to the side marked "300
ohm" or "300 Q."
B. If you have around antenna
cable:
Disconnect the cable from
your television.
Screw the cable into the
impedance-matching
transformer.
Your TV/Game Switch Box allows
you to change from television
viewing to video game play and
back by simply sliding aswitch.
The switch box is easy to install.
Find the picture that looks the
most like the back of your TV set
and follow those instructions. All
you need is ascrewdriver.
If Your Television Has Four
Screws Only:
A.Disconnect the twin-lead wire
from your television and attach it
to the ANTENNA screw terminals
on the TV/GAME Switch Box.
B. Connect the twin-lead wire
from the TV/GAME Switch Box
to the VHF antenna terminals
on your television set.
Attach the impedance-
matching transformer to the
ANTENNA screw terminals
on the TV/GAME Switch Box.
Or if you have aflat twin-
lead antenna wire:
Disconnect it from the televi-
sion and attach it to the
ANTENNA screw terminals
on the TV/GAME Switch Box.
C. Connect the short twin-lead
wire from the TV/GAME Switch
Box to the VHF antenna ter-
minals on your television set.

Short
Round Cable:
A.Attach the television's short
loose-hanging cable to the
connector next to it on your
television.
B. If you have around antenna
Disconnect the cable from
your television.
Screw the cable into the
impedance-matching
transformer.
Installing the TV/Game
Switch Box
If Your Television Is Connected
to Cable TV:
Disconnect the Cable TV Antenna
from your TV and connect it to
the TV/GAME Switch Box using
the method appropriate to your
application. Once properly con-
can remain in your antenna
Note: Your Cable TV company
may have already supplied you
with an impedance-matching
transformer.
Plug the Game Cable from the
back of your ATARI 7800 Pro-
System into the TV/GAME Switch
Box at the GAME connector.
The TV/GAME Switch Box can re-
main attached to your television
antenna without bothering your
television program reception.
The TV/GAME Switch Box can be
attached permanently to the back
of your television set.
Peel off the protective paper
on the back of the TV/GAME
Switch Box.
Press the exposed sticky sur-
face onto any clear area on
the back of your television,
near the antenna terminals.
VHF
Attach the impedance-
matching transformer to the
ANTENNA screw terminals
on the TV/GAME Switch Box.
Or, if you have aflat twin-
lead antenna wire:
Disconnect it from the tellevi-
sion and attach it to the
screw terminals
on the TV/GAME Switch •ox.
C. Connect the twin-lead wire
from the TV/GAME Switch I
to the VHF antenna terminals
on your television set.
UHF

Setting Up the Console
1.Check the channel selector
switch on the back of the con-
sole to be sure it is set to the
position.
2.Set your television channel
selector to Channel 3. If Chan-
nel 3is broadcasting in your
area, set the television channel
selector switch to Channel 2
and change the channel selector
switch on the console to the •
3.
Plug the Power Adapter cable
jack into the POWER <
at the back of rthe console.
position.
4
.
Plug the Power Adapter into
any convenient 120-volt AC
electrical wall outlet.
Important: Use only the Power
Adapter packed with your ATARI
7800. Use of any other power
supply could damage the console.
5. Attach TV Connector Cable to
console and TV/Game Switch Box.
6. Turn your television set on and
set the volume control to a com-
fortable level.
7. Press the POWER ON/OFF button
on the front left side of the con-
sole to ON. Ared light (LED)
glows when the POWER is ON.
8.
If your television set has an
off and manually fin
e,
pictui
Mevisi
rn it
tuneit re.
owever, if your television set
ot receive color unless the
itic fine-tuning is on.
Note: Always turn the POWER
OFF when the game is not in use.

The ATARI 7800 ProSystem in-
cludes two advanced controllers sure the connection is
designed for comfortable and
responsive gameplay. These con- 'o fire but-
trollers provide eight directions of tons. For most games, the right
and left fire buttons perform the
same functions, and you can use
whichever is most comfortable.
For more realistic play in some
games, however, these buttons
are capable of independent func-
tions. Consult your game manual
for instructions on how to use the
control. Their function for each
game is explained in the manual
for the particular game you are
playing.
Plug the controllers into the jacks
at the front of the console. Use
the left jack for one-player games;
use both jacks for two-player
games. Each jack is designed to fit
particular game you are playing.
1.Turn the power to the console 3. Insert the game cartridge into
the slot at the center of the con-OFF when inserting or remov-
ing acartridge.
2. Hold the game cartridge so the
name on the label faces away
from you and the game title
reads right-side-up.
sole. Be sure the cartridge fits
firmly in the slot but DO NOT
FORCE IT IN.
4. Turn the console POWER ON.
An ATARI logo, playfield or title
screen will appear on your
television set.
Using the 7800 Pro-Line
Controllers
Inserting a
Game Cartridge

To Start Play
After inserting agame cartridge,
turn
view the game title screen and,
with most cartridges, to s
ample of game play. Press any fire
button on the left joystick to start
the game at the current game op-
tion. To change the current game
option while the title screen is up,
push the joystick in the direction in-
dicated below or press SELECT on
your console to display the menu.
While the menu is displayed, push
your joystick in the following direc-
tions to change the game options:
Joystic
Joystick Up: Increase Number of
Joystick Down: Decrease
^ofj Players
Note: This joystick technique ap-
plies to ATARI 7800 ProSystem
games and controllers only. For all
others, consult the manual for
game you are playing.
Or, press
while the menu is displayed to
rotate through the game options.
state
SELECT on the coi
Press the fire button on your con-
troller or press RESET on the con-
sole to start agame with the
During game play, press RESET to
start anew game. Press SELECT to
display the menu
Press PAUSE on the console to
stop all game action. After 15 to
30 minutes, the screen will go
blank to preserve your television.
Press PAUSE again to resume
Some ATARI 2600
t-hfl ICIPT anrl i?J
U1” L_L l I CM lu TVI
switches. When
VCS games use
^FICULTY
difficulty switch
urzuT niFi
jun IL-/fi I
becomes more difficult. Some
ATARI game cartridges use these
two switches for other functions.
Many games don't use them at all.

Returning Your TV Set
to Television Program
Viewing
Press the console POWER
switch OFF.
Change the TV/Game Switch on
the Switch Box to TV.
Turn on the automatic fine-
tuning if you turned if off.
Maintaining Your ATARI
7800 ProSystem
Be careful not to drop the con-
sole, controllers, or game car-
tridges.
Troubleshooting Checklist
Do not expose the console, con-
trollers, or game cartridges to
extreme heat.
3Iter
Your ATARI 7800 ProSystem will
bring you many years of enjoy-
ment. To keep it in good working
condition, please remember the
following:
Always turn the POWER swi
OFF when your ATARI 7800
ProSystem is not in use.
Do not force agame cartridge
into the cartridge slot.
Do not spill liquids on your con-
sole, cartridges, or controllers.
Do not lift your 7800 console or
7800 controllers by the connect-
ing wires. You could bend or
crimp the wires and break the
internal insulation.
the console, controllers, or car-
serviceable parts for your ATARI
Do not use any other power
adapter other than the Power
Adapter packed with your
ATARI 7800 ProSystem. You
could damage the electrical com-
ponents in the console.
'Plug .
from the electrical outlet when
not in use.
iDo not use any TV switch box
other than the
Box packed with your ATARI
7800 ProSystem. You could
damage the electronic com-
The following list is supplied to
du troubleshoot any possi-
ble problems in setting up your
disconnect
the Power Adapter before check-
ing
Symptom
Game picture and playfield are
fuzzy or the sounds are
distorted.
Symptom
ifd image
does not appear on the screen.
Probable Cause and Remedy
-r^vv/r-r, ... •
Game cable not properly plugged
into TV/Game Switch Box.
Power jack not connected to
the console. not i
Probable Cause and Remedy
rectly connected to television
antenna.
TV/Game Switch Box not cor-
rectly connected to television
antenna
iame cartridge not properly
Television set not fine-tuned for
the best picture. Make sure the
automatic fine-tuning is off and
rrtnni I11\ / fir\A f|inofaroKocf
manually iiric-iuric: iui me uc^i
picture. However, if your televi-
the fine-tuning is on, leave it on.
Change console channel selec-
tor switch to •,and change
television channel selector to 2.
Garr
inserted
Power Adapter not plugged
into wall outlet.
Interference on Channel 3.
Change channel selector switch
to •and change television
channel selector to 2
Symptom
sJo regular television program
viewinc
Symptom
ponents in the console.
Clean the exterior surface of the
console with asoft and slightly
damp cloth (use water only).
No game sounds
Probable <
Probable Cause and Remedy
ntenna not co
:ed to TV/Game Switch
irectly
•and Remedy
Turn up the volume on your
7Game Switch Box set to
AME. Change to TV.

UStipisL
engineered to eliminate phosphor
memory or "hurnin" of the
4-
_L -14
playfield and score digits on yOur
television screen. We suggest,
however, these precautions:
mTurn dowrr the contrast of your
television set.
Turn the ATARI 7800 OFF when
not in use.
Compliance with FCC
Regulations
and uses radio .
frequency energy, and if it is not installed
properly, it may cause interference to radio
and television reception. It has been type
tested and found to comply with the limits
for aClass Bcomputing device in accor-
dance with the specifications in Subpart Jof
part f5of fCC Rules, which are designed to
provide reasonable protection against such
interference in aresidential installation. If
this equipment does cause interference to
radio or television reception, which can be
determined by turning the equipment off
and on, try to correct the interference by
one more of the following methods:
To comply with Federal Com-
munications Commission* (FCC)
regulations, and to keep your
ATARI 7800 ProSystem from in-
terfering with television reception
on nearby television sets, please
observe the following:
Do not install alonger antenna
cable from the TV/Game Switch
Box to the antenna connection
on your television set. The
antenna cable supplied with the
TV/Game Switch box is the cor-
rect length that complies with
FCC regulations.
Do not connect the antenna
output cable on your TV/Game
Switch Box directly to any
television antenna or Cable TV
outlet.
Do not attach loose wires to
your television antenna ter-
minals when you are using the
ATARI 7800.
Reorient the receiving antenna.
Relocate the computer with respect to the
receiver:
Plug the computer into adifferent outlet
so that the computer and receiver are on
different branch circuits.
If necessary, consult the dealer or an ex-
perienced radio/television technician for ad-
ditional suggestions. You may find the fol-
lowing booklet prepared by the Federal
Communications Commission helpful: “How
to Identify and Resolve Radio-TV Inter-
ference Problems."
This booklet is available from the U.S.
Government Printing Office, Washington,
D.C. 20402, Stock No. 004-000-00345-4.
Warning: This equipment has been certified
to comply with the limits for aClass Bcom-
puting device, pursuant to Subpart Jof Part
15of FCC Rules. Only peripherals (computer
input/output devices, terminals, printers, etc.)
certified to comply with the Class Blimits may
be attached to this computer. Operation with
non-certified peripherals is likely to result in
interference to radio and TV reception."
If acable is attached to the expansion inter-
face connector, it must be ashielded cable
(Atari part number C025465-0OI) in order to
insure FCC compliance. Use of anon-shielded
cable will void FCC certification.
14
Other manuals for 7800 ProSystem
3
Table of contents
Other Atari Game Console manuals

Atari
Atari 2600 Quick start guide

Atari
Atari CX 5200 Quick start guide

Atari
Atari 5200 User manual

Atari
Atari XE User manual

Atari
Atari 7800 ProSystem User manual

Atari
Atari 5200 User manual

Atari
Atari 5200 User manual

Atari
Atari Video pinball C380 User manual

Atari
Atari FLASHBACK 8 AR3220 User manual

Atari
Atari GAMESTATION PRO User manual