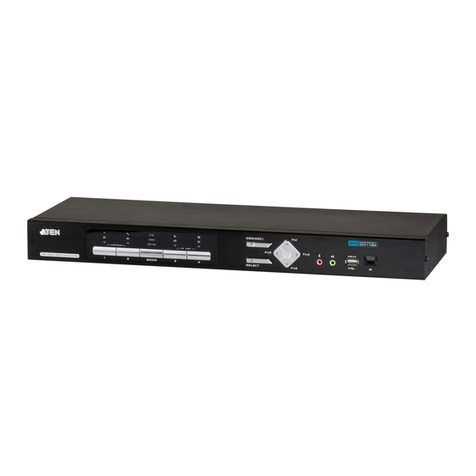
CS62U/CS62US 2-Port USB KVM Switch
Commutateur KVM à câble VGA/audio USB 2 ports CS62U/CS62US
CS62U/CS62US 2-Port-USB-VGA/Audio-Kabel-KVM-Switch
CS62U/CS62US Conmutador KVM con cable VGA/Audio USB de 2 puertos
Requirements
Console
• A VGA, SVGA, or multisync monitor capable of the highest resolution that you will be
using on any computer in the installation
• A USB Keyboard and a USB Mouse
• Speakers (optional)
Computers
The following equipment must be installed on each computer that is to be connected to
the system:
• A VGA, SVGA, or multisync video port
• USB Type A port
• Speaker port (optional)
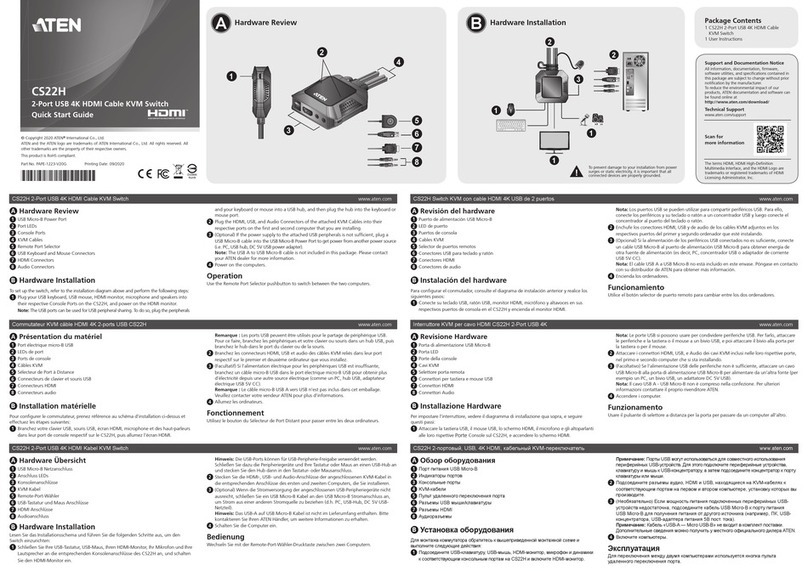
Hardware Review
A
KVM Cable Connectors
B
1. Port LEDs
2. KVM Cables
3. Speaker Jack
4. Console Ports
5. Speaker Plug
6. Video Connector
7. USB Keyboard/Mouse connector
Hardware Installation
C
Important
1. Make sure that the power to any device that you connect to the installation has
been turned off. You must unplug the power cords of any computers that have the
Keyboard Power On function.
2. Make sure that all devices you will be installing are properly grounded.
Setting up the CS62U / CS62US USB KVM Switch is quick and easy. Refer to the
installation diagrams:
1. Plug your USB keyboard, USB mouse, and monitor into their ports on the CS62U /
CS62US. These are located on the side of the CS62U/CS62US.
Conguration minimale
Console
• Un moniteur VGA, SVGA ou Multisync prenant en charge la plus élevée des
résolutions utilisées sur les ordinateurs de l’installation
• Un clavier USB et une souris USB
• Des haut-parleurs (facultatifs)
Ordinateurs
Les composants suivants doivent être installés sur chaque ordinateur à connecter au
système :
• Un port vidéo VGA, SVGA ou Multisync
• Port USB de type A
• Un port pour haut-parleurs (facultatif)
Description de l’appareil
A
Connecteurs de câble KVM
B
1. Voyants des ports
2. Câbles KVM
3. Prise (femelle) de haut-parleurs
4. Ports de console
5. Prise (mâle) de haut-parleurs
6. Connecteur vidéo
7. Connecteur clavier/souris USB
Installation du matériel
C
Important
1. Vériez que tous les périphériques à connecter à l’installation sont éteints. Vous
devez débrancher les cordons d’alimentation des ordinateurs disposant de la
fonction de mise sous tension via clavier.
2. Vériez que tous les périphériques que vous allez installer sont correctement mis à
la terre.
L’installation du commutateur KVM CS62U / CS62US est à la fois rapide et facile.
Reportez-vous aux schémas d’installation :
1. Branchez votre clavier USB, votre souris USB et votre moniteur dans les ports
correspondants du CS62U / CS62US. Ils se situent sur le côté du CS62U/CS62US.
Remarque: Lorsque vous utilisez un ensemble sans l clavier-souris, le dongle doit
être branché dans le port clavier du CS62U / CS62US pour que les
touches de raccourci fonctionnent.
Voraussetzungen
Konsole
• Ein VGA-, SVGA- oder Multisync-Monitor, der in der Lage ist, die höchste Auösung
darzustellen, die Sie auf einem der zu installierenden Computer verwenden möchten
• Eine USB-Tastatur und eine USB-Maus
• Lautsprecher (optional)
Computer
Auf den Computern, die mit dem System verbunden werden sollen, muss mindestens
Folgendes installiert sein:
• Eine VGA-, SVGA- oder Multisync-Grakkarte
• USB-Anschluss Typ A
• Lautsprecherbuchse (optional)
Hardwareübersicht
A
KVM-Kabelanschlüsse
B
1. Port-LEDs
2. KVM-Kabel
3. Lautsprecherbuchse
4. Konsolports
5. Lautsprecherstecker
6. Stecker für Graksignal
7. USB-Tastatur-/Mausstecker
Hardware installieren
C
Wichtig
1. Stellen Sie sicher, dass alle anzuschließenden Geräte ausgeschaltet sind. Bei
Computern, die sich über die Tastatur einschalten lassen, müssen Sie den
Netzstecker ziehen.
2. Stellen Sie sicher, dass alle anzuschließenden Geräte ordnungsgemäß geerdet sind.
Die Installation des CS62U / CS62US KVM-Switchs mit USB ist kinderleicht und schnell
vollzogen. Siehe die Installationsdiagramme:
1. Schließen Sie Ihre USB-Tastatur, USB-Maus und Monitor an die entsprechenden
Buchsen des CS62U / CS62US an. Sie benden sich an der Seite des CS62U/
CS62US.
Hinweis: Bei Verwendung einer drahtlosen Tastatur- und Mauskombination
müssen Sie den USB-Stick an die Tastaturbuchse des CS62U/CS62US
anschließen, damit die Hotkey-Tastenkombinationen funktionieren.
Requisitos
Consola
• Un monitor VGA, SVGA o Multisync capaz de representar la resolución más elevada
que vaya a usar con cualquiera de los ordenadores a instalar
• Un teclado y un ratón USB
• Altavoces (opcional)
Ordenadores
En cada ordenador que vaya a conectar al sistema se tienen que instalar los siguientes
componentes:
• Un puerto gráco VGA, SVGA o Multisync
• Puerto USB de tipo A
• Enchufe para altavoces (opcional)
Presentación del hardware
A
Conectores del cable KVM
B
1. Indicadores LED de los puertos
2. Cables KVM
3. Salida para altavoces
4. Puertos de consola
5. Conector para altavoces
6. Conector gráco
7. Conector USB para teclado/ratón
Instalar el hardware
C
Importante
1. Apague todos los equipos que vaya a conectar. Si alguno de los ordenadores utiliza
la función de Encender a través del teclado, tendrá que desconectar su cable de
alimentación.
2. Asegúrese de que todos los equipos que vaya a instalar tengan una toma de tierra
adecuada.
La instalación del conmutador KVM con USB CS62U / CS62US es rápida y sencilla.
Véanse los diagramas de instalación:
1. Conecte su teclado USB, ratón USB y monitor a los puertos correspondientes del
CS62U / CS62US. Éstos se encuentran en el panel lateral del CS62U / CS62US.
Nota: Si emplea un conjunto de teclado y ratón inalámbricos, su llave USB debe
conectarse al puerto para teclado del CS62U / CS62US para que las teclas de
acceso directo funcionen.
Note: When using a wireless keyboard and mouse combo, the dongle must plug
into the CS62U / CS62US’s keyboard port in order for the hotkeys to function.
2. Plug your speakers into the speaker jack.
3. Plug the USB, video, and audio connectors of the attached KVM cables into their
respective ports on the computers you are installing.
4. Power on the computers.
Note: The CS62U / CS62US’s power on default is to link to the rst computer that is
powered on.
Operation
Port Switching
All port switching operations begin by tapping the Scroll Lock key twice. See the
following table for full details.
Hotkey Action
[Scroll Lock] [Scroll
Lock] Toggles the KVM and Audio focus between the two ports.
Note: If using the Scroll Lock key conicts with other programs running on the
computer, the Ctrl key can be used instead.
Invoking Hotkey Setting Mode (HSM)
All hotkey operations begin by holding the Num Lock key, pressing and releasing
the Minus key, then releasing the Num Lock key. See the the following tables for full
details.
Note: If using [Num Lock] [-] conicts with other programs, [Ctrl] [F12] can be used
instead.
Auto Scanning
Model Hotkey Action
CS62US [Num Lock] [-] [a] Starts Auto Scan. The KVM focus cycles from port
to port at 5-second intervals.
Note: To exit Auto Scan, press [Esc] or [Spacebar]. Auto Scanning stops when you exit
Auto Scan mode.
2. Branchez vos haut-parleurs dans la prise de haut-parleurs.
3. Branchez les connecteurs USB, vidéo et audio des câbles KVM joints dans leurs
ports respectifs sur les ordinateurs devant faire partie de l’installation.
4. Allumez les ordinateurs.
Remarque: Le réglage par défaut du CS62U / CS62US à l’allumage consiste à
établir une liaison avec le premier ordinateur qui est allumé.
Utilisation
Commutation des ports
Toutes les opérations de commutation des ports commencent par une double pression
sur la touche Arrêt dél. Référez-vous au tableau suivant pour connaître tous les
détails.
Raccourci clavier Action
[Arrêt dél] [Arrêt dél] Bascule les contrôles KVM et audio entre les deux ports.
Remarque: Si la touche Arr. dél entre en conit avec d'autres programmes actifs,
utilisez à la place la touche Ctrl.
Activation du mode de raccourcis clavier (HSM)
Pour tous les raccourcis clavier, vous devez commencer par appuyer sur la touche
Verr. Num et la maintenir enfoncée, appuyer sur la touche Moins puis relâcher la
touche Verr. Num. Référez-vous aux tableaux suivants pour connaître tous les détails.
Remarque: Si l’utilisation de la touche [Verr. Num] provoque un conit avec d’autres
programmes, vous pouvez utiliser la combinaison [Ctrl] [F12] à la place.
Commutation automatique
Modèle Raccourci clavier Action
CS62US [Verr. Num] [-] [a] Démarre la recherche automatique. Le contrôle
KVM passe d'un port à l'autre toutes les 5
secondes.
Remarque: Pour quitter le mode Commutation automatique, appuyez sur [Echap]
ou [Barre d'espace]. La commutation automatique s’arrête lorsque vous
quittez le mode commutation automatique.
Sélection de port avec la souris
Double-cliquez simplement sur la molette de votre souris USB pour changer de port.
La fonction de commutation de port avec la souris vous permet de basculer d’un port à
l’autre.
2. Verbinden Sie die Lautsprecher mit der dafür vorgesehenen Buchse.
3. Verbinden Sie die USB-, Grak-, und Audiostecker des mitgelieferten KVM-Kabels
mit den entsprechenden Ports der zu installierenden Computer.
4. Schalten Sie die Computer ein.
Hinweis: Standardmäßig schaltet der CS62U/CS62US auf den ersten Computer
um, der eingeschaltet wird.
Bedienung
Port umschalten
Die Portumschaltungen werden grundsätzlich durch doppeltes Betätigen der Taste
Rollen eingeleitet. Weitere Details entnehmen Sie der folgenden Tabelle.
Hotkey Aktion
[Rollen] [Rollen] Schaltet die KVM-Steuerung und Tonsignalübertragung
zwischen den beiden Anschlüsse um.
Hinweis: Wenn die Taste Rollen mit anderen Programmen in Konikt gerät, können
Sie anstelle dessen auch die Taste Strg verwenden.
Hotkey-Einrichtungsmodus aktivieren (HKM)
Alle Hotkey-Funktionen werden durch Gedrückt-Halten der Taste Num, Drücken und
Loslassen der Taste Minus und Loslassen der Taste Num eingeleitet. Weitere Details
entnehmen Sie den folgenden Tabellen.
Hinweis: Wenn die Tastenkombination [Num] [-] mit anderen Programmen in Konikt
gerät, können Sie anstelle dessen auch [Strg] [F12] verwenden.
Automatische Portumschaltung
Modell Hotkey Aktion
CS62US [Num] [-] [a] Startet die automatische Umschaltung. Die KVM-
Steuerung wird abwechselnd alle 5 Sekunden von
einem Port auf den anderen umgeschaltet.
Hinweis: Um die automatische Portumschaltung zu beenden, drücken Sie die Taste
Esc oder die Leertaste. Die automatische Portumschaltung wird beendet,
sobald Sie diese stoppen.
Portauswahl per Maus
Doppelklicken Sie auf die Rolltaste der USB-Maus, um zwischen den Ports
umzuschalten. Über diese Portumschaltung per Maus können Sie zwischen den Ports
2. Conecte los altavoces a la salida para altavoces.
3. Conecte los conectores USB, monitor y audio de los cables KVM incluidos a los
puertos correspondientes de cada uno de los ordenadores que quiera instalar.
4. Encienda los ordenadores.
Nota: Por defecto, el CS62U / CS62US establece la conexión con el primer
ordenador encendido.
Funcionamiento
Conmutación de puertos
Para efectuar una conmutación de puertos mediante teclas de acceso directo,
primero debe pulsar dos veces la tecla Bloq Despl. Véase la tabla siguiente para más
información.
Teclas de acceso directo Acción
[Bloq Despl] [Bloq Despl] Alterna el control KVM y la transmisión de audio entre
los dos puertos.
Nota: Si la tecla BloqDespl es utilizada por otros programas instalados y crea
conictos, puede emplear la tecla Ctrl en su lugar.
Invocar el modo de teclas de acceso directo
Toda operación relacionada con las teclas de acceso directo se inicia manteniendo
pulsada la tecla Bloq Num, pulsando y soltando la tecla Menos y luego soltando la
tecla Bloq Num. Véanse las tablas siguientes para más información.
Nota: Si la combinación de teclas [Bloq Num] [-] es utilizada por otros programas
instalados y crea conictos, puede emplear [Ctrl] [F12] en su lugar.
Conmutación automática
Modelo Teclas de acceso directo Acción
CS62US [Bloq Num] [-] [a] Inicia la conmutación automática. El control
KVM pasa de un puerto a otro cada 5
segundos.
Nota: Para salir de la conmutación automática, pulse [Esc] o [Espacio]. La
conmutación automática se detiene en cuanto salga del modo de conmutación
automática.
Selección de puertos a través del ratón
Haga simplemente doble clic en el rodillo del ratón USB para cambiar de puerto.
Mouse Port Selection
Simply double-click the scroll wheel on your USB mouse to switch between ports. The
mouse port-switching function allows you to toggle back and forth between the ports.
Note: 1. This feature is only supported by USB 3-key scroll wheel mice.
2. The default setting is OFF.
3. This feature is only supported when mouse emulation is enabled.
Hotkey Summary Table
Combination Function
[Num Lock] [-]
+
[H] Toggles between the default [Num Lock]
[-] and alternate [Ctrl][F12] HSM invocation
keys.
[T] Toggles between the default [Scroll Lock]
[Scroll Lock] and alternate [Ctrl][Ctrl] port
switching keys.
[F2] Activates Mac keyboard mapping.
[F3] Activates Sun keyboard mapping.
[F10] Auto detects keyboard operating platform.
[F4] Lists current switch settings via the paste
function of a text editor.
[F5] Performs a USB keyboard and mouse reset.
[F6] [nn] [Enter]
Sets the keyboard language layout.
Note: nn is a two-digit number that repre-
sents one of the following keyboard
language codes: US English 33;
French 08;Japanese 15.
[R] [Enter] Resets hotkeys to the default setting.
[M] Enables/Disables mouse emulation.
[N] Enables/disables keyboard emulation
[W] Enables/Disable mouse port-switching
[Esc] or [Space Bar] Quits hotkey setting mode.
Note: When keyboard emulation is off, the [m], [w], [F2], [F3], [F10] ,[F4], [F5], and [F6]
hotkeys are disabled. To use the USB mouse port as a USB hub, you must rst
disable mouse emulation mode
Remarque: 1. Cette fonction n’est utilisable qu’avec les souris USB à 3 boutons avec
molette de délement.
2. Le réglage par défaut est Désactivé.
3. Cette fonction n’est prise en charge que si l’émulation de la souris est
activée.
Résumé des raccourcis clavier
Combinaison Fonction
[Verr. Num]
[-] +
[H] Permet de basculer entre le raccourci clavier par
défaut [Verr. Num] [–] et le raccourci alternatif [Ctrl]
[F12] pour l’activation du mode de raccourcis clavier.
[T] Permet de basculer entre le raccourci clavier par
défaut [Arrêt dél] [Arrêt dél] et le raccourci alternatif
[Ctrl] [Ctrl] pour la commutation des ports.
[F2] Active la disposition de clavier Mac.
[F3] Active la disposition de clavier Sun.
[F10] Détecte automatiquement la plateforme de
fonctionnement du clavier.
[F4] Répertorie les paramètres actuels du commutateur par
le biais de la fonction Coller d'un éditeur de texte.
[F5] Réinitialise le clavier et la souris USB.
[F6] [nn]
[Entrée]
Permet de congurer la langue du clavier.
Remarque: nn est un nombre à deux chiffres
représentant l’un des codes de langue du
clavier suivants : Anglais US 33 ; Français
08 ; Japonais 15
[R] [Entrée] Rétablit les valeurs par défaut des raccourcis.
[M] Active/désactive l'émulation de la souris.
[N] Active/désactive l'émulation du clavier.
[Verr. Num]
[-] + [W] Active/désactive la commutation de port avec la souris.
[Echap] ou [Barre d’espace] Quitte le mode de raccourcis clavier.
Remarque: Lorsque l’émulation du clavier est désactivée, les touches de raccourci
[m], [w], [F2], [F3], [F10], [F4], [F5] et [F6] sont désactivées. Pour utiliser le
der Reihe nach vor- und zurückschalten.
Hinweis: 1. Diese Funktion wird nur von 3-Tasten-USB-Mäusen mit Rolltaste
unterstützt.
2. Die Voreinstellung lautet AUS.
3. Diese Funktion wird nur unterstützt, wenn Sie die Mausemulation aktiviert
haben.
Hotkey-Übersichtstabelle
Kombination Funktion
[Num] [- ] +
[H] Schaltet zwischen den vordenierten ([Num] [–]) und
den alternativen Aktivierungstasten ([Strg] [F12]) für den
Hotkey-Modus um.
[T] Schaltet zwischen den vordenierten ([Rollen] [Rollen])
und den alternativen Portumschaltungstasten ([Strg]
[Strg]) um.
[F2] Aktiviert das Macintosh-Tastaturlayout.
[F3] Aktiviert das Sun-Tastaturlayout.
[F10] Erkennt die verwendete Tastatur automatisch.
[F4] Listet die aktuellen Switch-Einstellungen mithilfe der
Einfügen-Funktion in einem Texteditor auf.
[F5] Setzt die USB-Tastatur und –Maus zurück.
[F6] [nn]
[Enter]
Stellt das Tastaturlayout ein.
Hinweis: Dabei stellt nn eine zweistellige Zahl dar,
die für einen der folgenden Sprachcodes der
Tastatur steht: US-Englisch 33, Französisch 03,
Japanisch 15
[R] [Enter] Stellt die Standardeinstellungen für die Hotkeys wieder
her.
[M] Aktiviert bzw. deaktiviert die Mausemulation.
[N] Aktiviert bzw. deaktiviert die Tastaturemulation.
[Num] [- ] + [W] Aktiviert bzw. deaktiviert die Portumschaltung per Maus.
[Esc] oder [Leertaste] Beendet die Hotkey-Einrichtung.
Hinweis: Bei ausgeschalteter Tastaturemulation sind die Hotkeys [m], [w], [F2], [F3],
[F10] ,[F4], [F5] und [F6] deaktiviert. Um den USB Mausanschluss als USB-
La función de conmutación de puertos a través del ratón le permite pasar al puerto
siguiente o anterior.
Nota: 1. Esta característica sólo funciona con ratones USB de 3 teclas que tengan un
rodillo de desplazamiento.
2. El valor predeterminado es DESACTIVADO.
3. Esta opción sólo funciona cuando tenga activada la emulación del teclado.
Sumario de las teclas de acceso directo
Combinación Función
Bloq Num]
[-] +
[H] Alterna entre las teclas de activación predeterminadas
([Bloq Num] [–]) y las alternativas ([Ctrl] [F12]) para el
modo de teclas de acceso directo.
[T] Alterna entre las teclas de activación predeterminadas
[Bloq Despl] [Bloq Despl] y las alternativas [Ctrl] [F12]
para la conmutación de puertos.
[F2] Activa la distribución de teclado Macintosh.
[F3] Activa la distribución de teclado Sun.
[F10] Detecta el tipo de teclado automáticamente.
[F4] Muestra los ajustes actuales del conmutador a través de
la función Pegar en un editor de textos.
[F5] Reinicia el teclado y el ratón USB.
[F6] [nn]
[Intro]
Establece la disposición del idioma de teclado.
Nota: nn es un número de dos dígitos que representa uno
de los códigos de idioma del teclado siguientes:
Inglés americano 33; francés 08; japonés 15.
[R] [Intro] Restablece los valores predeterminados para las teclas
de acceso directo.
[M] Activa/desactiva la emulación del ratón.
[N] Activa/desactiva la emulación de teclado.
Bloq Num]
[-] + [W] Activa/desactiva la conmutación de puertos por medio del
ratón.
[Esc] o [Espacio] Sale del modo de teclas de acceso directo
Specications
Function CS62U CS62US
Computer Connections 2
Port Selection Hotkeys, Mouse
Connectors
Console
Ports
Keyboard 1 x USB Type A Female (White)
Video 1 x HDB-15 Female (Blue)
Mouse 1 x USB Type A Female (White)
Speakers 1 x Mini Stereo Jack Female (Green)
KVM
Ports
Keyboard /
Mouse 2 x USB Type A Male (Black)
Video 2 x HDB-15 Male (Blue)
Speakers 2 x Mini Stereo Plug Male (Green)
LEDs Selected 2 (Green)
Cable
Length Computers 1.8 m (6ft) 0.9 m (3ft)
Emulation Keyboard / Mouse USB
Video 2048 x 1536; DDC2B
Scan Interval 5 seconds
Environment
Operating Temp. 0–50ºC
Storage Temp. -20–60ºC
Humidity 0–80% RH, Non-condensing
Physical
Properties
Housing Plastic
Weight 0.40 kg 0.29 kg
Dimensions
(L x W x H) 8.10 x 6.90 x 2.60 cm
port souris USB en guise de concentrateur USB, vous devez tout d’abord
désactiver le mode d’émulation de souris.
Caractéristiques techniques
Fonction CS62U CS62US
Connexions à l'ordinateur 2
Sélection des ports Raccourcis clavier, souris
Connecteurs
Ports de
console
Clavier 1 connecteur USB femelle de Type A
(blanc)
Vidéo 1 connecteur HDB-15 femelle (bleu)
Souris 1 connecteur USB femelle de Type A
(blanc)
Haut-parleurs 1 mini-connecteur stéréo femelle (vert)
Ports
KVM
Clavier /
Souris 2 connecteurs USB mâles de type A
(noirs)
Vidéo 2 connecteurs HDB-15 mâles (bleus)
Haut-parleurs 2 mini-connecteurs stéréo mâles (vert)
Voyants Port sélectionné 2 voyants (vert)
Longueur de
câble Ordinateurs 1,8 m 0,9 m
Émulation Clavier / Souris USB
Vidéo 2048 x 1536 ; DDC2B
Intervalle de recherche 5 secondes
Environnement
Température de
fonctionnement 0 à 50 ºC
Température de
stockage -20 à 60 ºC
Humidité Humidité relative de 0 à 80 %, sans
condensation
Propriétés
physiques
Boîtier Plastique
Poids 0,40 kg 0,29 kg
Dimensions
(Long x Larg x Haut) 8,10 x 6,90 x 2,60 cm
Hub verwenden zu können, müssen Sie die Mausemulation deaktivieren.
Technische Daten
Funktion CS62U CS62US
Computeranschlüsse 2
Portauswahl Hotkeys, Maus
Anschlüsse
Konsolports
Tastatur 1 x USB Typ A Weiblein (weiß)
Grak 1 x HDB-15 Weiblein (blau)
Maus 1 x USB Typ A Weiblein (weiß)
Lautsprecher 1 x Mini-Stereo-Buchse, Weiblein (grün)
KVM-Ports
Tastatur/
Maus 2 x USB Typ A Männlein (schwarz)
Grak 2 x HDB-15 Männlein (blau)
Lautsprecher 2 x Mini-Stereo-Stecker, Männlein
(grün)
LED-Anzeigen Ausgewählt 2 (grün)
Kabellänge Computer 1,8 m 0,9 m
Emulation Tastatur/Maus USB
Grak 2048 x 1536; DDC2B
Umschaltintervall 5 Sekunden
Umgebung
Betriebstemperatur 0 – 50 ºC
Lagertemperatur -20 – 60 ºC
Feuchtigkeit 0 -80% rel. Luftfeuchte, nicht
kondensierend
Physische
Eigenschaften
Gehäuse Kunststoff
Gewicht 0,40 kg 0,29 kg
Abmessungen (L x B x H) 8,10 x 6,90 x 2,60 cm
Nota: Con la emulación de teclado desactivada, las teclas de acceso directo [m], [w],
[F2], [F3], [F10] ,[F4], [F5] y [F6] también quedan desactivadas. Para poder
utilizar el puerto USB para ratón como concentrador USB, tendrá que desactivar
el modo de emulación del ratón.
Especicaciones
Función CS62U CS62US
Conexiones al ordenador 2
Selección de puertos Teclas de acceso directo, ratón
Conectores
Puertos
de
consola
Teclado 1 conector USB hembra de tipo A (blanco)
Señal gráca 1 conector HDB-15 hembra (azul)
Ratón 1 conector USB hembra de tipo A (blanco)
Altavoces 1 conector mini estéreo hembra (verde)
Puertos
KVM
Teclado /
Ratón 2 conectores USB macho de tipo A (negros)
Señal gráca 2 conectores HDB-15 macho (azul)
Altavoces 2 conectores mini estéreo macho (verde)
Indicadores
LED Puerto seleccionado 2 (verde)
Longitud del
cable Ordenadores 1,8 m 0,9 m
Emulación Teclado / Ratón USB
Señal gráca 2048 x 1536; DDC2B
Intervalo de conmutación 5 segundos
Entorno
Temperatura de
funcionamiento 0 a 50 ºC
Temperatura de
almacenamiento -20 a 60 ºC
Humedad 0 a 80% de HR, sin condensar
Propiedades
físicas
Carcasa Plástico
Peso 0,40 kg 0,29 kg
Dimensiones (L x An x Al) 8,10 x 6,90 x 2,60 cm
Hardware Installation
C
© Copyright 2018 ATEN®International Co., Ltd.
ATEN and the ATEN logo are trademarks of ATEN International Co., Ltd. All rights reserved. All
other trademarks are the property of their respective owners.
Part No. PAPE-1285-E04G Printing Date: 11/2018
2-Port USB KVM Switch
Quick Start Guide
CS62U/CS62US
Support and Documentation Notice
All information, documentation, firmware,
software utilities, and specifications
contained in this package are subject to
change without prior notification by
the manufacturer.
To reduce the environmental impact of our
products, ATEN documentation and software
can be found online at
http://www.aten.com/download/
Technical Support
www.aten.com/support
EMC Information
FEDERAL COMMUNICATIONS COMMISSION INTERFERENCE STATEMENT:
This equipment has been tested and found to comply with the limits for
a Class B digital service, pursuant to Part 15 of the FCC rules. These limits
are designed to provide reasonable protection against harmful interference
in a residential installation. Any changes or modifications made to this
equipment may void the user s authority to operate this equipment. This
equipment generates, uses, and can radiate radio frequency energy. If not
installed and used in accordance with the instructions, may cause harmful
interference to radio communications. However, there is no guarantee that
interference will not occur in a particular installation. If this equipment does
cause harmful interference to radio or television reception, which can be
determined by turning the equipment off and on, the user is encouraged to
try to correct the interference by one or more of the following measures:
- Reorient or relocate the receiving antenna;
- Increase the separation between the equipment and receiver;
- Connect the equipment into an outlet on a circuit different from
that to which the receiver is connected;
- Consult the dealer/an experienced radio/television technician for help.
FCC Caution: Any changes or modifications not expressly approved by the
party responsible for compliance could void the user's authority to operate
this equipment.
This device complies with Part 15 of the FCC Rules. Operation is subject
to the following two conditions: (1) this device may not cause harmful
interference, and (2) this device must accept any interference received,
including interference that may cause undesired operation.
Scan for
more information
1
2
3
4
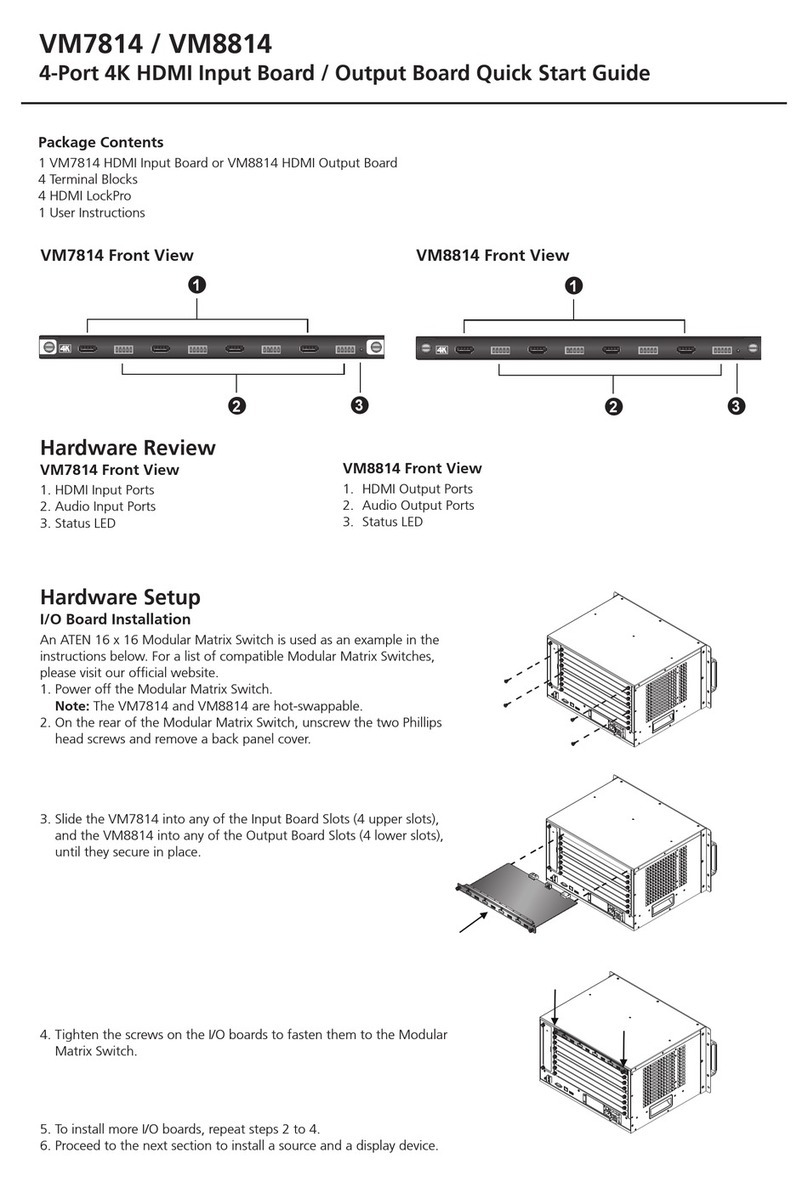
Package Contents
1 CS62U/CS62US 2-Port USB KVM Switch
2 Hotkey Stickers
1 User Instructions
www.aten.com
www.aten.com
www.aten.com
www.aten.com
Hardware Review
A
KVM Cable Connectors
B
1
2
3
12
3
3
3
5
6
7
4
