Installing the ATI-TV Wonder Tuner Card 7
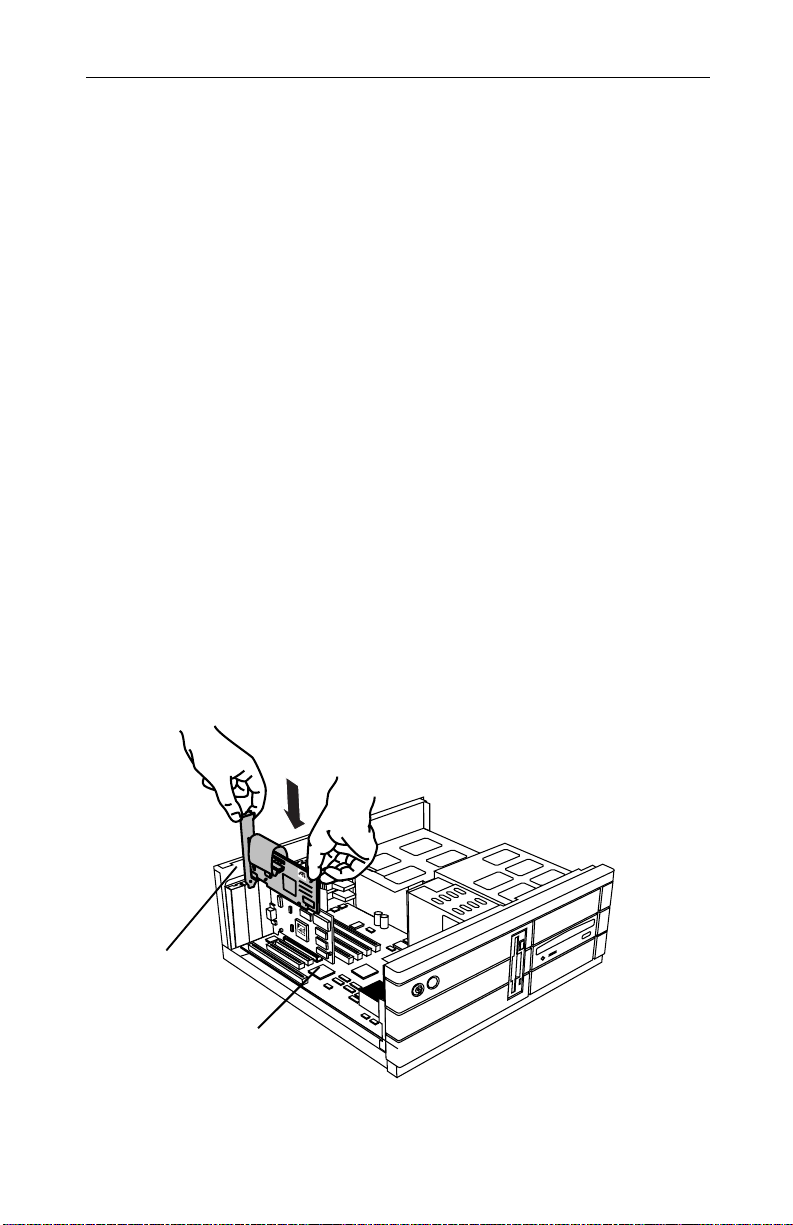
Installing the ATI-TV Wonder Tuner
Card
Please read these important safety instructions before you
proceed with the installation of your ATI-TV Wonder
tuner card.
Static electricity can damage sensitive electronic components.
Discharge your body’s static electric charge by touching a grounded
surface — for example, the metal area of the computer chassis —
before performing any hardware procedure.
The manufacturer assumes no liability for any damage caused by
improper installation of any components by unauthorized service
personnel. If you do not feel comfortable performing the installation,
consult a qualified computer technician.
Damage to system components, the accelerator card, and injury to
yourself may result if power is applied during installation.
Important Safety Instructions
•GROUNDING – CAUTION: FOR CONTINUED PROTECTION AGAINST RISK OF
ELECTRIC SHOCK AND FIRE, THE ATI-TV Wonder TUNER CARD SHOULD BE
INSTALLED ONLY IN PERSONAL COMPUTERS EQUIPPED WITH ATHREE-WIRE
GROUNDING PLUG—APLUG HAVING ATHIRD (GROUNDING) PIN. If you are
unable to insert the plug into the outlet, contact your electrician to replace
your obsolete outlet.
•OUTDOOR ANTENNA GROUNDING – Since an outdoor antenna or cable
system is connected to the product, be sure that the antenna or cable system
is grounded so as to provide some protection against voltage surges and
built-up static charges. Article 810 of the National Electrical Code,
ANSI/NFPA 70, provides information with regard to proper grounding of the
mast and supporting structure, grounding of the lead-in wire to the antenna
discharge unit, size of grounding conductors, location of antenna-discharge
unit, connection of grounding electrodes, and requirements for the grounding
electrode.
•POWER LINES – An outside antenna system should not be located in the
vicinity of overhead power lines or other light or power circuits, or where it
can fall into such power lines or circuits. When installing an outside antenna
system, extreme care should be taken to keep from touching such power
lines or circuits as contact with them may be fatal.
01WonderGS.fm Page 7 Friday, January 22, 1999 4:34 PM