3. To end the phone call, press the
active line key, press [SPEAKER],
or return the handset to its cradle.
Reviewing one-touch memory
1. Press and hold a one-touch memory
key (eg. [M1]). The display will
show the name and number stored
in that location.
Note: Be careful. Releasing the
button too soon will dial the number.
2. If you wish to dial the number,
either press the same memory key
again, press [DIAL/ENTER], press
[Handsfree], or press an
available line key, or pick up the
handset. The phone will connect
the line and dial out the number.
Editing a Speed Dial Number
1. During one-touch memory or
directorymemoryreview,press[Edit]
The LCD will show “EDIT NUMBER”
and then the current number is
displayed.
2. Press [▼] or [DELETE] to remove
an incorrect digit.
3. Use the dial pad to enter the new
number(s). Press [Store] or [DIAL
ENTER] when you are satisfied with
the number you are editing.
4. The LCD will say “EDIT NAME” and
then the current name is displayed.
5. Press [▼] or [DELETE] to remove
an incorrect letter. Press [▲] to
move the cursor right.
6. Use the dial pad to enter the new
letter(s). Press [SAVE] or [DIAL/
ENTER] when you are satisfied with
the name you are editing.
Cloning a Speed Dial Number
1. During one-touch or directory
memory review, press [SAVE]. The
display will show “SAVE TO?”
2. Press either a one-touch memory
location (eg. [M1]) or [DIR], which
ever place you wish to store the
number. Note: One-touch memory
locations accept duplicate phone
numbers, but the directory does not.
Erasing Speed Dial Numbers
1. During one-touch or directory
memory review, press [DELETE].
The LCD will display “ERASE
THIS ITEM?”. ERASE THIS ITEM?
2. Press [DELETE] to confirm. “ITEM
IS ERASED” is displayed. This
speed dial location is now available
to store a new number.
Note: Entries can only be deleted
individually. Group delete is not
available.
16
When the telephone is not in use, the
LCD displays the number of new calls
received, if any.
If a line is put on hold (eg. Line 1), the
display shows the line number and its
status.
When the telephone is not in use, if a
line is being used by another phone, the
display shows the line number and its
status.
When the telephone is not in use, if a
line is ringing, the display shows the line
number and its status.
When a line on this phone is in use, the
LCD display will show momentarily the
line currently in use and which device
(handset, speaker, or headset) is being
used.
If more than one event is valid, the display will scroll between the messages
9
LCD Displays
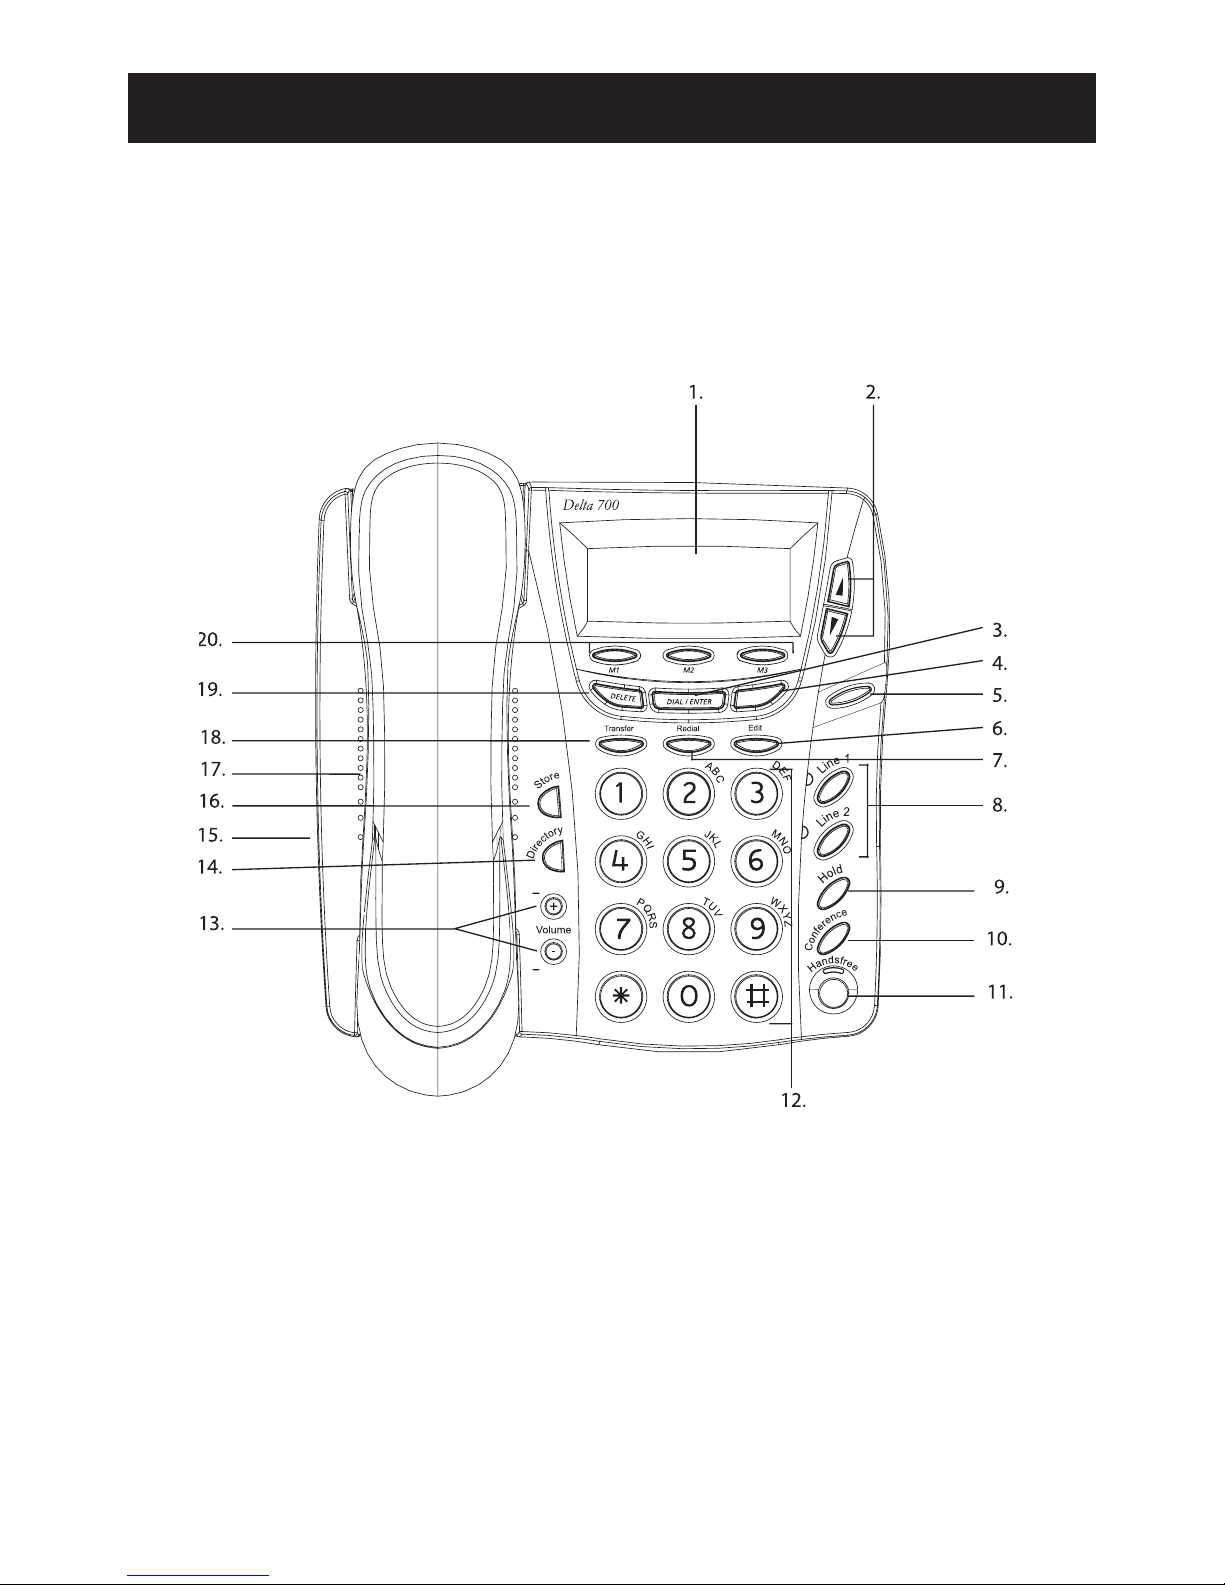
LOCATIONS OF CONTROLS AND FEATURES
SPEED DIAL