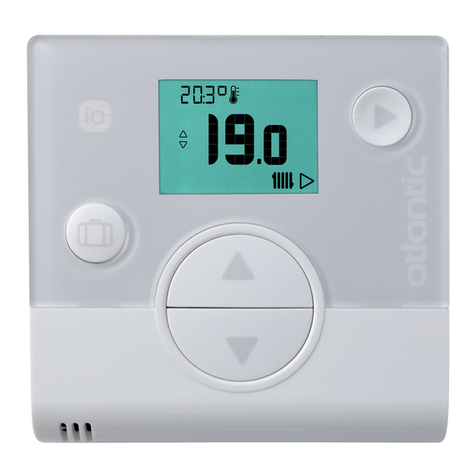
Atlantic Navilink A75 Quick start guide

U0611728_1847_EN_3
12/04/2019
Intended for professionals.
To be kept by the user for future reference
EN
MENU
15:23
12°
19,0°
21,5
ECO
OFF
INSTALLATION & USE
Navilink A75
Navilink A78
Intelligent Room Temperature Controller

Table of Contents
Description of the equipment 3
Display Description.............4
User Interface .................6
Navigating the Menus...........6
Modifying Settings .............7
Assembly and Connection 8
Installation. . . . . . . . . . . . . . . . . . . . 8
Opening the sensor ............9
Navilink A78 ..................9
Navilink A75 .................10
Attaching to a wall. . . . . . . . . . . . . 11
Initial commissioning 12
Room sensor pairing basics .....12 Pairing a sensor with a HP ......14
Manual mode 16
Exemption from timer program ...16
Cancelling an exemption from timer
program ....................18
Forced Domestic Hot Water
operation (Boost) .............19
Holiday 20
Programming holiday mode .....20 Viewing, modifying and cancelling
the next holiday period .........21
Active functions 22
Creating a timer program .......24 Deleting a Comfort period.......25
Energy consumption 26
Setting temperatures 23
Timer programming 24
Oil consumption 26
Settings 27
Language................27
Zone names .................27
Connections .................28
Signal quality ................30
Energy costs.................31
Software version..............31
Temperature correction.........31
Menu Structure 32

Navilink A75 / A78 / Installation & Use / 1847- EN 3
150
80
60
40
Ø60
Ø3.1
2310
150
80 2310
Description of the equipment
Frequency: 868 MHz. Radiofrequency output: 5mW maximum.
■Navilink A78
■Navilink A75

Navilink A75 / A78 / Installation & Use / 1847- EN
4
15:23
12°
19,0°
19.5
ECO
19,0°
21.5
ECO
OFF
Zone 1 Zone 2
7 September 2017
1
6
10
3
4
9
5
2
7
10
8
N° Symbols Denitions
115:23 Time
27 September 2017 Date
3
21.5
Temperature measured by the room sensor
4
19,0°
Room temperature setpoint
5Information (zone names, emergency mode, test mode, error display, etc.)
6Domestic Hot Water (DHW)*:
Activated
Boosting in progress
Deactivated
7Temperature measured by the outside sensor
►
Display Description
Some settings (or menus) might not be displayed. They are dependent on the installation's conguration (and installed options).

Navilink A75 / A78 / Installation & Use / 1847- EN 5
N° Symbols Denitions
8Operation
Heating
Cooling*
9Mode
Comfort
Manual (exemption)
ECO
Absence
Floor drying
Stop (except frost)
10 Production via ...
Heat Pump
Electrical backup*
HP + electrical backup*
HP + Fuel/Gas*
Fuel/Gas*
Some settings (or menus) might not be displayed. They are dependent on the installation's conguration (and installed options).

Navilink A75 / A78 / Installation & Use / 1847- EN
6
►
Navigating the Menus
To ... Action:
Access the menu Press MENU
Choose a menu item Turn the knob to highlight your choice.
Press the knob to accept.
Return to the previous menu Press
Return to the main menu Press MENU twice
Return to the welcome screen Press MENU or on the main menu
Some settings (or menus) might not be displayed.
They are dependent on the installation's conguration (and installed options).
MENU
N° Description
1Menu button
2Navigation knob
/ Accept button
3Back button
1
2
3
►
User Interface

Navilink A75 / A78 / Installation & Use / 1847- EN 7
►
Modifying Settings
• Turn the knob to highlight the setting you wish to change.
• Press the knob to accept the change.
• Turn the knob to adjust the setting.
• Press the knob to accept your choice.
MENU
MENU
Holiday
Active functions
Setting temperatures
Timer programming
Energy consumption
Settings
Manual mode
Some settings (or menus) might not be displayed. They are dependent on the installation's conguration (and installed options).

Navilink A75 / A78 / Installation & Use / 1847- EN
8
Assembly and Connection
►
Installation
The sensor must be installed in the living room area on an unobstructed wall. It must
be installed so as to be easily accessible. Choose a location with the fewest possible
obstacles to good transmission. Comply with the following points:
• Avoid proximity to electrical cables, strong magnetic elds or devices such as
computers, televisions or microwave ovens, etc.
• Avoid any zones of interference caused by large metallic objects or buildings containing
ne metallic mesh or reinforcing (e.g. glass or special concrete).
• The distance between the transmitter and the receiver must not exceed 30 m or
2 storeys.
• Do not install the appliance inside a metal casing (e.g. heat pump).
• Avoid direct sources of heat (chimney, television, cooking surfaces, sun)
and draughty areas (ventilation, door, etc.).
ClémentTAVERNIER
NoticesAtlantic
B : 20 cm miniA : 10 cm C : 150 cm
C
B
A
min.

Navilink A75 / A78 / Installation & Use / 1847- EN 9
►
Opening the sensor
►
Navilink A78
2 AA LR6 batteries (supplied).
Maintain polarity.
The batteries risk being prematurely degraded if the
generator is powered down.

Navilink A75 / A78 / Installation & Use / 1847- EN
10
►
Navilink A75
Power supply 0V - 12V.
Types of cables to use:
- rigid 0.5 - 1.5 mm2
- or exible 0.5 - 0.75 mm2with rigid ends.
■Cable connection
• Bare the end of the wires to around 10 mm.
• Insert the cable ends into the connection terminals.

Navilink A75 / A78 / Installation & Use / 1847- EN 11
►
Attaching to a wall
■Navilink A78, with battery
Ax the sensor bracket to the wall with a screw (not supplied) and plugs suited to your
type of wall, or using a mounting box.
■Navilink A75, cabled
Ax the sensor bracket using a mounting box.

Navilink A75 / A78 / Installation & Use / 1847- EN 13
MENU MENU
■HP 2 room sensors
1.Pair the 1st sensor with the HP
(see “Pairing a sensor with a HP”, page 14).
2.Pair the 2nd sensor with the 1st sensor
(see “Connections”, page 28).
3.Pair the sensor(s) with the CozyTouch (option)
(see “Pairing with a CozyTouch”, page 28).
To pair two devices,
both must be in pairing mode
1 2
3

Navilink A75 / A78 / Installation & Use / 1847- EN
14
►
Pairing a sensor with a HP
When the power is switched on, the "Easy Start" quick start function allows you to set
the appliance's initial settings.
Turn the knob to choose the language.
Settings
Language
French
Select "Pairing with a generator"
Settings
Connections
Pairing with a generator
Pairing with a Navilink
Setpoint settings
On the heat pump,
start the pairing procedure.
Please refer to the appliance's installation
instructions.
Select the sensor's zone number.
Choice of zone
Choose the zone:
Zone 1
Some settings (or menus) might not be displayed. They are dependent on the installation's conguration (and installed options).

Navilink A75 / A78 / Installation & Use / 1847- EN 15
■If the installation is tted with a single sensor,
select "No".
WiFi connection
Pairing with a second Navilink
Yes
■If the installation is tted with a second sensor,
select "Yes".
Start the pairing procedure on the 2nd sensor.
Please refer to the appliance's installation
instructions.
Select the sensor's zone number.
The welcome screen is displayed
(depending on installed options).
15:23
12°
19,0°
19.5
ECO
19,0°
21.5
ECO
OFF
Zone 1 Zone 2
7 September 2017
Some settings (or menus) might not be displayed. They are dependent on the installation's conguration (and installed options).

Navilink A75 / A78 / Installation & Use / 1847- EN
16
Manual mode
►
Exemption from timer program
When a timer program is active (advanced menu), an exemption allows you to force the
appliance into operation ("Heating" or "Cooling") at the desired temperature for a certain
duration.
■From the welcome screen
Select the zone using the knob
(the selected zone's circle is thicker).
15:23
12°
19,0°
--,-
ECO
19,0°
--,-
ECO
OFF
7 September 2017
Set the required temperature,
then the duration of the exemption.
21,5°
Zone 1
for a period of: 10h
Some settings (or menus) might not be displayed. They are dependent on the installation's conguration (and installed options).

Navilink A75 / A78 / Installation & Use / 1847- EN 17
■From the menu
Choose the zone from the menu:
"Manual mode".
Manual mode
Zone 1
Zone 2
Hot water
Set the required temperature,
then the duration of the exemption.
21,5°
Zone 1
for a period of: 10h
Some settings (or menus) might not be displayed. They are dependent on the installation's conguration (and installed options).

Navilink A75 / A78 / Installation & Use / 1847- EN
18
►
Cancelling an exemption from timer program
■Cancelling an exemption with 1 heating zone
From the welcome screen, select:
"Stop exemption".
15:23
12°
24,0°
--,-
OFF
7 September 2017
for a period of: 9 hrs 55 mins
Stop exemption
■Cancelling an exemption with 2 heating zones
Choose the zone from the menu:
"Manual mode".
Press the knob to cancel the exemption.
21,5°
Zone 1
for a period of: 10h
Exemption active
Stop exemption
Some settings (or menus) might not be displayed. They are dependent on the installation's conguration (and installed options).

Navilink A75 / A78 / Installation & Use / 1847- EN 19
►
Forced Domestic Hot Water operation (Boost)
The Domestic Hot Water (DHW) boost function heats the tank up to the Comfort
temperature.
Go to the menu:
"Manual mode" > "Hot water".
Press the knob to activate the "BOOST" function.
• When hot water is required, the heat pump adapts
its priority to meet the request.
• No heating is produced during the preparation of
domestic hot water.
Hot water
The BOOST function enables
full heating
of the hot water tank
BOOST
The BOOST function stops automatically
when the reserve of hot water is renewed
Some settings (or menus) might not be displayed. They are dependent on the installation's conguration (and installed options).

Navilink A75 / A78 / Installation & Use / 1847- EN
20
Holiday
In the event of a prolonged absence, you can set a period in which the heating operates
at a reduced temperature (except for frost) and the production of domestic hot water
(DHW) is stopped.
►
Programming holiday mode
Set the holiday start and end dates and accept.
- To return to the previous setting (e.g. from month to day),
press the button.
End date:
03 August
Accept
The holiday period will start at 00:00 on the
start date and end at 00:00 on the end date
Holiday
Start date:
19 July
Set the temperature for the dwelling during the holiday.
Holiday
8°
Hot water is stopped
Temperature for the dwelling
during the holiday:
Some settings (or menus) might not be displayed. They are dependent on the installation's conguration (and installed options).
This manual suits for next models
1
Table of contents
Other Atlantic Temperature Controllers manuals
Popular Temperature Controllers manuals by other brands

Zamel
Zamel exta RTM-02 instruction manual

Phoenix
Phoenix DryTAG RH quick start guide

Winext
Winext AN-303 user manual

United Electric Controls
United Electric Controls 800 Installation and maintenance instructions

Kovan
Kovan Room temperature controllerwith weekly... user manual

IFM Electronic
IFM Electronic efector 600 TN21 Series operating instructions