manuals.online logo
Brands
  1. Home
  2. •
  3. Brands
  4. •
  5. Atmel
  6. •
  7. Microcontroller
  8. •
  9. Atmel ARIS+ AT88SC-ADK2 User manual

Atmel ARIS+ AT88SC-ADK2 User manual

Other Atmel Microcontroller manuals

Atmel AVR32 STK1000 User manual

Atmel

Atmel AVR32 STK1000 User manual

Atmel ATmega48PV User manual

Atmel

Atmel ATmega48PV User manual

Atmel ATmega168PB Xplained Mini User manual

Atmel

Atmel ATmega168PB Xplained Mini User manual

Atmel AT43DK325 User manual

Atmel

Atmel AT43DK325 User manual

Atmel 80C51 Installation and operating instructions

Atmel

Atmel 80C51 Installation and operating instructions

Atmel SMART ATSAMC21MOTOR User manual

Atmel

Atmel SMART ATSAMC21MOTOR User manual

Atmel AT88CK109STK3 Installation manual

Atmel

Atmel AT88CK109STK3 Installation manual

Atmel AT01607 Installation and operating instructions

Atmel

Atmel AT01607 Installation and operating instructions

Atmel AT89C52 User manual

Atmel

Atmel AT89C52 User manual

Atmel QT600 User manual

Atmel

Atmel QT600 User manual

Atmel AVR2131 User manual

Atmel

Atmel AVR2131 User manual

Atmel ATmega48A User manual

Atmel

Atmel ATmega48A User manual

Atmel SAM4N Xplained Pro User manual

Atmel

Atmel SAM4N Xplained Pro User manual

Atmel AT43DK370 User manual

Atmel

Atmel AT43DK370 User manual

Atmel AT91 Series User manual

Atmel

Atmel AT91 Series User manual

Atmel AT89STK-09 User manual

Atmel

Atmel AT89STK-09 User manual

Atmel AVR4901 Installation and operating instructions

Atmel

Atmel AVR4901 Installation and operating instructions

Atmel AVR042 Installation and operating instructions

Atmel

Atmel AVR042 Installation and operating instructions

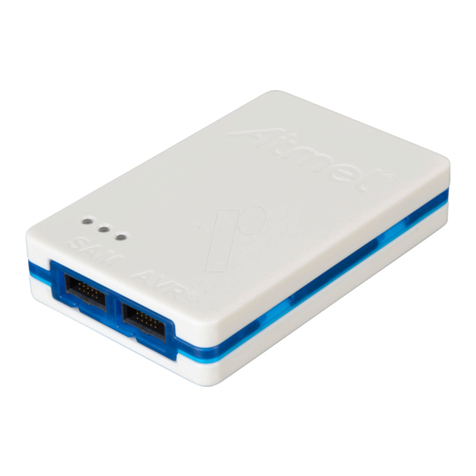
Atmel Atmel-ICE User manual

Atmel

Atmel Atmel-ICE User manual

Atmel AVR ATtiny22 Instruction Manual

Atmel

Atmel AVR ATtiny22 Instruction Manual

Atmel STK520 User manual

Atmel

Atmel STK520 User manual

Atmel AVR2054 User manual

Atmel

Atmel AVR2054 User manual

Atmel AT90USB162 User manual

Atmel

Atmel AT90USB162 User manual

Atmel ATmega324PB User manual

Atmel

Atmel ATmega324PB User manual

Popular Microcontroller manuals by other brands

Microsemi IGLOO nano Starter Kit user guide

Microsemi

Microsemi IGLOO nano Starter Kit user guide

GOWIN DK START GW1NSR-LV4CQN48PC7I6 V 1.1 user guide

GOWIN

GOWIN DK START GW1NSR-LV4CQN48PC7I6 V 1.1 user guide

HETRONIC ERGO-S Service manual

HETRONIC

HETRONIC ERGO-S Service manual

Laird BL654PA user guide

Laird

Laird BL654PA user guide

Novatek NT6861 manual

Novatek

Novatek NT6861 manual

Lantronix Intrinsyc Open-Q 865XR SOM user guide

Lantronix

Lantronix Intrinsyc Open-Q 865XR SOM user guide

Nuvoton ISD61S00 ChipCorder Design guide

Nuvoton

Nuvoton ISD61S00 ChipCorder Design guide

STMicrolectronics ST7 Assembler Linker user manual

STMicrolectronics

STMicrolectronics ST7 Assembler Linker user manual

Texas Instruments Chipcon CC2420DK user manual

Texas Instruments

Texas Instruments Chipcon CC2420DK user manual

NEC 78GK0S/K 1+ Series Application note

NEC

NEC 78GK0S/K 1+ Series Application note

Mikroe SEMITECH N-PLC Click Application note

Mikroe

Mikroe SEMITECH N-PLC Click Application note

Intel Agilex user guide

Intel

Intel Agilex user guide

DIGITAL-LOGIC MICROSPACE manual

DIGITAL-LOGIC

DIGITAL-LOGIC MICROSPACE manual

Texas Instruments TMS320F2837 D Series Workshop Guide and Lab Manual

Texas Instruments

Texas Instruments TMS320F2837 D Series Workshop Guide and Lab Manual

CYPRES CY14NVSRAMKIT-001 user guide

CYPRES

CYPRES CY14NVSRAMKIT-001 user guide

Espressif Systems ESP8266EX Programming guide

Espressif Systems

Espressif Systems ESP8266EX Programming guide

Abov AC33M8128L user manual

Abov

Abov AC33M8128L user manual

Silicon Laboratories C8051F800 user guide

Silicon Laboratories

Silicon Laboratories C8051F800 user guide

manuals.online logo
manuals.online logoBrands
  • About & Mission
  • Contact us
  • Privacy Policy
  • Terms and Conditions

Copyright 2025 Manuals.Online. All Rights Reserved.

8550B-SMEM-02/09
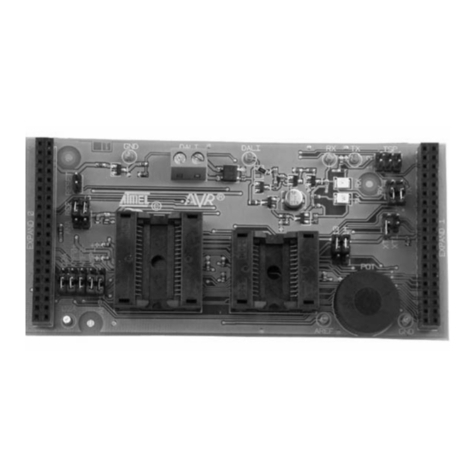
ARIS+ microcontroller onboard
WELCOME AND QUICK START GUIDE
Dear Valued Customer,
Thank you for choosing Aris+, a complete kit, with demonstration and evaluation
capabilities, for development of your applications using CryptoMemory®and
CryptoCompanion™ chips. Designed with developers in mind, Aris+ offers ample
development resources to include a large-memory AT90USB AVR microcontroller,
rich debug capabilities with JTAG-ICE and ISP programming ports, high-level API
development library, and convenient connectivity through USB. Aris+ features 4
LEDs for debug feedback, pushbuttons for AVR reset, CryptoCompanion reset, and
a Hardware Boot function for programming the AVR. The kit includes the Crypto
Evaluation Studio which provides a product demonstration.
CryptoMemory offers easy to deploy powerful security for product authentication and
confidential data storage. CryptoCompanion securely manages host resources by
implementing accompanying host algorithms in hardware and storing host keys.
We wish you a fulfilling experience working with Aris+.
Your Atmel Embedded Crypto Solutions Team
Troubleshooting
1. Check for proper orientation of CryptoMemory and CryptoCompanion chips in
their respective sockets.
2. Make sure to connect Aris+ board to a high-powered USB port.
Ordering Code
n AT88SC-ADK2
© 2009 Atmel Corporation. All rights reserved. Atmel®, logo and combinations thereof, CryptoMemory®, CryptoCompanion™
and others are registered trademarks or trademarks of Atmel Corporation or its subsidiaries. Other terms and product names may
be trademarks of others.
Disclaimer: The information in this document is provided in connection with Atmel products. No license, express or implied, by
estoppel or otherwise, to any intellectual property right is granted by this document or in connection with the sale of Atmel products.
EXCEPT AS SET FORTH IN ATMEL’S TERMS AND CONDITIONS OF SALE LOCATED ON ATMEL’S WEB SITE, ATMEL
ASSUMES NO LIABILITY WHATSOEVER AND DISCLAIMS ANY EXPRESS, IMPLIED OR STATUTORY WARRANTY RELATING
TO ITS PRODUCTS INCLUDING, BUT NOT LIMITED TO, THE IMPLIED WARRANTY OF MERCHANTABILITY, FITNESS FOR A
PARTICULAR PURPOSE, OR NON-INFRINGEMENT. IN NO EVENT SHALL ATMEL BE LIABLE FOR ANY DIRECT, INDIRECT,
CONSEQUENTIAL, PUNITIVE, SPECIAL OR INCIDENTAL DAMAGES (INCLUDING, WITHOUT LIMITATION, DAMAGES FOR
LOSS OF PROFITS, BUSINESS INTERRUPTION, OR LOSS OF INFORMATION) ARISING OUT OF THE USE OR INABILITY TO
USE THIS DOCUMENT, EVEN IF ATMEL HAS BEEN ADVISED OF THE POSSIBILITY OF SUCH DAMAGES. Atmel makes no
representations or warranties with respect to the accuracy or completeness of the contents of this document and reserves the right
to make changes to specifications and product descriptions at any time without notice. Atmel does not make any commitment to
update the information contained herein. Unless specifically provided otherwise, Atmel products are not suitable for, and shall not be
used in, automotive applications. Atmel’s products are not intended, authorized, or warranted for use as components in applications
intended to support or sustain life.
ARIS+ WELCOME AND QUICK START GUIDE www.atmel.com
Package Contents
1. Aris+ Demo board
2. Embedded Crypto Solutions CD
3. Sample tube CryptoMemory (Black stopper)
4. Sample tube CryptoCompanion (Green stopper)
5. USB cable
Systems Requirements
n Windows XP
n 400 MB available disk space
n Available USB Port
Software Installation
1. Insert Embedded Crypto Solutions CD into a PC.
2. Select the “Detailed Information” option.
3. Click “Install Now” to install Crypto Evaluation Studio and other resources.
This will place program icons on the desktop as well as the START menu.
Back
Getting Started
1. Connect Aris+ to your PC using the provided USB cable
2. Launch Crypto Evaluation Studio from:
“Start menu > All Programs > Atmel > ECS Resource Center”
3. Learn how to use the Crypto Evaluation Studio from help
Front
STEP 1:
Insert a CryptoMemory chip into the
socket labeled CryptoMemory.
Align PIN 1 of SOIC package to lower
left corner of socket.
STEP 2:
(Optional) Insert a CryptoCompanion
chip into the socket labeled CMC.
Align PIN 1 of SOIC package to lower
left corner of socket.
Hardware Setup STEP 1
STEP 2