ATN Thermal Entry Wizard User manual

ATN Thermal Entry Wizard
MANUAL
AMERICAN
TECHNOLOGIES
NETWORK
CORP.
TOUCHLESS FEVER DETECTOR

2 3
TABLE OF CONTENTS
Legal Information .......................................6
About this Manual .....................................6
Disclaimer ...........................................6
Data Protection .......................................7
Symbol Conventions ....................................7
Regulatory Information ..................................7
FCC Information ......................................7
FCC Conditions .......................................8
EU Conformity Statement ...............................8
Safety Instruction .......................................8
Danger..............................................8
Cautions ............................................9
Chapter 1. Overview ....................................10
1.1. Overview ........................................10
1.2. Features ........................................10
Chapter 2. Appearance .................................11
Chapter 3. Installation ..................................12
3.1. Installation Environment ............................12
3.2. Flush Mounting ...................................12
3.3. Surface Mounting .................................14
Chapter 4. Wiring ......................................17
4.1. Terminal Description ...............................18
4.2. Wire Normal Device ...............................19
4.3. Wire Secure Door Control Unit .......................21
4.4. Wire Fire Module..................................21
4.4.1. Wiring Diagram of Door Open When Powering Off .......... 21
4.4.2. Wiring Diagram of Door Locked When Powering Off......... 23
Chapter 5. Activation ...................................24
5.1. Activate via Device ................................25
5.2. Activate via SADP .................................26
5.3. Activate Device via Client Software....................27
Chapter 6. Basic Operation ..............................27
6.1. Set Application Mode. . . . . . . . . . . . . . . . . . . . . . . . . . . . . . .27
6.2. Login...........................................28
6.2.1. Login for First Time................................... 29
6.2.2. Login by Administrator ................................ 30
6.3. Communication Settings............................31
TABLE OF CONTENTS
6.3.1. Set Network Parameters .............................. 32
6.3.2. Set RS-485 Parameters .............................. 32
6.3.3. Set Wiegand Parameters.............................. 33
6.4. User Management ................................34
6.4.1. Add Administrator.................................... 34
6.4.2. Add Face Picture .................................... 34
6.4.3. Add Card ..........................................36
6.4.4. Add Password ...................................... 37
6.4.5. Set Authentication Mode .............................. 38
6.4.6. Search and Edit User ................................. 38
6.5. Temperature Measurement Settings...................38
6.6. Import and Export Data.............................40
6.6.1. Export Data ........................................ 40
6.6.2. Import Data ........................................40
6.7. Identity Authentication..............................40
6.7.1. Authenticate via Multiple Credential ...................... 41
6.7.2. Authenticate via Single Credential ....................... 41
6.8. System Settings ..................................42
6.8.1. Set Basic Parameters................................. 42
6.8.2. Set Face Picture Parameters...........................43
6.8.3. Set Time........................................... 45
6.9. Set Access Control Parameters ......................45
6.10. Maintenance ....................................46
6.10.1. Upgrade Firmware ..................................46
6.10.2. Data Management .................................. 47
6.10.3. Log Query. . . . . . . . . . . . . . . . . . . . . . . . . . . . . . . . . . . . . . . . . 48
6.11. Time and Attendance Status Settings .................48
6.11.1. Disable Attendance Mode via Device .................... 48
6.11.2. Set Auto Attendance via Device ........................ 49
6.11.3. Set Manual Attendance via Device...................... 50
6.11.4. Set Manual and Auto Attendance via Device .............. 50
6.12. View System Information...........................52
Chapter 7. Client Software Configuration...................53
7.1. Configuration Flow of Client Software ..................53
7.2. Device Management ...............................54
7.2.1. Add Device .........................................54
7.2.2. Reset Device Password...............................60
7.3. Group Management ...............................61
7.3.1. Add Group. . . . . . . . . . . . . . . . . . . . . . . . . . . . . . . . . . . . . . . . . . 61
7.3.2. Import Resources to Group ............................ 61
7.3.3. Edit Resource Parameters ............................. 61

4 5
TABLE OF CONTENTS TABLE OF CONTENTS
7.3.4. Remove Resources from Group ........................ 62
7.4. Person Management ...............................62
7.4.1. Add Organization .................................... 62
7.4.2. Configure Basic Information............................ 63
7.4.3. Issue a Card by Local Mode ............................63
7.4.4. Upload a Face Photo from Local PC ..................... 65
7.4.5. Take a Photo via Client ................................ 65
7.4.6. Collect Face via Access Control Device................... 66
7.4.7. Configure Access Control Information .................... 67
7.4.8. Customize Person Information.......................... 68
7.4.9. Configure Resident Information ......................... 69
7.4.10. Configure Additional Information ....................... 69
7.4.11. Import and Export Person Identify Information ............. 70
7.4.12. Import Person Information ............................ 70
7.4.13. Import Person Pictures ............................... 70
7.4.14. Export Person Information ............................ 71
7.4.15. Export Person Pictures............................... 71
7.4.16. Get Person Information from Access Control Device ........ 72
7.4.17. Move Persons to Another Organization .................. 72
7.4.18. Issue Cards to Persons in Batch........................ 72
7.4.19. Report Card Loss ................................... 73
7.4.20. Set Card Issuing Parameters .......................... 73
7.5. Set Access Group to Assign Access Authorization to Persons . 74
7.6. Configure Advanced Functions .......................76
7.6.1. Configure Device Parameters .......................... 76
7.6.2. Configure Multi-Factor Authentication .................... 81
7.6.3. Configure First Person In .............................. 82
7.6.4. Configure Anti-Passback .............................. 83
7.6.5. Configure Device Parameters .......................... 84
7.7. Configure Linkage Actions for Access Control ............89
7.7.1. Configure Client Actions for Access Event ................. 89
7.7.2. Configure Device Actions for Access Event ................90
7.7.3. Configure Device Actions for Card Swiping ................ 91
7.7.4. Configure Device Actions for Person ID ................... 91
7.8. Door Control .....................................92
7.8.1. Control Door Status .................................. 93
7.8.2. Check Real-Time Access Records ...................... 93
7.9. Event Center .....................................94
7.9.1. Enable Receiving Event from Devices .................... 94
7.9.2. View Real-Time Events ............................... 95
7.9.3. Search Historical Events .............................. 96
7.10. Remote Configuration (Web) ........................98
7.10.1. View Device Information ..............................98
7.10.2. Change Device Password ............................ 99
7.10.3. Time Management ..................................99
7.10.4. System Maintenance ............................... 100
7.10.5. Configure RS-485 Parameters........................ 101
7.10.6. Security Mode Settings ............................. 101
7.10.7. Network Parameters Settings ......................... 101
7.10.8. Report Strategy Settings ............................ 102
7.10.9. Network Center Parameters Settings................... 102
7.10.10. Configure SIP Parameters .......................... 102
7.10.11. Set Relay Parameters .............................. 103
7.10.12. Set Access Control Parameters ...................... 103
7.10.13. Set Face Recognition Terminal Parameters ............. 103
7.10.14. Configure Face Picture Parameters ................... 104
7.10.15. Configure Supplement Light Parameters ............... 105
7.10.16. Set Device No. ................................... 105
7.10.17. Configure Video and Audio Parameters ................ 105
7.10.18. Configure Volume Input or Output. . . . . . . . . . . . . . . . . . . . . 105
7.10.19. O perate Relay .................................... 106
7.10.20. View Relay Status................................. 106
A. Tips When Collecting/Comparing Face Picture ..........106
B. Tips for Installation Environment ......................107
C. Dimension.........................................108
The information in this manual is furnished for informational use only, is subject to change without notice,
is not to be construed as a commitment by ATN Corp.
ATN Corp. assumes no responsibility or liability for any errors or inaccuracies that may appear in this book.
©2020 ATN Corp. All right reserved.

6 7
LEGAL INFORMATION
ABOUT THIS MANUAL
The Manual includes instructions for using and managing the Product. Pic-
tures, charts, images, and all other information hereinafter are for description
and explanation only. The information contained in the Manual is subject to
change, without notice, due to firmware updates or other reasons. Please find
the latest version of this Manual at the www.manual.atncorp.com.
DISCLAIMER
TO THE MAXIMUM EXTENT PERMITTED BY APPLICABLE LAW, THIS
MANUAL AND THE PRODUCT DESCRIBED, WITH ITS HARDWARE, SOFT-
WARE AND FIRMWARE, ARE PROVIDED “AS IS” AND “WITH ALL FAULTS
AND ERRORS”. ATN Corp. MAKES NO WARRANTIES, EXPRESS OR IM-
PLIED, INCLUDING WITHOUT LIMITATION, MERCHANTABILITY, SATIS-
FACTORY QUALITY, OR FITNESS FOR A PARTICULAR PURPOSE. THE
USE OF THE PRODUCT BY YOU IS AT YOUR OWN RISK. IN NO EVENT
WILL ATN Corp. BE LIABLE TO YOU FOR ANY SPECIAL, CONSEQUEN-
TIAL, INCIDENTAL, OR INDIRECT DAMAGES, INCLUDING, AMONG OTH-
ERS, DAMAGES FOR LOSS OF BUSINESS PROFITS, BUSINESS INTER-
RUPTION, OR LOSS OF DATA, CORRUPTION OF SYSTEMS, OR LOSS
OF DOCUMENTATION, WHETHER BASED ON BREACH OF CONTRACT,
TORT (INCLUDING NEGLIGENCE), PRODUCT LIABILITY, OR OTHER-
WISE, IN CONNECTION WITH THE USE OF THE PRODUCT, EVEN IF ATN
Corp. HAS BEEN ADVISED OF THE POSSIBILITY OF SUCH DAMAGES OR
LOSS.
YOU ACKNOWLEDGE THAT THE NATURE OF INTERNET PROVIDES
FOR INHERENT SECURITY RISKS, AND ATN Corp. SHALL NOT TAKE ANY
RESPONSIBILITIES FOR ABNORMAL OPERATION, PRIVACY LEAKAGE
OR OTHER DAMAGES RESULTING FROM CYBER-ATTACK, HACKER AT-
TACK, VIRUS INSPECTION, OR OTHER INTERNET SECURITY RISKS;
HOWEVER, ATN Corp. WILL PROVIDE TIMELY TECHNICAL SUPPORT IF
REQUIRED.
YOU AGREE TO USE THIS PRODUCT IN COMPLIANCE WITH ALL AP-
PLICABLE LAWS, AND YOU ARE SOLELY RESPONSIBLE FOR ENSUR-
ING THAT YOUR USE CONFORMS TO THE APPLICABLE LAW. ESPE-
CIALLY, YOU ARE RESPONSIBLE, FOR USING THIS PRODUCT IN A MAN-
NER THAT DOES NOT INFRINGE ON THE RIGHTS OF THIRD PARTIES,
INCLUDING WITHOUT LIMITATION, RIGHTS OF PUBLICITY, INTELLEC-
TUAL PROPERTY RIGHTS, OR DATA PROTECTION AND OTHER PRIVA-
CY RIGHTS. YOU SHALL NOT USE THIS PRODUCT FOR ANY PROHIB-
ITED END-USES, INCLUDING THE DEVELOPMENT OR PRODUCTION
OF WEAPONS OF MASS DESTRUCTION, THE DEVELOPMENT OR PRO-
DUCTION OF CHEMICAL OR BIOLOGICAL WEAPONS, ANY ACTIVITIES
IN THE CONTEXT RELATED TO ANY NUCLEAR EXPLOSIVE OR UNSAFE
NUCLEAR FUEL-CYCLE, OR IN SUPPORT OF HUMAN RIGHTS ABUSES.
IN THE EVENT OF ANY CONFLICTS BETWEEN THIS MANUAL AND THE
APPLICABLE LAW, THE LATER PREVAILS.
DATA PROTECTION
During the use of device, personal data will be collected, stored, and pro-
cessed. To protect data, the development of ATN Corp. devices incorporates
privacy by design principles. For example, for device with facial recognition
features, biometrics data is stored in your device with encryption method; for
fingerprint device, only fingerprint template will be saved, which is impossible
to reconstruct a fingerprint image.
As data controller, you are advised to collect, store, process and transfer da-
ta in accordance with the applicable data protection laws and regulations, in-
cluding without limitation, conducting security controls to safeguard person-
al data, such as, implementing reasonable administrative and physical secu-
rity controls, conduct periodic reviews and assessments of the effectiveness
of your security controls.
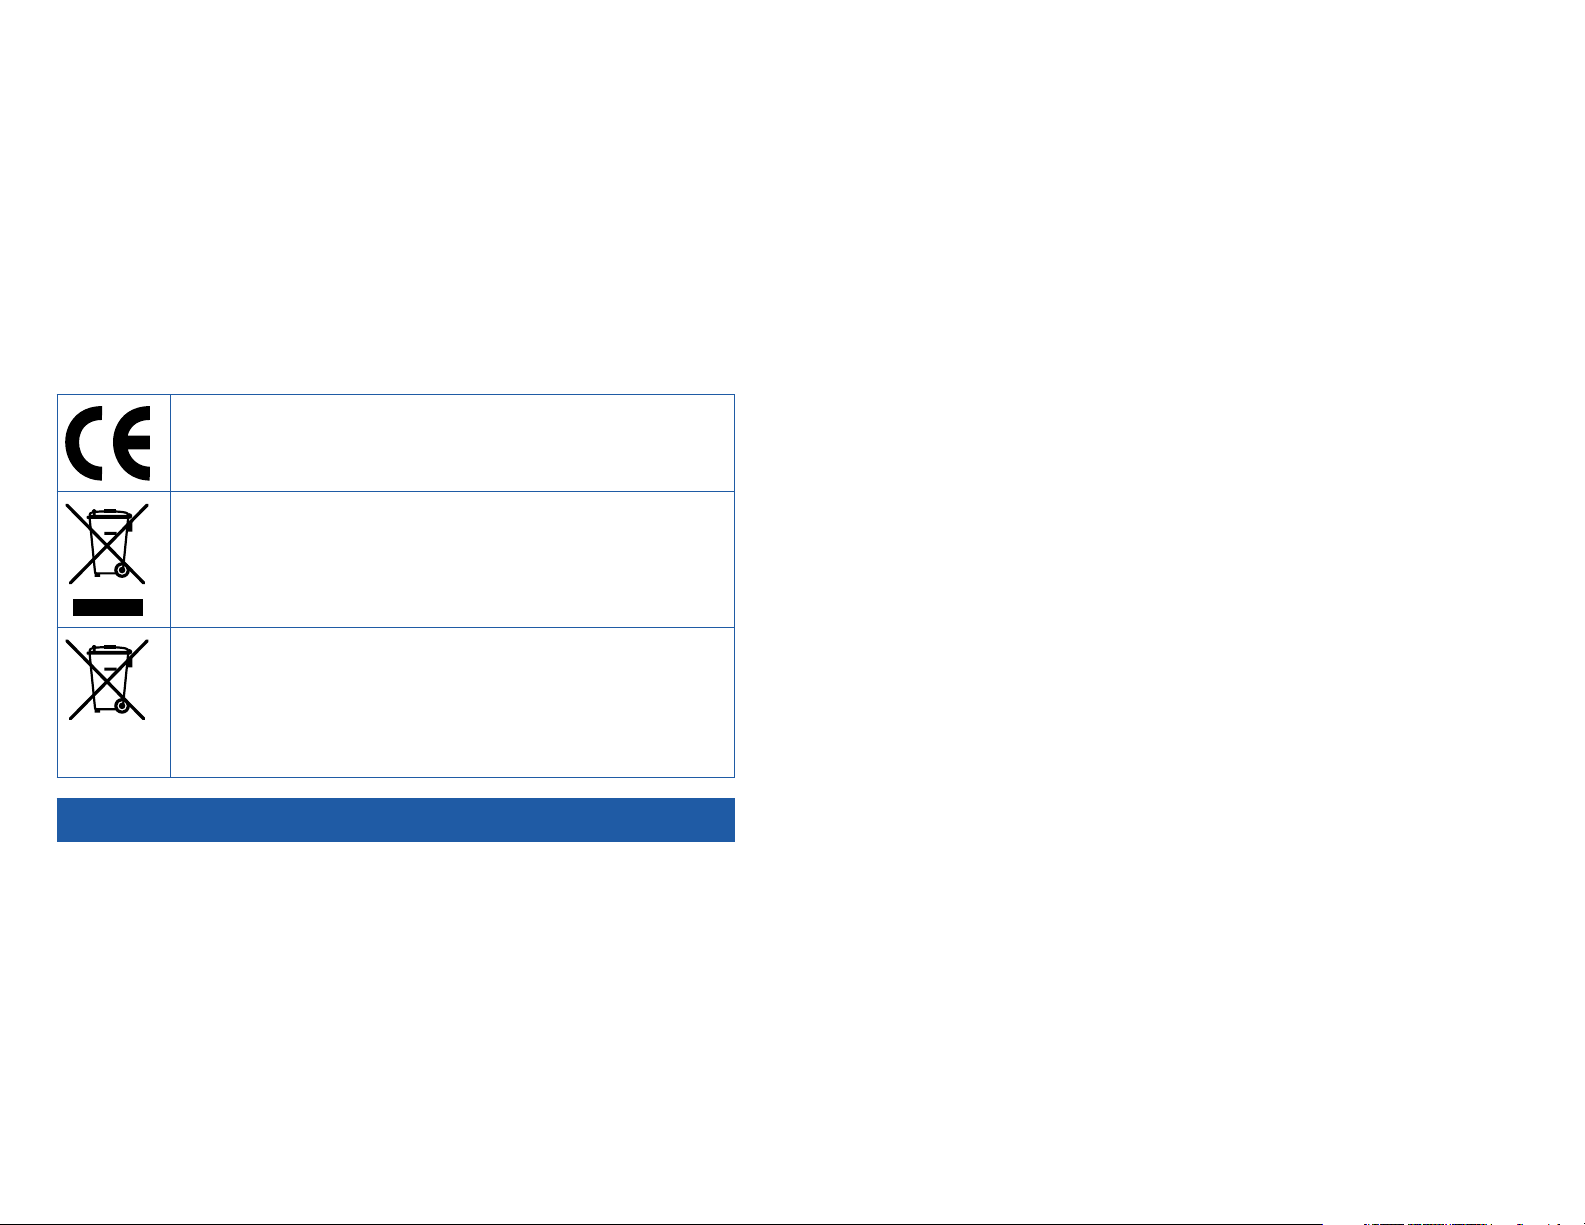
SYMBOL CONVENTIONS
The symbols that may be found in this document are defined as follows.
Symbol Description
Danger Indicates a hazardous situation which, if not avoided, will
or could result in death or serious injury.
Caution
Indicates a potentially hazardous situation which, if not
avoided, could result in equipment damage, data loss,
performance degradation, or unexpected results.
Note Provides additional information to emphasize or supple-
ment important points of the main text.
REGULATORY INFORMATION
FCC INFORMATION
Please take attention that changes or modification not expressly approved
by the party responsible for compliance could void the user’s authority to op-
erate the equipment.
FCC compliance: This equipment has been tested and found to comply with
the limits for a Class B digital device, pursuant to part 15 of the FCC Rules.
These limits are designed to provide reasonable protection against harmful in-
terference in a residential installation. This equipment generates, uses, and
can radiate radio frequency energy and, if not installed and used in accor-
dance with the instructions, may cause harmful interference to radio commu-
nications. However, there is no guarantee that interference will not occur in a
particular installation. If this equipment does cause harmful interference to ra-
dio or television reception, which can be determined by turning the equipment
off and on, the user is encouraged to try to correct the interference by one or
more of the following measures:
• Reorient or relocate the receiving antenna.
• Increase the separation between the equipment and receiver.

8 9
• Connect the equipment into an outlet on a circuit different from that to
which the receiver is connected.
• Consult the dealer or an experienced radio/TV technician for help.
This equipment should be installed and operated with a minimum distance
20cm between the radiator and your body.
FCC CONDITIONS
This device complies with part 15 of the FCC Rules. Operation is subject to
the following two conditions:
1. This device may not cause harmful interference.
2. This device must accept any interference received, including interference
that may cause undesired operation.
EU CONFORMITY STATEMENT
This product and - if applicable - the supplied accessories too are
marked with "CE" and comply therefore with the applicable harmo-
nized European standards listed under the EMC Directive 2014/30/
EU, RE Directive 2014/53/EU,the RoHS Directive 2011/65/EU
2012/19/EU (WEEE directive): Products marked with this symbol
cannot be disposed of as unsorted municipal waste in the Europe-
an Union. For proper recycling, return this product to your local sup-
plier upon the purchase of equivalent new equipment, or dispose of
it at designated collection points. For more information see: www.re-
cyclethis.info
2006/66/EC (battery directive): This product contains a battery that
cannot be disposed of as unsorted municipal waste in the European
Union. See the product documentation for specific battery informa-
tion. The battery is marked with this symbol, which may include letter-
ing to indicate cadmium (Cd), lead (Pb), or mercury (Hg). For proper
recycling, return the battery to your supplier or to a designated collec-
tion point. For more information see: www.recyclethis.info
SAFETY INSTRUCTION
These instructions are intended to ensure that user can use the product cor-
rectly to avoid danger or property loss.
The precaution measure is divided into Dangers and Cautions:
Dangers. Neglecting any of the warnings may cause serious injury or death.
Follow these safeguards to prevent serious injury or death.
Cautions: Neglecting any of the cautions may cause injury or equipment
damage. Follow these precautions to prevent potential injury or material dam-
age.
DANGER
• All the electronic operation should be strictly compliance with the electri-
cal safety regulations, fire prevention regulations and other related regu-
lations in your local region.
• Please use the power adapter, which is provided. This equipment is in-
tended to be supplied from the Class 2 surge protected power source rat-
ed DC 12V, 3A.
• Do not connect several devices to one power adapter as adapter overload
may cause over-heat or fire hazard.
• Please make sure that the power has been disconnected before you wire,
install or dismantle the device.
• When the product is installed on wall or ceiling, the device shall be firm-
ly fixed.
• If smoke, odors or noise rise from the device, turn off the power at once
and unplug the power cable, and then please contact the service center.
• Do not ingest battery, Chemical Burn Hazard.
• This product contains a coin/button cell battery. If the coin/button cell bat-
tery is swallowed, it can cause severe internal burns in just 2 hours and
can lead to death.
• Keep new and used batteries away from children. If the battery compart-
ment does not close securely, stop using the product and keep it away
from children. If you think batteries might have been swallowed or placed
inside any part of the body, seek immediate medical attention.
• If the product does not work properly, please contact your dealer or the
nearest service center. Never attempt to disassemble the device yourself.
(We shall not assume any responsibility for problems caused by unautho-
rized repair or maintenance.)
CAUTIONS
• Do not drop the device or subject it to physical shock, and do not expose
it to high electromagnetism radiation. Avoid the equipment installation on
vibrations surface or places subject to shock (ignorance can cause equip-
ment damage).
• Do not place the device in extremely hot (refer to the specification of the
device for the detailed operating temperature), cold, dusty or damp loca-
tions, and do not expose it to high electromagnetic radiation.
• The device cover for indoor use shall be kept from rain and moisture.
• Exposing the equipment to direct sun light, low ventilation or heat source
such as heater or radiator is forbidden (ignorance can cause fire danger).
• Do not aim the device at the sun or extra bright places. A blooming or
smear may occur otherwise (which is not a malfunction however) and af-
fecting the endurance of sensor at the same time.
• Please use the provided glove when open up the device cover, avoid di-
rect contact with the device cover, because the acidic sweat of the fingers
may erode the surface coating of the device cover.
• Please use a soft and dry cloth when clean inside and outside surfaces of
the device cover, do not use alkaline detergents.
• Please keep all wrappers after unpack them for future use. In case of any
failure occurred, you need to return the device to the factory with the orig-
inal wrapper. Transportation without the original wrapper may result in
damage on the device and lead to additional costs.
• Improper use or replacement of the battery may result in hazard of explo-
sion. Replace with the same or equivalent type only. Dispose of used bat-
teries according to the instructions provided by the battery manufacturer.

10 11
• Biometric recognition products are not 100% applicable to anti-spoofing
environments. If you require a higher security level, use multiple authen-
tication modes.
• Working temperature: 0°C to 50°C
• Indoor use. The device should be at least 2 meters away from the light,
and at least 3 meters away from the window.
CHAPTER 1. OVERVIEW
1.1. OVERVIEW
Face recognition terminal is a kind of access control device for face recog-
nition, which is mainly applied in security access control systems, such as lo-
gistic centers, airports, university campuses, alarm centrals, dwellings, etc.
1.2. FEATURES
• Supports Vanadium Oxide uncooled sensor to measure target’s tempera-
ture.
• Temperature measuring range: 30°C to 45°C (86°F to 113°F), accuracy:
0.1°C, deviation: ±0.5°C .
• Recognition distance: 0.3 to 1.8 m.
• Fast temperature measurement mode: Detects face and takes skin-sur-
face temperature without identity authentication.
• Multiple authentication modes are available: card and temperature, face
and temperature, card and face and temperature, etc.
• Face mask wearing alert, is an Option that can be enabled.
If the recognizing face does not wear a mask, the device will prompt a voice
reminder. At the same time, the authentication or attendance is valid.
• Forced mask wearing alert, is an Option that can be enabled.
If the recognizing face does not wear a mask, the device will prompt a voice
reminder. At the same time, the authentication or attendance will be failed.
• Triggers voice prompt when detecting abnormal temperature.
• Configurable door status (open/close) when detecting abnormal tempera-
ture.
• Transmits on-line and off-line temperature information to the client soft-
ware via TCP/IP communication and saves the data on the client soft-
ware.
• Face recognition duration <0.2 s/User; face recognition accuracy rate
≥99%.
• 6000 face capacity, 6000 card capacity, and 100,000 event capacity.
• Suggested height for face recognition: between 1.4 m and 1.9 m.
• Watchdog design and tamper function.
• Audio prompt for authentication result.
• NTP, manually time synchronization, and auto synchronization.
• Connects to external access controller or Wiegand card reader via Wie-
gand protocol.
• Connects to secure door control unit via RS-485 protocol to avoid the
door opening when the terminal is destroyed.
• Imports and export data to the device from the client software.
CHAPTER 2. APPEARANCE
Refer to the following contents for detailed information of the face recogni-
tion terminal:
Figure 2-1. Face Recognition Terminal Diagram

12 13
Table 2-1. Description of Face Recognition Terminal
No. Name
1USB Interface
2Card Swiping Area
3Touch Screen
4Camera
5IR Light
6White Light
7Thermographic Module
8IR Light
9Camera
10 TAMPER
11 Thermographic Module Interface
12 Debugging Port
13 Power Interface
14 Wiring Terminals
15 PSAM Card Slot (Reserved)
16 Network Interface
CHAPTER 3. INSTALLATION
3.1. INSTALLATION ENVIRONMENT
• Avoid backlight, direct sunlight, and indirect sunlight.
• For better recognition, there should be light source in or near the installa-
tion environment.
• Indoor and windless environment use only.
NOTE
For details about installation environment, see Tips for Installation
Environment.
3.2. FLUSH MOUNTING
Steps
1. Install a gang box.
2. Connect the thermographic module and the main body.
Figure 3-1. Connect Thermographic Module
3. Use 5 supplied screws (4_KA4×22-SUS) to secure the mounting plate on
the gang box.
4. Route the cable through the cable hole of the mounting plate and connect
to corresponding external devices’ cables.
5. Align the device with the mounting plate and hang the device on the
mounting plate. Make sure the two sheets on each side of the mounting
plate have been in the slots at the back of the device.
Figure 3-2. Install Device

14 15
6. Use 2 supplied screws (SC-M4×14.5TP10-SUS) to secure the device and
the mounting plate.
NOTE
When the screw’s head is beneath the device surface, the device is
secured.
Figure 3-3. Secure Device
NOTE
The installation height here is the recommended height. You can
change it according to your actual needs.
For easy installation, drill holes on mounting surface according to the
supplied mounting template.
3.3. SURFACE MOUNTING
Steps
1. According to the datum line on the mounting template, stick the mounting
template on the wall or other surface, 1.4 meters higher than the ground.
2. Drill 5 holes on the wall or other surface according to the mounting tem-
plate.
Figure 3-4. Mounting Template
3. Insert the screw sockets of the setscrews in the drilled holes.
Figure 3-5. Insert Screw Socket
4. Align the 6 holes to the mounting plate with the drilled holes.
5. Route the cable through the cable hole of the mounting plate, and connect
to corresponding external devices’ cables.
6. Align the device with the mounting plate and hang the device on the
mounting plate.

16 17
Figure 3-6. Install Device
7. Use 2 supplied screws (SC-M4×14.5TP10-SUS) to secure the device and
the mounting plate.
NOTE
When the screw’s head is beneath the device surface, the device is
secured.
Figure 3-7. Secure Device
NOTE
The installation height here is the recommended height. You can
change it according to your actual needs.
For easy installation, drill holes on mounting surface according to the
supplied mounting template.
CHAPTER 4. WIRING
You can connect the RS-485 terminal with the RS-485 card reader, connect
the NC and COM terminal with the door lock, connect the SENSOR terminal
with the door contact, the BTN/GND terminal with the exit button, connect the
alarm output and input terminal with the alarm output/input devices, and con-
nect the Wiegand terminal with the Wiegand card reader or the access con-
troller.
If connect the WIEGAND terminal with the access controller, the face recog-
nition terminal can transmit the authentication information to the access con-
troller and the access controller can judge whether to open the door or not.
NOTE
If cable size is 18 AWG, you should use a 12 V power supply. And the
distance between the power supply and the device should be no more
than 20 m.
If the cable size is 15 AWG, you should use a 12 V power supply. And the
distance between the power supply and the device should be no more
than 30 m.

18 19
If the cable size is 12 AWG, you should use a 12 V power supply. And the
distance between the power supply and the device should be no more
than 40 m.
4.1. TERMINAL DESCRIPTION
The terminals contains power input, alarm input, alarm output, RS-485, Wie-
gand output, and door lock.
The terminal’s diagram is as follows:
Figure 4-1. Terminal Diagram
The descriptions of the terminals are as follows:
Table 4-1. Terminal Descriptions
Group No. Function Color Name Description
Group A A1 Power Input Red +12 V 12 VDC Power Supply
A2 Black GND Ground
Group B
B1
Alarm Input
Yellow/Blue IN1 Alarm Input 1
B2 Yellow/Black GND Ground
B3 Yellow/Orange IN2 Alarm Input 2
B4
Alarm Output
Yellow/Purple NC Alarm Output
B5 Yellow/Brown COM Wiring
B6 Yellow/Red NO
Group C
C1
RS-485
Yellow 485+ RS-485 Wiring
C2 Blue 485-
C3 Black GND Ground
C4
Wiegand
Green W0 Wiegand Wiring 0
C5 White W1 Wiegand Wiring 1
C6 Brown WG_OK Wiegand Authenticated
C7 Orange WG_ERR Wiegand Authentication Failed
C8 Purple BUZZER Buzzer Wiring
C9 Gray TAMPER Tampering Alarm Wiring
Group D
D1
Door Lock
White/Purple NC Lock Wiring (NC)
D2 White/Yellow COM Common
D3 White/Red NO Lock Wiring (NO)
D4 Yellow/Green SENSOR Door Contact
D5 Yellow/Gray BTN Exit Door Wiring
4.2. WIRE NORMAL DEVICE
You can connect the terminal with normal peripherals.
Follow the diagram below to wire the thermographic module and the device
main body:
The wiring diagram without secure door control unit is as follows.

20 21
Figure 4-2. Device Wiring
NOTE
You should set the face recognition terminal’s Wiegand direction to
“Input” to connect to a Wiegand card reader. If connects to an access
controller, you should set the Wiegand direction to “Output” to transmit
authentication information to the access controller.
For details about Wiegand direction settings, see Setting Wiegand
Parameters in Communication Settings.
The power supply for the device should be 12 V DC, 2 A. The suggested
external power supply for door lock is 12 V, 1 A. The suggested external
power supply for the Wiegand card reader is 12 V, 1A.
The suggested power cable’s diameter: 22 AWG. The suggested other
cable’s diameter: 26 AWG.
Do not wire the device to the electric supply directly.
WARNING
The face recognition terminal shall adapt an external listed Class 2
power supply with surge protected function.
4.3. WIRE SECURE DOOR CONTROL UNIT
You can connect the terminal with the secure door control unit.
The wiring diagram is as follows.
Figure 4-3. Secure Door Control Unit Wiring
NOTE
The secure door control unit should connect to an external power
supply separately. The suggested external power supply is 12 V, 0.5 A.
4.4. WIRE FIRE MODULE
4.4.1. Wiring Diagram of Door Open When Powering Off
Lock Type: Anode Lock, Magnetic Lock, and Electric Bolt (NO)
Security Type: Door Open When Powering Off
Scenario: Installed in Fire Engine Access
Type 1
NOTE
The fire system controls the power supply of the access control system.

22 23
Figure 4-4. Wire Device
Figure 4-5. Wire Secure Door Control Unit
Type 2
Figure 4-6. Wiring Device
Figure 4-7. Wiring Secure Door Control Unit
4.4.2. Wing Diagram of Door Locked When Powering Off
Lock Type: Cathode Lock, Electric Lock, and Electric Bolt (NC)
Security Type: Door Locked When Powering Off
Scenario: Installed in Entrance/Exit with Fire Linkage
NOTE
The Uninterpretable Power Supply (UPS) is required.
The fire system (NC and COM, normally closed when powering off) is con-
nected with the lock and the power supply in series. When a fire alarm is
triggered, the door remains open. In normal times, NC and COM are open.

24 25
Figure 4-8. Device Wiring
Figure 4-9. Wiring Diagram
CHAPTER 5. ACTIVATION
NOTE
Please allow the system to run for 30 min after initial boot up, in order
for it to calibrate itself. Once calibration completes the system will pro-
vide accurate temperature measurement.
You should activate the device before the first login. After powering on the
device, the system will switch to Device Activation page.
Activation via the device, SADP tool and the client software are supported.
The default values of the device are as follows:
• The default IP address: 192.0.0.64
• The default port No.: 8000
• The default user name: admin
5.1. ACTIVATE VIA DEVICE
If the device is not activated, you can activate the device after it is powered
on.
On the Activate Device page, create a password and confirm the password.
Tap Activate and the device will activated.
Figure 5-1. Activation Page
CAUTION
The password strength of the device can be automatically checked.
We highly recommend you change the password of your own choosing
(using a minimum of 8 characters, including at least three kinds of fol-
lowing categories: upper case letters, lower case letters, numbers, and
special characters) in order to increase the security of your product.
And we recommend you change your password regularly, especially in
the high security system, changing the password monthly or weekly can
better protect your product.
Proper configuration of all passwords and other security settings is the
responsibility of the installer and/or end-user.
• After activation, you should select an application mode. For details, see
Set Application Mode.

26 27
• After activation, if you need to add the device to the client software or oth-
er platforms, you should edit the device IP address. For details, see Com-
munication Settings.
5.2. ACTIVATE VIA SADP
SADP is a tool to detect, activate and modify the IP address of the device
over LAN.
Before You Start
• Get the SADP software from the manual.atncorp.com select the Thermal
Entry Wizard and download the SADP software from the provided link.
• The device and the PC that runs the SADP tool should be within the same
subnet.
The following steps show how to activate a device and modify its IP address.
For batch activation and IP addresses modification, refer to User Manual of
SADP for details.
Steps
1. Run the SADP software and search the online devices.
2. Find and select your device in online device list.
3. Input new password (admin password) and confirm the password.
CAUTION
STRONG PASSWORD RECOMMENDED! We highly recommend you
create a strong password of your own choosing (using a minimum of 8
characters, including upper case letters, lower case letters, numbers,
and special characters) in order to increase the security of your prod-
uct. And we recommend you reset your password regularly, especially in
the high security system, resetting the password monthly or weekly can
better protect your product.
4. Click Activate to start activation.
Figure 5-2.
Status of the device becomes Active after successful activation.
5. Modify IP address of the device.
a) Select the device.
b) Change the device IP address to the same subnet as your computer by
either modifying the IP address manually or checking Enable DHCP.
c) Input the admin password and click Modify to activate your IP address
modification.
5.3. ACTIVATE DEVICE VIA CLIENT SOFTWARE
For some devices, you are required to create the password to activate
them before they can be added to the software and work properly.
Steps
NOTE
This function should be supported by the device.
1. Enter the Device Management page.
2. Click on the right of Device Management and select Device.
3. Click Online Device to show the on-line device area. The searched on-line
devices are displayed in the list.
4. Check the device status (shown on Security Level column) and select an
inactive device.
5. Click Activate to open the Activation dialog.
6. Create a password in the password field and confirm the password.
CAUTION
The password strength of the device can be automatically checked.
We highly recommend you change the password of your own choosing
(using a minimum of 8 characters, including at least three kinds of fol-
lowing categories: upper case letters, lower case letters, numbers, and
special characters) in order to increase the security of your product.
And we recommend you change your password regularly, especially in
the high security system, changing the password monthly or weekly can
better protect your product.
Proper configuration of all passwords and other security settings is the
responsibility of the installer and/or end-user.
7. Click OK to activate the device.
CHAPTER 6. BASIC OPERATION
6.1. SET APPLICATION MODE
After activating the device, you should select an application mode for better
device application.
Steps
1. On the Welcome page, select Indoor or Others from the drop-down list.

28 29
Figure 6-1. Welcome Page
2. Tap OK to save.
NOTE
You can also change the settings in System Settings.
If you install the device indoors near the window or the face recognition
function is not working well, select Others.
If you do not configure the application mode and tap Next, the system
will select Indoor by default.
If you activate the device via other tools remotely, the system will select
Indoor as the application mode by default.
6.2. LOGIN
Login the device to set the device basic parameters. You should enter the
device activation password for the first login. Or if you have add the adminis-
trator’s credential, you can login via the configured credential.
6.2.1. Login for First Time
You should login into the system before other device operations.
Steps
1. Long tap on the initial page for 3 s to enter password entering page.
2. Tap the Password field and enter the device activation password.
3. Tap OK to enter the home page.
NOTE
The device will be locked for 30 minutes after 5 failed password
attempts.
For details about setting the administrator authentication mode, see
Adding User.
Figure 6-2. Home Page

30 31
6.2.2. Login by Administrator
After you add the administrator for the device, only the administrator can log-
in the device for device operation.
Steps
1. Long tap on the initial page for 3 s to enter the admin login page.
Figure 6-3. Admin Login
2. Authenticate the administrator’s face or card to enter the home page.
Figure 6-4. Home Page
NOTE
The device will be locked for 30 minutes after 5 failed face or card
attempts.
3. Optional: Tap and you can enter the device activation password for
login.
4. Optional: Tap and you can exit the admin login page.
6.3. COMMUNICATION SETTINGS
You can set the network parameters, the RS-485 parameters, and the Wie-
gand parameters on the communication settings page.

32 33
6.3.1. Set Network Parameters
You can set the device network parameters, including the IP address, the
subnet mask, and the gateway.
Steps
1. Tap Comm. (Communication Settings) on the Home page to enter the
Communication Settings page.
2. On the Communication Settings page, tap Network to enter the Network
tab.
Figure 6-5. Network Settings
3. Tap IP Address, Subnet Mask, or Gateway and input the parameters.
4. Tap OK to save the settings.
NOTE
The device’s IP address and the computer IP address should be in the
same IP segment.
5. Tap to save the network parameters.
6.3.2. Set RS-485 Parameters
The face recognition terminal can connect external access controller, se-
cure door control unit or card reader via the RS-485 terminal.
Steps
1. Tap Comm. (Communication Settings) on the Home page to enter the
Communication Settings page.
2. On the Communication Settings page, tap RS-485 to enter the RS-485 tab.
Figure 6-6. Set RS-485 Parameters
3. Select an peripheral type according to your actual needs.
NOTE
Controller represents the access controller; Unit represents the secure
door control unit and Reader represents the card reader.
If you select Controller: If connect the device to a terminal via the
RS-485 interface, set the RS-485 address as 2. If you connect the device
to a controller, set the RS-485 address according to the door No.
4. Tap to save the network parameters.
NOTE
If you change the external device, and after you save the device param-
eters, the device will reboot automatically.
6.3.3. Set Wiegand Parameters
You can set the Wiegand transmission direction.
Steps
1. Tap Comm. (Communication Settings) on the Home page to enter the
Communication Settings page.
2. On the Communication Settings page, tap Wiegand to enter the Wiegand
tab.
Figure 6-7. Wiegand Settings
3. Enable the Wiegand function.
4. Select a transmission direction.
• Output: A face recognition terminal can connect an external access con-
troller. And the two devices will transmit the card No. via Wiegand 26 or
Wiegand 34.
• Input: A face recognition terminal can connect a Wiegand card reader.
5. Tap to save the network parameters.
NOTE
If you change the external device, and after you save the device param-
eters, the device will reboot automatically.

34 35
6.4. USER MANAGEMENT
On the user management interface, you can add, edit, delete, and search
the user.
6.4.1. Add Administrator
The administrator can login the device backend and configure the device pa-
rameters.
Steps
1. Long tap on the initial page and log in the backend.
2. Tap User →+ to enter the Add User page.
3. Edit the employee ID.
NOTE
The employee ID should be less than 32 characters. And it can be a
combination of lower letters, upper letters, and numbers.
The employee ID should not be duplicated.
4. Tap the Name field and input the user name on the soft keyboard.
NOTE
Numbers, upper case letters, lower case letters, and special characters
are allowed in the user name.
Up to 32 characters are allowed in the user name.
5. Optional: Add a face picture, cards, or password for the administrator.
NOTE
For details about adding a face picture, see Add Face Picture.
For details about adding a card, see Add Card.
For details about adding a password, see Add Password.
6. Optional: Set the administrator’s authentication type.
NOTE
For details about setting the authentication type, see Set Authentica-
tion Mode.
7. Enable the Administrator Permission function.
Enable Administrator Permission
The user is the administrator. Except for the normal attendance function, the
user can also enter the Home page to operate after authenticating the permis-
sion.
8. Tap to save the settings.
6.4.2. Add Face Picture
Add user’s face picture to the device. And the user can use the face picture
to authenticate.
Steps
1. Long tap on the initial page and log in the backend.
2. Tap User →+ to enter the Add User page.
3. Edit the employee ID.
NOTE
The employee ID should be less than 32 characters. And it can be a
combination of lower letters, upper letters, and numbers.
The employee ID should not be duplicated.
4. Tap the Name field and input the user name on the soft keyboard.
NOTE
Numbers, upper case letters, lower case letters, and special characters
are allowed in the user name.
Up to 32 characters are allowed in the user name.
5. Tap the Face Picture field to enter the face picture adding page.
Figure 6-8. Add Face Picture
6. Position your face looking at the camera.

36 37
NOTE
Make sure your face picture is in the face picture outline when adding
the face picture.
Make sure the captured face picture is in good quality and is accurate.
For details about the instructions of adding face pictures, see Tips
When Collecting/Comparing Face Picture.
After completely adding the face picture, a captured face picture will be dis-
played at the upper right corner of the page.
7. Tap Save to save the face picture.
8. Optional: Tap Try Again and adjust your face position to add the face pic-
ture again.
NOTE
The maximum duration for adding a face picture is 15s. You can check
the remaining time for adding a face picture on the left of the page.
9. Enable or disable the Administrator Permission function.
Enable Administrator Permission
The user is an administrator. Except for the normal attendance function, the
user can also enter the Home page to operate after authenticating the permis-
sion.
Disable Administrator Permission
The User is a normal user. The user can only authenticate or take atten-
dance on the initial page.
10. Tap to save the settings.
6.4.3. Add Card
Add a card for the user and the user can authenticate via the added card.
Steps
1. Long tap on the initial page and log in the backend.
2. Tap User →+ to enter the Add User page.
3. Tap the Employee ID. field and edit the employee ID.
NOTE
The employee ID should be less than 32 characters. And it can be a
combination of lower letters, upper letters, and numbers.
The employee ID should not be duplicated.
4. Tap the Name field and input the user name on the soft keyboard.
NOTE
Numbers, upper case letters, lower case letters, and special characters
are allowed in the user name.
Up to 32 characters are allowed in the user name.
5. Tap the Card field and input the card No.
6. Configure the card No.
Enter the card No. manually. Swipe the card over the card swiping area to
get the card No.
NOTE
The card No. cannot be empty.
Up to 20 characters are allowed in the card No.
The card No. cannot be duplicated.
7. Optional: Enable the Duress Card function. The added card
When the user authenticates by swiping this duress card, the device will up-
load an duress card event to the client software.
8. Enable or disable the Administrator Permission function.
Enable Administrator Permission
The user is an administrator. Except for the normal attendance function, the us-
er can also enter the Home page to operate after authenticating the permission.
Disable Administrator Permission
The User is a normal user. The user can only authenticate or take atten-
dance on the initial page.
9. Tap to save the settings.
6.4.4. Add Password
Add a password for the user and the user can authenticate via the password.
Steps
1. Long tap on the initial page and log in the backend.
2. Tap User →+ to enter the Add User page.
3. Tap the Employee ID. field and edit the employee ID.
NOTE
The employee ID should be less than 32 characters. And it can be a
combination of lower letters, upper letters, and numbers.
The employee ID should not be duplicated.
4. Tap the Name field and input the user name on the soft keyboard.
NOTE
Numbers, upper case letters, lower case letters, and special characters
are allowed in the user name.
Up to 32 characters are allowed in the user name.
5. Tap the Password field and create a password and confirm the password.
NOTE
Only numbers are allowed in the password.
Up to 8 characters are allowed in the password.
6. Enable or disable the Administrator Permission function.
Enable Administrator Permission
The user is an administrator. Except for the normal attendance function, the us-
er can also enter the Home page to operate after authenticating the permission.
Disable Administrator Permission
The User is a normal user. The user can only authenticate or take atten-
dance on the initial page.
7. Tap to save the settings.

38 39
6.4.5. Set Authentication Mode
After adding the user’s face picture, password, or other credentials, you
should set the authentication mode and the user can authenticate his/her
identity via the configured authentication mode.
Steps
1. Long tap on the initial page and log in the backend.
2. Tap User →Add User/Edit User →Authentication Mode.
3. Select Device or Custom as the authentication mode.
Device
If you want to select device mode, you should set the terminal authentica-
tion mode in Access Control Settings page first. For details see Setting Access
Control Parameters.
Custom
You can combine different authentication modes together according to your
actual needs.
4. Tap to save the settings.
6.4.6. Search and Edit User
After adding the user, you can search the user and edit it.
Search User
On the User Management page, Tap the search area to enter the Search
User page. Tap Card on the left of the page and select a search type from the
drop-down list. Enter the employee ID, card No., or the user name for search.
Tap to search.
Edit User
On the User Management page, select a user from the user list to enter the
Edit User page. Follow the steps in User Management to edit the user param-
eters. Tap to save the settings.
NOTE
The employee ID cannot be edited.
6.5. TEMPERATURE MEASUREMENT SETTINGS
You can set the temperature measurement parameters, including tempera-
ture detection, over-temperature alarm threshold, door not open when tem-
perature is abnormal, temperature measurement mode, measurement area
calibration, measure area, etc.
On the Home page, tap Temp (Temperature) to enter the Temperature Set-
tings page. Edit the temperature measurement parameters on this page and
tap to save the settings.
Figure 6-9. Temperature Measurement Parameters C/F
The available parameters descriptions are as follows:
Table 6-1. Temperature Measurement Parameters Descriptions
Parameter Description
Enable Temperature
Detection
When enabling the function, the device will authenticate
the permissions and at the same time take the temperature.
When disabling the device, the device will authenticate
the permissions only.
Over-Temperature
Alarm Threshold
(Max./Min.)
Edit the threshold according to actual situation. If the
detected temperature is higher or lower than the configured
parameters, an alarm will be triggered. By default, the value
is 9 9.14° F.
Door Not Open
When Temperature
is Abnormal
When Enabling the function, the door will not open
when the detected temperature is higher or lower than
the configured temperature threshold. By default, the
temperature is enabled.
Temperature
Measurement Only
When enabling the function, the device will not authenticate
the permissions, but only take the temperature. When
disabling the function, the device will authenticate the
permissions and at the same time take the temperature.
If read temp only is enabled, the door mechanism will un-
lock if wired correctly to the wiegand cord and a good read-
ing is obtained.
Measurement Area
Calibration/Measure
Area Settings
Configure the temperature measurement area and the
correction parameters.
Other manuals for Thermal Entry Wizard
1
Table of contents