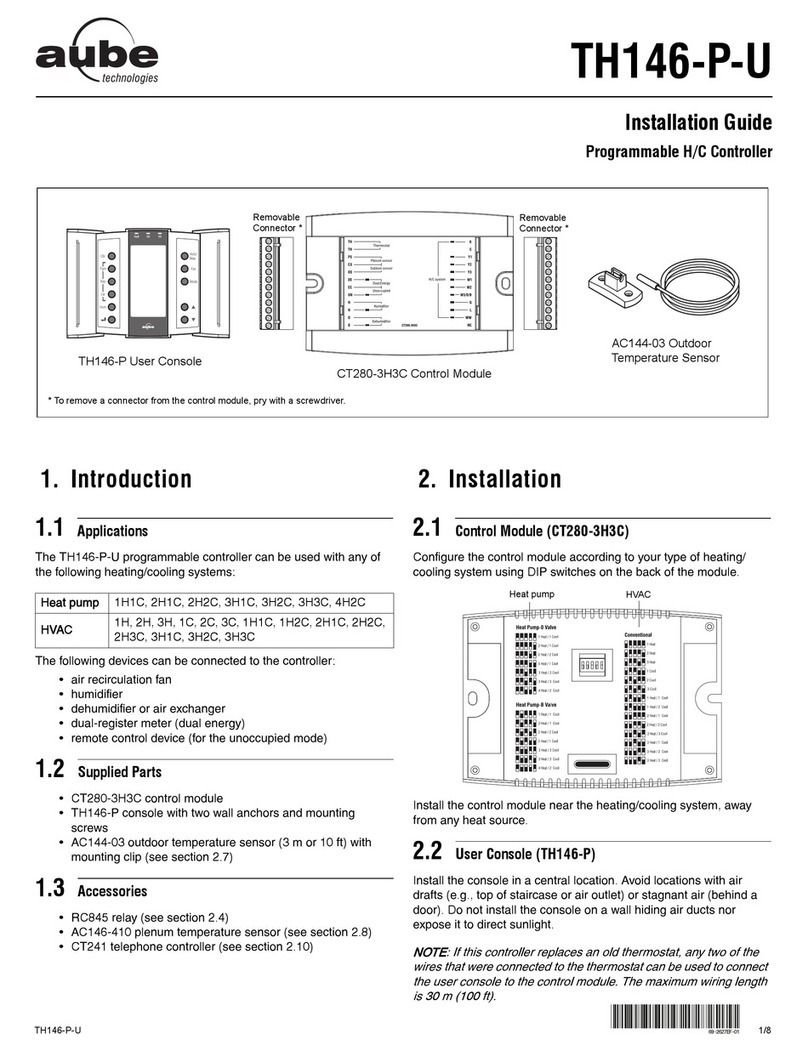
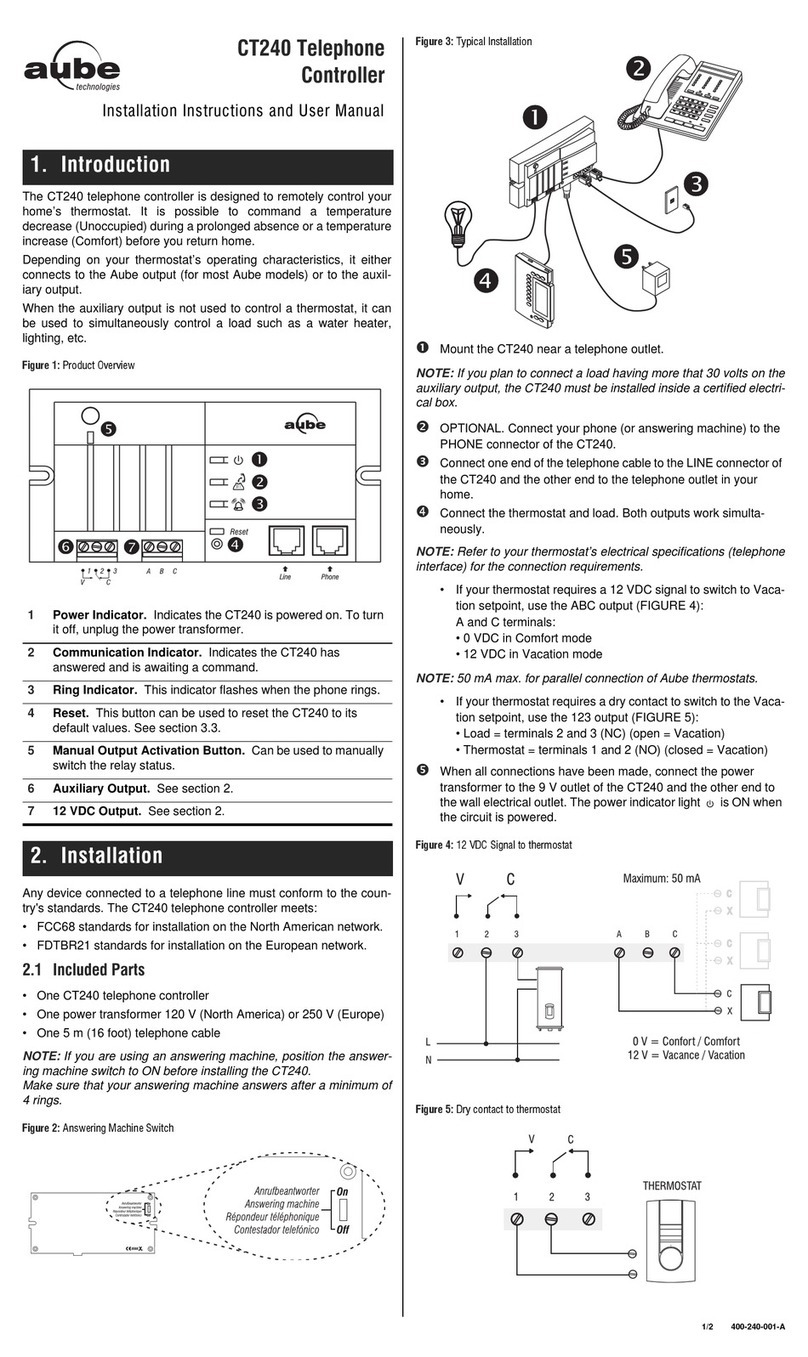
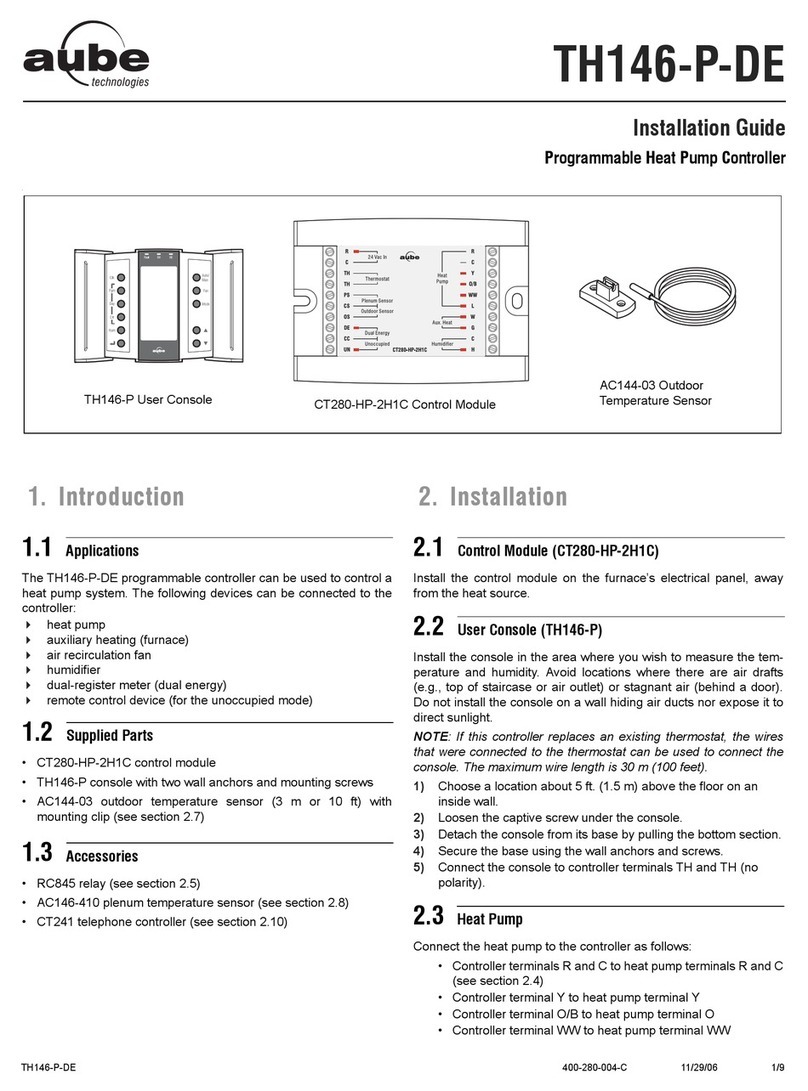
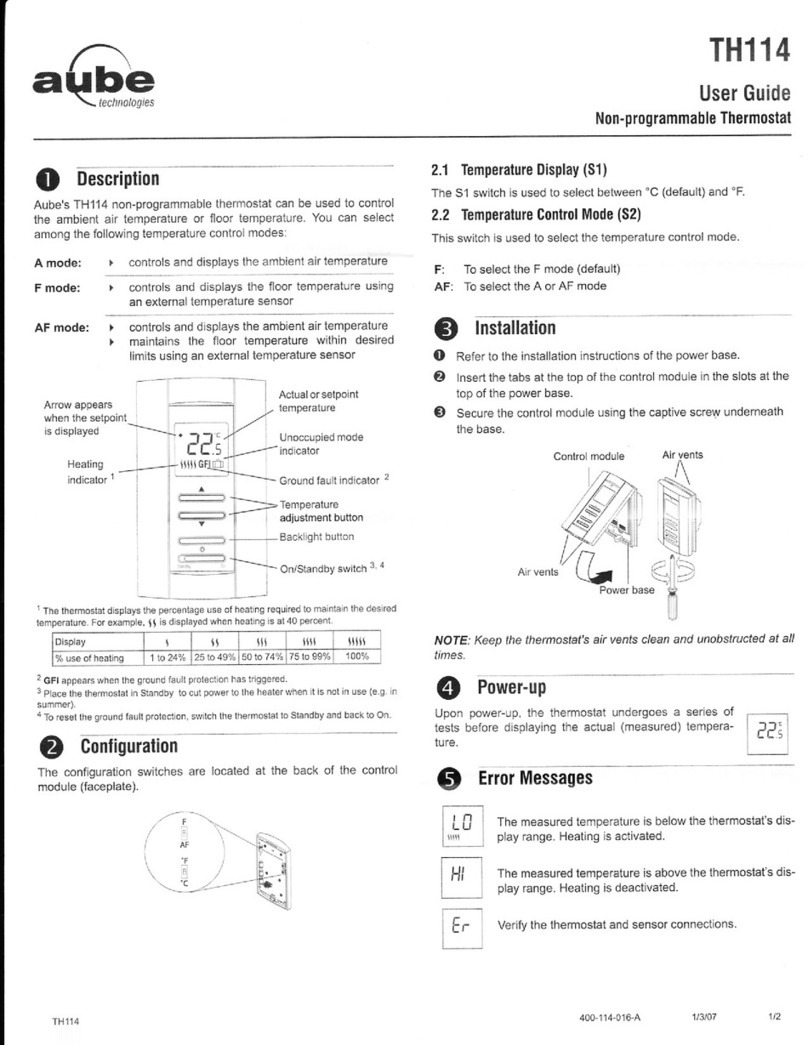
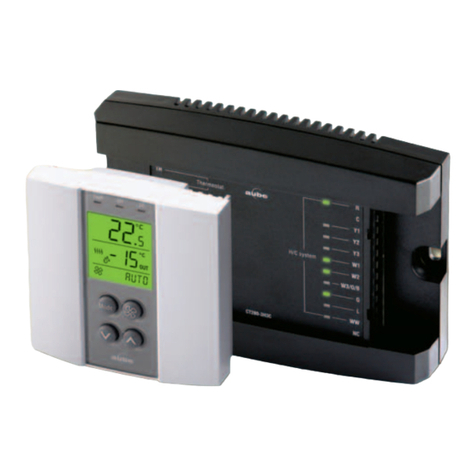
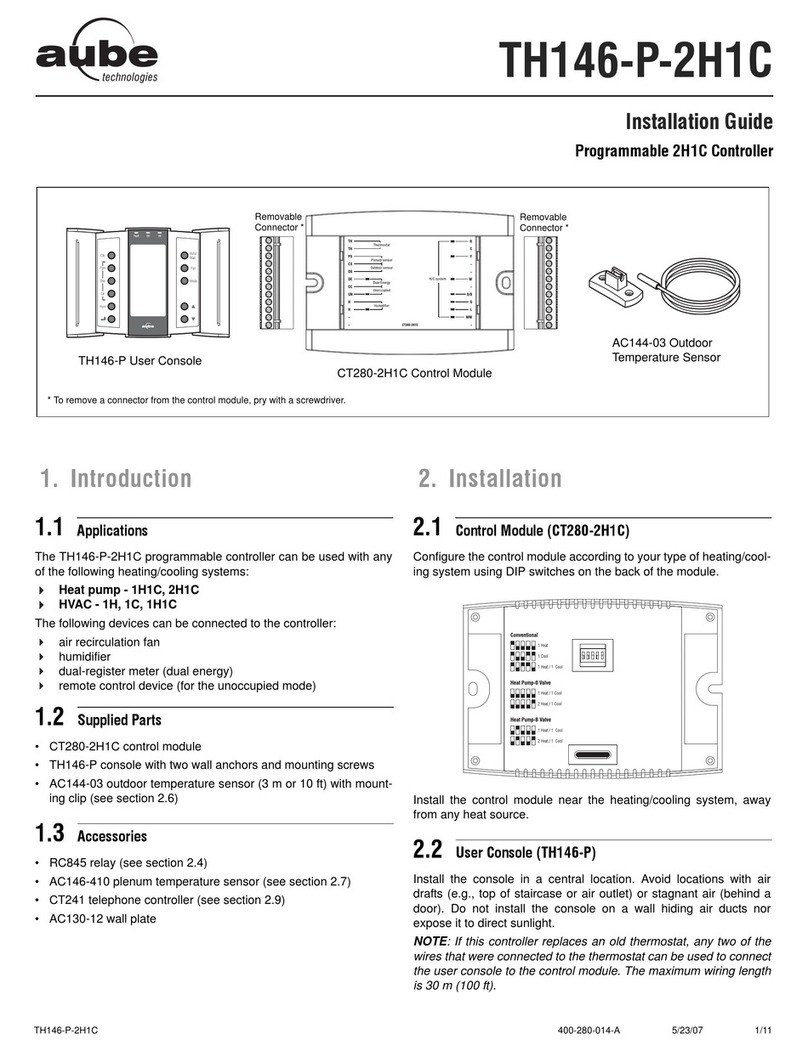
Aube Technologies TH146-P-U User manual

TH146-P-U
User’s Guide
Programmable H/C Controller
TH146-P-U 1/4
1) Press Clk. The hour display flashes.
2) Set the hour using .
3) Press Clk. The minute display flashes.
4) Set the minutes using .
5) Press Clk. The day display flashes.
6) Set the day using .
7) Press to return to the normal display.
1) Press Clk for 3 seconds to display the year.
2) Set the year using .
3) Press Clk to display the month.
4) Set the month using .
5) Press Clk to display the date.
6) Set the date using .
7) Press to return to the normal display.
Press the Fan button to select the fan operating mode.
• In automatic mode, the fan runs only when heating or cooling
is activated.
NOTE: For gas-operated HVAC systems, there
might be a delay before the fan starts or stops when heating
is activated or deactivated.
• In continuous mode, the fan runs continuously and the
symbol is displayed.
NOTE: if Smart Fan is enabled, when
the controller is in periods 2 and 4 of automatic mode and in
unoccupied mode, the fan will run only when heating or
cooling is activated. The fan will run continuously the rest of
the time.
Press Mode to place the system in one of the following modes:
You can place the controller in the unoccupied mode using a remote
control device such as Aube’s CT241 telephone controller. In this
mode, the temperature is lowered in heating mode or raised in
cooling mode. The amount of temperature setback is set using the
configuration menu (see installation guide). The message UNOC
appears during the unoccupied mode.
NOTE: Automatic changeover is disabled during the unoccupied
mode.
Temporary Bypass
In the unoccupied mode, only the buttons work. When you
adjust the temperature during this mode, the new temperature will
be used for the next 2 hours, after which the controller will return to
the previous setpoint. The message UNOC flashes during the
bypass.
Time and day setting
Programming
Program day selection
Program clear
Humidity setting
Return
Temperature
adjustment
mode selection
Fan operating
mode selection
System operating
mode selection
Up/Down buttons
Indicator LEDs
FAULT: System fault
EH: Emergency heat mode
DE: Dual energy
Day
Clock
Indoor temperature
Outdoor temperature
Indoor humidity
Indicator LEDs
Backlight
The screen is lit for 12 seconds
when any button is pressed.
However, the screen remains lit
while you are configuring the
controller.
1. General Settings
1.1 Clock and Day Setting
1.2 Date Setting
2. Operating Modes
2.1 Fan Operating Modes
2.2 System Operating Modes
HEAT The system is in heating mode.
COOL The system is in cooling mode.
AUTO
The system is in automatic changeover mode. (The
system switches between heating mode and cooling
mode to maintain the desired temperature.)
OFF The system is off.
EHEAT
The system is in emergency heat mode. Only auxiliary
heating is used when there is a call for heat. (This
mode applies only when the controller is connected to
a heat pump equipped with auxiliary heating).
2.3 Unoccupied Mode / Temperature Setback
This is a legacy product document
supported by Resideo. It is no
longer manufactured

TH146-P-U 2/4
The controller normally displays the measured indoor temperature.
To view the setpoint, press one of the buttons. The setpoint and
the symbol will be displayed for the next 5 seconds.
Use this mode to set the temperature manually. To place the
controller in this mode, press Auto/Man so that disappears from
the screen. Set the temperature using the buttons.
NOTE: If the controller is in automatic heat/cool changeover (see
section 2.2), the setpoint is automatically reduced or raised by 1°C
(1.8°F) when the controller switches to heating mode or to cooling
mode respectively. For example, if the setpoint is 24°C (75°F) in
heating mode, it will become 25°C (77°F) in cooling mode and will
return to 24°C (75°F) when the controller switches back to heating
mode.
Use this mode if you want the controller to adjust the temperature
according to the programmed schedule. To place the controller in
this mode, press Auto/Man so that appears on the screen.
Pre-programmed Schedule
The following schedule has been programmed at the factory. Two
temperature settings are programmed for each period of the
schedule: a heating setpoint and a cooling setpoint.
Modifying the Schedule
You can program up to 4 periods per day. To program a period, you
need to set the start time, the heating setpoint and the cooling
setpoint. The program can be different for each day of the week.
• Press Pgm to enter the programming mode. The settings for
Monday, Period 1 (P1) appear.
• To select a day to program, press Day until the day is displayed.
Press for 3 seconds to select all 7 days.
NOTE: If you select all 7 days, the settings of the displayed
period will be copied to all 7 days. For example, if you select all
7 days while period 1 is displayed, they will all now have the
same settings for period 1. If you display period 2 while all 7
days are selected, they will all now have the same settings for
period 2.
• To set the start time of a period, press Pgm until the period
number (P1 to P4) is displayed and the time display flashes. Then
press the buttons. The time changes in increments of 15
minutes.
NOTE: To skip a period, display the period and press Clr. For
example, in the pre-programmed schedule, periods 2 and 3
have been skipped for Saturday and Sunday.
• To set the temperatures for a period, press Pgm until the period
number (P1 to P4) is displayed and the temperature display
flashes. If necessary, press Mode to display the heating setpoint
or the cooling setpoint. Press the buttons to set the
temperature.
NOTE: The cooling setpoint is always higher than the heating
setpoint by a minimum of 1°C (1.8°F). For example, if the
cooling setpoint is 22°C (72°F) and you set the heating setpoint
to 23°C (73°F), the cooling setpoint will automatically become
24°C (75°F). However, if you raise the heating setpoint to 21°C
(70°F), the cooling setpoint will remain at 22°C (72°F). The
same principle applies when you set the cooling temperature.
• Press to exit.
The following diagram shows how to navigate the programming
menu.
Temporary Bypass
When you modify the temperature setpoint while the controller is in
automatic mode, the new temperature is used for the next 2 hours.
The icon flashes during the bypass. After the bypass, the
temperature set for the current period is used.
3. Temperature Setting
3.1 Temperature Display
3.2 Manual Temperature Setting
3.3 Automatic Temperature Setting
Pre-programmed Schedule MO TU WE TH FR SA SU
P1 Heating 21°C (70°F) 6:00 a.m.
Cooling 25.5°C (78°F)
P2 Heating 16.5°C (62°F) 8:00 a.m. --
Cooling 29.5°C (85°F)
P3 Heating 21°C (70°F) 6:00 p.m. --
Cooling 25.5°C (78°F)
P4 Heating 16.5°C (62°F) 10:00 p.m.
Cooling 28°C (82°F)
Heating is On Cooling is On
System operating mode
Fan operating mode (ap-
pears when the fan is in
continuous mode, disap-
pears when it is in automatic
mode)
Temperature adjustment
mode (appears when the
system is in automatic
mode, disappears when it
is in manual mode)
Auxiliary heating is On
Appears when the
temperature setpoint
is displayed Indoor temperature
MO TU
P1
6:00 6:00
21 25.5 21 25.5
P2
8:00 8:00
16.5 29.5 16.5 29.5
Pgm
Pgm
Pgm
Pgm
Pgm Pgm
Day
Day
Mode Mode
Mode Mode
Heat Cool Heat Cool
Heat Cool Heat Cool

TH146-P-U 3/4
NOTE: Skip this section if you do not have a humidifier or a
dehumidifier connected to the controller.
The humidity level can be set manually or automatically.
The humidity level is set by the user (5 to 60%).
1) Press the Hum button until MAN appears on the screen.
2) Press one of the buttons to adjust the humidity level.
3) Press the button.
The humidity level is set by the controller based on the outdoor
temperature to prevent ice formation or condensation on the
windows while providing enough humidity for your comfort.
However, the user can apply an offset (-9 to 9%). For example, the
user can enter a negative offset if there is still ice formation or
condensation on the windows.
1) Press the Hum button until AUTO appears on the screen. The
humidity level set by the controller is also displayed.
2) Press one of the buttons to enter or change the offset.
3) Press the button.
To turn the humidity control off:
1) Press the Hum button until OFF appears on the screen.
2) Press the button.
If you have connected an air exchanger to the controller, you can set
it in air exchange mode. In this mode, the air exchanger is activated
to circulate air between indoors and outdoors regardless of the
indoor humidity level.
To activate the air exchange mode:
1) Press the Hum button until AIR appears on the screen.
2) Set the duration of the air exchange mode using the
buttons. Select 10 - 90 minutes for a specific duration or On for
an indefinite length of time.
3) Press the button.
NOTE: If the air exchange mode has been set for a specific
duration, the controller will revert to the mode in which it was
previously (humidity control mode or off) at the end of the air
exchange mode.
To deactivate the air exchange mode:
1) Press the Hum button until one of the following appears on the
screen.
•AUTO: The air exchanger is in humidity control mode —
automatic setting (see section 4.2).
•MAN: The air exchanger is in humidity control mode —
manual setting (see section 4.1).
•OFF: The air exchanger is Off.
2) Press the button.
If the controller is configured for a minimum air exchange time every
hour and that minimum has not already been attained by the end of
the hour, the air exchanger will be activated regardless of the indoor
humidity level. Let’s say the minimum time is set to 10 minutes. If the
air exchanger has operated for 7 minutes during a particular hour, it
will automatically be activated for another 3 minutes by the end of
that hour. The minimum air exchange time is set using the
configuration menu (see installation guide).
1) Press the Mode button for 3 seconds to access the
configuration menu. The first menu item (parameter) is
displayed.
2) To view another menu item, briefly press the Mode button.
3) To modify a parameter, press either button.
4) To exit the configuration menu, press .
4. Humidity Setting
4.1 Manual Humidity Setting
4.2 Automatic Humidity Setting
4.3 Off
5. Air Exchange Setting
Humidifier is On
Dehumidifier is On
Appears when the
humidity setpoint
is displayed
Humidity control mode
(auto, manual, off or
air exchange)
Humidity level
Appears when
dehumidification is
disabled because the
outdoor temperature
is too high
5.1 Manual Activation
5.2 Manual Deactivation
5.3 Minimum Air Exchange Time
6. User Configuration Menu
6.1 Accessing User Configuration Menu

TH146-P-U 4/4
CT280-3H3C CONTROL MODULE
Power supply: 24 VAC
Current consumption: 150 mA
Maximum load per output: 1 A @ 24 VAC
Short cycle protection
•Minimum off-time: 4 minutes
•Minimum on-time: 2 minutes
Control cycles: 2 to 6 per hour
Operating temperature: 0°C to 50°C (32°F to 122°F)
Storage temperature: -20°C to 50°C (-4°F to 122°F)
Humidity conditions: 0 to 95%, non-condensing
Dimensions: 95 x 137 x 30 (3.8 x 5.4 x 1.2 in.)
TH146-P USER CONSOLE
Temperature setpoint range
•Heating mode: 5°C to 30°C (40°F to 86°F)
•Cooling mode: 15°C to 40°C (59°F to 104°F)
Humidity setpoint range: 5 to 60%
Indoor temperature display range: 0°C to 70°C (32°F to 158°F)
Outdoor temp. display range: -50°C to 70°C (-58°F to 158°F)
Temperature display resolution: 0.5°C (1°F)
Program protection: non-volatile memory
Operating temperature: 0°C to 50°C (32°F to 122°F)
Storage temperature: -20°C to 50°C (-4°F to 122°F)
Humidity conditions: 0 to 95%, non-condensing
Dimensions: 79 x 79 x 24 mm (3.1 x 3.1 x 1 in.)
Honeywell warrants this product, excluding battery, to be free from
defects in the workmanship or materials, under normal use and
service, for a period of three (3) years from the date of purchase by
the consumer. If at any time during the warranty period the product
is determined to be defective or malfunctions, Honeywell shall repair
or replace it (at Honeywell's option).
If the product is defective,
(i) return it, with a bill of sale or other dated proof of purchase, to
the place from which you purchased it, or
(ii) contact Honeywell. Honeywell will make the determination
whether the product should be returned, or whether a
replacement product can be sent to you.
This warranty does not cover removal or reinstallation costs. This
warranty shall not apply if it is shown by Honeywell that the defect or
malfunction was caused by damage which occurred while the
product was in the possession of a consumer.
Honeywell's sole responsibility shall be to repair or replace the
product within the terms stated above. HONEYWELL SHALL NOT
BE LIABLE FOR ANY LOSS OR DAMAGE OF ANY KIND,
INCLUDING ANY INCIDENTAL OR CONSEQUENTIAL DAMAGES
RESULTING, DIRECTLY OR INDIRECTLY, FROM ANY BREACH
OF ANY WARRANTY, EXPRESS OR IMPLIED, OR ANY OTHER
FAILURE OF THIS PRODUCT. Some provinces and states do not
allow the exclusion or limitation of incidental or consequential
damages, so this limitation may not apply to you.
THIS WARRANTY IS THE ONLY EXPRESS WARRANTY
HONEYWELL MAKES ON THIS PRODUCT. THE DURATION OF
ANY IMPLIED WARRANTIES, INCLUDING THE WARRANTIES
OF MERCHANTABILITY AND FITNESS FOR A PARTICULAR
PURPOSE, IS HEREBY LIMITED TO THE THREE-YEAR
DURATION OF THIS WARRANTY. Some provinces and states do
not allow limitations on how long an implied warranty lasts, so the
above limitation may not apply to you.
This warranty gives you specific legal rights, and you may have
other rights which vary by province, state or region.
705 Montrichard Avenue
Saint-Jean-sur-Richelieu, Quebec
J2X 5K8
Canada
1-800-831-2823
aube.service@honeywell.com
www.aubetech.com
6.2 User-accessible Configuration Parameters
Time format
•12Hr
•24Hr
Early Start
• On: Heating or cooling starts in advance
(as determined by the controller) so that
the desired temperature is attained at the
set times.
• OF (Off): Heating or cooling starts at the
set times.
NOTE: Early Start applies for periods 1 and
3 (P1 and P3) only. When this feature is
enabled, heating or cooling will start in
advance of the set time for P1 and P3 but
will start at the set time for P2 and P4.
Automatic
daylight
savings
adjustment
• OF (Off): The function is deactivated.
• 1 : The controller switches to daylight
savings time on the first Sunday of April
and to normal time on the last Sunday of
October.
• 2 : The controller switches to daylight
savings time on the second Sunday of
March and to normal time on the first
Sunday of November.
Temperature
format
•°C
• °F
This table lists only configuration parameters acessible by users.
For the complete list of configuration parameters, see the
installation guide.
7. Technical Specifications
8. Warranty
9. Technical Assistance
Printed in USA 02-2013

TH146-P-U
Guide de l’utilisateur
Contrôleur programmable — chauffage/climatisation
TH146-P-U 1/4
1) Appuyer sur le bouton Clk. L’affichage de l’heure clignote.
2) Régler l’heure au moyen de .
3) Appuyer sur le bouton Clk. L’affichage des minutes clignote.
4) Régler les minutes au moyen de .
5) Appuyer sur le bouton Clk. L’affichage du jour clignote.
6) Régler le jour au moyen de .
7) Appuyer sur le bouton pour retourner à l’affichage normal.
1) Appuyer sur le bouton Clk pendant 3 secondes pour afficher
l’année.
2) Régler l’année au moyen de .
3) Appuyer sur le bouton Clk pour afficher le mois.
4) Régler le mois au moyen de .
5) Appuyer sur le bouton Clk pour afficher la date.
6) Régler la date au moyen de .
7) Appuyer sur le bouton pour retourner à l’affichage normal.
Appuyer sur le bouton Fan pour sélectionner le mode du ventilateur.
• En mode automatique, le ventilateur fonctionne uniquement lors
d’une demande de chauffage ou de climatisation.
NOTA : Pour les
systèmes CVAC fonctionnant au gaz, il peut y avoir un délai avant
que le ventilateur démarre ou s'arrête une fois le chauffage activé ou
désactivé
.
• En mode continu, le ventilateur fonctionne sans arrêt et l’icône
s’affiche à l’écran.
NOTA : Si la fonction « Smart Fan» est utilisée,
lorsque le contrôleur sera dans les périodes 2 et 4 du mode
automatique ou en mode Inoccupé, le ventilateur fonctionnera
uniquement lors d’une demande de chauffage ou de climatisation.
Le ventilateur fonctionnera continuellement le reste du temps.
Appuyer sur le bouton Mode pour placer le système dans l’un des
modes suivants :
Le contrôleur peut être placé en mode Inoccupé au moyen d'un
dispositif de télécommande tel que la télécommande téléphonique
CT241 de Aube. Dans ce mode, la température de consigne est
abaissée en mode chauffage ou augmentée en mode climatisation.
L’écart de température est reglé à partir du menu de configuration
(voir le guide d’installation). Le message UNOC apparaît durant le
mode Inoccupé.
NOTA : Le changement automatique chauffage/climatisation est
désactivé durant le mode Inoccupé.
Dérogation temporaire
En mode Inoccupé, seuls les boutons fonctionnent. Si vous
modifiez la température lorsque le contrôleur est en mode Inoccupé,
la nouvelle valeur sera utilisée pendant les 2 heures suivantes. Le
message UNOC clignote durant la dérogation.
Réglage de
l’heure et le jour
Programmation
Sélection du jour
à programmer
Annulation
Réglage de l’humidité
Retour
Sélection du
mode de réglage
de la température
Sélection du mode
de fonctionnement
du ventilateur
Sélection du mode
de fonctionnement
du système
Boutons de réglage
Témoins
FAULT : défaut du système
EH : mode de chauffage d’urgence
DE : mode bi-énergie
Jour
Horloge
Température intérieure
Température extérieure
Humidité intérieure
Témoins
Rétroéclairage
L'écran s’illumine pendant 12
secondes lorsqu’on appuie sur
n'importe quel bouton. Cepen-
dant, l'écran reste illuminé pen-
dant que vous configurez le
contrôleur.
1. Réglages généraux
1.1 Réglage de l’horloge
1.2 Réglage de la date
2. Modes de fonctionnement
2.1 Modes de fonctionnement du ventilateur
2.2 Modes de fonctionnement du système
HEAT Le système est en mode chauffage.
COOL Le système est en mode climatisation.
AUTO
Le système change automatiquement entre le mode
chauffage et le mode climatisation pour maintenir la
température désirée.
OFF Le système est arrêté.
EHEAT
Le système est en mode chauffage d’urgence. Seul le
chauffage d’appoint est utilisé lors d’une demande de
chauffage. (Ce mode s’applique uniquement lorsque le
contrôleur est relié à une thermopompe munie de
chauffage d’appoint.)
2.3 Mode Inoccupé

TH146-P-U 2/4
Le contrôleur affiche normalement la température mesurée. Pour
voir la consigne, appuyer sur l’un des boutons . La consigne et
l’icône seront affichées pendant 5 secondes.
Utiliser ce mode de réglage pour régler la température
manuellement. Pour placer le contrôleur en réglage manuel,
appuyer sur le bouton Auto/Man de sorte que l’icône disparaisse
de l'écran. Régler la température à l'aide des boutons .
NOTA : Si le système est en changement automatique chauffage/
climatisation (voir section 2.2), la consigne est automatiquement
réduite ou haussée de 1 °C (2 °F) lorsque le système passe
respectivement au mode chauffage ou au mode climatisation. Par
exemple, si la consigne est de 24 °C (75 °F) en mode chauffage,
elle deviendra 25 °C (77 °F) en mode climatisation et retournera à
24 °C (75 °F) quand le système reviendra au mode chauffage.
Utiliser ce mode de réglage si vous désirez que le contrôleur rajuste
la température en fonction de l’horaire programmé. Pour placer le
contrôleur en réglage automatique, appuyer sur le bouton Auto/Man
de sorte que l’icône apparaisse à l'écran.
Horaire préprogrammé
L’horaire suivant a été programmé en usine. Deux valeurs de
température sont programmées pour chaque période de l’horaire :
la consigne de chauffage et la consigne de climatisation.
Modification de l’horaire
Vous pouvez programmer jusqu'à 4 périodes par jour. Pour
programmer une période, vous devez régler l'heure du début de la
période, la consigne de chauffage et la consigne de climatisation.
Chaque jour de la semaine peut avoir un programme différent.
• Appuyer sur le bouton Pgm pour accéder au mode de
programmation. Les réglages de la période 1 (P1) du lundi sont
affichés.
• Pour sélectionner le jour à programmer, appuyer sur le bouton
Day jusqu'à ce que le jour soit affiché. Appuyer pendant 3
secondes pour sélectionner les 7 jours.
NOTA : Si vous sélectionnez les 7 jours, les réglages de la période
affichée seront copiés pour toute la semaine. Par exemple, si vous
sélectionnez les 7 jours pendant que la période 1 est affichée, ils
auront tous les mêmes réglages pour la période 1. Si vous affichez la
période 2 pendant que les 7 jours sont sélectionnés, ils auront tous les
mêmes réglages pour la période 2.
• Pour régler l’heure du début d’une période, appuyer sur le bouton
Pgm jusqu'à ce que le numéro de la période (P1 à P4) soit affiché
et que l’heure clignote. Appuyer ensuite sur les boutons .
L’heure se règle à 15 minutes près.
NOTA : Pour sauter une période, afficher la période et appuyer sur le
bouton Clr. Par exemple, dans l’horaire préprogrammé, les périodes 2
et 3 ont été sautées pour le samedi et le dimanche.
• Pour régler les températures d’une période, appuyer sur le
bouton Pgm jusqu'à ce que le numéro de la période (P1 à P4) soit
affiché et que la température clignote. Au besoin, appuyer sur le
bouton Mode pour sélectionner la consigne de chauffage ou la
consigne de climatisation. Appuyer sur les boutons pour
régler la température.
NOTA : La consigne de climatisation dépasse toujours la consigne de
chauffage d’un minimum de 1 °C (2 °F). Par exemple, si la température
de climatisation est de 22 °C (72 °F) et que vous réglez la consigne de
chauffage à 23 °C (73 °F), la consigne de climatisation deviendra
automatiquement 24 °C (75 °F). Cependant, si vous réglez la consigne
de chauffage à 21 °C (70 °F), la consigne de climatisation restera à 25
°C (77 °F). Le même principe s’applique lorsque vous réglez la
consigne de climatisation.
• Appuyer sur le bouton pour sortir du mode de programmation.
L’illustration suivante démontre comment naviguer dans le menu de
programmation.
Dérogation temporaire
Si vous modifiez la température alors que le contrôleur est en
réglage automatique, la nouvelle valeur sera utilisée pendant les 2
heures suivantes. L'icône clignotera durant la dérogation. Après
la dérogation, la température programmée pour la période en cours
sera utilisée.
3. Réglage de la température
3.1 Affichage de la température
3.2 Réglage manuel de la température
3.3 Réglage automatique de la température
Horaire programmé en usine LU MA ME JE VE SA DI
P1 Chauffage 21 °C (70 °F) 6 h
Climatisation 25,5 °C (78 °F)
P2 Chauffage 16,5 °C (62 °F) 8 h --
Climatisation 29,5 °C (85 °F)
P3 Chauffage 21 °C (70 °F) 18 h --
Climatisation 25,5 °C (78 °F)
P4 Chauffage 16,5 °C (62 °F) 22 h
Climatisation 28 °C (82 °F)
Le chauffage
est activé
Climatisation
Mode de fonctionnement
du système
Mode de fonctionnement du
ventilateur (apparaît en
mode continu, disparaît en
mode automatique)
Mode de réglage de la
température (apparaît
en réglage automatique,
disparaît en réglage
manuel)
Le chauffage
auxiliaire est activé
Apparaît lorsque la
température de
consigne est affichée Température intérieure
MO TU
P1 P1
6:00 6:00
21 25.5 21 25.5
MO TU
P2 P2
8:00 8:00
16.5 29.5 16.5 29.5
Pgm
Pgm
Pgm
Pgm
Pgm Pgm
Day
Day
Mode Mode
Mode Mode
Chauff. Climat.
Chauff. Climat.
Chauff. Climat.
Chauff. Climat.

TH146-P-U 3/4
NOTA : Omettre cette section si un humidificateur ou un
déshumidificateur n’est pas relié au contrôleur.
Le taux d’humidité peut être reglé de façon manuel ou automatique.
L’utilisateur règle le taux d’humidité manuellement (5 % à 60 %).
1) Appuyer sur le bouton Hum jusqu’à ce que le message MAN
apparaisse à l’écran.
2) Appuyer sur l’un des boutons pour régler le taux
d’humidité.
3) Appuyer sur le bouton .
Le contrôleur établit la consigne de taux d’humidité en fonction de la
température extérieure afin de prévenir le givre ou la condensation
sur les fenêtres. Cependant, l’utilisateur peut appliquer un écart
(-9 % à 9 %) à la consigne. Par exemple, il peut programmer une
valeur négative s’il y a de condensation sur les fenêtres.
1) Appuyer sur le bouton Hum jusqu’à ce que le message AUTO
apparaisse à l’écran. Le taux d’humidité établi par le contrôleur
est aussi affiché.
2) Appuyer sur l’un des boutons pour programmer un écart.
3) Appuyer sur le bouton .
Pour arrêter l’humidificateur :
1) Appuyer sur le bouton Hum jusqu’à ce que le message OFF
apparaisse à l’écran.
2) Appuyer sur le bouton .
Si un échangeur d'air est relié au contrôleur, ce dernier peut être
placé en mode d’échange d’air. Dans ce mode, l’échangeur d’air est
activé pour permettre une circulation d’air entre l’intérieur et
l’extérieur peu importe le taux d’humidité intérieur.
Pour passer au mode d’échange d’air :
1) Appuyer sur le bouton Hum jusqu'à ce que AIR apparaisse à
l’écran.
2) Régler la durée du mode d’échange d’air à l’aide des boutons
. Sélectionner 10-90 minutes pour une durée spécifique ou
sélectionner On pour une durée indéfinie.
3) Appuyer sur le bouton .
NOTE : Si le mode d’échange d’air est réglé pour une durée
spécifique, le contrôleur retournera au mode qu’il était
précédemment (régulation d’humidité ou arrêt) à la fin du mode
d’échange d’air.
Pour quitter le mode d’échange d’air :
1) Appuyer sur le bouton Hum jusqu’à ce que l’écran affiche l’une
des mentions suivantes :
•AUTO : l’échangeur d’air est en mode de régulation de
l’humidité — réglage automatique (voir la section 4.2).
•MAN : l’échangeur d’air est en mode de régulation de
l’humidité — réglage manuel (voir la section 4.1).
•OFF : l’échangeur d’air est arrêté.
2) Appuyer sur le bouton pour retourner à l'affichage normal.
Si le contrôleur est configuré pour une durée minimale d’échange
d’air par heure, l'échangeur d'air sera activé vers la fin de l’heure
quel que soit le taux d’humidité si la durée minimale n’a pas été
atteinte. Par exemple, si la durée minimale est réglée à 10 minutes
et que l'échangeur d'air a fonctionné durant 7 minutes dans le
courant d’une heure, il sera automatiquement activé pendant 3
autres minutes juste avant la fin de l’heure. La durée minimale
d’échange d’air est reglée à partir du menu de configuration (voir le
guide d’installation).
1) Appuyer sur le bouton Mode pendant 3 secondes pour accéder
au menu de configuration. Le premier paramètre apparaît.
2) Pour visualiser un autre paramètre, appuyer brièvement sur le
bouton Mode.
3) Pour modifier un paramètre, appuyer sur l’un des boutons .
4) Pour sortir du menu de configuration, appuyer sur le bouton .
4. Réglage de l’humidité
4.1 Réglage manuel de l’humidité
4.2 Réglage automatique de l’humidité
4.3 Arrêt
5. Réglage de l’échange d’air
Indique que l’humidificateur
est en marche
La flèche indique que
la consigne de taux
d’humidité est affichée
Mode de régulation
d’humidité (auto, manuel,
arrêt ou échangeur d’air)
Taux d’humidité
Indique que le
déshumidificateur
est en marche
Indique que la déshumidi-
fication est désactivée
parce que la température
extérieure est trop élevée
5.1 Activation manuelle
5.2 Désactivation manuelle
5.3 Durée minimale d’échange d’air
6. Menu de configuration
6.1 Accés au menu de configuration

TH146-P-U 4/4
MODULE DE CONTRÔLE CT280-3H3C
Alimentation : 24 Vca
Consommation : 150 mA
Charge maximale par sortie : 1 A @ 24 Vca
Protection anti-court cycle
•Temps d’arrêt minimal: 4 minutes
•Temps de fonctionnement minimal: 2 minutes
Cycles de régulation : 2 à 6 par heure
Température de fonctionnement : 0 °C à 50 °C (32 °F à 122 °F)
Température d’entreposage : -20 °C à 50 °C (-4 °F à 122 °F)
Conditions d’humidité : 0 % à 95 % sans condensation
Dimensions : 95 mm x 137 mm x 30 mm (3,8 po x 5,4 po x 1,2 po)
CONSOLE TH146-P
Plage de réglage de la température
•Mode chauffage : 5 °C à 30 °C (40 °F à 86 °F)
•Mode climatisation : 15 °C à 40 °C (59 °F à 104 °F)
Plage de réglage d’humidité : 5 % à 60 %
Affichage de la temp. intérieure : 0 °C à 70 °C (32 °F à 158 °F)
Affichage de la temp. extérieure : -50 °C à 70 °C (-58 °F à 158 °F)
Résolution d’affichage : 0,5 °C (1 °F)
Protection de la programmation : mémoire non volatile
Température de fonctionnement : 0 °C à 50 °C (32 °F à 122 °F)
Température d’entreposage : -20 °C à 50 °C (-4 °F à 122 °F)
Conditions d’humidité : 0 % à 95 % sans condensation
Dimensions : 79 mm x 79 mm x 24 mm (3,1 po x 3,1 po x 1 po)
Honeywell garantit ce produit, à l'exception des piles, contre tout
vice de fabrication ou de matière dans la mesure où il en est fait une
utilisation et un entretien convenables, et ce, pour trois (3) ans à
partir de la date d'achat par le consommateur. En cas de
défectuosité ou de mauvais fonctionnement pendant la période de
garantie, Honeywell remplacera ou réparera le produit (au gré de
Honeywell).
Si le produit est défectueux,
(i) le retourner, accompagné d'une preuve d'achat indiquant la
date d'achat, à l’endroit où il a été acheté, ou
(ii) contacter Honeywell. Honeywell déterminera alors si le produit
doit être retourné ou si un produit de remplacement peut vous
être expédié.
La présente garantie ne couvre pas les frais de retrait ou de
réinstallation. La présente garantie ne s'appliquera pas s'il est
démontré que la défectuosité ou le mauvais fonctionnement est dû
à un endommagement du produit alors que le consommateur l'avait
en sa possession.
La responsabilité de Honeywell se limite à réparer ou à remplacer le
produit conformément aux modalités susmentionnées.
HONEYWELL N'EST EN AUCUN CAS RESPONSABLE DES
PERTES OU DOMMAGES, Y COMPRIS LES DOMMAGES
INDIRECTS OU ACCESSOIRES DÉCOULANT DIRECTEMENT
OU INDIRECTEMENT D'UNE VIOLATION QUELCONQUE D'UNE
GARANTIE, EXPRESSE OU TACITE, APPLICABLE AU PRÉSENT
PRODUIT NI DE TOUTE AUTRE DÉFECTUOSITÉ DU PRÉSENT
PRODUIT. Certaines provinces ne permettent pas l'exclusion ou la
restriction des dommages indirects et, par conséquent, la présente
restriction peut ne pas s'appliquer.
LA PRÉSENTE GARANTIE TIENT LIEU DE TOUTES LES
AUTRES GARANTIES, EXPRESSES OU TACITES, ET LES
GARANTIES DE VALEUR MARCHANDE ET DE CONFORMITÉ À
UNE FIN PARTICULIÈRE SONT PAR LES PRÉSENTES
EXCLUES APRÈS LA PÉRIODE DE TROIS ANS DE LA
PRÉSENTE GARANTIE. Certaines provinces ne permettent pas de
limiter la durée des garanties tacites et, par conséquent, la présente
limitation peut ne pas s'appliquer.
La présente garantie donne au consommateur des droits légaux
spécifiques et peut-être certains autres droits qui peuvent varier
selon la province, l’état ou la région.
705, avenue Montrichard
Saint-Jean-sur-Richelieu (Québec)
J2X 5K8
Canada
1 800 831-2823
aube.service@honeywell.com
www.aubetech.com
6.2 Paramètres de configuration
Affichage de
l’heure
•12h
•24h
Démarrage
anticipé
• On (activé) : Le chauffage ou la
climatisation démarre plus tôt afin que la
température désirée soit atteinte à l’heure
réglée.
• OF (désactivé) : Le chauffage ou la
climatisation débute à l’heure réglée.
NOTA : Le démarrage anticipé ne s’applique
que pour les périodes 1 et 3 (P1 et P3).
Lorsque cette fonction est activée, le
chauffage ou la climatisation démarre avant
les heures réglées pour P1 et P3, mais
débute aux heures réglées pour P2 et P4.
Passage
automatique à
l’heure d’hiver
et d’été
• OF (désactivé) : L’heure normale (d’hiver)
est employée toute l'année.
• 1 : Le contrôleur passe à l’heure avancée
(d’été) le premier dimanche d’avril et à
l’heure d’hiver le dernier dimanche
d’octobre.
• 2 : Le contrôleur passe à l’heure d’été le
deuxième dimanche de mars et à l’heure
d’hiver le premier dimanche de novembre.
Affichage de la
température
•°C
• °F
Ce tableau présente seulement des paramètres de configuration
acessible par l’utilisateur. Pour la liste complète de paramètres
de configuration, voir le guide d'installation.
7. Fiche technique
8. Garantie
9. Service technique
Imprimé aux É.-U. 02-2013
Other manuals for TH146-P-U
2
Table of contents
Languages:
Other Aube Technologies Controllers manuals

Aube Technologies
Aube Technologies TH114 User manual

Aube Technologies
Aube Technologies CT241-01 User manual

Aube Technologies
Aube Technologies TH146-N-2H1C User manual

Aube Technologies
Aube Technologies TH146-N-U User manual

Aube Technologies
Aube Technologies TH146-P-DE User manual

Aube Technologies
Aube Technologies CT241 Manual

Aube Technologies
Aube Technologies RC845 User manual

Aube Technologies
Aube Technologies TH146-P-U User manual

Aube Technologies
Aube Technologies DVR-320 User manual

Aube Technologies
Aube Technologies CT240 Manual