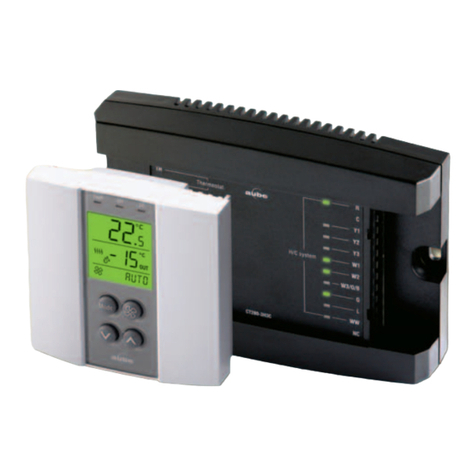
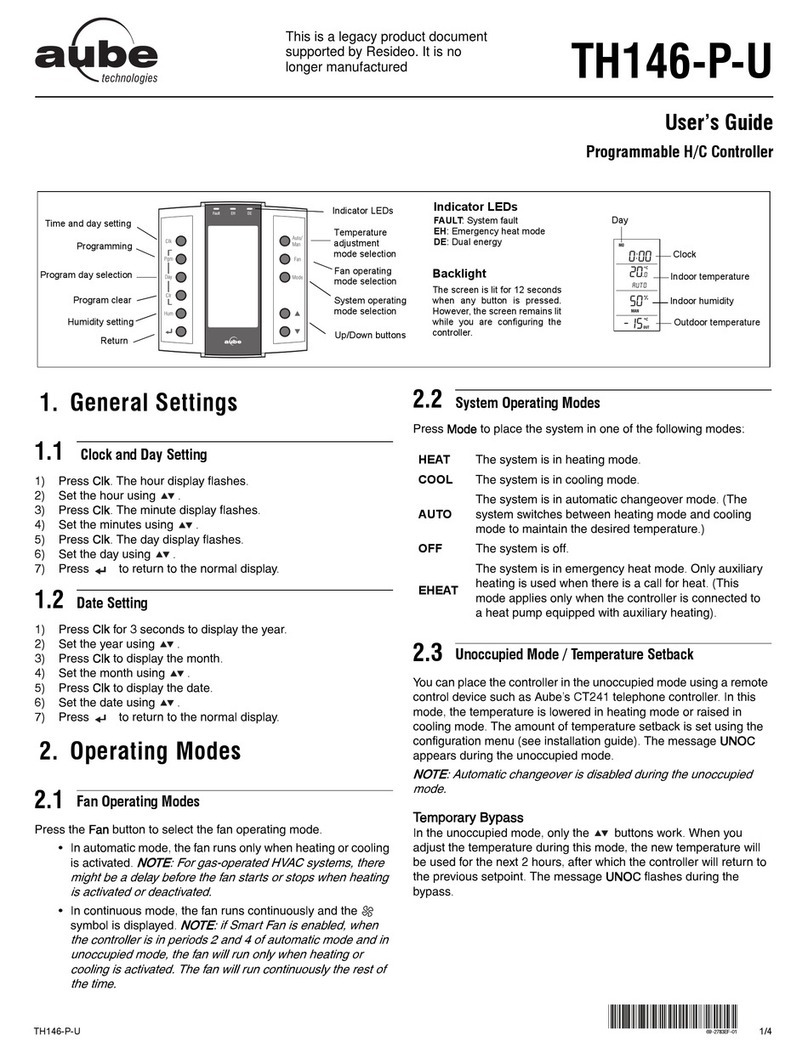
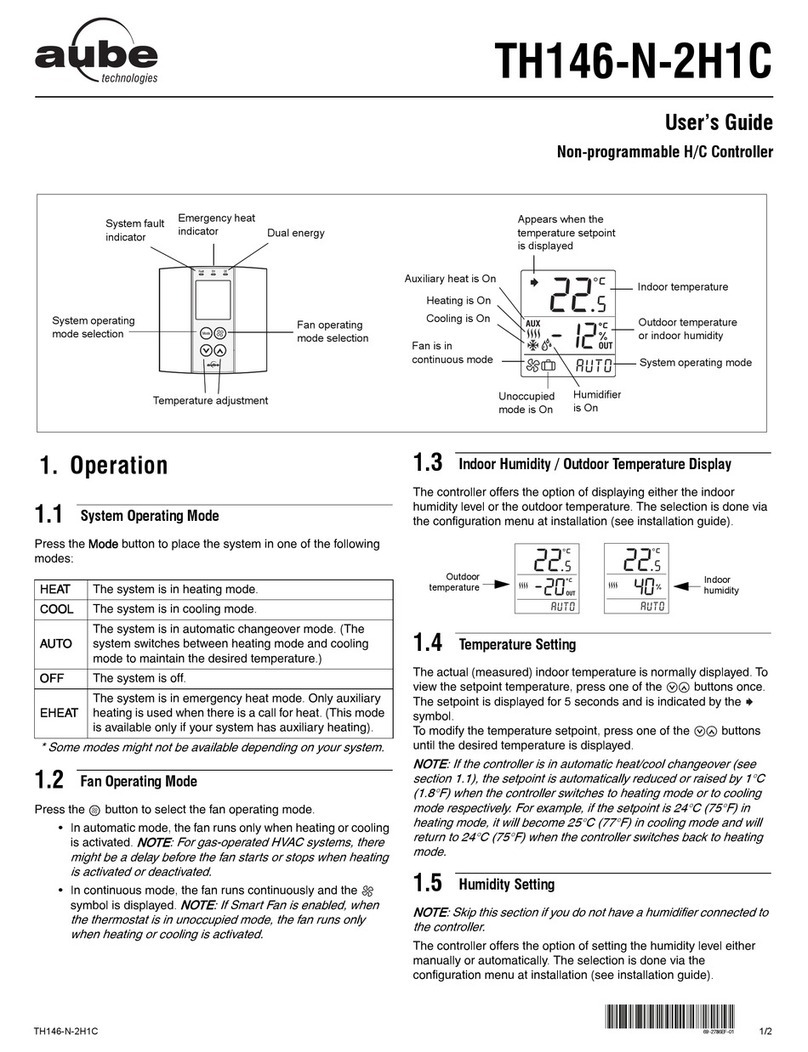
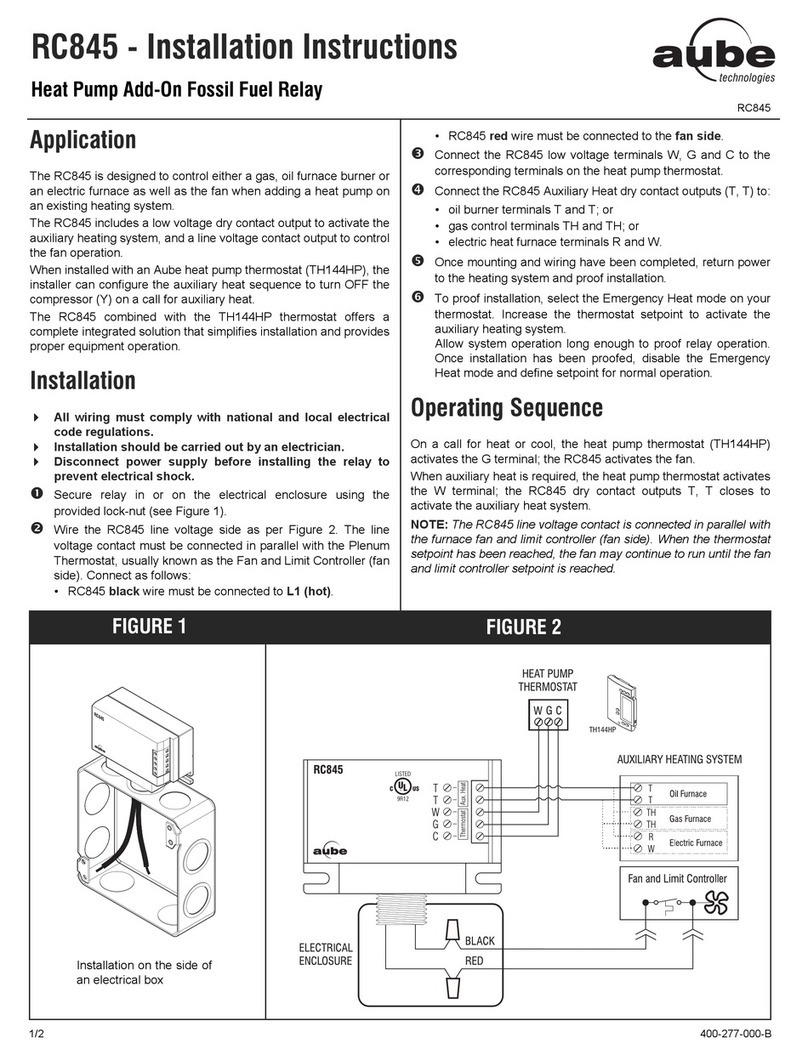
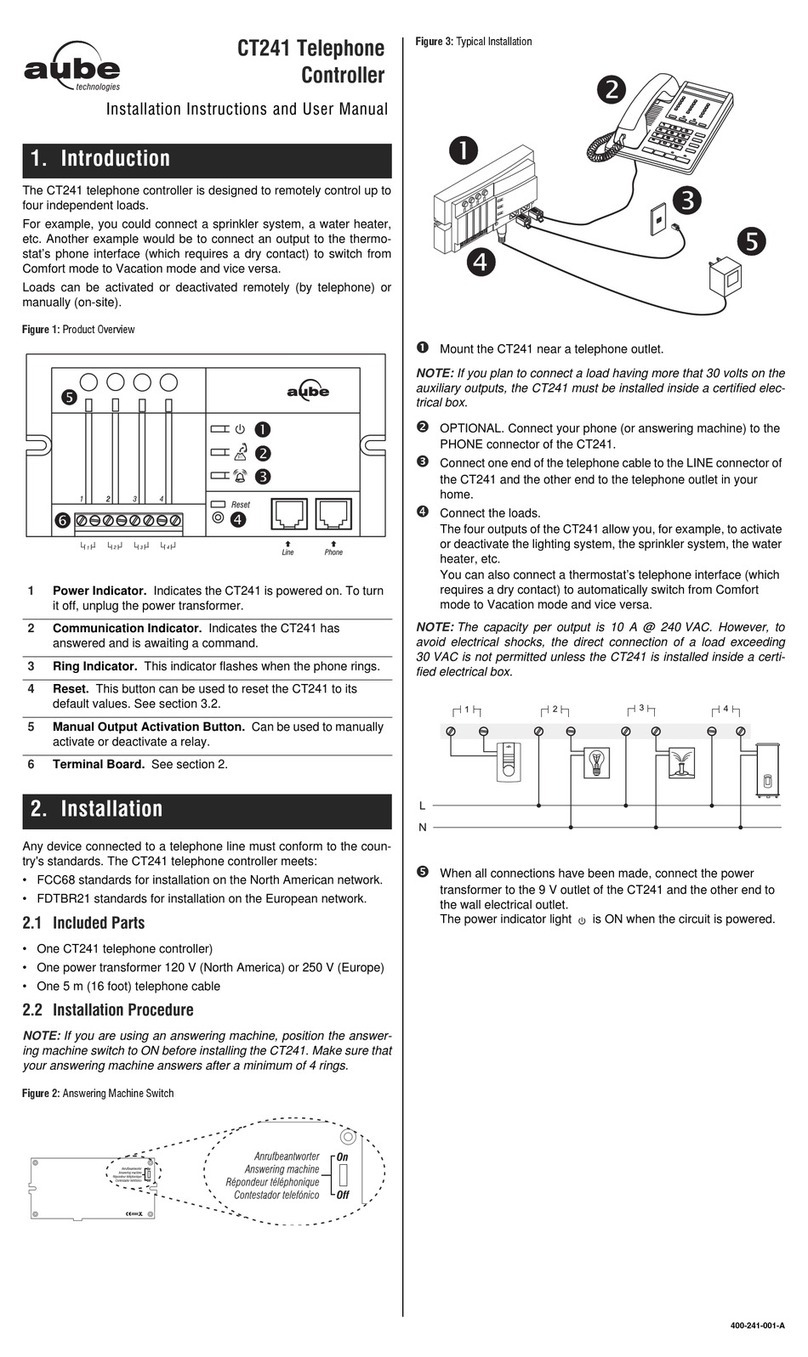
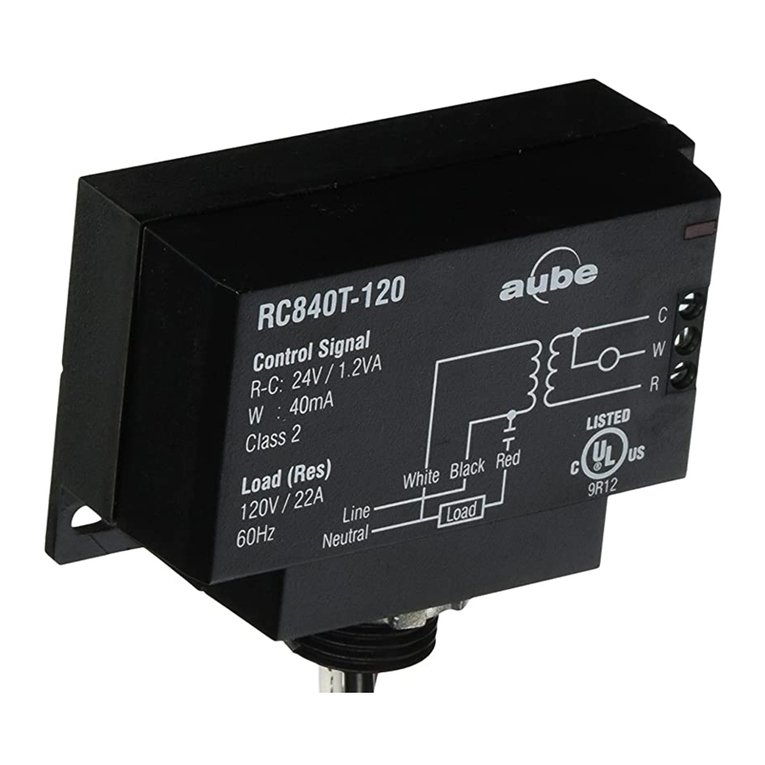
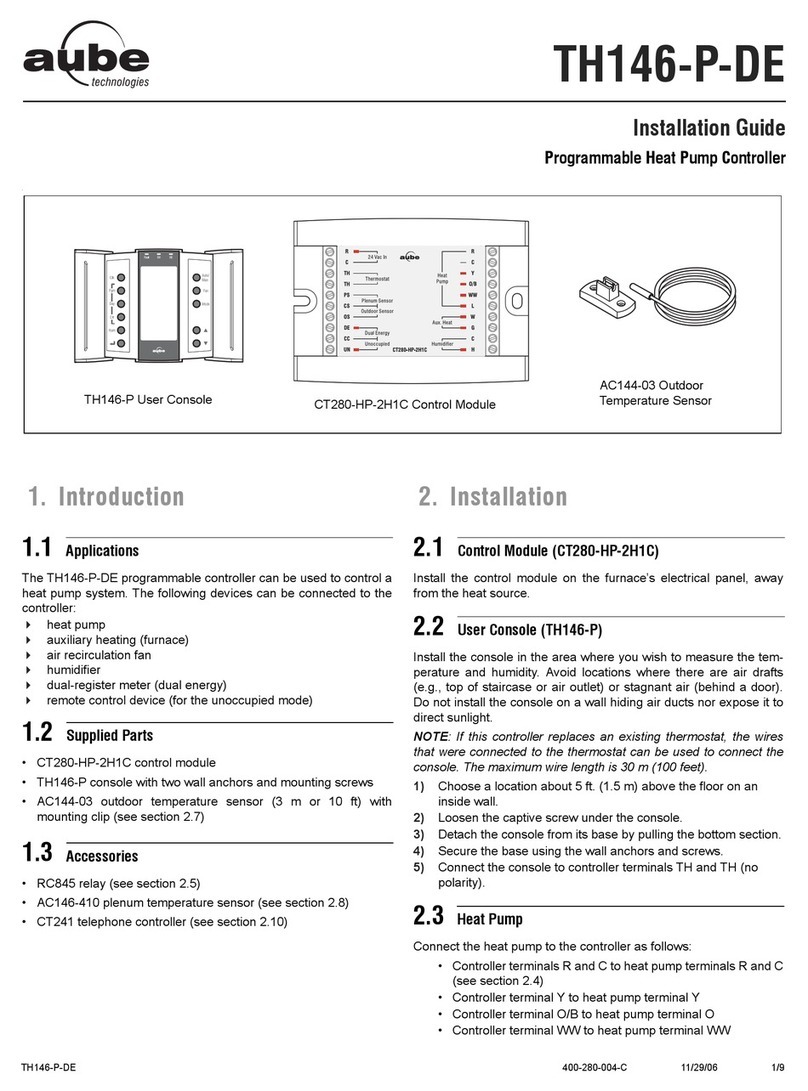
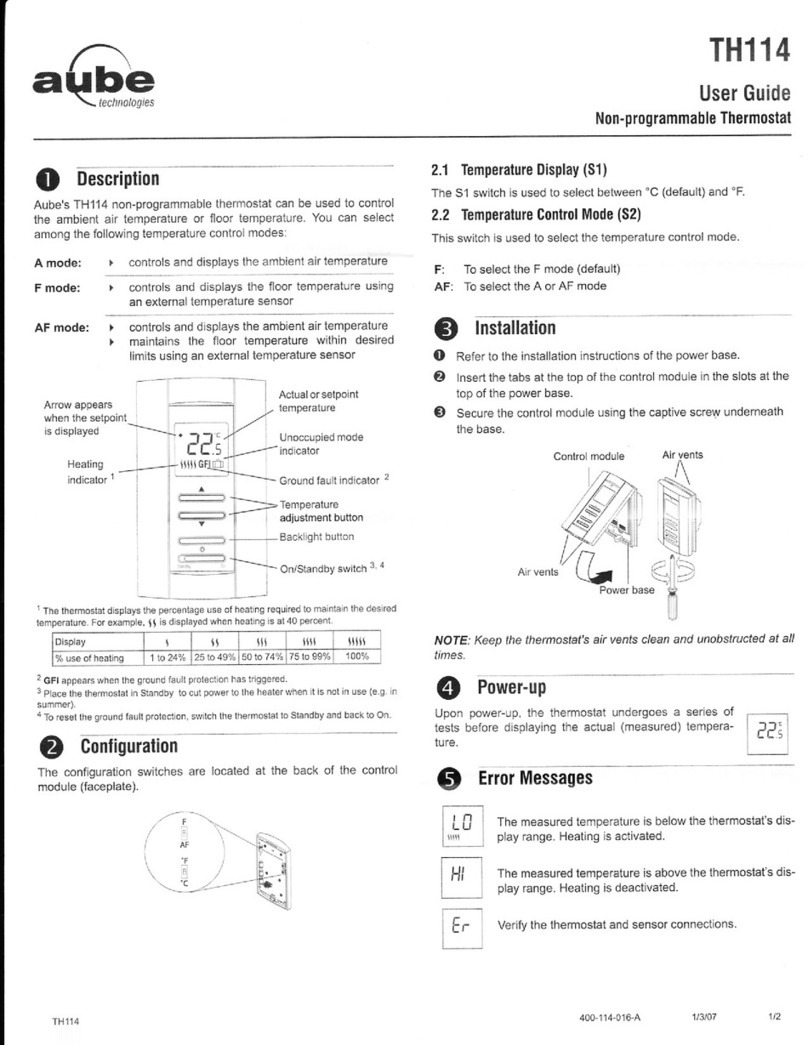
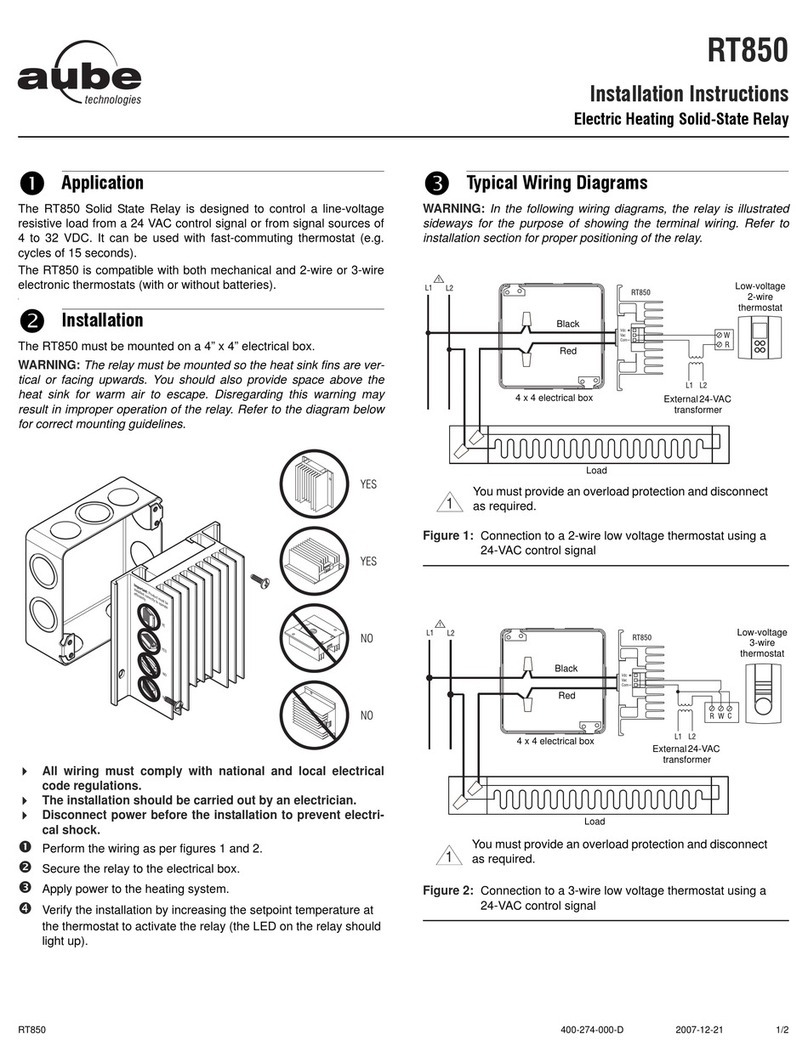
Aube Technologies TH146-N-2H1C User manual

TH146-N-2H1C 1/8
TH146-N-2H1C
Installation Guide
Non-programmable H/C Controller
The TH146-N-2H1C electronic controller can be used with any of
the following heating/cooling systems:
• Heat pump - 1H1C, 2H1C
• HVAC - 1H, 1C, 1H1C
The following devices can be connected to the controller:
• air recirculation fan
• humidifier
• dual-register meter (dual energy)
• remote control device (for the unoccupied mode)
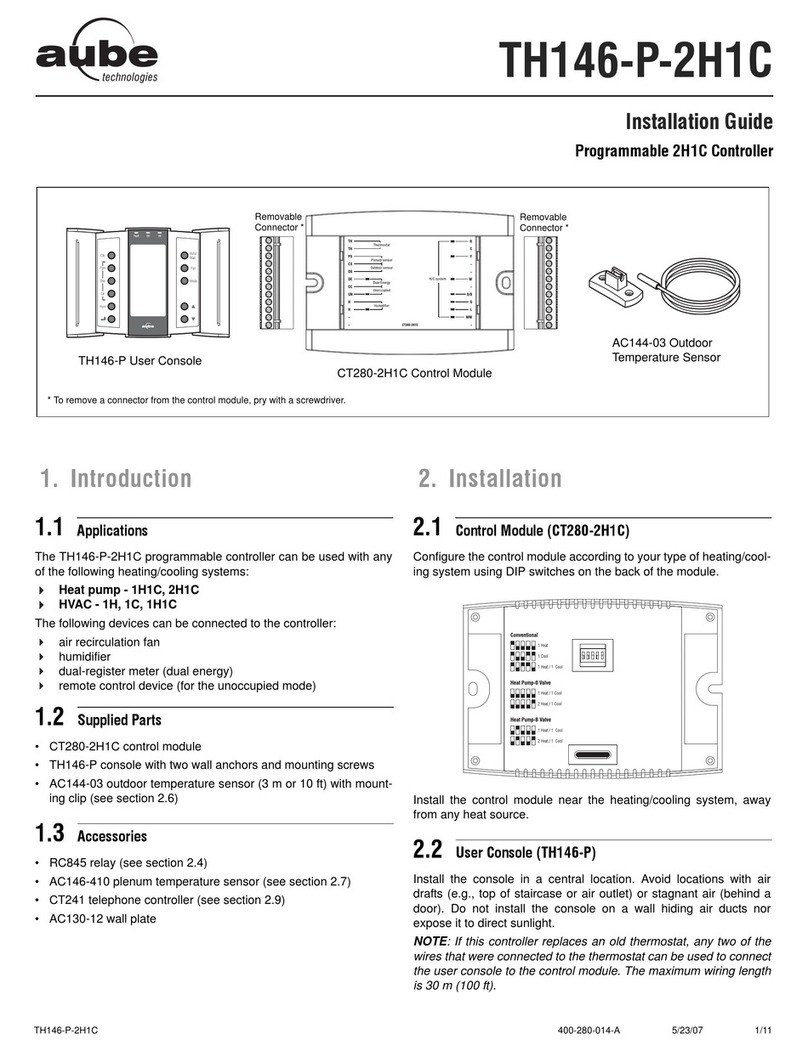
• CT280-2H1C control module
• TH146 console with two wall anchors and mounting screws
• AC144-03 outdoor temperature sensor (3 m or 10 ft) with
mounting clip (see section 2.6)
• RC845 relay (see section 2.4)
• AC146-410 plenum temperature sensor (see section 2.7)
• CT241 telephone controller (see section 2.9)
Configure the control module according to your type of heating/
cooling system using DIP switches on the back of the module.
Install the control module near the heating/cooling system, away
from any heat source.
Install the console in a central location. Avoid locations with air
drafts (e.g., top of staircase or air outlet) or stagnant air (behind a
door). Do not install the console on a wall hiding air ducts nor
expose it to direct sunlight.
NOTE: If this controller replaces an old thermostat, any two of the
wires that were connected to the thermostat can be used to connect
the user console to the control module. The maximum wiring length
is 30 m (100 ft).
CT280-2H1C Control Module
AC144-03 Outdoor
Temperature Sensor
TH146 User Console
Removable
Connector *
Removable
Connector *
* To remove a connector from the control module, pry with a screwdriver.
1. Introduction
1.1 Applications
1.2 Supplied Parts
1.3 Accessories
2. Installation
2.1 Control Module (CT280-2H1C)
2.2 User Console (TH146)
This is a legacy product document
supported by Resideo. It is no
longer manufactured

TH146-N-2H1C 2/8
1) Choose a location about 1.5 m (5 ft) above the floor on an
inside wall.
2) Loosen the captive screw under the console.
3) Detach the console from its base by pulling the bottom section.
4) Secure the base using the wall anchors and screws.
5) Connect the console to controller terminals TH and TH (no
polarity).
The terminals used to connect the heating/cooling system depend
on the type of system. See the appropriate wiring table on page 4.
If you have an add-on installation, you may need an RC845 relay to
connect the furnace (auxiliary heat) and its fan to the controller.
Install the relay near the control module and connect the wires as
follows:
• relay terminals W, G and C to controller terminals W, G and
C.
• relay terminals T and T to the appropriate furnace terminals:
T and T (oil); TH and TH (gas); R and W (electric).
NOTE: Refer to the relay’s installation instructions for more details.
Connect the humidifier in series with the power supply between
controller terminals H and H (dry contact).
The outdoor sensor is required for the following:
• outdoor temperature display
• balance points (heat pumps only, see section 4.2)
• defrost point (heat pumps only, see section 4.3)
• automatic humidity control (see user guide)
When installing the sensor, observe the following guidelines:
• Avoid locations where the sensor can be covered with snow
or exposed to direct sunlight.
• Avoid air outlets and concealed chimneys or stove pipes.
Install the sensor using its mounting clip and connect it to controller
terminals OS and CS (no polarity).
NOTE: The maximum wiring length is 30 m (100 ft).
The plenum sensor is required for the following:
• low temperature limit inside the plenum (HVAC only)
• high temperature limit inside the plenum (HVAC only)
• fan limit if gas heating is used (HVAC only)
• high pressure protection during defrost cycle (This protection
is generally needed for add-on installations only. It is not
needed if the heat pump is not connected to the controller
terminal WW.)
Install the sensor on the side of the plenum and
position it such that its aperture faces the air
flow.
Connect the sensor to controller terminals PS
and CS (no polarity). For more information,
refer to the instructions provided with the
sensor.
NOTE: The maximum wiring length is 30 m (100 ft).
NOTE: The dual-energy input can be used only with a heat pump
equipped with auxiliary heat.
The dual-energy input can be connected to the dual-register meter
equipped with a normally open (NO) dry contact. Connect the
controller terminals DE and CC to the meter terminals (yellow and
red wires).
The contact closes when the outdoor temperature drops below the
temperature setting on the meter. When the contact is closed, the
heat pump is disabled and only the auxiliary heat can be used.
To use the unoccupied mode, the controller requires a remote
control device such as Aube’s CT241 telephone controller equipped
with a normally open (NO) dry contact placed between terminals
UN and CC of the controller. The unoccupied mode is activated
when the contact closes. (See user guide.)
To access the configuration switches, loosen the captive screw
under the console and pull the console from its base.
Backlight (SW1-1)
BL ON: The screen backlight remains on all the time.
AUTO: The screen backlight turns on when a button is pressed
and remains on for 12 seconds.
Access Mode (SW1-2)
INST: Installer mode. Gives access to all configuration
parameters.
NOTE: In installer mode, the short-cycle protection is disabled
and the interstage delay is reduced to 1 minute.
USER: User mode. Gives access to configuration parameter 17
(humidity control) only (see page 8).
Keypad Lock (SW1-3)
I: The keypad is locked. Settings cannot be changed.
O: The keypad is unlocked.
2.3 Heating/Cooling System
2.4 RC845 Relay
2.5 Humidifier
2.6 Outdoor Sensor (AC144-03)
2.7 Plenum Sensor (AC146-410)
2.8 Dual-energy Input
2.9 Unoccupied Mode Input
3. Configuration
3.1 Configuration Switches

TH146-N-2H1C 3/8
1) Place the console in Installer mode (INST) using the SW1-2
switch on the back of the console.
2) Press the Mode button for 3 seconds to access the
configuration menu (see page 8). The first menu item
(parameter) is displayed.
3) To view another menu item, briefly press the Mode button.
4) To modify a parameter, press either button.
5) To exit the configuration menu, press .
6) Return the console to User mode (USER).
With automatic heating/cooling mode changeover, there’s no need
to adjust the controller at every change of season or weather
condition. The controller switches automatically between heating
mode and cooling mode to maintain the desired temperature. The
mode changeover is triggered as follows:
• The controller switches to cooling mode when the indoor
temperature is higher than the setpoint by more than 1.5°C
(2.5°F) for 15 minutes.
• The controller switches to heating mode when the indoor
temperature is lower than the setpoint by more than 1.5°C
(2.5°F) for 15 minutes.
Balance Points are used to disable the heat pump or the auxiliary
heating when the outdoor temperature is below or above a set
temperature.
• When the outdoor temperature is below the Balance Point
Low (bP L), the heat pump is disabled and only auxiliary
heating can be used (see page 8, item 2).
• When the outdoor temperature is above the Balance Point
High (bP H), the auxiliary heat is disabled and only the heat
pump can be used (see page 8, item 3).
NOTE: Balance Points cannot be used if the AC144-03 outdoor
temperature sensor is not connected to the controller.
The auxiliary heat is activated during defrost except under the
following conditions:
• When the outdoor temperature is above the defrost point
(see page 8, item 4).
NOTE: This condition will not apply if
the AC144-03 outdoor sensor is not connected to the
controller.
• When the plenum temperature is above 40°C (104°F) for
add-on installations only. The auxiliary heat is re-activated
when the plenum temperature drops below 32°C (90°F).
NOTE: This condition will not apply if the AC146-410 plenum
sensor is not connected to the controller.
NOTE: The auxiliary heat’s short-cycle protection is disabled during
defrost.
The controller can be configured for either of the following types of
heat pump installations (see page 8, item 5).
•Add-on Installation: This type of installation is performed
when adding a heat pump to an existing furnace. When the
heat pump is installed, the furnace becomes the auxiliary
heat source. In this type of installation, the indoor coils are
usually installed downstream of the auxiliary heat source.
When the controller is configured for an add-on installation,
the heat pump is disabled during auxiliary heating to prevent
overpressure.
•New Installation: In this type of installation, as there is not
already a furnace, the auxiliary heat source is installed at the
same time as the heat pump. In this type of installation, the
indoor coils are located upstream of the auxiliary heat. When
the controller is configured for a new installation, the heat
pump and the auxiliary heat can operate simultaneously.
Interstage Delay is the time allocated for the temperature to return
to an acceptable value when it deviates too far from the setpoint. If
this time has elapsed, the next heating or cooling stage is activated.
The heating or cooling stage will be deactivated when the
temperature returns to an acceptable value. The Interstage Delay is
fixed at 4 minutes if the controller is configured for an HVAC system
and is user-adjustable if it is configured for a heat pump (see
page 8, item 6).
Low Temperature Limit (LLMT) and High Temperature Limit (HLMT)
are used to keep the plenum from becoming too cold or too hot.
During cooling, if the plenum temperature is lower than LLMT, a
cooling stage is deactivated starting with the one that was last
activated. If, after a while, the temperature is still too low, another
cooling stage is deactivated and so on. Likewise, during heating, if
the plenum temperature is higher than HLMT, a heating stage is
deactivated starting with the one that was last activated. If, after a
while, the temperature is still too high, another heating stage is
deactivated and so on. (see page 8, items 7 and 8.)
WARNING: LLMT and HLMT can be used in parallel with an
UL353-approved device but they do not replace such device.
NOTE: LLMT and HLMT cannot be used if the plenum temperature
sensor is not connected to the controller.
When Smart Fan is enabled (see page 8, item 12), the fan operates
as follows:
• During the unoccupied mode (i.e., when you are away from
home), the fan operates only when heating or cooling is
activated.
• The fan operates continuously the rest of the time.
NOTE: For Smart Fan to work, set the fan to On (see user guide).
3.2 Configuration Menu
4. Principles of Operation
4.1 Automatic Heating/Cooling Changeover
4.2 Balance Points (heat pumps only)
4.3 Heating During Defrost (heat pumps only)
4.4 Types of Heat Pump Installations
4.5 Interstage Delay
4.6 Low and High Temperature Limits
4.7 Smart Fan
TH146-N-2H1C 4/8
Wiring Tables
Heat Pump
Terminal Device 1H1C 2H1C
TH Console Connect the console between the TH terminals (no polarity)
TH
PS Plenum sensor Connect the plenum sensor between the PS and CS terminals (no polarity)
CS Common S Common terminal for the plenum sensor and the outdoor sensor
OS Outdoor sensor Connect the outdoor sensor between the CS and OS terminals (no polarity)
DE Dual Energy Connect the dual-register meter between the DE and CC terminals (no polarity)
CC Common C Common terminal for the dual-energy meter and the unoccupied mode input
UN Unoccupied mode input Connect a dry contact between the UN and CC terminals (no polarity)
HHumidifier (24 Vac / 1 A) Connect the humidifier between the H terminals (dry contact)
H
RPower (24 Vac)
C
YCompressor (24 Vac / 1 A)
WAuxiliary heat (24 Vac / 1 A)
O/B Reversing valve (24 Vac / 1 A)
GFan (24 Vac / 1A)
LFault (24 Vac / 5 mA)
WW
Defrost (24 Vac / 5 mA)
NOTE: Requires a dry contact (do not
connect to a solid-state relay such as a
triac).
HVAC
Terminal Device 1H 1C 1H1C
TH Console Connect the console sensor between the TH terminals (no polarity)
TH
PS Plenum sensor Connect the plenum sensor between the PS and CS terminals (no polarity)
CS Common S Common terminal for both plenum sensor and outdoor sensor
OS Outdoor sensor Connect the outdoor sensor between the OS and CS terminals (no polarity)
DE Not used
CC Common C Common terminal for the unoccupied mode input
UN Unoccupied mode input Connect a dry contact between UN and R terminals (no polarity)
HHumidifier (24 Vac / 1 A) Connect the humidifier between the H terminals (dry contact)
H
RPower (24 Vac)
C
YCooling unit (24 Vac / 1 A)
WHeating unit (24 Vac / 1 A)
O/B Not used
GFan (24 Vac / 1 A)
LNot used
WW Not used

TH146-N-2H1C 5/8
Wiring Diagram: 2H1C Heat Pump — New Installation
AC146-410
AC144-03
CT241
Humidifier
Compressor
Auxiliary Heat
Reversing Valve
Fan
Fault
Defrost
Dual Energy

TH146-N-2H1C 6/8
Wiring Diagram: 2H1C Heat Pump — Add-on Installation
AC146-410
AC144-03
CT241
Fault
Reversing Valve
Compressor
Furnace
Fan Limit
Humidifier
Dual Energy
Defrost

TH146-N-2H1C 7/8
Wiring Diagram: 1H1C HVAC
AC146-410
AC144-03
CT241
Cooling Unit
Heating Unit
Fan
Humidifier

TH146-N-2H1C 8/8
Configuration Menu
Item Parameters Display Default Options Description
1Temperature
format °C °C / °F Select the temperature display format.
2Balance point
low
-10°C
(14°F)
-30 to 10°C
(-22 to 50°F)
Set the bP L limit (see section 4.2).
NOTE: Lower bP L below its minimum (- -) if you do not wish to use this
function.
3Balance point
high
5°C
(41°F)
-5 to 30°C
(23 to 86°F)
Set the bP H limit (see section 4.2).
NOTE: Raise bP H above its maximum (- -) if you do not wish to use this
function.
4 Defrost point 10°C
(50°F)
-10 to 15°C
(14 to 59°F)
Set the defrost point temperature (see section 4.3).
NOTE: Raise the defrost point above its maximum (- -) if you do not wish to use
this function.
5 Installation type Ad Ad / nr
Set according to the type of heat pump installation (see section 4.4).
• Ad (add-on): Use this setting when the indoor coils are located downstream
of the auxiliary heat source. This is generally the case for add-on
installations.
• nr (normal): Select this setting when the indoor coils are located upstream of
the auxiliary heat source. This is generally the case for new installations.
6Auxiliary
interstage delay 30 min. 5 to 90 min. Set the interstage delay for the auxiliary stage (see section 4.5).
7Low temperature
limit
- -
(disabled)
-10 to 20°C
(14 to 68°F)
Set the low temperature limit of the plenum (see section 4.6).
NOTE: The function is disabled when LLMT is set below its minimum (- -).
8Hightemperature
limit
- -
(disabled)
30 to 90°C
(86 to 194°F)
Set the high temperature limit of the plenum (see section 4.6).
NOTE: The function is disabled if HLMT is set above its maximum (- -).
9 Cycles per hour 4 2 to 6
Select the number of heating/cooling cycles per hour. For optimal heating
control, use the setting that matches your system as follows: 3=20 min (hot
water, 90%+ high-efficiency furnace), 4=15 min (gas or oil), 5=12 min (gas or
oil), 6=10 min (electric).
10 Heat type EL GA / EL
This setting determines the fan operation in automatic mode when the system is
in heating mode.
• EL (electric heating): The fan starts when heating starts and stops when
heating stops.
• GA (gas or oil heating): The fan starts when the temperature inside the
plenum rises above the Fan Limit (see item 11) and stops when the
temperature drops 12°C below the Fan Limit.
NOTE: The fan will not start if
the plenum temperature sensor is not connected to the controller
.
11 Fan limit 80°C
(176°F)
38 to 90°C
(100 to 194°F)
This parameter is available only when gas heating is selected (see item 10).
WARNING: FLMT can be used in parallel with an UL353-approved device but
they do not replace such device.
NOTE: The fan will not start if you raise FLMT above its maximum (--).
12 Smart Fan OF On / OF • On: Smart Fan is On (see section 4.7).
• OF: Smart Fan is Off.
13 Temperature
setback
0°C
(0°F)
0 to 9°C
(0 to 16°F)
Set the amount of temperature setback when the controller is placed in
Unoccupied mode (see user guide).
14
Outdoor
temperature
display
On On / OF
Select between displaying the outdoor temperature or the indoor humidity level.
• On: Displays the outdoor temperature.
• OF: Displays the indoor humidity level.
NOTE: To display the outdoor temperature, the outdoor sensor must be
connected.
15 Humidifier
operating mode HE Co / HE / Fn
• Co (conventional): The humidifier will operate if the humidity is too low. If the
fan is not already On, it will turn On at the same time as the humidifier.
• HE (heat): The humidifier can operate only when heating is activated.
• Fn (fan): The humidifier can operate as long as the fan is running, whether
heating is activated or not.
NOTE: The humidifier is disabled when cooling is activated.
16
Automatic
humidity
adjustment
OF On / OF
Allows you to set the humidity control to automatic mode.
• On (automatic): The humidity level is automatically regulated by the controller
according to the outdoor temperature to avoid condensation or ice formation
on windows while providing enough humidity for your comfort (see item 17).
• OF (manual): The user manually sets the humidity level (see item 17).
17
Humidity setpoint 5 % 5 to 60% Set the desired humidity level. This parameter is available only when the
humidity control is placed in manual mode (see item 16).
Humidity offset 0 -9 to 9%
This parameter is available only when the humidity control is placed in
automatic mode (see item 16). It allows the user to apply an offset to the
automatic humidity control. For example, the user can enter a negative offset if
there is ice formation or condensation on the windows.
Note 1: Parameters 2 to 6 are not available when the controller is configured for HVAC or 1H1C heat pump.
Note 2: Parameters 7 and 8 are not available when the controller is configured for heat pump.
Printed in USA 02-2013

TH146-N-2H1C 1/8
TH146-N-2H1C
Guide de l’installateur
Contrôleur non programmable — chauffage/climatisation
Le contrôleur électronique TH146-N-2H1C peut être utilisé avec
n'importe lequel des systèmes de chauffage et climatisation
suivants :
• Thermopompe - 1H1C, 2H1C
• CVAC - 1H, 1C, 1H1C
Les appareils suivants peuvent aussi être reliés au contrôleur :
• ventilateur à circulation d’air
• humidificateur
• compteur à double registre (bi-énergie)
• dispositif de télécommande (pour mode Inoccupé)
• Module de contrôle CT280-2H1C
• Console TH146 avec deux chevilles et deux vis de montage
• Sonde de température extérieure AC144-03 de 3 m (10
pieds) avec un support de montage (voir section 2.6)
• Relais de chauffage RC845 (voir section 2.4)
• Sonde de plénum AC146-410 (voir section 2.7)
• Télécommande téléphonique CT241 (voir section 2.9)
Configurer le module de contrôle selon votre type de système de
chauffage et climatisation au moyen des sélecteurs à l’arrière du
module.
Installer le module de contrôle près du système de chauffage et
climatisation, loin des sources de chaleur.
Installer la console à un endroit central. Éviter les endroits où il y a
des courants d’air (ex. : le haut d’un escalier ou une sortie d’air) ou
des points d’air stagnant (ex. : derrière une porte). Éviter aussi
d’installer le thermostat sur un mur qui dissimule des conduits d’air
ou de l’exposer aux rayons du soleil.
NOTA : Si le contrôleur remplace un ancien thermostat, les fils qui
raccordaient le thermostat peuvent être utilisés pour brancher la
console au module de contrôle. La longueur maximale permise du
fil est 30 m (100 pieds).
Module de contrôle CT280-2H1C
Console TH146
Sonde de température
extérieure AC144-03
Connecteur
amovible *
Connecteur
amovible *
* Pour séparer un connecteur du module de contrôle, l’écarter du module avec un tournevis.
1. Introduction
1.1 Applications
1.2 Pièces fournies
1.3 Accessoires
2. Installation
2.1 Module de contrôle (CT280-2H1C)
2.2 Console (TH146)

TH146-N-2H1C 2/8
1) Choisir un endroit situé à environ 1,5 m (5 pieds) au-dessus du
plancher et sur une cloison intérieure.
2) Dévisser la vis captive située sous la console.
3) Séparer la console de sa base en tirant sur la partie du bas.
4) Fixer la base avec les chevilles et les vis.
5) Raccorder la console aux bornes TH et TH du contrôleur
(aucune polarité).
Les bornes à utiliser pour relier le système de chauffage et
climatisation dépendent du type de système. Voir le tableau de
connexions approprié à la page 4.
Si vous avez une installation «add-on» (installation modifiée), un
relais RC845 peut être nécessaire pour raccorder la fournaise
(chauffage d’appoint) et le ventilateur au contrôleur. Installer le
relais RC845 près du module de contrôle. Raccorder comme suit :
• bornes W, G et C du relais aux bornes W, G et C du
contrôleur.
• bornes T et T du relais aux bornes de la fournaise : T et T
(mazout); TH et TH (gaz); R et W (électrique).
NOTA : Se référer aux instructions d’installation du relais pour les
détails sur le raccordement.
Raccorder l’humidificateur en série à l’alimentation entre les bornes
H et H (contact sec) du contrôleur.
La sonde extérieure remplit les fonctions suivantes :
• affichage de la température extérieure
• points d’équilibre (thermopompes uniquement, voir
section 4.2)
• point de dégivrage (thermopompes uniquement, voir
section 4.3)
• contrôle automatique de l’humidité (voir le guide de
l’utilisateur)
Suivre les directives suivantes :
• Éviter les endroits où elle risque d’être recouverte de glace
ou d’être exposée aux rayons directs du soleil.
• Éviter les bouches de ventilation et les tuyaux de cheminée.
Installer la sonde à l’aide du support de montage et la raccorder aux
bornes OS et CS du contrôleur (aucune polarité).
NOTA : La longueur maximale permise du fil est 30 m (100 pieds).
La sonde de plénum remplit les fonctions suivantes :
• limite minimale de température dans le plénum (CVAC
uniquement)
• limite maximale de température dans le plénum (CVAC
uniquement)
• limite du ventilateur si un chauffage au gaz est utilisé (CVAC
uniquement)
• protection contre la surpression durant le cycle de dégivrage
(la sonde n’est généralement nécessaire que pour les
installations « add-on» (installations modifiées). Elle n’est
pas nécessaire si la thermopompe n’est pas reliée à la borne
WW du contrôleur.)
Installer la sonde sur le côté du plénum et la
positionner de sorte que l’ouverture de lecture
soit face au courant d’air.
Raccorder la sonde aux bornes PS et CS du
contrôleur (aucune polarité).Pour plus
d'information, se référer aux instructions fournies
avec la sonde.
NOTA : La longueur maximale permise du fil est
30 m (100 pieds).
NOTA : L’entrée bi-énergie peut être utilisée uniquement avec une
thermopompe munie de chauffage d’appoint.
L’entrée bi-énergie se branche au compteur à double registre muni
d’un contact sec normalement ouvert (NO). Raccorder les bornes
DE et CC du contrôleur aux bornes (fils jaune et rouge) du
compteur.
Le contact se ferme lorsque la température extérieure est inférieure
à la consigne réglée sur le compteur. Quand le contact est fermé, la
thermopompe est désactivée et seul le chauffage d’appoint peut
être utilisé.
Pour utiliser le mode Inoccupé, vous devez relier les bornes UN et
CC du contrôleur à un système de contrôle à distance, tel que la
télécommande téléphonique CT241 de Aube, muni d’un contact sec
normalement ouvert (NO). Le mode est activé lorsque le contact se
ferme. (Voir le guide de l’utilisateur.)
Pour avoir accès aux sélecteurs, dévisser la vis captive située sous
la console et tirer la console de sa base.
Rétroéclairage (SW1-1)
BL ON : L’écran est continuellement rétroéclairé.
AUTO : L’écran est rétroéclairé uniquement lorsqu’on appuie
sur un bouton. L’écran reste éclairé pendant 12 secondes.
Mode d’accès (SW1-2)
INST : Mode installateur. Permet d’avoir accès à tous les
paramètres de configuration.
NOTA : Dans le mode installateur, la protection anti-court cycle
est désactivée et le délai d’activation (interstage) est réduit à 1
minute.
USER : Mode utilisateur. Permet d’avoir accès au paramètre nº
17 (réglage d’humidité) uniquement (voir la page 8).
Clavier verrouillé (SW1-3)
I : Le clavier est verrouillé. Les réglages ne sont pas
modifiables.
O : Le clavier est déverrouillé.
2.3 Système de chauffage et climatisation
2.4 Relais RC845
2.5 Humidificateur
2.6 Sonde extérieure (AC144-03)
2.7 Sonde de plénum (AC146-410)
2.8 Entrée bi-énergie
2.9 Entrée mode Inoccupé
3. Configuration
3.1 Sélecteurs de configuration

TH146-N-2H1C 3/8
1) Placer la console en mode installateur (INST) à l’aide du
sélecteur SW1-2 situé à l’arrière de la console.
2) Appuyer sur le bouton Mode pendant 3 secondes pour accéder
au menu de configuration (voir la page 8). Le premier
paramètre apparaît.
3) Pour visualiser un autre paramètre, appuyer brièvement sur le
bouton Mode.
4) Pour modifier un paramètre, appuyer sur l’un des boutons .
5) Pour sortir du menu de configuration, appuyer sur le bouton .
6) Replacer la console en mode utilisateur (USER).
Grâce au changement automatique entre le mode chauffage et le
mode climatisation, plus besoin de régler le contrôleur à chaque
changement de saison ou de conditions météorologiques. Le
contrôleur passe automatiquement au mode chauffage ou au mode
climatisation pour maintenir la température désirée :
• Le contrôleur passe au mode climatisation lorsque la
température intérieure est supérieure à sa consigne de plus
de 1,5 °C (2,5 °F) pendant 15 minutes.
• Le contrôleur passe au mode chauffage lorsque la
température intérieure est inférieure à sa consigne de plus
de 1,5 °C (2,5 °F) pendant 15 minutes.
«Balance Points» (points d'équilibre) permettent de désactiver la
thermopompe ou le chauffage d’appoint lorsque la température
extérieure est supérieure ou inférieure à la valeur réglée.
• Lorsque la température extérieure est inférieure au «Balance
Point Low» (point d’équilibre bas), la thermopompe est
désactivée et seul le chauffage d’appoint peut être utilisé
(voir page 8, numéro 2).
• Lorsque la température extérieure est supérieure au
«Balance Point High» (point d’équilibre haut), le chauffage
d’appoint est désactivé et seule la thermopompe peut être
utilisée (voir page 8, numéro 3).
NOTA : Les points d'équilibre ne peuvent être utilisés si la sonde de
température extérieure AC144-03 n’est pas branchée.
Lorsque la thermopompe est en dégivrage, le contrôleur active le
chauffage d’appoint, sauf dans les cas suivants :
• La température extérieure est supérieure au «Defrost Point»
(point de dégivrage; voir page 8, numéro 7).
NOTA : Cette
condition ne sera pas applicable si la sonde extérieure
AC144-03 n’est pas branchée.
• La température du plénum est supérieure à 40 °C (104 °F)
pour les installations «add-on» uniquement. Le chauffage
d’appoint peut être réactivé seulement lorsque la
température descend en dessous de 32 °C (90 °F).
NOTA :
Cette condition ne sera pas applicable si la sonde de plénum
AC146-410 n’est pas branchée.
NOTA : La protection anti-court cycle du chauffage d’appoint est
désactivée lors du dégivrage.
Le contrôleur peut être configuré pour l'un ou l'autre des types
d'installation de thermopompes suivants (voir page 8, numéro 5) :
•Installation «add-on» (installation modifiée) : Ce type
d'installation est exécuté pour ajouter la thermopompe à une
fournaise. Une fois la thermopompe installée, la fournaise
sert de chauffage d’appoint. Dans ce type d'installation, les
serpentins intérieurs sont habituellement installés en aval du
chauffage d’appoint. Lorsque le contrôleur est configuré pour
une installation modifiée, la thermopompe est désactivée
durant le chauffage d’appoint pour empêcher la surpression.
•Nouvelle installation : Dans ce type d'installation, comme il
n'y a pas déjà de fournaise, le chauffage d’appoint est
installé en même temps que la thermopompe. Dans ce type
d'installation, les serpentins intérieurs sont situés en amont
du chauffage d’appoint. Lorsque le contrôleur est configuré
pour une nouvelle installation, la thermopompe et le
chauffage d’appoint peuvent fonctionner en même temps.
Le délai d’activation est le temps alloué à la température pour
retourner à une valeur acceptable lorsque qu’elle s’éloigne trop de
sa consigne. Si le temps est écoulé, le prochain étage de chauffage
ou de climatisation sera activé. L’étage de chauffage ou de
climatisation sera désactivé lorsque la température retournera à
une valeur acceptable. Le délai d’activation est fixé à 4 minutes
lorsque le contrôleur est configuré pour un système CVAC, mais il
est réglable lorsque le contrôleur est configuré pour une
thermopompe (voir page 8, numéro 6).
La limite de température minimale (LLMT) et la limite de
température maximale (HLMT) servent à empêcher que le plénum
ne devienne trop froid ou trop chaud. Durant la climatisation, si la
température du plénum est inférieure à LLMT, un étage de
refroidissement est désactivé en commençant par celui qui a été
activé le dernier. Si, après un certain délai, la température est
encore trop basse, un autre étage de refroidissement est désactivé,
et ainsi de suite. De même, durant le chauffage, si la température
du plénum est supérieure à HLMT, un étage de chauffage est
désactivé en commençant par celui qui a été activé le dernier. Si,
après un certain délai, la température est encore trop élevée, un
autre étage de chauffage est désactivé, et ainsi de suite. Voir page
8, numéros 7 et 8.
MISE EN GARDE : Les LLMT et HLMT peuvent être utilisées en
parallèle avec un dispositif approuvé UL 353 mais ne remplacent
pas celui-ci.
NOTA : Les LLMT et HLMT ne peuvent être utilisées si la sonde de
plénum n’est pas branchée.
Lorsque la fonction «Smart Fan» est activée (voir page 8, numéro
12), le ventilateur fonctionne comme suit :
• Pendant le mode Inoccupé (c.-à-d. quand vous êtes absent),
le ventilateur fonctionne uniquement lorsque le chauffage ou
la climatisation sont activés.
• Le ventilateur fonctionne sans arrêt le reste du temps.
NOTA : Pour que la fonction «Smart Fan» fonctionne, placer le
ventilateur en mode « On» (voir le guide de l’utilisateur).
3.2 Menu de configuration
4. Principes de fonctionnement
4.1 Changement automatique chauffage/climatisation
4.2 «Balance Points» (thermopompes uniquement)
4.3
Chauffage durant le dégivrage (thermopompes uniquement)
4.4 Types d’installation de thermopompes
4.5 Délai d’activation
4.6 Limites de température minimale et maximale
4.7 «Smart Fan» (ventilateur intelligent)

TH146-N-2H1C 4/8
Tableaux de connexions
Thermopompe
Borne Dispositif 1H1C 2H1C
TH Console Relier la console aux bornes TH (aucune polarité)
TH
PS Sonde de plénum Relier la sonde de plénum aux bornes PS et CS (aucune polarité)
CS Commun S Borne commune pour la sonde de plénum et la sonde extérieure
OS Sonde extérieure Relier la sonde extérieure aux bornes CS et OS (aucune polarité)
DE Bi-énergie Relier le compteur à double registre aux bornes DE et CC (aucune polarité)
CC Commun C Borne commune pour la connexion du compteur à double registre et de l’entrée mode Inoccupé
UN Entrée mode Inoccupé Relier un contact sec aux bornes UN et CC (aucune polarité)
HHumidificateur (24 Vca / 1 A) Relier un humidificateur aux bornes H (contact sec)
H
RAlimentation (24 Vca)
C
YCompresseur (24 Vca / 1 A)
WChauffage d’appoint (24 Vca / 1 A)
O/B Valve d’inversion (24 Vca / 1 A)
GVentilateur (soufflerie) (24 Vca / 1A)
LDéfaut (24 Vca / 5 mA)
WW
Dégivrage (24 Vca / 5 mA)
NOTA: Exige un contact sec (ne pas
relier à un relais à semi-conducteur tel
un triac).
CVAC
Borne Dispositif 1H 1C 1H1C
TH Console Relier la console aux bornes TH (aucune polarité)
TH
PS Sonde de plénum Relier la sonde de plénum aux bornes PS et CS (aucune polarité)
CS Commun S Borne commune pour la sonde de plénum et la sonde extérieure
OS Sonde extérieure Relier la sonde extérieure aux bornes CS et OS (aucune polarité)
DE Non utilisée
CC Commun C Borne commune pour la connexion de l’entrée mode Inoccupé
UN Entrée mode Inoccupé Relier un contact sec aux bornes UN et CC (aucune polarité)
HHumidificateur (24 Vca / 1 A) Relier un humidificateur aux bornes H (contact sec)
H
RAlimentation (24 Vca)
C
YRefroidissement (24 Vca / 1 A)
WChauffage (24 Vca / 1 A)
O/B Non utilisée
GVentilateur (24 Vca / 1 A)
LNon utilisée
WW Non utilisée

TH146-N-2H1C 5/8
Schéma de branchement : thermopompe 2H1C — nouvelle installation
Compresseur
Valve d’inversion
Ventilateur
Défaut
Dégivrage
Chauffage d’appoint
AC146-410
AC144-03
Humidificateur
CT241
Bi-énergie

TH146-N-2H1C 6/8
Schéma de branchement : thermopompe 2H1C — installation «add-on» (installation modifiée)
Fournaise
Thermostat
ventilateur
Défaut
Dégivrage
Valve d’inversion
Compresseur
AC146-410
AC144-03
Humidificateur
CT241
Bi-énergie

TH146-N-2H1C 7/8
Schéma de branchement : CVAC 1H1C
Refroidissement
Chauffage
Ventilateur
AC146-410
AC144-03
Humidificateur
CT241

TH146-N-2H1C 8/8
Menu de configuration
No. Paramètre Affichage Valeur
par défaut Options Description
1Affichage de la
température °C °C / °F Permet de sélectionner le format d’affichage de la température.
2
«Balance Point Low»
point d’équilibre bas
(note 1)
-10 °C
(14 °F) -30 °C à 10 °C
(-22 °F à 50 °F)
Permet de programmer la valeur bP L (voir section 4.2).
NOTA : Abaissez le bP L au dessous du minimum (- -) si vous ne désirez pas utiliser la
fonction.
3«Balance Point High»
point d’équilibre haut
(note 1)
5 °C
(41 °F) -5 °C à 30°C
(23 °F à 86°F)
Permet de programmer la valeur bP H (voir section 4.2).
NOTA : Augmentez le bP H au dessus du maximum (- -) si vous ne désirez pas utiliser la
fonction.
4«Defrost Point»
point de dégivrage
(note 1)
10 °C
(50 °F)
-10 °C à 15 °C
(14 °F à 59 °F)
Permet de programmer la valeur du point de dégivrage (voir section 4.3).
NOTA : Augmentez le point de dégivrage au dessus du maximum (- -) si vous ne désirez pas
utiliser la fonction.
5Type d’installation
(note 1) Ad Ad / nr
Régler selon le type d’installation de thermopompe (voir section 4.4).
•Ad(
add-on
) : Utiliser ce réglage pour les thermopompes dont les serpentins intérieurs se
situent en aval du chauffage d’appoint. Ceci est généralement le cas des installations
modifiées.
• nr (normal) : Utiliser ce réglage pour les thermopompes dont les serpentins intérieurs se
situent en amont du chauffage d’appoint. Ceci est généralement le cas des nouvelles
installations.
6Délai d’activation de
l’étage auxiliaire (note 1) 30 min. 5 à 90 min. Permet de programmer le délai d’activation de l’étage auxiliaire (voir section 4.5).
7Limite de température
minimale (note 2) - -
(désactivée) -10 °C à 20 °C
(14 °F à 68 °F) Permet de programmer la valeur de la limite de température minimale (voir section ).
NOTA : La fonction est désactivée lorsque LLMT est placé au dessous du minimum (- -).
8Limite de température
maximale (note 2) - -
(désactivée) 30 °C à 90 °C
(86 °F à 194 °F) Permet de programmer la valeur de la limite de température maximale (voir section 4.6).
NOTA : La fonction est désactivée lorsque HLMT est placé au dessus du maximum (- -).
9 Cycles par heure 4 2 à 6
Permet de sélectionner le nombre de cycles par heure. Pour un contrôle optimal du chauffage,
choisir le réglage qui correspond à votre système : 2=30 min (vapeur, gravité); 3=20 min (eau
chaude, 90%+ haute efficacité); 4=15 min (gaz ou mazout); 5=12 min (gaz ou mazout); 6=10
min (électrique)
10 Type de chauffage EL GA / EL
Ce paramètre détermine le fonctionnement du ventilateur en mode automatique lorsque le
système est en mode chauffage.
• EL (chauffage électrique) : Le ventilateur démarre et s'arrête en même temps que le
chauffage.
• GA (chauffage au gaz ou au mazout) : Le ventilateur démarre quand la température du
plénum grimpe au dessus du seuil de déclenchement (voir le numéro 11) et s'arrête quand
la température baisse à 12 °C sous le seuil.
NOTA : Le ventilateur ne démarrera pas si la
sonde de plénum n’est pas branchée.
11 Seuil de déclenchement
du ventilateur 80 °C
(176 °F) 38 °C à 90 °C
(100 °F à 194 °F)
Ce paramètre est disponible uniquement pour le chauffage au gaz (voir le numéro 10).
MISE EN GARDE : Ce paramètre peut être utilisé en parallèle avec un dispositif approuvé UL
353 mais ne remplace pas celui-ci.
NOTA : Le ventilateur ne démarrera pas si vous augmentez le seuil au dessus du maximum
(- -).
12 «Smart Fan»
(ventilateur intelligent) OF On / OF • On : La fonction «Smart Fan» est activée (voir section 4.7).
• OF : La fonction «Smart Fan» est désactivée.
13 Écart de température 0 °C 0 °C à 9 °C
(0 °F à 16 °F) Permet de régler la baisse ou la hausse de température lorsque le contrôleur est placé en
mode Inoccupé (voir le guide de l’utilisateur).
14 Affichage de la
température extérieure On On/OF
Permet de choisir entre l’affichage de la température extérieure et l’affichage du taux
d’humidité intérieur :
• On : La température extérieure est affichée.
• OF : Le taux d’humidité à l’intérieur est affiché.
NOTA : Pour que la température extérieure soit affichée, la sonde extérieure AC144-03 doit
être branchée.
15 Mode de l’humidificateur HE Co / HE / Fn
• Co (conventionnel) : L’humidificateur fonctionnera si l’humidité est trop basse. Si le
ventilateur n’est pas déjà en marche, il démarrera en même temps que l’humidificateur.
• HE (chauffage) : L’humidificateur peut fonctionner uniquement lorsque le chauffage est
activé.
• Fn (ventilateur) : L’humidificateur peut fonctionner aussi longtemps que le ventilateur est
activé.
NOTA : L’humidificateur ne peut pas être activé lorsque la climatisation est en marche.
16 Réglage automatique
de l’humidité OF On/OF
Permet de placer le réglage de l’humidité en mode automatique.
• On (auto) : Le taux d’humidité s’ajuste automatiquement en fonction de la température
extérieure (voir numéro 17).
• OF (manuel) : L’utilisateur règle manuellement le taux d’humidité (voir numéro 17).
17
Niveau d’humidité 5 % 5 % à 60 % Permet de régler le niveau d’humidité. Ce paramètre est disponible uniquement lorsque le
contrôle d’humidité est placé en mode manuel (voir numéro 16).
Écart de la consigne 0 -9 % à 9 % Ce paramètre est disponible uniquement lorsque le contrôle d’humidité est placé en mode
automatique (voir numéro 16). Il permet de définir un écart (%) au taux établi par le contrôleur.
Par exemple, l’utilisateur peut appliquer un écart négatif s’il y a du givre sur les fenêtres.
Note 1 : Paramètres 2 à 6 ne sont pas disponibles si le contrôleur est configuré pour un système CVAC ou une thermopompe 1H1C.
Note 2 : Paramètres 7 et 8 ne sont pas disponibles si le contrôleur est configuré pour une thermopompe.
Imprimé aux É.-U. 02-2013
Other manuals for TH146-N-2H1C
1
Table of contents
Languages:
Other Aube Technologies Controllers manuals

Aube Technologies
Aube Technologies RC845 User manual

Aube Technologies
Aube Technologies TH146-P-U User manual

Aube Technologies
Aube Technologies CT241 Manual

Aube Technologies
Aube Technologies RC840T User manual

Aube Technologies
Aube Technologies TH146-N-U User manual

Aube Technologies
Aube Technologies TH146-P-DE User manual

Aube Technologies
Aube Technologies TH146-P-2H1C User manual

Aube Technologies
Aube Technologies CT241-01 User manual

Aube Technologies
Aube Technologies TH146-P-U User manual

Aube Technologies
Aube Technologies TH146-N-2H1C User manual