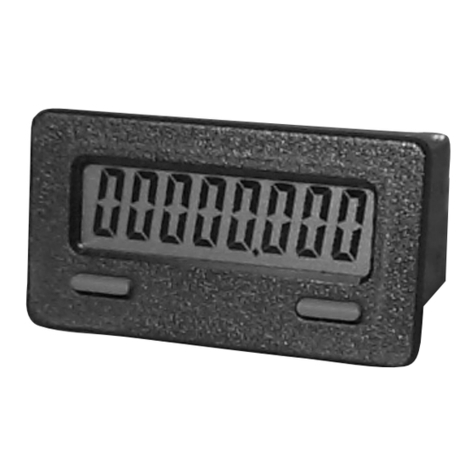
Auber Instruments JSL-64A User manual

AUBER INSTRUMENTS WWW.AUBERINS.COM
2021.03 P1/5
JSL-64A 1/32 DIN General Purpose Timer
Version 1.2 (March 2021)
1. Overview
This JSL-64 timer can count from 0.01 second to 9999 minutes. Operating
function modes include single delay, double delay, and cycle delay. It can
count-down or count-up. The timer can be activated automatically when
powering up, by front key pad, or via remote switch.
2. Specification
Timer range: 0.01 second to 9999 minutes.
Timer mode: single delay, double delay, cycle delay, count-up timer.
Timer trigger: power on, front key pad, or remote switch.
Timer error: < 1 s/day.
Power supply: 85 - 260 V AC or DC.
Power consumption: < 2 W.
Relay output: 10A at 240 VAC / 30 VDC (resistive load)
Average relay life: 100,000 times at rated current.
Operating temperature: 0 - 60° C.
Humidity: 0 - 95% RH.
Panel cutout: 22 x 45 mm.
Outer dimension: 24 x 48 x 75 mm (1" x 2" x 3").
3. Front Panel
Figure1. Front panel.
1. Time unit indicator (colon sign): Turns on when time format is MM:SS
(Minutes: Seconds) or HH:MM (Hours: Minutes) and flashes when the timer is
running; turns off when time unit is M (Minutes) or S (Seconds).
2. LED digital display: During normal operation as a timer, it displays the actual
time. When timer is stopped, it displays the preset value. During controller
setup, it displays parameter value.
3. OUT indicator: Turns on when relay is on; turns off when relay is off.
4. RUN indicator: Turns on when timer is running; blinking/flashing when timer
is paused; turns off when timer is stopped.
5. SET key: press it once to set timer and relay delay timer T1/T2 (if applicable.
T1 timer shows as t-1, T2 timer shows as t-2); press and hold it for 3 second
will enter the programming mode. This key is disabled when timer is running.
6. DOWN key / STP key: Reduces the value in the programming mode; when
the timer is running, press it to stop the timer. (For special stop function in
single delayed on mode, please see note 6 on page 3 for details).
7. UP key / PAU key: Increases the value in the programming mode; when
timer is running, press and hold it will pause the timer; the timer will continue
running after this key is released.
8. RST key: Reset key. When the timer is running, press it will restart the timer.
If "RUN" parameter is set to RST, press it will start the timer after powered up.
4. Terminal Assignment
6 7 8 9 10
1 2 3 4 5
OUT
ST
STPPAURST COM
AC
85~260V
Figure 2. Terminal assignment.
Pin #
Function
Description
Note
Note: pin 1 to pin 5 are high voltage pins.
1
AC power input
85V ~ 260V AC power input.
2
AC power input
3
N.C.
Not connected.
4
Relay Output
Normally open (NO) relay. The relay
action is in synchronize with the OUT
indicator.
A
5
Relay Output
Note: pin 6 to pin 10 are low voltage pins.
6
Reset
When connected with COM pin,
works as the RST key to reset the
timer.
B
7
Pause
When connected with COM pin,
works as the PAU key to pause the
timer.
B
8
Stop
When connected with COM pin,
works as the STP key to stop the
timer.
B
9
Special
Terminal
Special terminal reserved for
Espresso Shot Timer (EST) function.
C
10
Common
Common pin.
B
Note A. Terminal 4 and 5 are for normally-open (NO) relay output. When this
relay is energized (or when the OUT LED is on), pin 4 is connected to pin 5
internally; When the relay is NOT energized (or when the OUT LED is off), pin
4 is disconnected from pin 5. The relay is a “dry switch” that does not provide
power by itself. Please see the wiring examples in Section 7.
Instruction Manual
1
4
5 6 7 8
2
3

AUBER INSTRUMENTS WWW.AUBERINS.COM
2021.03 P2/5
Note B. Pin 10 is the common pin for the pin 6/7/8. There are two ways to
operate terminal 6, 7, and 8.
a) Connecting a normally open (NO) momentary push button switch between
the pin (6, 7 or 8) to the COM (10). Please note, the function starts when you
release (or open) the button of the switch, not when you press down the switch.
See Figure 5.
b) Connecting a DC logic signal (TTL or CMOS or voltage in the range from 3
to 30 VDC) between the terminal (6, 7 or 8) to the COM (10). Please note, the
function is rising-edge triggered. The logic signal should normally be at high
level. The function starts when the signal goes from low to high. If you have an
inverted logic signal, you need to connect a NPN transistor between terminal
and COM; add 10Kohm resistor to the gate for signal input. See Figure 6.
The function of all these terminals is accomplished by the rising phase of
control signal. If the control signal is from a momentary NO switch that is
connected to the terminal, the action starts when switch is released (from close
to open). When the control signal is from another digital device, the action
starts when voltage goes from low to high.
Note C. Pin 9 is a special terminal reserved for Espresso Shot Timer function
(when FUNC is set to EST) in the JSL-64A and JSL-64A-EST. When it is
connected with the COM pin, the timer resets its display and start counting up
from zero. When it is disconnected from COM pin, the counting stops.
5. Getting Started
5.1 Powering up the timer
To power up the timer, simply connect 120 VAC or 220 VAC power to pin 1
and 2. It is recommended to use a power supply or power cord that has an
ON/OFF switch on it.
5.2 General operations
A brief description of the keys on the timer are described below. Please also
refer to Section 6 for details of parameter RUN, STOP, and PAUS. The
settings of these parameters can affect the actual functions of STP, PAU, and
RST key.
Key
Action
SET
•Shot-press: bring up the set value; select parameter; save
value.
•Long-press: bring up the parameter menu.
•No action while timer is running.
▼/STP
•Stops the timer from counting time.
•May stops the relay output depending on the STOP setting.
•Decrease value.
▲/PAU
•Pauses the timer counting.
•Increase value.
RST
•Clears timer display.
•May restart the timer if parameter RUN = RST.
5.3 Accessing the parameters
To bring up the parameter menu, long press the SET key for 3 seconds till the
display shows “FUNC”. Use UP or DOWN arrow key to scroll the parameter list.
Use SET key to select or check the value of a parameter. Use UP or DOWN
arrow key to change the value of any parameter, and press the SET again to
save the new value then go back to the parameter list.
Please refer to the Section 6 for the details of each parameter. Figure below
shows how to access the menu.
1:10
FUNC
M: s
sdl
T1u
END
SET
Long-press
for 3
seconds
SET
EST
SET
SET
s
Set Value
(blinking)
Change the set value
using UP or DOWN
arrow key
Normal Display
Mode
Figure 3. Flow chart of how to change the parameter values.
5.4 Changing the set values
Depending on the timer function you choose, you may need to adjust the set
values T1 and T2.
If you use the Single Delay function (FUNC = SDL), you’ll need to adjust T1. If
you use Delayed Interval or Cycle function (FUNC = DINT or CYCL), you’ll
need to adjust T1 and T2. If you use the Espresso Shot Timer function (FUNC
= EST), you don’t need to adjust the set values. The flow chart below shows
how to adjust the set values.
1:10
T1 1:10
END
SET Short-press
SET
1:00
SET
Set Value
(blinking)
Change the set value
using UP or DOWN
arrow key
Normal Display
Mode
Figure 4. Flow chart of how to change set values on the timer.

AUBER INSTRUMENTS WWW.AUBERINS.COM
2021.03 P3/5
6. Parameter Settings
All parameters are listed in the table below.
Press and hold SET key for 3 seconds to enter the menu mode. For each
parameter setting, use UP or DOWN key to select different programming
values. Press SET key to confirm then exit. Please check figure 3 for details.
For the definition of each programming value, see Table 1.
Table 1. Parameter Description.
Code
Description
Range
Initial
No
te
Set Values
(Short-press SET key)
T1
T1
Set value for T1
1:10
1
T2
T2
Set value for T2
1.10
2
Parameters
(Long-press SET key for 3 seconds)
FUNC
Func
Timer function, operating
mode
SDL,
DINT,
CYCL,
EST *
sdl
3 *
T1U
T1u
T1 timer unit
S,
M:S,
M,
H:M
M:S
4
T2U
T2u
T2 timer unit
S
TDIR
Tdir
Timer counting direction
UP, DN
DN
5
OUT
Out
Relay output mode
OFDL,
ONDL
OFDL
6
RUN
run
Timer triggering action
RST, PU
RST
7
STOP
stop
Relay action when STP
key is pressed
0, 1
0
8 **
PAUS
paus
Relay action when PAU
key is pressed
0, 1
1
9
* Please note that ESP function is a new feature added to JSL-64A. It is not available in
JSL-64.
** Please note that STOP parameter will only appear in the menu when FUNC = SDL
and OUT = ONDL.
Details about each parameter
Note 1.T1 is the set value in Single Delay (SDL) mode. It is also the first set
value in in Delayed Interval Mode (DINT) and the Cycled Mode (CYCL) mode.
Note 2. T2 is the second set value in Delayed Interval Mode (DINT) or in the
Cycled Mode (CYCL). This parameter will only be displayed if the Timer Mode
FUNC is set to either DINT or CYCL mode.
Note 3: FUNC is the timer operating mode, it can be set to SDL, DINT, CYCL,
or EST.
SDL (Single Delay):The timer counts a single period of time that is
defined in T1. The relay can either be turned on during this period of timer or it
can be turned on at the end of this period of time, depends on the OUT setting.
When OUT = OFDL, the relay turns on at the beginning when timer starts
counting, and turns off when the counting stops. When OUT = ONDL, the relay
stays off when timer starts counting, and the relay turns on when the timer
reaches the set value till the RST (reset) key is pressed or when the power to
the device is cycled. Please refer to Note 6 for details about OUT parameter.
In Single Delay and On-Delay mode (i.e., FUNC = SDL, OUT = ONDL), a
special parameter “STOP”will appear in the parameter menu. For details
please refer to the Note 8 below.
DINT (Delayed Interval): The timer will count time for two periods of time,
T1 and T2, and then stops. Relay action depends on the OUT setting. When
OUT =OFDL, the relay turns on at the end of T1, stays on during T2 time, and
then turns off at the end of T2 time. When OUT = ONDL, the relay turns on at
the beginning at T1 time, turns off at the end of T1 time, stays off during T2,
and then turns on again at the end of T2 time. This is a single action process.
CYCL (Cycle): The timer will repeat a counting cycle that consists of two
periods of time, T1 and T2. The relay turns on/off during each cycle depending
on the OUT setting. When OUT = OFDL, the relay turns on at the end of T1,
stays on during T2 time, and then turns off at the end of T2 time. When OUT =
ONDL, the relay turns on at the beginning at T1 time, turns off at the end of T1
time, stays off during T2, and then turns on again at the end of T2 time. This
cycle will be immediately repeated till it is stopped or reset.
EST (Espresso Shot Timer): This is a special mode designed for counting
the shot time (brew time) on an espresso machine. The timer display resets to
zero and it starts counting up when the pin 9 and 10 are shorted together. The
timer stops counting when terminal 9 and 10 are disconnected. The time unit is
determined by the parameter T1U. Pressing the RST key can clear the display.
The relay output, STP key, and PAU key are not functional in this mode. The
settings of parameter T2U, TDIR, OUT, RUN, STOP, and PAUS are irrelevant
to this mode.
Note 4. T1U and T2Udefine the time unit for T1 and T2. (Note, T2 is only
available when FUNC = DINT or CYCL).
Settings
Description
Range
S
Seconds
0.01 s ~ 99.99 s
M:S
Minutes: Seconds
1 s ~ 99 m 59 s
M
Minutes
1 m ~ 9999 m
H:M
Hours: Minutes
1 m ~ 99 h 59 m
Note 5. TDIR determines the Timer Counting Direction.
UP: counting up.
DN: counting down.
Note 6.OUT determines the relay output status as the timer runs.
OFDL (off-delay): the relay will turn ON when timer starts counting and
the relay will turn OFF when the timer reaches the set value.
ONDL (on-delay): the relay will stay OFF when the timer starts counting
and the relay will turn ON when the timer reaches the set value.
Note 7.RUN determines how does the timer start counting.
PU (power up): the timer starts counting when the device is powered up.
RST (reset): the timer starts when reset button is pressed and released.

AUBER INSTRUMENTS WWW.AUBERINS.COM
2021.03 P4/5
Note 8. The parameter STOP defines the relay output status when STP key is
pressed during timer T1 is counting.
(** The parameter STOP parameter will only appear in the menu when FUNC =
SDL and OUT = ONDL.)
When running the single-delay (FUNC = SDL) and on-delay mode (OUT =
ONDL), depending on the applications, user may want the output relay
(normally open) to stay at off position (which is the initial status), or, stay at on
position (which is the relay’s final status) when the STP key is pressed. Here
are two examples. A) Some users use the timer to turn on a buzzer at the end
of a process for notification purpose. They want to be able to disable the
buzzer (change to the initial status) by simply pressing down the stop button
once he acknowledged the notification. B) Some users want to delay the
process of turning on a load. But sometimes, they may want to cancel the
delay (change to the final state) to start the oven by pushing the stop key.
In order to satisfy these two conflict requirements, a special parameter for stop
function, STOP will show up in the parameter menu when both ONDL (on
delay) and SDL (single delay) are selected, STOP can be selected as 0
(default) or 1. When it is set to 0, during the delay, stop signal will set relay to
the final state (pulled-in). When it is set to 1, during the delay, stop signal will
set the relay to the initial state (dropped-out). When the time delay is finished
and relay pulled in, user can reset the relay to the initial state by sending a stop
signal, regardless of the STOP setting.
Note 9. The parameter PAUS defines whether the relay output (pin 4 and 5)
should be changed from ON to OFF while the timer is running and the PAU key
is pressed. When PAUS = 0, pressing the PAU key will only pause the timer
and it will NOT affect the relay output status. When PAUS = 1, pressing the
PAU key will not only pause the timer but also change a relay output status
from ON to OFF. However, it will not affect relay status if the relay is OFF.
7. Wiring Examples
1) Signal controlled by switches
Power (120 or 240V AC) is sent to pin 1 and 2. The external reset (RST) and
pause (PAU) switch should be momentary type. They are needed only if you
want to control the timer remotely. Otherwise, you can use the front keys on
the timer. These switches can also be replaced with a control signal from
computer or other control devices. The alarm speaker used in this example
is also optional. It is to show how to wire the output. You can substitute it
with any output such as a coffee grinder. The output terminals (#4 and 5)
are from an internal relay. It is a dry switch that does not provide the power by
itself. In this case, the alarm is powered by the 120VAC. The external switch
connected to the alarm is for disabling the sound if needed.
6 7 8 9 10
1 2 3 4 5
L
N
120VAC
RST
PAU
Figure 5. Connecting reset switch and pause switche to JSL-64A.
2) Signal controlled by DC logic signal.
L
N
120VAC
6 7 8 9 10
1 2 3 4 5
Figure 6. Rising-edge triggered signal.
L
N
120VAC
10ke
b
cNPN
6 7 8 9 10
1 2 3 4 5
Figure 7. Inverted logic signal.
3) Espresso shot timer
In this example, we will use a small relay (120V coil voltage and a pair of
normally open NO contacts) with JSL-64A timer. The espresso machine use
120VAC power and it has a vibration pump that runs at 120VAC. To use this
timer as an espresso shot timer, please set FUNC = EST, and T1U = S. Then
press RST key to clear the screen. The display will show “0.00”as shown in
the Figure 8 below. Wiring of the timer, relay, and the pump is shown in the
Figure 9 below.
Figure 8. The display of the JSL-64A timer in ESP mode.

AUBER INSTRUMENTS WWW.AUBERINS.COM
2021.03 P5/5
Pump Mimi Relay
R30A
COM
NCNO
Original
wires on the
pump
(120VAC) COM
6 7 8 9 10
1 2 3 4 5
ST
To 120 VAC
A1
A2
JSL-64A Timer
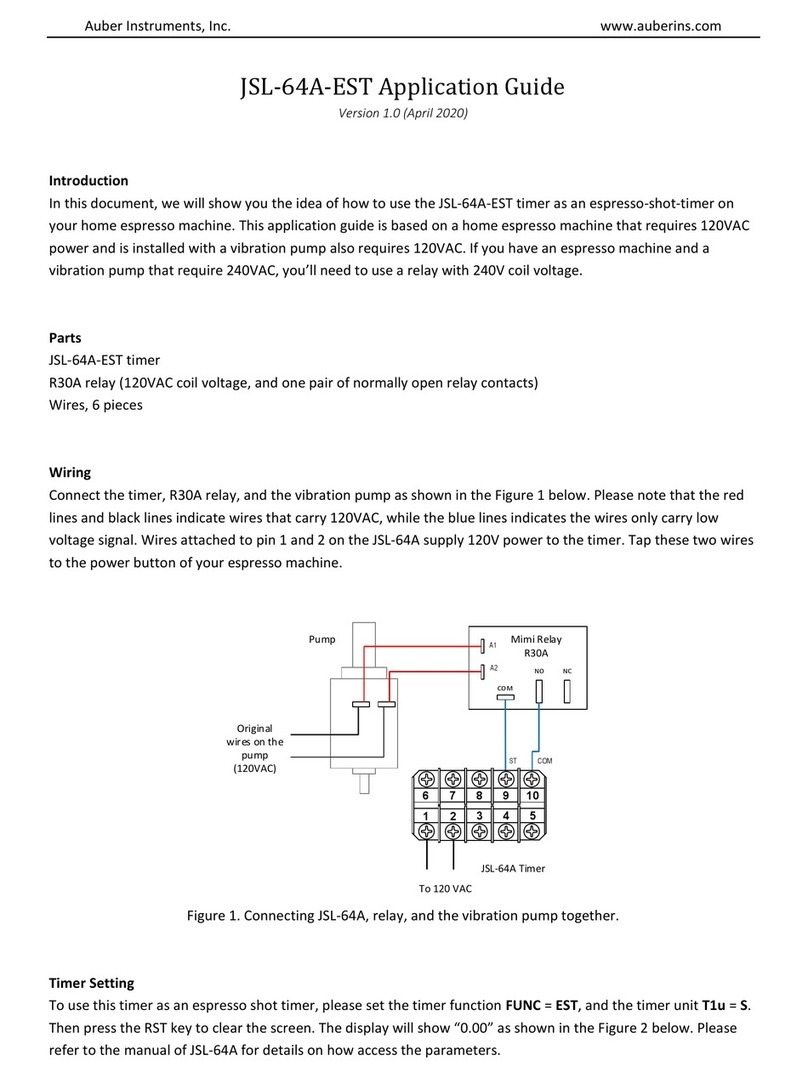
Figure 9. Wiring diagram of using JSL-64A timer as a shot timer on espresso
machine.
Whenever the pump is activated, the mini relay R30A’s coil will be energized to
pull its NO contacts in, so the pin 9 and 10 of the timer are shorted together,
the timer will start counting time up in seconds. The timer stops counting when
the pump is deactivated.
8. Timing Diagrams
The following diagrams show how the relay output status is affected by RST,
PAU, and STP key/terminals under different FUNC (Timer Function) and OUT
(Relay Output Mode) settings.
Please note that: 1) “RUN” is set to “RST” in following examples, powering up
to start the timer is not discussed here. 2) Timer starts counting from the
moment when reset key/switch is released or input signal (TTL) is rising from
low to high. 3) Timer display stops counting as soon as stop key/switch is
pressed (voltage from high to low), but relay output will only be triggered when
stop key/switch is released (voltage from low to high).
Power
Relay
output
Reset
Pause
Stop
T1 Ta Tb
Ta+Tb=T1
Figure 10 (a). Single delay and off-delay (FUNC = SDL, OUT = OFDL).
Power
Relay
output
Reset
Pause
Stop = 0
T1
Ta Tb
Ta+Tb=T1
Stop = 1
Figure 10 (b). Single delay and on-delay (FUNC = SDL, OUT = ONDL) (for the
STOP parameter, please see Note 8 on page 2 for details).
Power
Relay
output
Reset
Pause
Stop
T1 Ta Tb
Ta+Tb=T1
T2 T2
Figure 10 (c). Delayed interval and off-delay (FUNC = DINT, OUT = OFDL).
Power
Relay
output
Reset
Pause
Stop
T1
Ta Tb
Ta+Tb=T1
T2 T2
Figure 10 (d). Delayed interval and on-delay (FUNC = DINT, OUT = ONDL).
Power
Relay
output
Reset
Pause
Stop
T1 Ta Tb
Ta+Tb=T1
T2
T2 T1
T2
Figure 10 (e). Cycled and off-delay (FUNC = CYCL, OUT = OFDL).
Power
Relay
output
Reset
Pause
Stop
T1
Ta Tb
Ta+Tb=T1
T2 T2
T1
T2
Figure 10 (f). Cycled and on-delay (FUNC = CYCL, OUT = ONDL).
(END)
Auber Instruments
5755 North Point Parkway, Suite 99
Alpharetta, GA 30022, USA
www.auberins.com
Copyright 2007-2021, Auber Instruments. All Rights Reserved.
No part of this manual shall be copied, reproduced, or transmitted in any way without the
prior, written consent of Auber Instruments. Auber Instruments retains the exclusive
rights to all information included in this document.
Table of contents
Other Auber Instruments Timer manuals
Auber Instruments
Auber Instruments JSL-72 User manual
Auber Instruments
Auber Instruments JSL-73B User manual
Auber Instruments
Auber Instruments JSL-73C User manual
Auber Instruments
Auber Instruments JSL-74A User manual
Auber Instruments
Auber Instruments JSL-71 User manual
Auber Instruments
Auber Instruments JSL-74 User manual
Auber Instruments
Auber Instruments JSL-73C-24 User manual
Auber Instruments
Auber Instruments JSL-64A-EST User guide

Auber Instruments
Auber Instruments JSL-72 User manual
