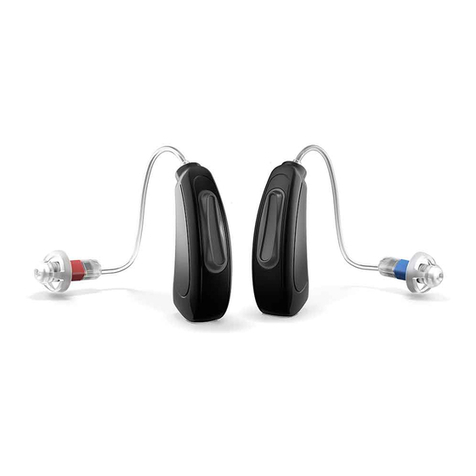
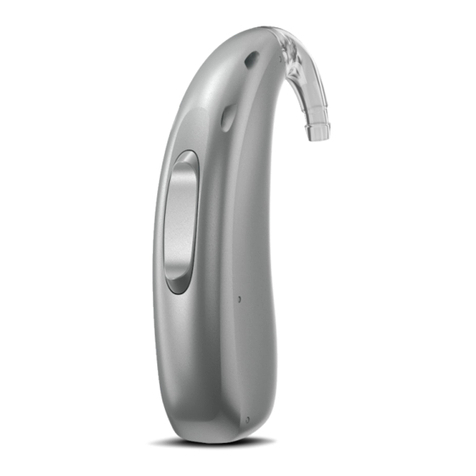
Audifon eox M User manual

018867-212-341-3040 /08/2011
Hightech made in Germany
www.audifon.com
audifon GmbH & Co. KG
Werner-von-Siemens-Straße 2
99625 Kölleda
Germany
Corporate Headquarters
contact@audifon.com
Phone +49-3635-4056-590
Fax +49-3635-4056-589

eox
Hightech made in Germany
Instructions for use
Solutions for better hearing

Last revised: 29.08.2011
audifon declares that the product audifon eox meets the
requirements of the Directive 1999/5/EC.
The full text of the Declaration of Conformity can be inspected
at audifon GmbH & Co. KG, Werner-von-Siemens-Strasse 2,
99625 Kölleda, Germany.
Intended use of hearing aids
hearing aids by audifon are utilized to compensate impairments
in personal hearing. They require an individual fitting in
performance, executed by a hearing aid professional.
The hearing aid’s mode of action is the reception of sound using
a microphone, digital processing of the signal and playback of
the amplified Sound.
Intended use of combined Tinnitus-Retraining-instruments
Instruments for Tinnitus-Retraining-Therapy (TRT) from
audifon are intended for usage as part of a professionally guided
Tinnitus-Retraining-Therapy only.
Utilizing an artificially generated background noise, TRT-
instruments support distraction from the tinnitus and to pursue
the long-term goal of tinnitus habituation.

1
Contents
1. Introduction......................................................... 2
2. Overview of dierent styles .................................. 3
3. Behind-The-Ear hearing aids................................. 4
3.1 Construction .................................................. 4
3.2 Start-up and operation ................................... 5
3.3 Switching the hearing aids on and o.............. 6
3.4 Multi-functional rocker switch........................ 7
3.4.1 Volume selection..................................... 8
3.4.2 Selecting the hearing programs .............. 9
3.5 Direct Audio Input .......................................... 11
3.6 Care instructions ............................................ 13
4. In-The-Ear hearing aids......................................... 14
4.1 Construction .................................................. 14
4.2 Start-up and operation ................................... 15
4.3 Switching the hearing aids on and o.............. 16
4.4 Volume selection (hearing aids with
volume control) .............................................. 17
4.5 Selecting the hearing programs
(for hearing aids with a program switch) ......... 18
4.6 Care instructions ............................................ 19
5. Automatic telephone program ............................. 20
6. Cobined TRT-Instruments..................................... 22
7. Safety and care instructions.................................. 23
8. Troubleshooting ................................................... 25
9. Environmentally-friendly disposal......................... 26
10.Service.................................................................. 28
Warranty card

2
. Introduction
Congratulations on the purchase of your new audifon hearing
aids. Your hearing care professional has adjusted the hearing
aids to your individual requirements. These instructions are
therefore intended to help you use your audifon hearing aids
properly.
Please read through the following operating and care
instructions carefully to avoid malfunctions and faults. If
you follow these instructions, your hearing aids will prove an
invaluable help in your day-to-day communication with your
surroundings and other people.
The specific model of your hearing aids is shown on the sticker
on the packaging, or on the warranty card or printed on the
hearing aids themselves.
If you have any further questions, please contact your hearing
care professional.

3
. Overview of dierent styles*
M/M TRT
S/S TRT
IS+/IS+ TRT
BehindTheEar
BehindTheEar
InTheEar
Low battery warning
An audible signal indicates the end of the battery’s life (approx.
30 minutes before the battery runs out).
The audio-sequence from transmitter and receiver dier from
themselves. Ask your hearing care professional to demonstrate
the audio sequences.
We recommend to use audifon zinc air batteries. Please follow
the instructions on the battery packaging. Please dispose of
used batteries in the appropriate containers at your health care
professional’s premises. Always switch your hearing aids o
after use. Remove the battery if your hearing aids are out of use
for long periods.
* The variety of types depends on sales area.
** American Association of Poison Control Centers
1-800-222-1222 – open 24 hours a day
www.aapcc.org
Model Battery Styles From page
Important safety information**:
Keep batteries and hearing aids away from children
and pets. There is a risk of swallowing! If a battery is
swallowed, consult a doctor immediately.

4
4
3
2
1
6
. BehindTheEar hearing aids
. Construction
Your hearing aids comprise the following elements:
Note: Your hearing aids may dier from the illustrations.
Earhook
Microphone inlets
Rocker switch
Audio input, optional
Battery compartment and ON/OFF switch
Battery compartment lock
5
5
3
1
1
5
2
6
4

5
. Startup and operation
To start your hearing aids first insert a
battery in the battery compartment.
Remove a battery from its packaging.
Note: If you are using a zinc air battery,
remove the protective film and wait a few
minutes before inserting it.
Hold the hearing aids upright as shown
in the picture and gently rock them on a hard
surface, i.e. table top. The door will open to
OFF position. Now you are able to open the
battery compartment completely.
Insert the battery in the battery
compartment. Ensure that the + symbol on
the battery is visible when you have inserted
it.

6
Switching on
Your hearing aids are switched on and o via
the battery compartment. To turn on, simply
close the battery compartment.
The batterie compartment snap into place
noticeable.
The hearing aids are now switched on. After
a preset delay, the first program will be
activated and the hearing aids will be ready
for use.
Switching o
To switch the hearing aids o, hold the
hearing aid upright and rock it on a hard
surface until the door snaps open. This is the
OFF position see ..
If the hearing aids will be out of use for a long
time, open the battery compartment fully
and remove the battery.
Battery compartment lock
The battery compartment can be locked by
sliding the lock up using a small screwdriver.
In this position the hearing aids can still
be switched o, but the battery cannot be
removed.
. Switching the hearing aids on and o

7
. Multifunctional rocker switch
Your hearing aids feature a multifunctional
rocker switch for controlling the volume and
selecting the dierent programs. The rocker
switch can be used by pressing the top end +
and the bottom end .
The rocker switch can be programmed
with one of three functions. Your hearing
care professional has marked which of the
functions has been set for your hearing aids
here:
Volume control
Press briefly to adjust the volume see
also ...
Program selection button
Press briefly to change the program
see also ...
Volume control and program
selection button combined
Press the switch briefly to adjust
the volume; hold the switch down
for approx. second to change the
program.
easyclick
With easyclick technology activated
all settings on rocker switch results in
instant, identical change in the other
hearing aid. Your hearing aids can be
run from both sides.
+
–

8
The volume can be adjusted incrementally
using the rocker switch. Pressing the top end
of the switch briefly increases the volume,
pressing the bottom end briefly reduces the
volume.
The hearing aids will return to the default
volume setting each time they are turned on.
To adjust the volume, press the rocker switch
accordingly. Each time you press the switch,
you will hear an audible confirmation.
Once you have reached the upper or lower
volume limit, you will hear a clear signal.
Note: Volume control and program selection
are optional functions. Your hearing care
professional will set your hearing aids to your
individual requirements.
easyclick imports your volume settings in the
other hearing aid automatically see chapter
..
+
–
.. Volume selection

9
Sound Dynamix
eox hearing aids feature automatic situation detection, i.e. the
program is automatically adjusted to your hearing environment.
The hearing aids can recognize six dierent situations: quiet,
speech in quiet, speech in noise, noise, wind and music.
Rocker switch
Your hearing care professional will have adjusted your hearing
aids to various hearing situations with you and assigned these
to certain hearing programs. The rocker switch allows you to
switch between the hearing programs. Simply hold down one
end of the rocker switch until you hear audible confirmation
of the change of program. The number of signals indicates the
number of the selected program. You can switch up or down
through the hearing programs.
easyclick imports your program changes in the other hearing aid
automatically see chapter ..
.. Selecting the hearing programs
+key:
key:
+–
Program change sequence*:
* Example with hearing programs

10
Hearing program
1.
2.
3.
4.
Description of setting
Automatic telephone program
eox hearing aids can automatically switch to an adapted
telephone program as soon as you hold a telephone receiver
with magnetic sticker to your ear. If this option is enabled, it
will constitute one of the available hearing programs.
Note: Volume control and program selection are optional
functions. Your hearing care professional will set your hearing
aids to your individual requirements.

11
. Direct Audio Input optional
Selected hearing systems oer you the possibility of direct,
uninterrupted connection to external batterypowered devices
such as portable MP player via the Direct Audio Input socket.
Note: Audio equipment with power supply must meet the
standard IEC or IEC to connectriskless with the
hearing aid.
The audio shoe is an optional accessory which is provided by
your hearing care professional.
Connection audio shoe
Remove the flap of the audio contacts by
using a small screwdriver.
Put the Audioshoe and the hearing aid as
shown together.
Secure the lock of the audio shoe using a
little screw driver as illustrated.

12
Replacement of the audio shoe
Release the lock of the audio shoe using a
little screw driver as illustrated.
Replace the audio shoe.
Cover the Audio contacts with the relative
coverflap.
Connecting external sound sources and
hearing aids
Plug in the plug into the buttom of the audio
shoe.
Note: Do not use force! Please ask your
hearing care professional if the plug do not fit
to the audio shoe.

13
The earmold and the flexible plastic
tubing attached to them must be
detached from the earhook before
cleaning. Only use recommended
products for cleaning the earmold.
Thin tubes and hearing aid can
separated by using the bolted
connection. Replace the Dome for
cleaing the hearing aid.
Do not use a damp cloth to clean your hearing aids.
Always use a soft, dry cloth.
. Care instructions
with earmold
with Thin Tube and
Dome

14
. InTheEar hearing aids
. Construction
Your hearing aids comprise the following elements:
Microphone inlets
Battery compartment
Volume control*
Program switch*
Removal handle*
only on request
5
4
2
1
3
Note: Your hearing aids may dier considerably from the
illustration as they have been made according to your individual
ear impressions.
easyclick
With easyclick technology activated all settings on rocker
switch results in instant, identical change in the other hearing
aid. Your hearing aids can be run from both sides.
4
3
2
1
5
* Depending on which type you have, your hearing aids may not
feature the elements marked with an *.

15
. Startup and operation
To start the device first insert a battery in the
battery compartment.
Remove a battery from its packaging.
Note: If you are using a zinc air battery, remove
the protective film and wait a few minutes
before inserting it.
Open the battery compartment carefully with
your finger nail at the opening edge and swing
it right out.
Insert the battery in the battery compartment.
Make sure the + symbol on the battery
matches the + symbol on the battery
compartment.
Note: The battery compartment will not close if
the battery is not inserted correctly!
In this case, insert the battery correctly. Do not
try to open the battery compartment further
than shown in figure 3 as this could damage
your hearing aids.

16
. Switching the hearing aids on and o
The hearing aids are switched on and o by
closing/opening the battery compartment.
Hearing aids switched on: battery
compartment closed.
Hearing aids switched o: battery
compartment open.
on
o

17
When you switch your hearing aids on,
they will be at the volume set for you.
Increase volume: slowly turn the
controller forwards.
Reduce volume: slowly turn
controller backwards.
Once you have reached the upper or
lower volume limit, you will hear a
clear signal.
With easyclick technology activated
all settings on rocker switch results
in instant, identical change in the
other hearing aid. Your hearing aids
can be run from both sides.
. Volume selection
hearing aids with volume control
right ear
left ear
This manual suits for next models
5
Table of contents
Other Audifon Hearing Aid manuals

Audifon
Audifon Sueno Pro User manual

Audifon
Audifon aviva Series User manual

Audifon
Audifon sino R User manual

Audifon
Audifon rega pico User manual

Audifon
Audifon lewi R User manual

Audifon
Audifon lewi R User manual

Audifon
Audifon via pro User manual

Audifon
Audifon sueno pro S User manual

Audifon
Audifon lewi S User manual
Audifon
Audifon MULTISTREAMER PRO User manual