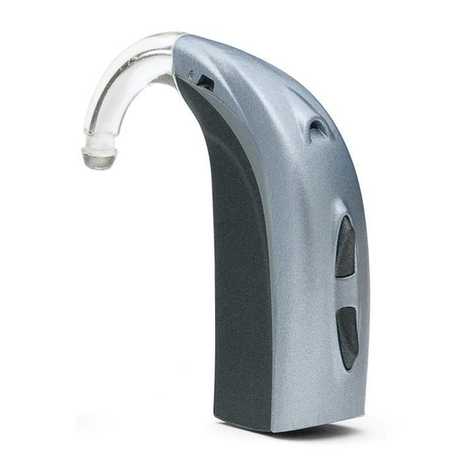
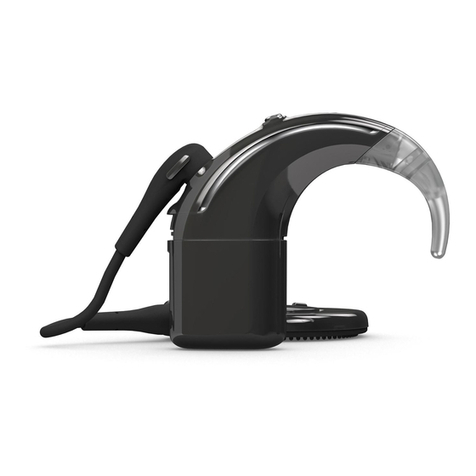
Audifon sueno pro S User manual

sueno pro S
sueno pro R
sueno pro ITE
User Manual
TINNITUS INSTRUMENTS

3
CONTENTS
INTRODUCTION ...............................................................
YOUR TINNITUS INSTRUMENT .........................................
. Type.............................................................................
. Overview.....................................................................
. Batteries......................................................................
.. Information on battery........................................
.. Low battery warning...........................................
OPERATION SUENO PRO S.............................................
. Construction ...............................................................
. Inserting battery..........................................................
. Removing battery........................................................
. Switching tinnitus instruments on and o....................
. Inserting and removing tinnitus instruments ...............
.. Inserting with Thin Tube......................................
.. Inserting with ear mould .....................................
.. Removing tinnitus instruments...........................
. Volume control and program selection ........................
.. Multifunctional rocker switch .............................
.. Volume selection.................................................
.. Selecting hearing programs.................................
OPERATION SUENO PRO R ............................................
. Construction ...............................................................
. Inserting battery..........................................................
. Removing battery........................................................
. Switching tinnitus instruments on and o....................
. Inserting and removing tinnitus instruments ...............
. Volume control and program selection ........................
.. Multifunctional rocker switch .............................
.. Volume selection.................................................
.. Selecting hearing programs.................................
Intended purpose
Tinnitus instruments from audifon are used in the framework
of tinnitus therapy. They use artificially generated background
noise to distract suerers from their tinnitus and help with the
long-term goal of accustoming them to it.
Tinnitus instruments need to be fitted individually by a hearing
care professional or an ENT doctor.
Diagnostics and the prescription of tinnitus instruments is the
task of an ENT doctor.
Updated: 21.12.2020

54
INTRODUCTION
Congratulations on the purchase of your new audifon tinnitus
instrument. You now have at your disposal an instrument
designed to help you get accustomed to your tinnitus and/
or hyperacusis (excessive sensitivity to sound). It assists with
correcting disorders of the audiological system and masking
tinnitus and/or improving existing hyperacusis.
Please read through the following operating and care
instructions carefully to avoid malfunctions and faults.
The exact designation of your tinnitus instrument is shown on
the sticker on the packaging, on the warranty card or printed on
the instrument itself.
If you have any further questions about environmentally friendly
disposal of your old audifon tinnitus instrument, please contact
your doctor or your hearing care professional.
OPERATION SUENO PRO ITE..........................................
. Construction ...............................................................
. Inserting battery..........................................................
. Removing battery........................................................
. Switching tinnitus instruments on and o....................
. Inserting and removing tinnitus instruments ...............
. Volume control and program selection ........................
.. Volume selection.................................................
.. Selecting the hearing programs ...........................
ACCESSORIES....................................................................
CARE INSTRUCTIONS .......................................................
. General........................................................................
. Cleaning and care of behindtheeartinnitus instruments
with external receiver ..................................................
. Changing earwax protection filter ...............................
. Drying tinnitus instruments.........................................
TROUBLESHOOTING ........................................................
SAFETY INFORMATION.....................................................
. Important warnings ....................................................
. Information about product safety................................
SIDE EFFECTS ....................................................................
OPERATING CONDITIONS.................................................
TRANSPORT AND STORAGE CONDITIONS .......................
ENVIRONMENTALLY COMPATIBLE DISPOSAL ...................
OTHER INFORMATION .....................................................
SERVICE ...........................................................................
KEY TO SYMBOLS ..............................................................
WARRANTY CARD

76
YOUR TINNITUS INSTRUMENT
2.1 Type
Your tinnitus instruments may be behind-the-ear devices with
or without an external receiver or in-the-ear devices. Please see
the relevant sections for their operation.
2.2 Technical features
Detailed acoustic data for your tinnitus instruments can
be found in a separate data specification. This and further
information are available from your hearing care professional or
www.audifon.com.
2.3.1 Information on battery
A zinc air battery is used to supply the power for your tinnitus
instruments. This type of battery is only activated when oxygen
comes through the air holes into the button cell and a chemical
reaction is initiated. During production, the air holes are sealed
with a protective strip.
This ensures the battery remains fresh until use and lasts longer
when it is sealed. Removing the protective strip allows oxygen
to enter and the chemical reaction is initiated.
2.3 Batteries
To start your tinnitus instruments first insert a battery in the
battery compartment.
Make sure you only use zinc air batteries. Please follow the
instructions on the battery packaging. For the exact type of
battery in your tinnitus instrument please see the overview
table.
Always switch your tinnitus instruments o after use. Remove
the battery if your instruments are out of use for long periods, to
avoid damage.
sueno pro S
sueno pro R
sueno pro ITE
312
312
312
120
130
140
Model Size Average service life (zinc air) in h
Battery

98
2.3.2 Low battery warning
An audible signal indicates the end of the battery life in good
time (approx. 30 minutes before the end of the battery’s life).
Important warnings
Refitting the strip when the battery is not in use
will not extend its service life.
Your batteries should be stored at room temperature.
Avoid keeping them in hot places or rooms with high
humidity (e.g. bathroom). Storage in a cooled location is not
necessary.
Never carry batteries loose in a trouser pocket or a purse.
Metal objects like coins or keys could cause batteries to
short-circuit.
Old batteries may contain hazardous substances or
heavy metals that can pollute the environment and harm
health. Batteries are recycled as they contain valuable
raw materials such as iron, zinc, manganese or nickel. Old
batteries should not be discarded with household waste.
Consumers are obliged to dispose of batteries at a collection
point provided by the local authority or a sales outlet. After
use you can also return the batteries in the appropriate
containers at the premises of your hearing care professional
free of charge.
4
3
2
1
1
1
44
3
OPERATION SUENO PRO S
The tinnitus instruments consist of the following
elements:
The tinnitus instruments have
markings for the sides: blue = left, red = right
Your tinnitus instruments may dier from the
illustrations.
Ear hook
Multifunctional rocker switch
Battery compartment lock
Battery compartment / ON/OFF switch
3.1 Construction
2

1110
First, push the battery compartment up until
it clicks into the first catch position (OFF
position). You should now be able to
open it fully.
Then remove the battery from the battery
compartment.
Please do not open the battery
compartment any wider than shown on
page 9. This might damage the device.
3.3 Removing battery
Remove a battery from its packaging.
If the battery has a protective film, remove
and wait a few minutes before inserting the
battery.
First, push the battery compartment up until
it clicks into the first catch position (OFF
position). You should now be able to open it
fully.
Then insert the battery in the battery
compartment. Ensure that the + symbol
marked on the battery is visible when you
have inserted it.
Please do not open the battery
compartment any wider than shown
here. This might damage the device.
Note: Do not force the battery into the
battery compartment. If it does not
fit, check whether you are inserting it
correctly and that it is the correct type of
battery (see Section 2.2).
3.2 Inserting battery

1312
3.5.1 Inserting with Thin Tube
Switch the tinnitus instrument on by closing the battery
compartment securely.
Place the tinnitus instrument behind your ear.
Slide the earpiece carefully into your ear canal.
Rotate slightly until it is positioned properly.
Open and close your mouth to avoid air being
trapped in the ear canal.
The optional concha support helps improve
the fit of the earpiece in the ear.
3.5 Inserting and removing tinnitus instruments
Easy Thin
Tube + dome
Concha clip
(optional)
Tinnitus instrument
Switching on
Close the battery compartment securely by
moving it past the catch of the OFF position
into the casing.
You will feel the battery compartment
clicking into place as you close it.
The tinnitus instruments are now switched
on. After a preset delay and a start-up jingle,
the first program will activate and the
instruments are now ready for use.
Your tinnitus instruments are switched on and o via the
battery compartment.
3.4 Switching tinnitus instruments on and o
Switching o
To switch the device o, press the battery
compartment out to the first catch position.
This is the OFF position.
If they will be out of use for a long time, open
the battery compartment fully and remove
the battery.

1514
3.5.3 Removing tinnitus instruments
Lift your tinnitus instrument and slide carefully over the outer
part of your ear. Carefully pull the tube with the earpiece out of
the ear canal. Switch the hearing aid o by moving the battery
compartment to the OFF position.
Warning: Risk of injury!
In some very rare cases the dome may remain in the ear canal
on removal. Should this happen, please contact your doctor
or hearing care professional at once.
Please do not try to remove the dome yourself.
Your tinnitus instruments feature a
multifunctional rocker switch for controlling
volume and selecting dierent programs.
The rocker switch can be activated by
pressing the top (+) and bottom end (-).
The rocker switch can be programmed with
one of three functions. Your hearing care
professional has marked here which of the
functions has been set for your hearing aids:
3.6 Volume control and program selection
3.6.1 Multifunctional rocker switch
+
–
To position the concha support, bend slightly and
place it carefully in the outer part of your ear.
Caution: Risk of injury!
Always wear the thin sound tube with the
dome and check that the dome is positioned
securely on the tube.
3.5.2 Inserting with ear mould
Switch the tinnitus instrument on by closing the battery
compartment securely.
Place the tinnitus instrument behind your ear.
Tinnitus instrument
Ear mould
Insert the ear mould in your ear, rotating slightly as
you do so.
Move the upper part of the ear mould backwards
and forwards slightly to adjust.

1716
3.6.2 Volume selection
The volume can be adjusted in steps using
the rocker switch. Briefly pressing the top
end of the switch increases the volume,
while briefly pressing the bottom end
reduces the volume.
When you switch your devices on, they will
be at the volume set for you. You can now
increase or reduce the volume in steps.
Each time you press the switch, you will
hear audible confirmation.
Once you have reached the upper or lower
volume limit, you will hear a clear signal.
Volume control and program selection are optional
functions. Your hearing care professional will adjust your
devices to your individual requirements.
+
3.6.3 Selecting hearing programs
Multifunctional rocker switch
Your hearing care professional will have adjusted your hearing
aids to various hearing situations with you and assigned them
to specific hearing programs.
The rocker switch allows you to swap between the hearing
programs. To do so, simply hold down one end of the rocker
switch until you hear audible confirmation of the change in
program. The number of signals indicates the number of the
program selected. You can move up or down through the
hearing situations.
+ switch:
switch:
Program change sequence*:
* Example with three hearing programs
Volume control and program selection are optional
functions. Your hearing care professional will adjust your
hearing aids to your individual requirements.
Volume control
To control the volume, press the multifunction rocker
switch briefly on the top or bottom also see ...
Program selector switch
To change the program, press the multifunction rocker
switch briefly on the top or bottom also see ...
Volume control and program selector switch
combined To control the volume, press the multifunction
rocker switch briefly on the top or bottom; to change the
program hold the switch down for approx.
second see also .. and ...
+

1918
4
5
3
2
1
OPERATION SUENO PRO R
The tinnitus instruments consist of the following elements:
The tinnitus instruments have markings for the sides:
blue = left, red = right
Your tinnitus instruments may dier from the illustrations.
Receiver module
Dome
Concha clip optional
Rocker switch
Battery compartment / ON/OFF switch
4.1 Construction
1
2
3
5
4
Hearing program
Description of setting

2120
Open the battery compartment carefully
with your fingernail at the edge for opening
and swing it right out.
Then remove the battery from the battery
compartment.
Please do not open the battery compartment
any wider than shown in Section 4.2. This
might damage the device.
4.3 Removing battery
Switching on
Close the battery compartment securely by
moving it past the catch of the OFF position
into the casing.
You will feel the battery compartment
clicking into place as you close it.
The tinnitus instruments are now switched
on. After a preset delay and a start-up jingle,
the first program will activate and the
instruments are now ready for use.
4.4 Switching tinnitus instruments on and o
Your tinnitus instruments are switched on and o via the
battery compartment.
4.2 Inserting battery
Please remove a battery from its packaging.
If the battery has a protective film, remove
and wait a few minutes before inserting the
battery.
Open the battery compartment carefully
with your fingernail at the edge for opening
and swing it right out.
Please do not open the battery
compartment any wider than shown
here. This might damage the device.
Then insert the battery in the battery
compartment. Make sure the (+) symbol on
the battery matches the (+) symbol on the
battery compartment.
Note:Do not force the battery into the battery compartment.
If it does not fit, check whether you are inserting it correctly
and that it is the correct type of battery (see Section 2.2).

2322
Removing
Lift your tinnitus instrument and slide carefully over the outer
part of your ear.
Carefully pull the tube with the earpiece out of the ear canal.
Switch the tinnitus instrument o by moving the battery
compartment to the OFF position.
Warning: Risk of injury!
In some very rare cases the dome may remain in the ear
canal on removal. Should this happen, please contact your
doctor or hearing care professional at once. Please do not
try to remove the dome yourself.
Open and close your mouth to avoid air being
trapped in the ear canal.
The optional concha support helps improve
the fit of the earpiece in the ear. To position
the concha support, bend slightly and place
the support carefully in the outer part of your
ear.
Switch the tinnitus instrument on by closing the battery
compartment securely.
Caution: Risk of injury!
Always wear the receiver module with its dome or
PowerSleeve and check that they are positioned securely on
the tube.
Switching o
To switch the device o, press the battery
compartment out to the first catch position.
This is the OFF position.
If the devices are going to be out of use for a
long time, open the battery compartment
fully and remove the battery.
Inserting
Place the tinnitus instrument behind your ear.
4.5 Inserting and removing tinnitus instruments
Tinnitus
instrument
Concha
clip
(optional)
Earpiece
(receiver
module +
dome)
The tinnitus instruments have markings for the sides: blue =
left, red = right
Slide the earpiece carefully into your ear canal.
Rotate slightly until it is positioned properly.

2524
4.6.2 Volume selection
The volume can be adjusted in steps using
the rocker switch. Briefly pressing the top
end of the switch increases the volume,
while briefly pressing the bottom end
reduces the volume.
When you switch your devices on, they will
be at the volume set for you. You can now
increase or reduce the volume in steps.
Each time you press the switch, you will
hear audible confirmation.
Once you have reached the upper or lower
volume limit, you will hear a clear signal.
Volume control and program
selection are optional functions.
Your hearing care professional will
adjust your devices to your individual
requirements.
Your tinnitus instruments feature a
multifunctional rocker switch for controlling
volume and selecting dierent programs.
The rocker switch can be activated by
pressing the top (+) and bottom end (-).
4.6 Volume control and program selection
4.6.1 Multifunctional rocker switch
The rocker switch can be programmed with one of three
functions. Your hearing care professional has marked
here which of the functions has been set for your tinnitus
instruments:
Volume control
To control the volume, press the multifunction rocker
switch briefly on the top or bottom.
Program selector switch
To change the program, press the multifunction rocker
switch briefly on the top or bottom.
Volume control and program selector switch
combined
To control the volume, press the multifunction rocker
switch briefly on the top or bottom; to change the program
hold the switch down for approx. second.

2726
4
3
2
1
OPERATION SUENO PRO ITE
Your tinnitus instruments consist of the following elements:
Your tinnitus instruments may dier from the illustrations
as they have been made according to an individual
impression of your ear.
Depending on the model, your tinnitus instruments have
markings for the sides: blue = left, red = right
Depending on the type you have, your tinnitus instrument
may not feature the elements marked with the asterisk *.
Battery compartment
Volume control
Program switch*
Drawstring*
5.1 Construction
1
2
4
3
1
2
3
4.6.3 Selecting the hearing programs
Rocker switch
Your hearing care professional will have adjusted the various
hearing programs with you.
+ switch:
switch:
Program change sequence*:
* Example with three hearing programs
The rocker switch allows you to swap
between the hearing programs. To do so,
simply hold down one end of the rocker
switch until you hear audible confirmation
of the change in program. The number of
signals indicates the number of the program
selected. You can move through the hearing
programs up or down.
Hearing program
Description of setting
Volume control and program selection are optional
functions. Your hearing care professional will adjust your
devices to your individual requirements.

2928
Open the battery compartment carefully
with your fingernail at the edge for opening
and swing it right out.
Then remove the battery from the battery
compartment.
5.3. Removing battery
Remove a battery from its packaging.
If the battery has a protective film, remove
and wait a few minutes before inserting the
battery.
Open the battery compartment carefully
with your fingernail at the edge for opening
and swing it right out.
Then insert the battery in the battery com-
partment. Make sure the (+) symbol on the
battery matches the (+) symbol on the bat-
tery compartment.
Note: Do not force the battery into the
battery compartment. If it does not fit,
check whether you are inserting it cor-
rectly and that it is the correct type of
battery (see Section 2.2).
5.2. Inserting battery

3130
Inserting
Insert your tinnitus instruments in the outer part of the ear
so that the tip points towards the ear canal. To insert, pull the
earlobe down slightly and at the same time press the tinnitus
instrument into your ear. Your tinnitus instrument will then slide
into the right position.
Removing
Take your tinnitus instrument out by pulling your earlobe with
one hand and pushing gently behind the ear. This will release the
instrument from the ear canal.
If it has a drawstring, use it to carefully pull your tinnitus
instrument out of your ear.
5.5 Inserting and removing tinnitus instruments
Depending on the model, your tinnitus instruments have
markings for the sides: blue = left, red = right
Before use, check that your tinnitus instruments are clean. After
use earwax and other residues may be present. Remove before
using again.
Switching o
The tinnitus instruments are switched o as
soon as the battery compartment is opened.
If they will be out of use for a long time, open
the battery compartment fully and remove
the battery.
o
Switching on
Your tinnitus instruments are switched on
and o via the battery compartment.
They are now switched on as soon as the
battery compartment is closed.
After a preset delay and a start-up jingle,
the first program will activate and the
instruments are now ready for use.
5.4 Switching tinnitus instruments on and o
on

3332
Press the program switch on your devices to
run through the various hearing programs.
Each time you press the program switch,
the next hearing program will be activated.
An audible signal confirms each program
change.
Hearing program
Description of setting
5.6.2 Selecting hearing programs
(tinnitus instruments with a program switch)
When you switch your hearing aids on,
they will be at the volume set for you.
•Increase volume
Slowly turn the controller forwards.
•Reduce volume
Slowly turn the controller
backwards.
Once you have reached the upper or
lower volume limit, you will hear a
clear signal.
5.6.1 Volume selection
right ear
left ear
5.6 Volume control and program selection

3534
CARE INSTRUCTIONS
To ensure your devices function perfectly for years to come,
audifon oers special care products to enable optimum
cleaning.
Protect your tinnitus instruments from moisture (e.g.
showers, sweat, rain) and take them out before using hairspray
or similar cosmetic products.
We also recommend that you carry out daily care on your
tinnitus instruments as they are exposed to moisture and dust
during proper use, even when handled with care.
Whatever type of tinnitus instrument you use: Each one is in
direct contact with the skin. This produces perspiration, which
may damage your tinnitus instrument in the long term unless
dried on a daily basis. In-the-ear hearing aids are coated with a
water-repellent finish to prevent any damage from moisture.
Wearing a tinnitus instrument or insertion of the ear adapter
piece in the ear canal will always involve soiling with earwax.
For this reason we recommend regular cleaning. Do not use a
damp cloth to clean your tinnitus instruments. Always use a
soft, dry cloth.
7.1 General
ACCESSORIES
The tinnitus instruments from the sueno pro family feature the
following accessories, which are available from your hearing
care professional. For further information contact
your hearing care professional.
Accessories
Side marking
UniTip Soundshell
UniTip receiver module S
CeruStop filter
UniTip domes
Easy Thin Tubes
Concha clip
Open Fit adapter
audifit software
version 5.8 or higher
Shows the side of your tinnitus instruments:
red = right, blue = left
Individual ear adapter piece for your tinnitus instruments
The receiver module is used to emit the noise into the
ear canal.
Small filter that protects the receiver module from
blockages and that should be replaced regularly.
Universal earpieces for use with your tinnitus instruments
Thin Tube for use of your tinnitus instruments
Secures the Thin Tube in your ear
Adapter for connecting Easy Thin Tubes to your
tinnitusinstrument
Fitting software used by the hearing care professional to
adjust your tinnitus instruments for you
Description

3736
7.3 Changing the earwax protection filter
Your tinnitus instruments have protection filters to prevent
earwax being deposited inside the receiver. It is necessary to
regularly change the filter to ensure your tinnitus instruments
function perfectly. To replace the filter, proceed as follows:
Where present, first remove the
dome from the receiver module
and clean it.
Remove the replacement tool
from the filter dispenser and
slide it into the filter.
Remove the filter.
Turn the replacement tool so
the new filter is at the bottom.
Press the new filter with the
replacement tool into the
filter opening of the tinnitus
instrument until it clicks into
place. Then simply pull out the
replacement tool and dispose
of it.
Should your tinnitus instrument still not function correctly
despite regular care, call on your hearing care professional.
Do not try under any circumstances to repair your tinnitus
instrument yourself.
7.2 Cleaning and care of behind-the-ear-tinnitus
instruments with external receiver
Tinnitus instruments with an external receiver involve special
features in terms of cleaning and care. Please proceed as
follows:
To clean your tinnitus instruments on the outside, either use an
audifon pro care Cleaning-Tissue or a dry, lint-free cloth which
you have moistened with audifon pro care Cleaning-Spray. Rub
your behind-the-ear tinnitus instrument carefully with a tissue
or cloth. This will remove soiling and residues of earwax quickly
and easily. When handling the external receiver, please take
special care.

3938
dry go
The audifon dry go is the perfect solution for drying your devices
when on trips or if out and about. Once connected, for example
to the USB port on your laptop, the drying program can be
conveniently started at the touch of a single button. A flow of
warm air inside the audifon dry go will then dry your devices
reliably. The drying station switches
o automatically at the end of the
drying program.
dry star UV 2
The audifon dry star UV will dry your devices gently yet
thoroughly through a constant circulation of uniformly warm
air inside the casing.
The audifon dry star UV is not only automatic but also
consumes very little power, switching itself o at the end of the
drying program.
The drying station is simple to operate
using a single sensor button.
7.4 Drying tinnitus instruments
Your tinnitus instruments should be dried after use at the
end of the day and above all after cleaning. If you take care of
your tinnitus instruments by drying them carefully, this will
significantly increase their service life. There are two ways of
doing this. If you have an audifon drying station of the type dry
star UV or dry go, use this for drying. Take note of the individual
product instructions for further details. Alternatively, you can
dry your tinnitus instruments in the audifon pro care Drying-Tub
with an audifon Drying-Capsule.
This manual suits for next models
2
Table of contents
Other Audifon Hearing Aid manuals

Audifon
Audifon lewi S User manual

Audifon
Audifon via pro User manual
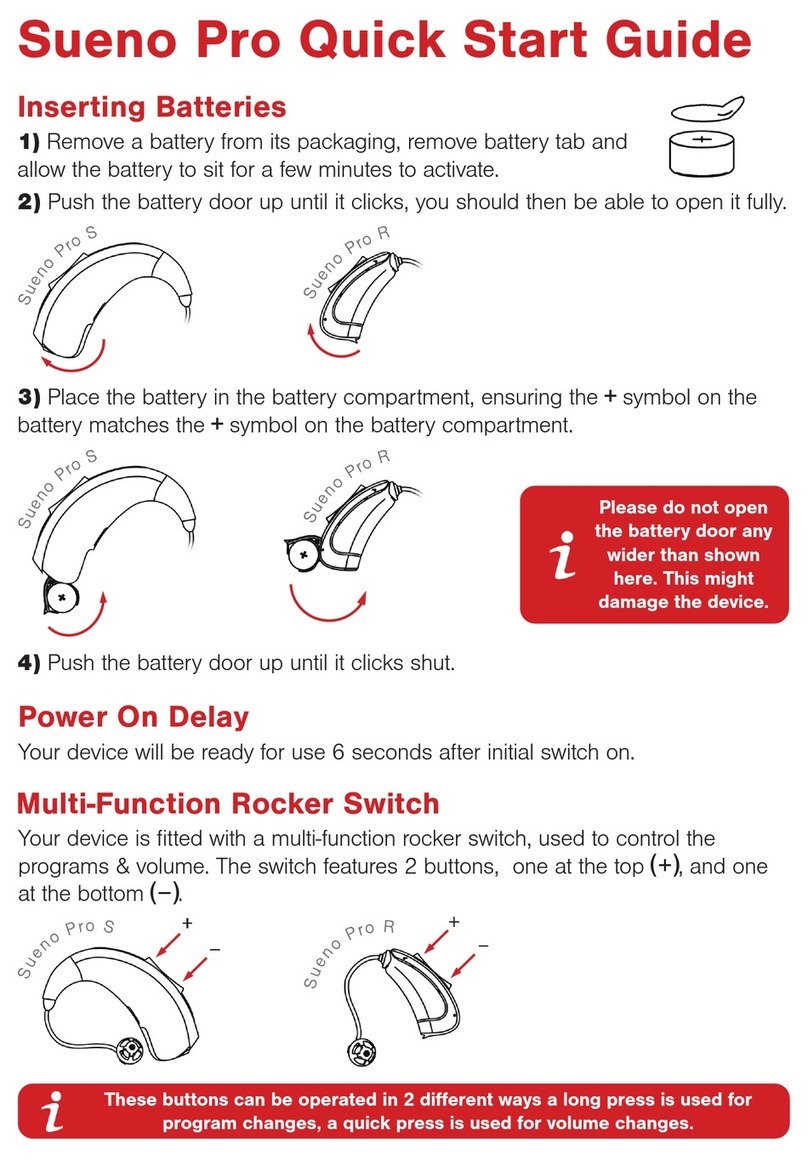
Audifon
Audifon Sueno Pro User manual

Audifon
Audifon sino S User manual

Audifon
Audifon lewi S User manual

Audifon
Audifon lewi S User manual

Audifon
Audifon eox M User manual
Audifon
Audifon aviva Series User manual
Audifon
Audifon lewi R User manual

Audifon
Audifon lewi R User manual
