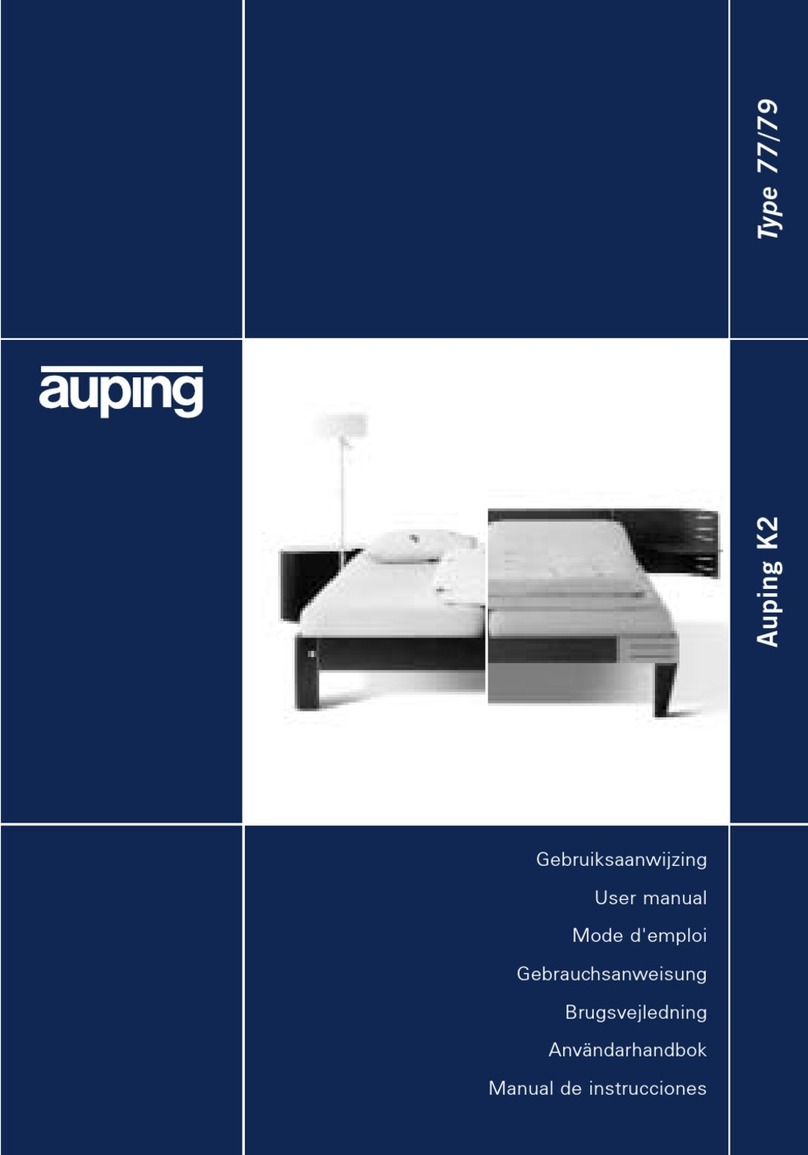
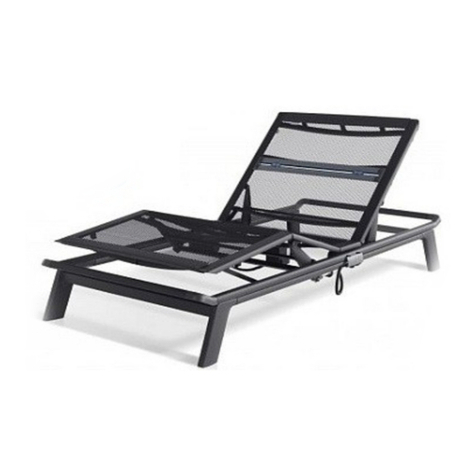
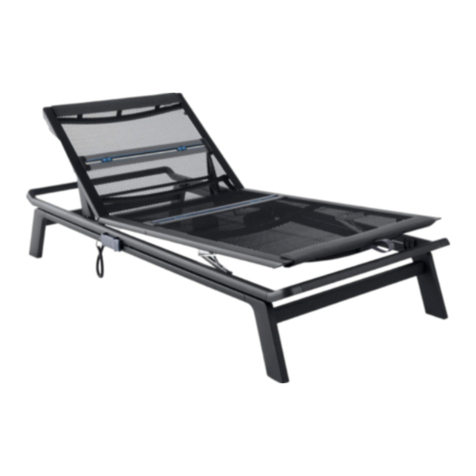
Auping Kiruna User manual

Koninklijke Auping bv
Laan van Borgele 70
Postbus 67
7400 AB Deventer Holland
Tel. +31 570 68 19 11
Fax +31 570 50 12 21
E-mail: info@auping.nl
Voor België en Luxe m b u r g /
pour la Belgique et le
G.D. de Luxe m b o u r g :
Royal Auping nv/sa
Vlaamse Kaai 55
B-2000 Antwerpen
Tel. +32 3 257 13 47
Fax +32 3 257 19 62
E-mail: info@auping.be
Pour la Fr a n c e :
Auping Showroom Nort h e r n - F e a t h e r
9, Rue Balard
FR-75015 Paris
Tel. +33 1 45579090
Fax +33 1 45575486
E-mail: infos@nort h e r n - f e a t h e r. f r
Für Deutschland:
Royal Auping
Postfach 67
7400 AB Deventer Holland
Tel. +31 570 68 19 11
Fax +31 570 50 16 37
E-mail: info@auping.nl
For Skandinavien:
Royal Auping
K ron prinsensgade 1
Postboks 1141
1010 København K
D a n m a r k
Tel. +45 33 17 94 34
Fax +45 33 13 08 51
E-mail: info@auping.dk
Para España:
Royal Auping
Avda. Valdemarin 93 - portal E-1A
28023 Madrid
Tel. +34 913 575 626
Fax +34 913 574 436
E-mail: info@auping.es
For other countries, see
www.auping.com
6 5 2 0 0 0 0 / 0 6 - 2 0 0 6
Auping K i r u n a
G e b ru i k s a a n w i j z i n g
User manual
Mode d'emploi
G e b r a u c h s a n w e i s u n g
B r u g s v e j l e d n i n g
Manual de instru c c i o n e s
B o x s p r i n g
Sommier tapissier
B o x s p r i n g b e t t
Canapé de muelles

NL 1
Kiruna
1. Inleiding 2
1.1 Opbouw van de Kiruna 3
1.2 Afstandsbediening 3
1.3 Technische informatie 4
2. Veiligheidsaanwijzingen 5
3. Ingebruikname 6
3.1 De onderdelen van uw Kiruna 6
3.2 Monteren boven- en onderframe en aanbrengen
van de elektromotoren 6
3.3 Gebruiksklaar maken 8
4. Bediening 8
4.1 Elektrisch verstelbare delen 8
5. Storingen 9
5.1 Elektrische storingen 9
5.2 Mechanische storingen 9
6. Reiniging en onderhoud 10
7. Afvoeren verpakking en product 11
8. Garantiebepalingen Koninklijke Auping bv
voor Kiruna by Auping 12
Dit product voldoet aan de geldende CE-richtlijnen.

1.1 Opbouw van de Kiruna
1. Topmatras
2. Boxspring
3. Poten
4. Matras*
5. Handset + infrarood ontvanger*
De verstelbare Kiruna is verstelbaar
via twee onafhankelijke motoren, te
bedienen met behulp van een infra-
rood handset. De verstelbare Kiruna
beschikt over een knieholte- en dijbeen-
ondersteuning.
*Indien van toepassing
1.2 Afstandsbediening
1. Rugdeel omhoog
2. Rugdeel omlaag
3. Voeteneind omhoog
4. Voeteneind omlaag
5. Rugdeel en voeteneind omhoog
6. Rugdeel en voeteneind omlaag
NL 3NL 2
1. Inleiding
De hectiek van alledag verg e t e n .
Langzaam wegzakken in een weel-
derig bed en genieten van superieur
comfort. Met Kiruna kan dat elke dag.
Vlakke boxspring (25 cm excl. poten)
Vlakke boxspring (19 cm excl. poten)
Verstelbare boxspring (19 cm excl. poten)
fig.4
fig.1
fig.2
fig.3

NL 5NL 4
1.3 Technische informatie
Aandrijfmotor (2 stuks, per motor)
-Input 230 V~(afhankelijk van het
model input 220/240/110 V~)
50/60 Hz, 145 W.
-Gelijkstroommotor 24 V, 75 W.
Maximale inschakelduur 2 minuten
per 20 minuten.
Afstandsbediening infrarood
-Handset
-Ontvanger
-D ruktoetsen voor verstelling van ru g -
deel en voeteneind
-Synchroonbedieningsset
Gewicht
- Boxspring hoog vlak,
90 x 210 cm: 40 kg
- Boxspring laag vlak,
90 x 210 cm: 35 kg
- Boxspring laag verstelbaar,
90 x 210 cm: 60 kg
- Matras,
90 x 210 cm: 28 kg
-K i runa topper, pocket,
180 x 210 cm: 30 kg
-K i runa topper, paarde n haa r /po c ket ,
180 x 210 cm: 35 kg
-K i runa topper, latex,
180 x 210 cm: 37 kg
2. Veiligheidsaanwijzingen
■De Kiruna is geen kinderspeelgoed.
Laat kinderen niet met het bed
spelen.
■Gebruik het bed niet als trampoline
of trapje.
■Controleer of de aansluitspanning
van de transformator overeenkomt
met de netspanning in de woning.
■Ve r s t e l b a re bedden hebben be-
wegende delen. Zorg ervoor dat
ledematen niet bekneld kunnen
raken.
■Verstel het bed alleen wanneer u in
het bed ligt. Let op dat zich tijdens
het verstellen geen kinderen onder
het bed bevinden.
■Maak het bed spanningsloos voor-
dat u met schoonmaken begint.
Trek de stekker uit het stopcontact.
■Plaats het bed uitsluitend in droge
ruimtes. Vanwege de elektrische
onderdelen is het niet toegestaan
het bed in vochtige ruimtes te
plaatsen.
■Let op dat de snoeren niet bekneld
kunnen raken. Controleer dit door
het bed na installatie eenmaal te
verstellen.
■Trek de stekker uit het stopcontact
bij onweer.

5. Bevestig de rugmotor (151747)
aan de onderzijde van het onder-
frame met behulp van de schroev e n
en borgpen, zoals aangegeven op
de illustraties (zie fig. 7).
6. Bevestig de bovenbeenmotor
(151748) aan de onderzijde van
het onderframe met behulp van de
schroef en borgpen, zoals aange-
geven op de illustraties (zie fig. 7).
7. Steek de stekker van de rugmotor
in de besturingskast bij aansluit-
punt 1.
8. Plaats de bijgeleverde batterij in de
i n f r a roo d handset en steek de
stekker van de ontvanger in de
besturingskast bij aansluitpunt 2.
9. Steek de stekker van de boven-
beenmotor in de besturingskast bij
aansluitpunt 3.
10. Zet de snoeren vast onder de
trekontlasting op de besturingskast
(zie fig. 8).
11. Schuif de besturingskast aan de
klem aan de onderzijde van het
frame (zie fig. 9).
12. Indien u het bed synchroon wilt ver-
stellen, bevestig de synchroon k a bel
aan de twee besturingskasten (deze
twee uiteindes zijn gelijk) en aan de
ontvanger van de infraroodset.
13. Plaats de ontvanger van de infra-
roodset met behulp van de plakstrip
aan de buitenzijde van het bed op
het onderframe. Let op dat de
ontvanger niet wordt afgedekt.
NL 7
3. Ingebruikname
3.1 De onderdelen van uw Kiruna
-Kiruna Boxspring
-2 Elektromotoren met afstands-
bediening en besturingskast*
-Matras*
- Topmatras
-Poten
3.2 Monteren boven- en onderf r a m e
en aanbrengen van de elektro-
m o t o r e n
1. Haal het bovenframe uit de ver-
pakking en leg het op zijn kop op
de grond.
2. Haal het onderframe uit de ver-
pakking en leg het onderframe op
het bovenframe.
3. Bevestig de frames met behulp van
de bouten en ringen (zie figuur 5).
>> Ga bij montage van een vlakke
Kiruna door naar hoofdstuk 3.3.
>> Ga bij montage van een ver-
stelbare Kiruna door naar punt 4.
4. Bevestig aan beide zijden van het
voeteneinde de hefarmen (zie fig. 6).
*Indien van toepassing
NL 6
fig. 5
fig. 7
(voeteneinde)
fig. 8
fig. 9
fig. 6

4.1 Elektrisch verstelbare delen
Voor het verstellen van de elektrische
delen gebruikt u de afstandsbediening
(zie fig. 11).
Druk een ‘op’ of ‘neer’ toets in. Houd
deze ingedrukt tot de juiste stand
bereikt is. Er kan maar één toets tege-
lijk bediend worden.
1. Rugdeel omhoog
2. Rugdeel omlaag
3. Voeteneind omhoog
4. Voeteneind omlaag
5. Rugdeel en voeteneind omhoog
6. Rugdeel en voeteneind omlaag
NL 9
4. Bediening 5. Storingen
NL 8
3.3 Gebruiksklaar maken
Monteer de poten aan de boxspring.
Bij vlakke boxsprings langer dan
200 cm moet altijd een (vijfde)
middenpoot geplaatst worden.
Zet de boxspring in de juiste positie
op de onderzetpoten. Controleer of de
boxspring vrij kan bewegen.
Leg de matras(sen) op de boxspring.
Steek de stekker in het stopcontact*.
*Indien van toepassing
fig. 10
fig. 11
Een eventuele elektrische storing is
lastig, maar nooit gevaarlijk. De motor
is voorzien van alle veiligheids-
keuringen en is dubbel geïsoleerd.
5.1 Elektrische storingen
Controleer of:
-de stekker in het stopcontact zit;
-er netspanning aanwezig is;
-de batterij van de infrarood afstands-
bediening werkt;
-de infrarood ontvanger niet is afge-
dekt;
- de frequentie van de infraro o d
afstandsbediening gelijk is aan de
f req uentie van de infrarood ont-
vanger. De afstandbediening en de
ontvanger hebben een frequentie-
schakelaar.
De infrarood afstandsbediening kan
niet tegelijkertijd met andere infrarood
afstandsbedieningen gebruikt worden.
Op de infrarood ontvanger zit een
noodknop, waarmee alle verstelbare
delen naar beneden gaan.
Batterij
Voor de werking van de infrarood
afstandsbediening is één 9 volt blok-
batterij nodig.
Vervang de batterij als volgt:
-verwijder aan de achterzijde van de
afstandsbediening het klepje en
plaats de batterij daarin;
-in de afstandsbediening is ruimte
voor het plaatsen van een reserve
batterij.
Batterijen zijn chemisch afval. Dank
batterijen af conform de plaatselijke
voorschriften als klein chemisch afval
(KCA).
Let op! Bij vervanging van de batterij
bij voorkeur het type 6LR61-9V
gebruiken.
5.2 Mechanische storingen
Ongewenste geluiden (piepen en
kraken van het bed)
Ongewenste geluiden worden meestal
veroorzaakt doordat:
-het bed niet goed vlak staat;
-de poten los zitten;
-het bed niet vrij van de muur staat.

NL 11
7. Afvoeren verpakking en product
Auping investeert jaarlijks in schonere
productieprocessen en probeert door
het gebruik van duurzame materialen
het milieu zo min mogelijk te belasten.
De matrassen en boxsprings worden
gemaakt van CFK-vrije materialen. De
matrassen en boxsprings worden op
een zodanige manier vervaardigd dat
er bij de productie geen onnodig afval
ontstaat.
Let op!
Bij het demonteren van de motor aan
het hoofdeind van een versteld bed,
kan het hoofdeind omlaag vallen.
Veilige afvalverwerking
Het verpakkingsmateriaal bestaat uit
karton en polyethyleenfolie. Voer het
verpakkingsmateriaal en uw oude bed
op verantwoorde wijze en conform de
overheidsbepalingen af.
NL 10
6. Reiniging en onderhoud
Indien nodig kunt u het metalen frame
van de boxspring met een zachte doek
schoonmaken. Gebruik geen schuur-
middelen of andere schoonmaak-
middelen. De boxspring mag nooit
met water gereinigd worden. De box-
spring ook niet kloppen of zuigen,
maar reinigen met een zachte borstel.
U dient er voor te zorgen dat de
ventilatie optimaal en ononderbroken
kan plaatsvinden. Wij raden u aan daar-
om geen matrasdek tussen matras en
boxspring te gebruiken.
De boxspring poten kunnen tot maxi-
maal 15 cm verlengd worden. Wij advi-
seren u eenmaal per 6 maanden de
poten aan te draaien.

NL 13
gereduceerde kosten in geval van een
garantie op basis van afschrijving.
Afhankelijk van het land waarin aan-
spraak op onze garantie wordt ge-
maakt, omvat deze niet automatisch
de vergoeding van de kosten van
v e r zending van defecte pro d u c t e n
naar de Auping fabriek of de Auping
distributeur voor onderzoek van de
klacht of voor reparatie. Hetzelfde geldt
voor retourzending van vervangende
of gerepareerde producten. De repa-
ratie zelf is binnen de garantietermijn
gratis. Voorrijkosten worden in reke-
ning gebracht.
Een aanspraak op garantie kan alleen
worden gedaan onder overlegging van
de originele factuur. De garantie is
alleen geldig voor de oorspronkelijke
koper. De aanmelding dient te geschie-
den bij de Auping dealer bij wie het
p roduct oorspronkelijk werd aan-
geschaft, ook indien u inmiddels naar
een ander land verhuisd bent.
De garantie vervalt, indien het product
op enig moment gedemonteerd of
gemonteerd wordt door personen die
d a a r voor door Auping niet als
gekwalificeerd zijn aangemerkt, tenzij
de gebruiksaanwijzing ‘do-it-yourself’
montagevoorschriften bevat en deze
nauwkeurig worden opgevolgd.
De Auping garantie geldt in alle landen
waar Auping vert e g e n w o o rdigd is.
Auping behoudt zich het recht voor,
geen garantie te verlenen op Auping
producten die naar landen worden ge-
bracht waar Auping geen vertegen-
woordiging heeft.
NL 12
8. Garantiebepalingen Koninklijke Auping bv voor Kiruna by Auping
De merknaam Auping staat borg voor
jarenlang probleemloos functioneren.
Auping maakt gebruik van hoog-
waardige en duurzame materialen. Elk
product wordt met de grootste zorg
gefabriceerd en nauwkeurig gecontro-
leerd voordat het de fabriek verlaat.
Auping geeft levenslange garantie op
materiaal- en fabricagefouten van alle
bedbodems (waaronder te verstaan:
spiraalbodems en stalen frames) met
uitzondering van de motoren, gas-
veren en elektronica. Op materiaal- en
fabricagefouten van laatstgenoemde
artikelen en van matrassen en dekbed-
den wordt 5 jaar garantie gegeven op
basis van jaarlijkse afschrijving van
20% van de aankoopwaarde. Dit houdt
in dat, mochten zich materiaal- of fabri-
cagefouten voordoen, in het eerste
jaar na factuurdatum de volledige
kosten van vervanging of reparatie
vergoed worden. In de volgende 4
jaren wordt dit steeds 20% minder.
Op kussens en bedlinnen is de garan-
tietermijn 2 jaar.
Op overige artikelen wordt 5 jaar
volledige garantie gegeven. De garan-
tietermijn gaat in op de datum die
vermeld staat op de factuur.
Voorwaarde is wel dat onze plaatsings-
i n s t r ucties en onderh o u d s a d v i e z e n
correct gevolgd zijn en dat sprake is
van normaal huishoudelijk gebruik.
Indien zich materiaal- of fabricagefou-
ten voordoen, verplicht Auping zich
zulke fouten gratis te herstellen
volgens de Auping garantie voorwaar-
den. Indien het defect niet hersteld kan
worden, vervangt Auping het product
binnen de garantietermijn zonder
kosten door hetzelfde, of indien niet
meer leverbaar, door een gelijkwaar-
dig product. Uitsluitend Auping bepaalt
of een fout hersteld wordt door ver-
vanging, reparatie of vergoeding.
Aanspraken op garantie voor gebre-
ken/beschadigingen ontstaan door
ondoelmatig handelen (bijvoorbeeld
door overbelasting), verkeerd of on-
oordeelkundig gebruik of door norma-
le slijtage, worden uitgesloten. Combi-
naties met niet-Auping pro d u c t e n
kunnen, afhankelijk van de aard van de
klacht, tot beperkingen in de garantie-
aanspraak leiden.
Een aanspraak op garantie dient eerst
door Auping als gegrond erkend te
worden. Bij een gegronde klacht zal
Auping het defecte product of defecte
onderdelen vervangen, zonder bereke-
ning van materiaalkosten, of tegen

GB 1
Kiruna
1. Introduction 2
1.1 Structure of the Kiruna 3
1.2 Handset 3
1.3 Technical specifications 4
2. Safety instructions 5
3. Assembly 6
3.1 The components of your Kiruna 6
3.2 Assembly of upper frame and base frame
and installing the electric motors 6
3.3 Preparing for use 8
4. Use 8
4.1 Electrically adjustable sections 8
5. Malfunctions 9
5.1 Electrical malfunctions 9
5.2 Mechanical malfunctions 9
6. Cleaning and maintenance 10
7. Disposal of packaging and product 11
8. Warranty conditions Koninklijke Auping bv
for the Kiruna by Auping 12
This product conforms to current CE guidelines.

GB 3GB 2
1.1 Structure of the Kiruna
1. Top mattress
2. Boxspring
3. Legs
4. Mattress*
5. Handset + infrared receiver*
The adjustable Kiruna has two
independent motors, which can be
operated by means of an infrared
handset. The adjustable Kiruna has
knee & thigh support.
*If applicable
1.2 Handset
1. Raise back section
2. Lower back section
3. Raise foot end
4. Lower foot end
5. Raise back section and foot end
6. Lower back section and foot end
1. Introduction
Escape from the stress of everyday
life. Relax in a luxurious bed with
superior comfort. A daily treat with the
Kiruna.
Flat boxspring (25 cm excl. legs)
Flat boxspring (19 cm excl. legs)
Adjustable boxspring (19 cm excl. legs)
fig.4
fig.1
fig.2
fig.3

GB 5GB 4
1.3 Technical specifications
Drives (2 units, per motor)
-Input 230 V~(depending on model:
input 220/240/110 V~) 50/60 Hz
145 W.
-DC motor 24 V, 75 W. Maximum
working time 2 minutes per 20 minu-
tes.
Infrared remote control
-Handset
-Receiver
-Push buttons to adjust the back
section and foot end
-Synchronous control set
Weight
- Boxspring high flat,
90 x 210 cm: 40 kg
- Boxspring low flat,
90 x 210 cm: 35 kg
- Boxspring low adjustable,
90 x 210 cm: 60 kg
-M a t t ress,
90 x 210 cm: 28 kg
-K i runa topper, pocket,
180 x 210 cm: 30 kg
-K i runa topper, horsehair/pocket,
180 x 210 cm: 35 kg
-K i runa topper, latex,
180 x 210 cm: 37 kg
2. Safety instructions
■The Kiruna is not a toy. Do not allow
children to play with the bed.
■Do not use the bed as a trampoline
or stepladder.
■Check that the voltage of the
transformer is the same as the
mains voltage in the house.
■Adjustable beds have moving parts.
Make sure that your limbs cannot
become trapped.
■Only adjust the bed while you are
lying on it. Make sure that no
children are under the bed while it is
being adjusted.
■Disconnect the bed from the power
supply before cleaning. Pull the
plug out of the socket.
■Owing to the presence of electric
components, place the bed in dry
spaces only.
■Make sure that the cables cannot
become trapped. Check this by
adjusting the bed after it has been
installed.
■Remove the plug from the socket
during a thunderstorm.

GB 7GB 6
5. Attach the back motor (151747)
to the underside of the base frame
using the screws and locking pin
as shown in the illustrations (see
fig. 7).
6. Attach the upper leg motor
(151748) to the underside of the
base frame using the screws and
locking pin as shown in the
illustrations (see fig. 7).
7. Insert the plug of the back motor
into connection point 1 on the
control box.
8. Place the included battery in the
infrared handset and insert the
plug of the receiver in connection
point 2 on the control box.
9. Insert the plug of the upper leg
motor into connection point 3 on
the control box.
10. Secure the cables by fastening the
cable clamp on the control box.
(see fig. 8).
11. Slide the control box onto the
clamp at the underside of the
frame (see fig. 9).
12. For synchronous adjustment,
attach the synchronic cable to
control boxes (both ends of the
cable are identical) and to the
infrared receiver.
13. Using the adhesive strip, attach
the infrared receiver to the outside
of the bed against the base frame.
Make sure that the receiver is not
obstructed.
3. Assembly
3.1 The components of your Kiruna
-Kiruna Boxspring
-2 Electric motors with handset and
control box*
-Mattress*
- Top mattress
-Legs
3.2 Assembly of upper frame and base
frame and installing the electric
m o t o r s
1. Remove the upper frame from the
packaging and lay it upside down
on the floor.
2. Remove the base frame from the
packaging and place it on the
upper frame.
3. Attach the frames using the bolts
and washers (see fig. 5).
>> In case of assembly of the flat
Kiruna, go to chapter 3.3.
>> In case of assembly of the
adjustable Kiruna, go to point 4.
4. Attach the lifting arms on both
sides of the foot end (see fig. 6).
*If applicable
fig. 5
fig. 7
(foot)
fig. 8
fig. 9
fig. 6

GB 9GB 8
4.1 Electrically adjustable sections
The handset is used to adjust the
electrically adjustable sections (see
fig. 11).
P ress one of the 'up' or 'down'
buttons, holding it down until the
desired position is reached. Only one
button can be operated at a time.
1. Raise back section
2. Lower back section
3. Raise foot end
4. Lower foot end
5. Raise back section and foot end
6. Lower back section and foot end
4. Use 5. Malfunctions
3.3 Preparing for use
Attach the legs to the boxspring.
Always place a (fifth) central leg in
case of flat boxsprings longer than
200 cm.
Position the boxspring correctly on
the supporting legs. Check that the
boxspring can move freely.
Place the mattress(es) on the box-
spring.
Insert the plug into the mains socket*.
*If applicable
fig. 10
fig. 11
While an electrical fault may be a
nuisance, it is not dangerous. The
motor is fitted with all necessary
safety provisions and has double
insulation.
5.1 Electrical malfunctions
Check that:
-the plug is in the socket;
-the current is switched on at the
mains;
-the battery of the infrared handset is
charged;
- the infrared receiver is not ob-
structed;
- the frequency of the infrare d
receiver is the same as that of the
infrared receiver. The handset and
the receiver are fitted with a
frequency switch.
The infrared handset cannot be used
simultaneously with other infrare d
remote controls.
The infrared receiver is fitted with an
e m e rge ncy button. When this is
pressed all adjustable parts return to
the horizontal position.
Battery
The infrared handset requires a 9 Volt
block battery.
To insert the battery:
- remove the lid at the back of the
handset and insert the battery;
-the remote control offers space for
a spare battery.
Batteries are chemical waste.
Dispose of batteries according to the
local regulations for household
chemical waste.
Please note! When replacing the
battery, use of the type 6LR61-9V is
recommended.
5.2 Mechanical malfunctions
Undesirable noises (bed squeaks
and creaks)
Unwanted noises are usually caused
by:
-the bed not being properly hori-
zontal;
-the legs are not properly tightened;
-the bed is not positioned away from
the wall.

GB 11GB 10
7. Disposal of packaging and product
Auping continually invests in cleaner
p roduction processes in order to
minimise its environmental burd e n
through the greatest possible use of
durable materials. Its mattresses and
boxsprings are manufactured fro m
CFC-free materials. These mattresses
and boxsprings are also manufactured
in such a way that no unnecessary
waste is produced.
Please note!
The head support can drop down
when the motor on the head side of
the bed is being dismantled.
Safe waste disposal
The packaging is made up of card-
b o a rd and polyethylene film (PE).
Please dispose of these materials in a
responsible way in accordance with
the regulations of your local authority.
6. Cleaning and maintenance
If necessary, the metal frame of the
boxspring can be cleaned using a soft
cloth. Do not use scouring agents or
other detergents. The boxspring should
never be cleaned using water. The
boxspring should never be beaten or
vacuum cleaned, but should be
cleaned using a soft brush instead.
You should ensure that adequate
u n i n t e r rupted ventilation can take
place. We therefore recommend not to
fit a mattress cover between the
mattress and boxspring.
The boxspring legs can be extended
to a maximum height of 15 cm. We
recommend to tighten the legs every
six months.

GB 13GB 12
supply the parts to rectify the problem
at no material cost to claimant or at
reduced material cost if a warranty on
depreciation basis applies.
Depending on the country, the war-
ranty may not automatically include
cost incurred for shipping defective
products to Royal Auping or its autho-
rised distributor for scrutiny and/or
rep a ir, nor for shipping cost of re p l a c e-
ment or repaired product(s) back to
claimant. Within the warranty period
repair itself, however, will be free of
charge.
Any warranty claim must be accom-
panied by the original purchase invoice.
The warranty is being granted to the
original (first) purchaser only. Notifi-
cation of a warranty claim must be
made to the Auping dealer from whom
the product was originally purchased,
even if this is not in claimant’s present
country of residence.
Unless this booklet contains ‘do-it-
yourself’ assembly instructions for the
product or part thereof and these have
been followed up meticulously, the
warranty will become invalidated if the
product was at any time disassembled
or reassembled by persons not autho-
rised and confirmed by Royal Auping
to be qualified.
The Auping warranty covers any
c o u n t r y where Royal Auping has
re p resentation. Depending on such
country, warranty conditions may vary;
Please consult your local Auping
distributor for details. Royal Auping
reserves the right to exclude cover on
any Royal Auping products which are
taken to countries outside of Royal
Auping distribution channels.
8. Warranty clause Koninklijke Auping bv/Royal Auping
The Auping brand name is your
warranty for years of use to your full
satisfaction of the product you have
bought. Each Auping product is
composed of high-quality, durable
materials and has been manufactured
with utmost care. It has been
thoroughly inspected before it left the
factory.
Royal Auping gives you a lifetime
warranty against material or manu-
facturing defects in all its bed bases
(i.e. mesh bases and steel bed
frames), except on motors, adjust-
ment mechanisms and electro n i c
parts. On these products as well as
mattresses and duvets, there is a
5-year warranty against material or
manufacturing defects, based on an
annual depreciation of 20% of the
purchase price. This means that if any
material or manufacturing defects
should occur in the first year after the
invoice date, we will reimburse the full
costs of replacement or repair. This
will be reduced each time by 20% in
the next four years. For pillows and
bed linen a full 2-year warranty applies.
The warranty period begins on the
date shown on your purchase invoice.
The warranty is granted under the
explicit condition that our installation
and maintenance instructions have
been observed and that the product
has been subject to normal household
usage.
In the event of material or manu-
facturing defects, Royal Auping is
obliged to rectify the defects free of
charge according to the Auping war-
ranty conditions. If the defect cannot
be repaired, Royal Auping will within
the warranty period replace the
product free of charge by an identical
product, or, if the product is no longer
manufactured, by a similar replace-
ment of the same value. Whether a
justified claim will be settled by repl a ce-
ment, by repair or by compensation
remains at Royal Auping’s discretion.
The Royal Auping warranty does not
cover any claim due to improper use
(e.g. due to overload) or normal wear
and tear. If an Auping product is
combined with a product not manu-
factured by Auping, the warranty may
be restricted or declared void, depen-
ding on the nature of the claim.
Any warranty claim must first be re c o g-
nised as justified, either by the autho-
rised distributor in claimant’s country,
or by Royal Auping. Royal Auping will

FR 1
Kiruna
1. Introduction 2
1.1 Structure du Kiruna 3
1.2 Télécommande 3
1.3 Caractéristiques techniques 4
2. Conseils de sécurité 5
3. Mise en service 6
3.1 Les éléments constitutifs de votre Kiruna 6
3.2 Montage du cadre supérieur et inférieur et pose
des électromoteurs 6
3.3 Préparer pour l’utilisation 8
4. Commande 8
4.1 Parties réglables électriquement 8
5. Pannes 9
5.1 Pannes électriques 9
5.2 Pannes mécaniques 9
6. Entretien et nettoyage 10
7. Mise au rebut emballage et produit 11
8. Conditions de garantie de Koninklijke Auping bv
pour Kiruna by Auping 12
Cet produit satisfait aux normes CE en vigueur.

FR 3FR 2
1.1 Structure du Kiruna
1. Matelas de dessus
2. Sommier Boxspring
3. Pieds
4. Matelas*
5. Unité de commande manuelle +
récepteur infrarouge*
Le modèle Kiruna est réglable au
moyen de deux moteurs indépen-
dants, avec une unité de commande
manuelle à infrarouge. Le Kiru n a
réglable est doté d'une articulation au
niveau des genoux et d'un soutien
supplémentaire au niveau des cuisses.
*Le cas échéant
1.2 Télécommande
1. Relèvement partie dos
2. Abaissement partie dos
3. Relèvement partie pieds
4. Abaissement partie pieds
5. Relèvement partie dos et partie
pieds
6. Abaissement partie dos et partie
pieds
1. Introduction
Oublier l’agitation quotidienne. Vous
assoupir peu à peu dans un lit
somptueux et jouir d’un confort de
haut niveau. Avec Kiruna, c’est
possible chaque jour.
Sommier boxspring plat (25 cm hors pieds)
Sommier boxspring plat (19 cm hors pieds)
Sommier boxspring réglable (19 cm hors
pieds)
fig.4
fig.1
fig.2
fig.3

FR 5FR 4
1.3 Caractéristiques techniques
Moteurs d’entraînement (2 unités, par
moteur)
-Entrée 230 V~ (selon le modèle,
entrée 220/240/110 V~) 50/60 Hz,
145 W.
-Moteur courant continu 24 V, 75 W,
durée de marche maximale:
2 minutes toutes les 20 minutes.
Télécommande à infrarouge
-Unité de commande manuelle
-Récepteur
- Touches de réglage de la partie dos
et pieds
-Kit de commande synchronisée
Poids
- Boxspring haut plat,
90 x 210 cm : 40 kg
- Boxspring bas plat,
90 x 210 cm : 35 kg
- Boxspring bas réglable,
90 x 210 cm : 60 kg
- Matelas,
90 x 210 cm: 28 kg
-Dessus Kiruna, ensaché,
180 x 210 cm : 30 kg
-Dessus Kiruna, crin de
cheval/ensaché,
180 x 210 cm : 35 kg
-Dessus Kiruna, latex,
180 x 210 cm : 37 kg
2. Conseils de sécurité
■Le Kiruna n'est pas un jouet. Ne
laissez pas les enfants jouer avec le
lit.
■Il ne faut ni sauter ni se mettre
debout sur le lit.
■Contrôlez si la tension pour le
branchement du transformateur est
identique à la tension utilisée dans
l’habitation.
■Les lits réglables comprennent des
éléments mobiles. Veillez à ce que
les membres ne puissent pas être
coincés.
■Changez la position du lit uni-
quement lorsqu'il est occupé. Lors
du changement de position, veillez
à ce qu'aucun enfant ne se trouve
sous le lit.
■Débranchez le lit avant de
commencer le nettoyage. Il doit
être hors tension.
■Placez le lit uniquement dans un
local sec. En raison de l'existence
de composants électriques, il n'est
pas permis de placer le lit dans un
local humide.
■Veillez à ce que les cordons ne
puissent pas se coincer. Contrôlez
cela en changeant la position du lit
une fois après installation.
■Par temps d'orage, débranchez la
fiche du lit de la prise murale.

FR 7FR 6
5. Fixez le moteur de support dos
(151747) sur la face inférieure du
cad r e inférieur au moyen des vis et
de la goupille, comme indiqué sur
les illustrations (voir fig. 7).
6. Fixez le moteur de support cuisse
(151748) sur la face inférieure du
cad r e inférieur au moyen de la vis
et de la goupille, comme indiqué
sur les illustrations (voir fig. 7).
7. Ins é rez la prise du moteur dossier
des genoux dans le boîtier de com-
mande au point de raccordement 1.
8. Placez les piles fournies dans la
commande manuelle à infrarouge
et branchez la fiche du récepteur
dans le boîtier de commande au
point de raccordement 2.
9. Ins é rez la prise du moteur flexion
des genoux dans le boîtier de com-
mande au point de raccordement 3.
10. Fixez les fils sous la décharge de
traction sur le boîtier de commande
(voir fig. 8).
11. Glissez le boîtier de commande sur
la pince qui se trouve sur la face
i n f é r i e u redu cadre (voir fig. 9).
12. Pour régler le lit de façon synchro-
nisée, fixez le câble de synchroni-
sation aux deux boîtiers de
commande (les deux extrémités
sont identiques) et au récepteur
de la commande à infrarouge.
13. Placez le récepteur de la com-
mande à infrarouge à l’extérieur du
lit sur le cadre inférieur au moyen
de la bande autocollante. Veillez à
ne pas couvrir le récepteur.
3. Mise en service
3.1 Les éléments constitutifs de votre
Kiruna
-Boxspring Kiruna
-2 électromoteurs avec télécom-
mande et boîtier de commande
mural*
-Matelas*
-Matelas de dessus
-Pieds
3.2 Montage du cadre supérieur et infé-
rieur et pose des électromoteurs
1. Sortez le cadre supérieur de l’embal-
lage et posez-le à l’envers sur le
sol .
2. S o rtez le cadre inférieur de l’embal-
lage et posez le cadre inférieur sur
le cadre supérieur.
3. Fixez les cadres au moyen des bou-
lons et des rondelles à re s s o rt(voir
figure 5).
>> Pour le montage d’un Kiruna plat,
passez au chapitre 3.3.
>> Pour le montage d’un Kiruna
réglable, passez au point 4.
4. Fixez les bras élévateurs des deux
côtés de l’extrémité pieds (voir
fig. 6).
*Le cas échéant
fig. 5
fig. 7
(pied)
fig. 8
fig. 9
fig. 6

FR 9FR 8
4.1 Parties réglables électriquement
Pour le réglage des parties électri-
ques, utilisez la commande à distance
(voir fig. 11).
Appuyez sur la touche ‘haut’ ou ‘bas’.
Maintenez la pression jusqu’à obten-
tion de la bonne position. Il n’est
possible de se servir que d’une seule
touche à la fois.
1. Relèvement partie dos
2. Abaissement partie dos
3. Relèvement partie pieds
4. Abaissement partie pieds
5. Relèvement partie dos et partie
pieds
6. Abaissement partie dos et partie
pieds
4. Commande 5. Pannes
3.3 Préparer pour l'utilisation
Monter les pieds sur le sommier box-
spring. Sur les sommiers boxspring
plats d’une longueur supérieure à
200 cm, il convient de toujours mon-
ter un (cinquième) pied au milieu.
Mettez le boxspring dans la position
correcte sur les pieds de soutien.
Contrôlez si le boxspring peut bouger
librement.
Placer le ou les matelas sur le box-
spring.
Branchez la fiche dans la prise
murale*.
*Le cas échéant
fig. 10
fig. 11
Une panne électrique peut être
ennuyeuse, mais elle n'est en aucun
cas dangereuse. Le moteur est en
tous points conforme aux normes de
sécurité et doublement isolé.
5.1 Pannes électriques
Contrôlez :
-si la prise est branchée ;
-s’il y a du courant ;
-si la pile de la télécommande infra-
rouge fonctionne effectivement ;
-si le récepteur à infrarouge n’est pas
couvert ;
-si la fréquence de la télécommande
infrarouge est égale à la fréquence
du récepteur infrarouge. La télé-
commande et le récepteur ont un
commutateur de fréquence.
La télécommande à infrarouge ne
peut pas être utilisée simultanément
avec d’autres télécommandes à infra-
rouge.
Sur le récepteur infrarouge se trouve
un bouton d’arrêt d’urgence permet-
tant de remettre toutes les parties
mobiles en position basse.
Pile
Le fonctionnement de la télé-
commande à infrarouge requiert une
pile de 9 volts.
Pour remplacer la pile :
-enlever le petit couvercle au dos de
la télécommande et mettre la pile en
place ;
- la télécommande off re assez
d’espace pour une pile de réserve.
Les piles sont des déchets chimiques.
Débarrassez-vous des piles comme
prescrit par la réglementation locale
sur les déchets chimiques ménagers.
Attention ! En cas de remplacement
de la pile, utiliser de préférence le
type 6LR61-9V.
5.2 Pannes mécaniques
Bruits indésirables provenant du lit
(grincements et craquements)
Les bruits indésirables ont le plus
souvent les causes suivantes :
-le lit n’est pas à l’horizontale ;
-les pieds ne sont plus solidement
fixés ;
-le lit est contre le mur.
Table of contents
Languages:
Other Auping Indoor Furnishing manuals
Auping
Auping Kiruna Sami User manual
Auping
Auping AVS User manual
Auping
Auping AVS 488 User manual
Auping
Auping AirMassage & Hotspot User manual

Auping
Auping Regina User manual

Auping
Auping AVS 411 User manual
Auping
Auping AVS Boxspring flat Guide

Auping
Auping Kiruna Sami User manual
Auping
Auping Smart Base User manual
Auping
Auping 322 User manual
Popular Indoor Furnishing manuals by other brands

Regency
Regency LWMS3015 Assembly instructions

Furniture of America
Furniture of America CM7751C Assembly instructions

Safavieh Furniture
Safavieh Furniture Estella CNS5731 manual

PLACES OF STYLE
PLACES OF STYLE Ovalfuss Assembly instruction

Trasman
Trasman 1138 Bo1 Assembly manual

Costway
Costway JV10856 manual

