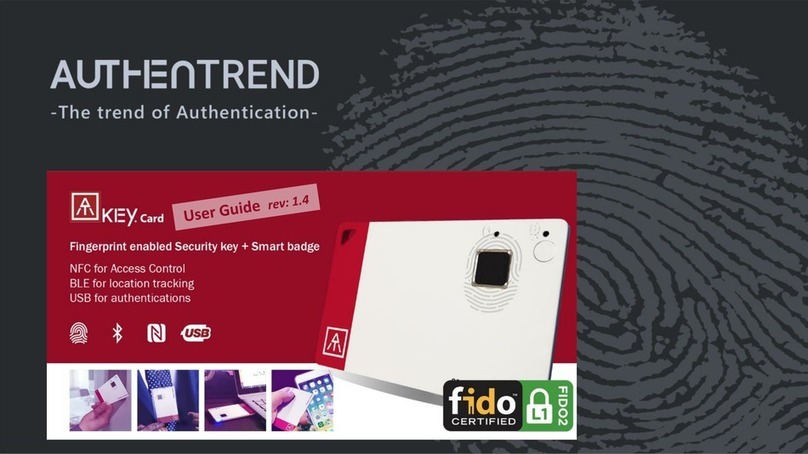
AuthenTrend ATKey User manual

1
Quick Guide for
ATKey with RSA SecurID Access
Rev. 1.0

2
RSA SecurID Access supports using FIDO2-Certified and U2F-compliant security keys -
ATKey.Card (USB/BLE/NFC) and ATKey.Pro (USB) as an authentication option.

4
Step 3
Fingerprint matching for authentication
Step 2
Set Up FIDO Token
Step 1
Enroll fingerprint to ATKey
| 3 Steps
Standalone enrollment
Enroll via Windows 10
Settings
(build 1903 or later version)
Enroll via ATKey App
Enroll via Chrome Canary
(Mac, Chromebook, Linux or
Windows 10 build earlier than
1903)
or
or
or
Register ATKey in RSA SecurID
Access My Page
Setting Up Cloud
Authentication Service for
Security Keys
and / or
Authenticate to a protected
application using your ATKey
Authenticate to a login using
your ATKey
Please enroll your fingerprint first!!

5
| (Step 1) Fingerprint Enrollment (up to 10x fingerprints)
•Insert ATKey.Pro into USB port
•Check Youtube video here for the detail:
https://youtu.be/lDrcZxWXAL4
•LED is BLUE ON, quick click side-button 3x
times (by nail) to go into enrollment mode:
•If there is no any fingerprint enrolled, LED
turns to WHITE
•If there are any enrolled fingerprints,
LED is GREEN flashing, please verify
enrolled fingerprint to start enrolling
new finger
•Put your specific finger on sensor, touch and
lift your finger (LED is WHITE flashing, from
slow to faster), repeat it more than 12 times
till LED shows GREEN (13th time), then your
fingerprint is enrolled
•If you want to quit from standalone
enrollment, click button once, LED will turn to
Blue, back to normal state.
•If your OS is Windows 10 build 1903 or later
versions, you can manage ATKey as security key
•PIN code, add/delete fingerprints, reset
•jump to “Windows Settings” page for the detail
•Windows Settings => System => About
•Download “ATKey for Windows” app from
Windows Store to manage ATKey:
•Enroll fingerprint
•Add/delete fingerprint
•ATKey information
•Companion ATKey to Windows (Windows
Hello login)
•Firmware upgrade
•Search “ATKey” or “AuthenTrend” from
Windows Store to find the app, download
and install
•Jump to “ATKey for Windows” for the detail
Standalone enrollment Enroll from Windows Settings Enroll from ATKey for Windows app

6
| (Step 1) Windows Settings (OS build is 1903 or later version) –Enroll fingerprint
•Windows Settings => Account => Sign-in options => Security Key => add “PIN code” and enroll “Fingerprints”
Click “Manage”,
touch fingerprint sensor to setup
Add “Security Key PIN” first;
this PIN code will write into
ATKey.Pro
•Setup “Security Key
Fingerprint”
•Type-in PIN code, following
screen hint to enroll
fingerprint, until “All Set!”

7
| (Step 1) Windows Settings (OS build is 1903 or later version) –Reset Key
•Windows Settings => Account => Sign-in options => Security Key => Reset Security key (Delete PIN code and erase all fingerprints)
1. Cyan LED is flashing
2. Remove ATKey.Pro and re-insert to
USB port
3. Cyan LED is flashing
4. Touch by any finger to reset or
cancel it - please make it done
(Reset) within 10 sec
1. Blue LED is flashing
2. Remove ATKey.Pro and re-insert to
USB port
3. Blue LED is flashing
4. Touch by any finger to reset or
cancel it - please make it done
(Reset) within 10 sec
Click “Process”
[firmware 1.00.6 or later version] [firmware 1.00.5 or previous version]
Microsoft required spec.- for authenticator reset: in order to prevent
accidental trigger of this mechanism, user presence is required. In case of
authenticators with no display, request MUST have come to the
authenticator within 10 seconds of powering up of the authenticator.

8
| (Step 1) App “ATKey for Windows” – Enroll fingerprint
•Launch “ATKey for Windows” app (version 2.0.57.0 or later version)
•Click “Add and Register ATKey” –please make sure ATKey.Pro inserts to USB port and LED shows blue ON
Click to refresh the page
around 12 times touch/enroll to finish ONE fingerprint enrollment
Verify enrolled fingerprint to confirm
ATKey.Pro fingerprint enrolled and
register for management by app
Default name is -: ATKey.Pro + Keycode

9
| (Step 1) App “ATKey for Windows” – Key Management
•ATKey management –information, rename, firmware upgrade
•“Check for Update”
•Select encrypted firmware image to upgrade manually
•Please wait till 100% done, then plug ATKey.Pro off USB port; re-insert to USB port,
waiting ~15 sec to boot to new firmware (LED from White to Blue ON).
•read firmware version here
•Read “keycode” here

10
| (Step 1) for non-Windows Users
•If you are using non-Windows 10, or your Windows 10 is earlier than build 1903
•Enroll fingerprint into ATKey.Pro via
•Standalone enrollment
•Or Chrome Canary (https://www.google.com/chrome/canary/)
•Here is quick guide for Chrome Canary:
From “Settings” =>
“Privacy and security”
User presence needs - touch dongle by any finger
Assign PIN code into the key

11
| (Step 1) for non-Windows Users
•If you are using non-Windows 10, or your Windows 10 is earlier than build 1903
•Enroll fingerprint into ATKey.Pro via
•Standalone enrollment
•Or Chrome Canary (https://www.google.com/chrome/canary/)
•Here is quick guide for Chrome Canary:
•Click “Add” to fingerprint (enroll
new finger)
•Here lists enrolled fingerprints
with assigned names
Enroll fingerprint till it’s done Assign the name of the enrolled fingerprint

12
| (Step 2) Register ATKey in RSA SecurID Access My Page
1. Sign into My Page. Your IT administrator sends the My Page URL to you.
2. Select Security key from the drop-down list, and click Get Started.
3. Connect the security key and follow the instructions –insert ATKey.Pro USB port and
touch fingerprint for matching
4. Change the name of the key if you like
ATKey.Pro

13
| (Step 3) Authenticate to a protected application using your ATKey
1. Open the protected application.
2. Insert ATKey.Pro into the USB port and touch fingerprint for matching

14
| (Step 2) Setting Up Cloud Authentication Service for Security Keys
If you are an administrator, perform these steps to start using security keys with Cloud Authentication Service. These steps
assume that you have an existing Cloud Authentication Service deployment.
1. Confirm that FIDO Token is in the desired assurance level:
•In the Cloud Administration Console, click Access > Assurance Levels.
•Add or move FIDO Token to the desired assurance level.

15
| (Step 2) Setting Up Cloud Authentication Service for Security Keys
2. Confirm that you have an access policy that uses that assurance level:
•Click Access > Policies.
•Click Edit for the policy.
•In the Rules Sets tab, confirm that FIDO Token is listed in Authentication
Options.
3. Add a service provider:
•Click Authentication Clients > Relying Parties > Add a Relying Party > Add next
to Service Provider.
•Determine if you want to use FIDO Token for primary authentication or additional
authentication, or both. If you want to use FIDO for primary authentication, add a
service provider and specify FIDO as the primary authentication method. In the
Authentication tab, select RSA SecurID Access manages all authentication. In the
Primary Authentication Method drop-down list, select FIDO Token.
•If you are using FIDO for additional authentication, in the Access Policy for
Additional Authentication, select the policy that contains FIDO Token

16
| (Step 2) Setting Up Cloud Authentication Service for Security Keys
4. Enable FIDO authenticator registration in My Page:
•Click Platform > My Page.
•Under Configuration, select Users can register FIDO authenticators in My Page and select Security key.

17
| (Step 3) Setting Up Cloud Authentication Service for Security Keys
1. For your service login page, select FIDO token; insert ATKey.Pro to USB port, touch fingerprint for matching to login
ATKey.Pro
ABC
USER1

18
| Fingerprint Highlights
•Up to 10x fingerprints, when it’s full (10x fingerprints), user can’t enroll new fingers in.
•For new fingerprint enrollment, it always needs authorization from enrolled fingerprints (verify by enrolled
fingerprint first).
•For fingerprint enrollment, users need to touch sensor continuously around 12 times to complete the “template”.
•Following FIDO2 spec., adding PIN code into ATKey.Pro is preferred; user can add PIN code into ATKey.Pro through
Windows Settings (1903 or later builds) or adding from ATKey for Windows (2.0.58.0 or later version)
•Following FIDO2 spec., it allows 3 times continuous failure during one “cycle” (LED will be static RED), user needs
to remove the dongle from Host and re-insert for another cycle; if it fails 5 cycles continuously, Key will re-format
and reset.

19
| LED
Flashing
Touch your enrolled
fingerprint to verify
Standalone enrollment
(flashing from slow to fast,
then done by GREEN
meaning enrolled
fingerprint verified PASS);
Fingerprint calibration
(white flashing, done back
to blue)
User touch needs (but
any finger is ok)
Static ON
Power on, normal
state
Fingerprint verified
PASS (for a second)
•
Fingerprint
verified Failed
•
Erase fingerprint
•
Reset key
•Fingerprint sensor
calibration
•
Power on, but
firmware booting
failed
blue green red white cyan
Other AuthenTrend IP Access Controllers manuals
Popular IP Access Controllers manuals by other brands

Aiphone
Aiphone AC-10U Installation & operation manual

Kaba
Kaba RAC 4 installation guide
HID
HID VertXHID V2000 Quick installation guide

Schlage
Schlage Panel Interface Module RS485 Installation & operating instructions

GeoVision
GeoVision GV-CS1320 quick start guide
Prosonic
Prosonic PRO-698 instruction manual


