Automatic Solutions ASA 550L I Manual

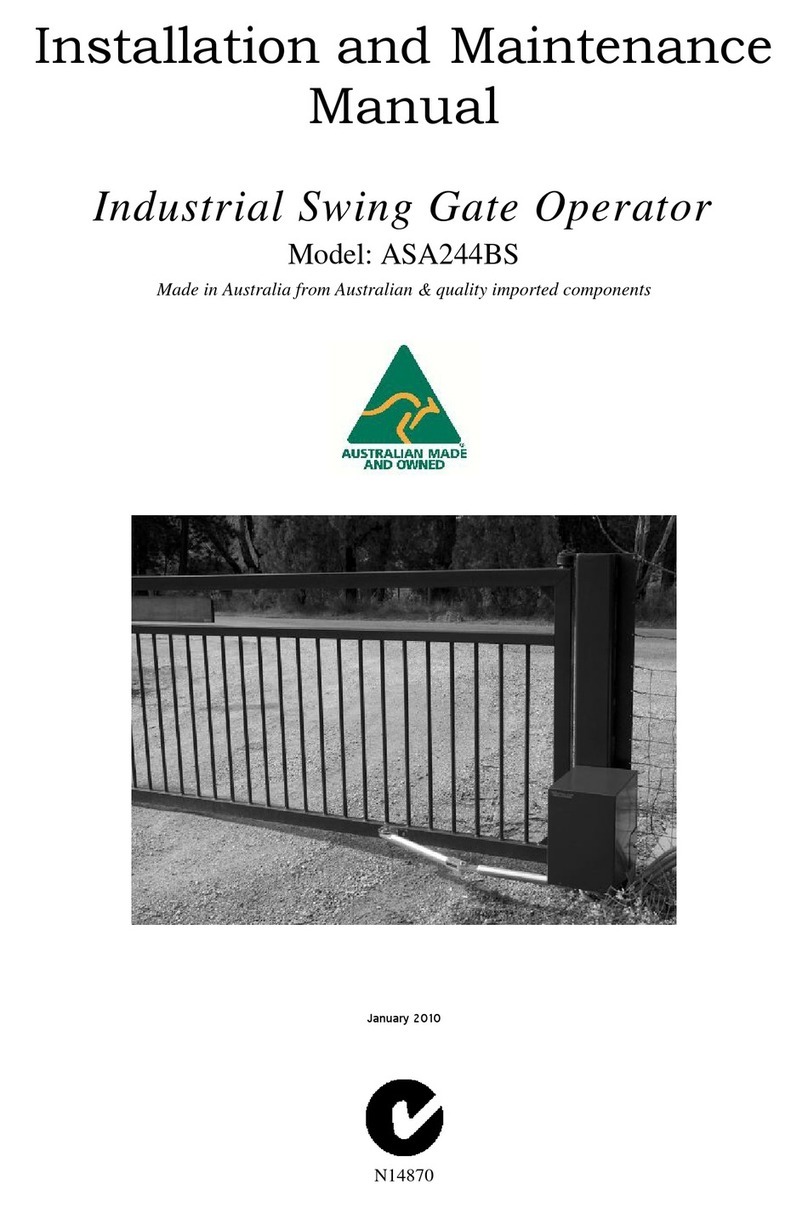
Installation and Maintenance Manual
Sliding Gate Operators
Inbuilt Models: ASA 550L I & 750L I Range
Made in Australia from Australian & quality imported components
Installation and Maintenance Manual
Sliding Gate Operators
Inbuilt Models: ASA 550L I & 750L I Range
Made in Australia from Australian & quality imported components
April 2010
N14870
Installation and Maintenance Manual
Sliding Gate Operators
Inbuilt Models: ASA 550L I & 750L I Range
Made in Australia from Australian & quality imported components

Abbreviated Installation Instructions
(For those who don't have time!)
S l i di ng G ate O p e rat o r s
ASA 550, 750 “L” Range
Made in Australia from Australian & quality imported components
Place operator in correct position (Pinion wheel to be
parallel to the gate and stepped out to allow for width
of rack once it is mounted onto the gate frame). Mark
out fixings and fix operator to the concrete pad.
Fix rack to the gate frame keeping 1mm-2mm clearance
between the rack teeth and Pinion wheel
Once the rack is fixed move the gate and sight the
rack moving over the pinion wheel, check that most
of the pinion wheel meshes with the rack. Make sure
rack runs freely over the pinion wheel, any tights
spots should be corrected by adjusting the rack
height. Check the operator is firmly bolted down to
the concrete pad.
Ensure stops are installed on the gate for the fully closed
and fully open positions.
Connect required P.E Beams. Adjust Limits to
actuate prior to gate end positions. Connect Power
supply. Turn on Power.

To commission the gate, move the gate
approximately 1m from the fully open position and
tighten the knurled wheel (Clockwise) engaging the
clutch assembly
Press the opening button located under the dip
switches to begin opening cycle,
Ensure the direction the gate travels is in
accordance with the opening and closing status
LED’s, if not reverse two of the motor wires at the
inverter terminals.
Inverter settings can be adjusted via the keypad i.e.
Opening speed, closing speed and ramp times.
Automation settings operating modes are able to be
adjusted via the CB6 board, refer to manual for
further instructions
Once Inverter settings are appropriately set proceed
to fine adjust the Limits for required operation

CONTENTS
Abbreviated Installation Instructions Page 2-3
Section 1 Safety Precautions Page 5
Section 2 Wiring Requirements Page 6
Section 3 Installation Page 6-10
Electrical Cabling
Mechanical Installation
Electrical Connections
CB6 Control Board
Variable Speed Drive Unit
Commissioning
Section 4 Manual Release Instructions Page 10
Section 5 Maintenance Page 11
Section 6 Warranty Page 12
Annexure Control Board Layout for Inverter Controls
Schematic Wiring Diagram

1. S
AFETY
P
RECAUTIONS
WARNING!
FAILURE TO FOLLO
INSTRUCTIONS COULD RESULT IN
AND EQUIPMENT
.
Appropriately licensed and competen
The operators are designed specifica
for any other purpose.
Before commencing installation, read
Check that the operator and controls
Check the gate or door and its associ
compression and other various traps
the general installation and surround
Check the gateposts or mounting str
operator and the load of the opening
CAUTION!
Always incorporate the appropria
devices to protect both equipment
operator in auto close mode.
Display any necessary signs to indica
The operators are not designed to be u
All electrical connections and wiring
(Or its counterpart for other countries
WARNING! ELECTRICITY CAN KILL
The manufacturer of the automation
to either the operator, gate or door an
oWrong or poor installation p
oNo or inadequate safety dev
oEither the surrounding struct
the task in hand.
oInefficient locking devices w
oPoor maintenance on the eq
oAny other circumstances be
Isolate power before attempting any
Only original spare parts are to be u
Keep loose clothing and hands clear
The installer should provide all info
instructions regarding the manual ov
LOW THESE SAFETY PRECAUTIONS AND INS
IN INJURY OR DEATH AND
/
OR DAMAGE TO P
etent personnel only should install the automation equ
ically to open and close sliding gates or doors and sh
, read through this installation manual.
ols are in new condition and have not been damaged i
ociated support posts and walls to protect against shea
aps which could cause serious injury or death. Take in
nding environment.
structure has the necessary strength and rigidity to su
ng and closing gate motion.
riate Photo Electric Cells, Induction Loops and an
ent and personnel. Extra caution should be employ
dicate any danger areas and automatic operation of th
be used in any hazardous areas or areas subject to flo
ing must be performed with AS/NZS 3000-2007 as t
tries outside of Australia and New Zealand)
LL
on equipment is not responsible for the damage which
r and any other person or equipment when: -
n practices were performed.
evices were used.
ucture or the gate or door strength and rigidity was n
s were employed.
equipment.
beyond the manufacturers control.
any maintenance, qualified personnel only to carry ou
e used should there be a requirement for them.
ear of the gate whilst in operation or potentially able
formation concerning the use of the automation equi
override and maintenance procedures to the users of
NSTALLATION
PROPERTY
equipment.
should not be used
ed in transit.
hearing,
e into consideration
support the
any other safety
loyed when using
the gate or door.
flooding etc.
s the guidelines.
ich may be caused
as not sufficient for
out maintenance
le to be operated.
uipment as well as
of the system.

2. W
IRING
R
EQUIREMENTS
240v 10A non-earth leakage protected power supply where operator is mounted.
Low voltage cables from operator for access control. (Shielded cable if over 8m runs).
3. I
NSTALLATION
D
ETAILS
After reading the previous sections in this manual, and having checked for suitable installation,
proceed as follows:-
Electrical Cabling
A suitably rated Isolator and 240v power supply should be available near to where the gate operator is
to be mounted. The following diagrams will provide measurements for the positioning of conduits and
the appropriate position for mounting the operator whether a GDS 550-450LI or a GDS 750-630LI.

Mechanical Installation
Ensure gate rolls easily and has been installed in a manner where there is no excessive friction or
binding occurring.
A concrete base approximately 600mm long x 300 wide x 300mm deep should be laid where the gate
operator is to be located.
IMPORTANT ensure there are gate stops firmly installed in the fully open and closed positions. These
stops need to be engineered and installed such that they will be strong enough to stop the gate should the
limits fail at any time.
Remove the gate operator cover and position mounting plate and operator in approximate mounting
location.
Use the rack to locate the operator the correct distance away from the gate rail (finer adjustment can be
made after).
Dynabolt or chemical anchor the bottom mounting plate to the concrete mounting pad using 12 x
100mm fixings.
Unscrew anticlockwise the manual disconnect knurled knob so the drive gear free wheels.
Fix the rack to the gate rail ensuring there is approximately 1mm - 2mm gap between the meshing of the
teeth of the rack and the drive gear (no more). Move the gate by hand from one end to the other while
checking that the rack is meshing correctly with the drive gear on the operator. Check also that the rack
is centred around the middle of the teeth on the drive cog –tighten the mounting plate nuts.

Electrical Connections
Connect a non earth leakage protected 10A 240v supply to Din Rail terminals labelled A & N, Connect
earth to the earth Din Rail terminal.
Conduits for power & control need to preferably come up through the base plate 'knockout'.
Connections to Control Board
Units are pre-wired
Control Inputs
The P.E, OPN and STP inputs require a normally closed switch contact and therefore should be shorted to
the COM terminal if not used. This is done via bridging links already on the circuit board (bottom left
corner) The CLS, OSC and PED inputs require a normally open switch contact and therefore should be left
unconnected if not used. All the switch inputs of this control board including the limit switch inputs require
a switch contact only. Do not connect any switches which provide a voltage to the control board as this will
damage the control board. If the desired inputs are 12/24v or has long wiring associated with it use an IM-1
module to isolate it from the control board’s input. The IM-1 is available from the manufacturer.
Powering Accessories
Accessories which require a 24v AC supply can be powered from the transformer output used to power the
control board via the isolated 24v AC supply which is connected to the DIN rail terminals as labelled.
However, the transformer’s current capacity must be checked to allow for the extra power required by the
accessories. Never use the supply connected to the 24v AC supply control board terminals to power any
accessory as this can interfere with the control boards operation. (Blue Wires)
Locks & Lights
Use the lock output terminals on the din rail to switch the 12 volts to an electric lock (if fitted). The load
switched by the lock output terminals must not exceed 30V A.C / D.C @ 5Amps. If a electro magnetic
lock is used, change one wire on the control board lock output to the normally closed output. Use the light
relay module (if fitted) to switch the applied voltage to a light. The load switched by the light relay module
must not exceed 240V A.C / 30V D.C @ 10 Amps.

MODE SELECTION
Using the mode selection dip-switches select the desired operating modes. Note the times associated with
the parameters marked with an * can be changed. The auto-close times can be changed using the procedure
in the following section. See the instruction manual for details on how to change the other parameters.
See the detailed instruction manual for details on how to change the other parameters.
Position 1 SYNCHRONISING DELAY
OFF - No delay
ON - Motor 1 starts to open 2 seconds* before Motor 2 and Motor 2 starts to close 2 seconds* before
Motor 1.
Position 2 PULSE LOCK OUTPUT
OFF - Lock output is activated for the entire motor drive cycle.
ON - Lock output pulses for 0.3 seconds* at the start of each drive cycle.
Position 3 LIGHT OUTPUTS WARNING
OFF - Optional light module controls a light with timer which turns light off after 60seconds*.
ON - Optional light module controls a warning light which activates whenever motors are on.
Position 4 SWIPE MODE (OSC INPUT)
OFF - OSC input terminal has standard Open, Close, Stop action.
ON - OSC input terminal will only open the door/gate. The input also resets the P.E triggered
auto-close mode so that the P.E input will need to be triggered again before a P.E auto-
close cycle will be initiated.
Position 5 M 2 OUTPUTS STATUS
OFF - The M2 output controls second motor
ON - The M2 output controls status lights
Position 6 P.E STOPS CLOSE CYCLE
OFF - Activating the P.E input while motors are closing causes the motors to reverse.
ON - Activating the P.E input while motors are closing causes the motors to stop but not reverse.
Position 7 P.E STOPS OPEN CYCLE
OFF - Activating the P.E input while motors are opening is ignored by the controller.
ON - Activating the P.E input while motors are opening causes the motors to stop.
Position 8 P.E TRIGGERED AUTO-CLS
OFF - Not selected
ON - Selects the P.E triggered auto-close mode which causes the motors to auto-close if
the P.E input is activated then released. (Auto-close delay time is 0 seconds*)
Position 9 PEDESTRIAN AUTO-CLS
OFF - No pedestrian access auto-close
ON - Selects auto-close in the pedestrian access mode. (Auto-close delay time is 15
seconds*)
Position 10 STANDARD AUTO-CLS
OFF - Not selected
ON - Selects standard auto-close mode which will close the motors after fully opening.
(Auto-close delay time is 30 seconds*)

Setting Cycle Timers & Auto Close Times
The control board has pre-set cycle times which are used to set the maximum time the controller will drive
the motors in the open and closed directions. The pre-programmed time for the open and close cycle
timer’s is 60 seconds. The control board also has a pre-set pedestrian access time of 5 seconds which is
intended to open the motor connected to M1 output only part way. If these default times do not suit your
needs simply use the procedure below to adjust them. Note the same procedure can be used to adjust the
auto-close times.
1. Place the slide switch into the “set” position
2. Adjust the timer’s value by pressing and holding the required push button for the desired time.
3. Repeat step 2 for the next timer (if desired).
4. Place the slide switch back into the “RUN” position.
5. Test operation.
Make sure that the slide switch is placed back into the “RUN” position before testing the new timer value.
As you can see the procedure used to set each timer’s value is the same only the push button used changes.
Each push button is clearly labelled underneath as to which timer’s value it sets. Note when setting the
OPEN, CLOSE and PEDESTRIAN cycle times the controller will drive the motors as if a “real” cycle is
being executed. The difference being that the motors will stop as soon as the button is released or the limit
switches are reached. The OPN status LED on the control board will flash at 1 second intervals to assist
setting times. Note when setting the OPEN and CLOSE cycle times when limit switches are used, release
the push button a few seconds after the limit switch cuts motor power. This allows for the motors to slow
down over the life of the operators without the need to adjust again.
Variable Speed Drive Unit
The variable speed drive unit will, ramp up the speed of the operator and then ramp down prior to
closing.
It must be remembered that the limit switches are to be set in a position which initiates the ramp down
time. Therefore, the limit switches need to operate much sooner than when there is no variable speed
drive unit.
The accelerate and decelerate times have been set in the factory for the normal installation but can be
changed if necessary. Similarly, the speed that the gate operates at has also been set but can be
changed (up to approx 70Hz).
NOTE changing the speed will change the position the gate will end up in its fully closed and open
position. (Unless limit switch cams are also adjusted accordingly).
Accelerate time (FN01) 5 sec
Decelerate time (FN02) 2.5 sec
Closing Speed (FN08) 40Hz
Running Frequency 60Hz
To change accelerate time: Press DSP/FUN button
Use arrows to select FN01
Press DATA/ENT
Use arrows to select new time
Press DATA/ENT
Press DSP/FUN
To change decelerate time: as above except select FN02
To change closing speed: as above except select FN08. If opening speed and closing speed is to be the
same, remove wire link between REV and SP1 terminals on invertor.
To change opening speed of operator: when display is flashing and showing Hz, use arrows to raise or
lower the Hz figure.
NOTE frequency upper limit has been set to 70Hz and lower limit 30Hz.

Commissioning
Position the gate halfway and tighten knurled knob at back of slider, very firmly, by hand so gate will
drive.
Power up board and with gate in the half way position, press transmitter or manual control switch so
operator drives gate.
The first pulse will always open gate, green LED will flash (top right hand corner) if it does not, then
reverse 2 of the motor wires.
Check which limit switch stops gate in each direction and adjust cams so gate will stop in the fully
open and closed positions.
Limit switches should not switch off the gates too soon (before reaching the stops) and conversely not
too late, so the torque limiter is operating.
Tighten torque limiter knurled knob.
Set open & closed travel time.
Check that all safety devices work as designed and the electromagnetic lock holds the gate firmly
closed (if fitted).
Install cover using screws provided in the front and sides to hold cover firm.
Provide full details to the owner concerning the operation and relevant maintenance and disconnect
details.
4. M
ANUAL
R
ELEASE
I
NSTRUCTIONS
Should the power fail or for some other reason the gate does not operate in the normal motorised
manner, manual disconnection can be achieved by:-
Turn power off to the control box and isolate.
By using the key, unlock the door on the back of the cover.
Turn the large knob anticlockwise which will release the drive
Manually slide open the gate.

5. M
AI NTENANCE
D
ETAILS
WARNING!
Failure to maintain equipment may result
Recommended maintenance to be perfor
Operator performs over 150 cy
Operator performs between 10
Operator performs between 50
Operator performs between 20
Operator performs under 20 cy
Date: ................................................................
Site Name:................................................................
Site Address: ................................................................
Before commencing maintenance on the o
run inadvertently.
Gate rolls freely................................
Gate guide rollers in good c
Gate stops in good condition
Gate rack is tight & correct c
Gate track is not damaged................................
Gate operator mounting bolt
No oil leaks from gearboxes
Gearbox mounting bolts/nut
Inside operator and control b
‘Baygon’ Surface Spray aro
All electrical connections tig
Limit Switches operate in ap
External safety devices work
Electromagnetic lock, if fitte
Gearbox self locking i.e. sea
General operation i.e. speed
Comments................................................................
................................................................
................................................................
Service performed by ................................
S
ult in injury or death and/or damage to property and eq
formed on the operator and gate are as follows:-
cycles a day each month
100-150 cycles a day every 2 month
50-99 cycles a day every 4 months
20-49 cycles a day every 6 months
cycles a day every 12 months
..............................................................
................................................................................................
................................................................................................
the operator, isolate the electrical supply to ensure op
................................................................................................
condition................................................................
ion...........................................................................................
ct clearances between pinion wheel & rack ...........................
...............................................................................................
olts right ................................................................
es ...........................................................................................
uts tight................................................................
l box clean ................................................................
round operator and control box (not on electroni
tight........................................................................................
appropriate positions.............................................................
ork effectively / cleaned.........................................................
itted, operates correctly and is clean ................................
seal needs replacing? ..............................................................
ed, auto close etc normal........................................................
................................................................................................
.............................................................................................................................
.............................................................................................................................
..........................................................................................................................
d equipment
..........................................................
......................................................
operator will not
...............................................
...............................................
...........................
...........................
...............................
.................................................
...........................
..................................................
.............................................
nics) .............
........................
.............................
.........................
......................................
..............................
........................
............................................
.............................
.............................
..........................................................

6. WARRANTY
a. Gate Drive Systems Australia warrants that the goods manufactured by it shall be free from defect in
manufacture for a period of 12 months from the date of invoice. Should any fault occur within that
period as a result of faulty workmanship or materials, Gate Drive Systems Australia will make all
necessary repairs, or at its discretion replace the product at no charge to the Customer except for
freight. The appropriate Serial Number must be quoted for all warranty claims.
b. For the goods not manufactured by Gate Drive Systems Australia, we shall pass on the
manufacturer’s warranty to the Customer from the date of invoice. It is the manufacturer’s
discretion to repair or replace goods deemed to be defective as a result of faulty workmanship or
materials.
c. All goods must be returned to Gate Drive Systems Australia or its representative for inspection or
testing to assess if a claim is justified. It is the responsibility and at the cost of the Customer, to
return the goods for inspection and freight costs are the responsibility of the Customer.
d. The warranty is negated and will not apply in the following circumstances:-
i. If no proof of date of purchase can be produced.
ii. If the product has been used in a manner beyond its design parameters.
iii. If the product is tampered with or repaired by personnel not authorised to do so.
iv. In respect of loss or damage caused by rough treatment.
v. If the product is not used and maintained in accordance with instructions or recommendations
listed in this Installation and Maintenance Manual.
vi. In respect of loss or damage caused by an Act of God or any other cause not within the
manufacturers control.
e. Goods returned under warranty for repair or testing will incur a charge to be fixed by the
manufacturer if no fault is found.
f. The Customer shall bear freight charges for returning the goods for inspection and for the delivery of
any replacement or repaired product from a justified warranty claim.
g. Save for the express conditions and warranties herein contained all other conditions or warranties
(whether as the quality, fitness for purpose or any other matter) expressed or implied by statute,
common law, equity, trade custom, usage or otherwise are hereby expressly excluded provided that
nothing in these terms and conditions shall exclude or limit any breach or condition implied by law,
the exclusion or limitation of which is not permitted by law.

Single Controls
Dual Controls

CONTROL BOARD LAYOUT FOR INVERTER CONTROLS
1.
Mode Selection and Adjustment
17.
Electric Lock Control Terminals
2.
Protection Fuse
18.
Terminals for 24vAC Supply for
3.
Inverter Input Terminals
Control Logic
4.
Motor 1 Drive Output Terminals for Inverter
19.
Plug In Rec eiver's Antenna Terminals
5.
Motor 2 Drive Output Terminals for Inverter
With Optional Shield
6.
Motor 1 Limit Switch Inputs
20.
Connector for Plug-In Receiver
7.
Motor 2 Limit Switch Inputs
(no t shown)
8.
Terminals for Isolated 24vAC Supply
21.
Firmware Version Label
for Limit Switch and Control Inputs
22.
Light Control Relay Interface
9.
Pedestrian Access Control Input
Connector
10.
Open/Stop/Close Control Input
23.
Inp ut Status L.E.Ds.
11.
Close Control Input
24.
Stop Input Jumper
12.
Stop Control Input
25.
Open Input Jumper
13.
Open Control Input
26.
PE Beam Input Jumper
14.
Photoelectric Safety Beam Input
27.
M2 Close Limit Jumper
15.
Com mon Terminal for Inputs [9]
28.
M2 Open Limit Jumper
Thru [14].
29.
M1 Close Limit Jumper
16.
Control Input Harness Connector
30.
M1 Open Limit Jumper
FIG. 4

SELF INSTALL - NEED TECHNICAL
ASSISTANCE?
OPTION 1: DIRECT WITH THE SERVICE DESK QUICKEST AND MOST EFFECTIVE METHOD
Submit your enquiry direct with the service desk at service@automaticsolutions.com.au
The service desk has the most experienced staff in Australia to help with your problem but they need your help.
Describe your problem in detail and as clearly as possible. Dont forget to include a telephone number.
Be certain to detail which model or models of you are working with.
Send photos of the installation they love photos. The people at the service desk are good but they are
even better when they can see the installation. Send photos of the overall scene so they can see the
entire installation. Also send photos of the wiring to the control board and any other part of the
installation you think is relevant.
Send video if appropriate. Smartphones these days take remarkably good video in small file sizes which
can be emailed in a moment. If your problem needs a video to show the issue please feel free to send it.
NOTE: THIS IS BY FAR THE FASTEST AND MOST SUCCESFUL WAY TO SOLVE YOUR PROBLEM
PHOTOS AND VIDEOS ARE THE NEXT BEST THING TO BEING THERE
OPTION 2: LODGE YOUR ENQUIRY LOCALLY - SLOWER BUT CAN STILL BE EFFECTIVE
Make contact with the store of purchase. Branch staffs are typically not technicians and dependent on their length
of service will have varying degrees of technical knowledge. If they cannot help however they will certainly either
source help locally from their technicians or make contact with the service technicians on your behalf.
OPTION 3: SERVICE CALL WITH AUTOMATIC SOLUTIONS TECHNICIAN SLOWEST METHOD
If you fall within the local branch service area it may be possible to book a local technician to look at your
installation. Wait times will vary dependent on local workloads. The cost is a service fee which includes the first
half hour and the hourly rate thereafter. If any Automatic Solutions provided parts are found to be defective and
within warranty these will be provided free of charge.
(NOTE: If you suspect that any parts are defective and within warranty you may wish to consider option 4)
A note on this option: If you decide on this option you will be asked to sign an authorisation to proceed which
will provide legal authority and payment security. This form has three options available of which only the first two
are available to you. The third option is for warranty repairs only for full install customers. Self install customers
requiring warranty only service need to refer to option four below.
IMPORTANT: IN SHORT THIS OPTION WILL INCUR CHARGES
OPTION 4: RETURN THE PRODUCT IF BELIEVED TO BE FAULTY
As a self install customer who has purchased product if you believe the product to be faulty rather than an
installation or site problem you have the option of returning the product for evaluation and to exercise your right
to a replacement, repair or refund as applicable. All returned product is forwarded immediately to the service
technicians for evaluation and response. There are two main methods available to return product
Direct to the service centre this is the quickest method as it cuts out the branch delay
Via the branch of purchase slower because of the delay at the branch
When choosing this option you need to complete a product return form. This form gives you all the information
on procedure involved and where to send to. These are available at the branch of purchase, can be emailed to
you (contact your branch), or available here - http://automaticsolutions.com.au/page/warranty.php
This manual suits for next models
1
Table of contents
Other Automatic Solutions Gate Opener manuals
Popular Gate Opener manuals by other brands

CAB
CAB HD.80 Operating instructions and spare parts catalogue
Dieffematic
Dieffematic ELIOT 800AC instruction manual
JOYTECH
JOYTECH SL500DC user manual
Aprimatic
Aprimatic ONDA 623 Mechanical installation, Use and Maintenance instructions
Delton
Delton LINEAR-11 Technical installation manual
Bauer
Bauer 4024 Kit Instructions and warnings for installation and use
