2
1
CONTENT
.............................................................................................................
31.KNOW YOUR MACHINE
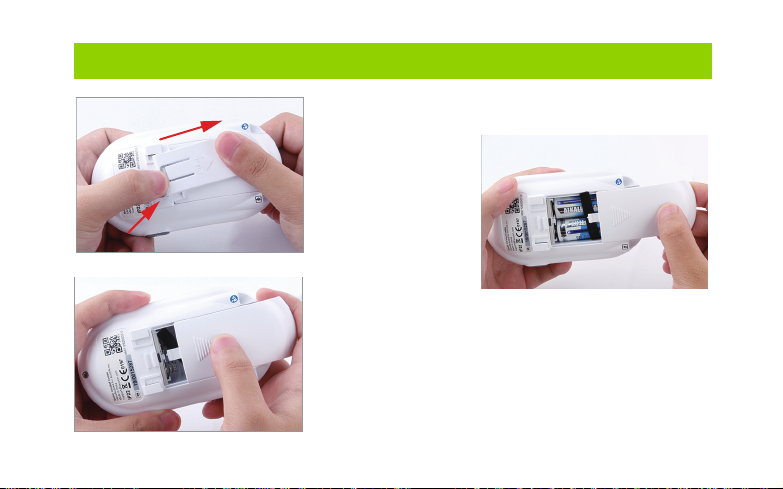
.................................................................................................................. 52.INSTALL BATTERIES
................................................................................ 63.CONNECT LEAD WIRES TO CH1 OR CH2
................................................................... 74.CONNECT ELECTRODES PADS TO LEAD WIRES
...................................................................................................... 85.PLACE ELECTRODES PADS
11
..................................................................................................
7. INTRODUCTION OF PROGRAMS
25
...................................................................................................................
8. OTHER FEATURES
26
.............................................................................................
9. STORE PROPERLY AFTER USE
28
.............................................................................................................
10.TROUBLE SHOOTING
9
6.OPERATION OF THE DEVICE.....................................................................................................