- 7 -
User Manual
ASSEMBLY AND INSTALLATION
This Use and Care Guide provides specific operating instructions for your model. Use this unit only as
instructed in this Use and Care Guide. Before starting the unit, follow these important first steps.
LOCATION
• Choose a place that is near a grounded electrical outlet. Do not use an extension cord or an adapter plug.
• If possible, place the unit out of direct sunlight and away from the range, dishwasher or other heat sources.
• For optimum performance, this product should only be used indoors under normal ambient conditions.
• The appliance must be installed on a floor that is level and strong enough to support a fully loaded unit.
• If the appliance has been placed in a horizontal or tilted position for any period of time, please wait at least 24 hours
before plugging the unit in.
INSTALLING THE CASTERS Follow the steps below to install the casters:
1. Empty the inside of the cabinet completely and lay the Keg Cooler down on its side.
We recommend that you place a piece of cardboard or cloth underneath the cabinet to prevent dents or scratches.
2. Insert the casters into the holes on the bottom corners of the cabinet. Tighten each caster by turning the head of
the bolts clockwise with a wrench (not provided in the kit).
3. Once all four casters have been tightened, stand the cabinet in its upright position.
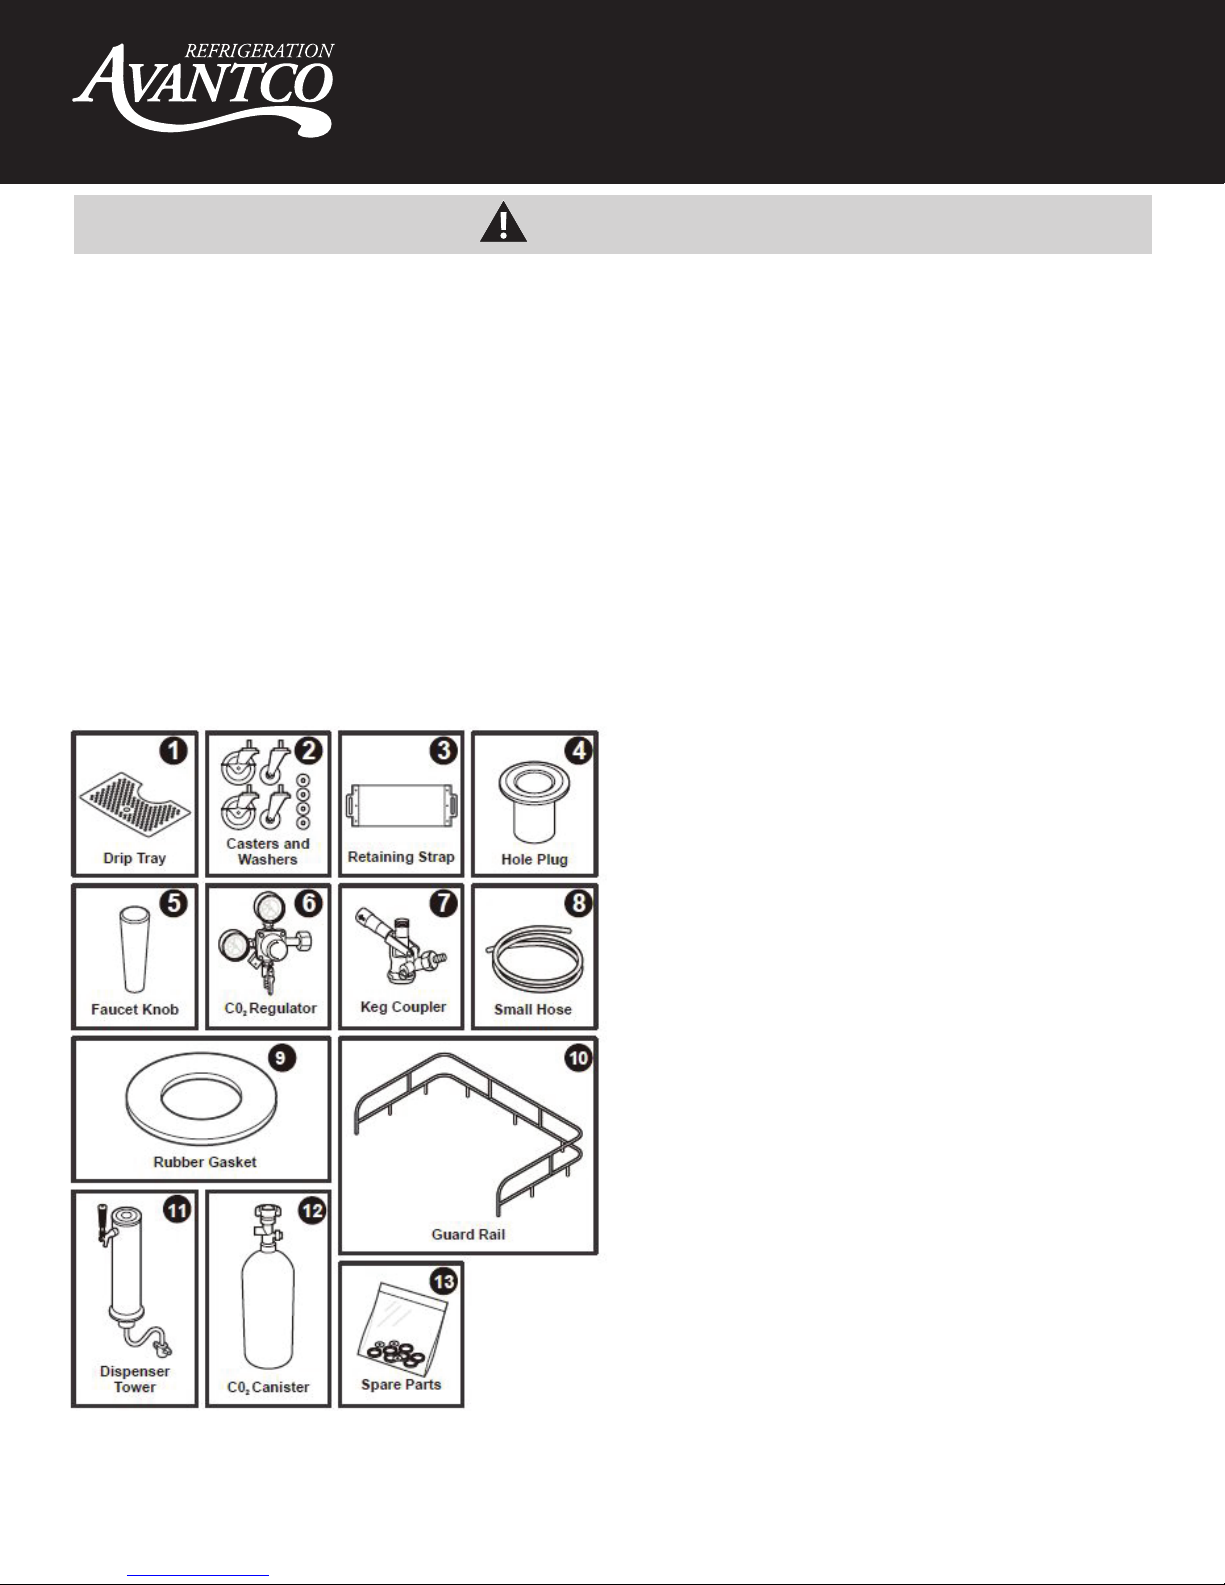
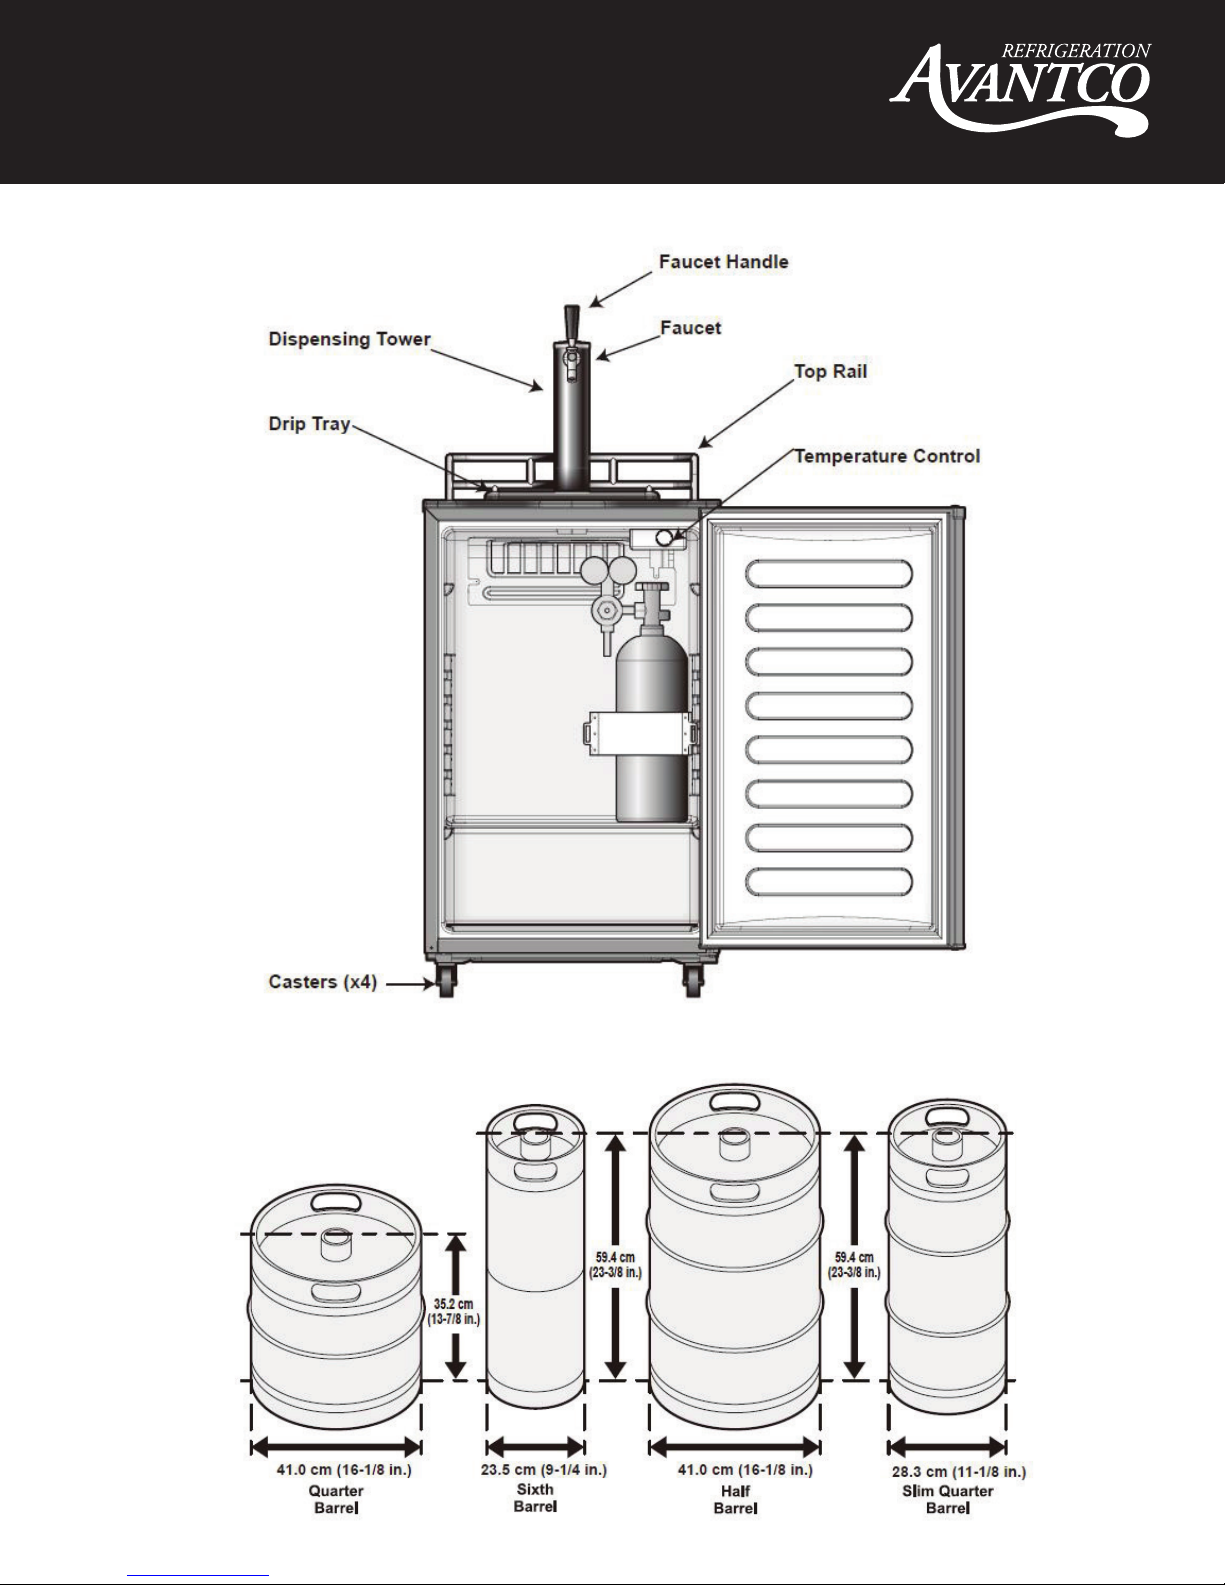
INSTALLING THE BEER TAP
There are notches on the bottom of the dispensing tower that line
up with grooves inside the opening on the top of the Keg Cooler.
Align the dispensing tower with the opening on the top of the unit,
then place inside and twist clockwise until secure. Use four screws
to fasten the beer tap. Pay attention to use the thin black gasket (9)
for assembly (see illustration). If you find this to be a tight fit, apply
some soapy water to the gasket to make the tower easier to twist
into place. Also see illustration showing hose connections to CO2
regulator to the beer tap.
- Sides and Top..........5 inches (12.7 cm)
- Back .................5 inches (12.7 cm)
INSTALLING THE GUARD RAIL Follow the steps below to install the casters:
1. Place the guard rail on top of the cabinet.
2. Align all support feet of the guardrail with the holes on the top of the unit and press down into place.
INSTALLATION Initial clearances
• Allow the following clearances for ease of installation, proper air circulation and electrical connections.
NOTE: Two of the casters include locking mechanisms to ensure the unit does not slide on
hard floors. These two locking casters should be fastened at the front end
of the unit, with the unlocked casters fastened on the rear end.
CAUTION: Do not install the unit where the temperature will drop below 55°F (13°C) or rise above
90°F (32°C). The compressor will not be able to maintain proper temperatures inside the unit.