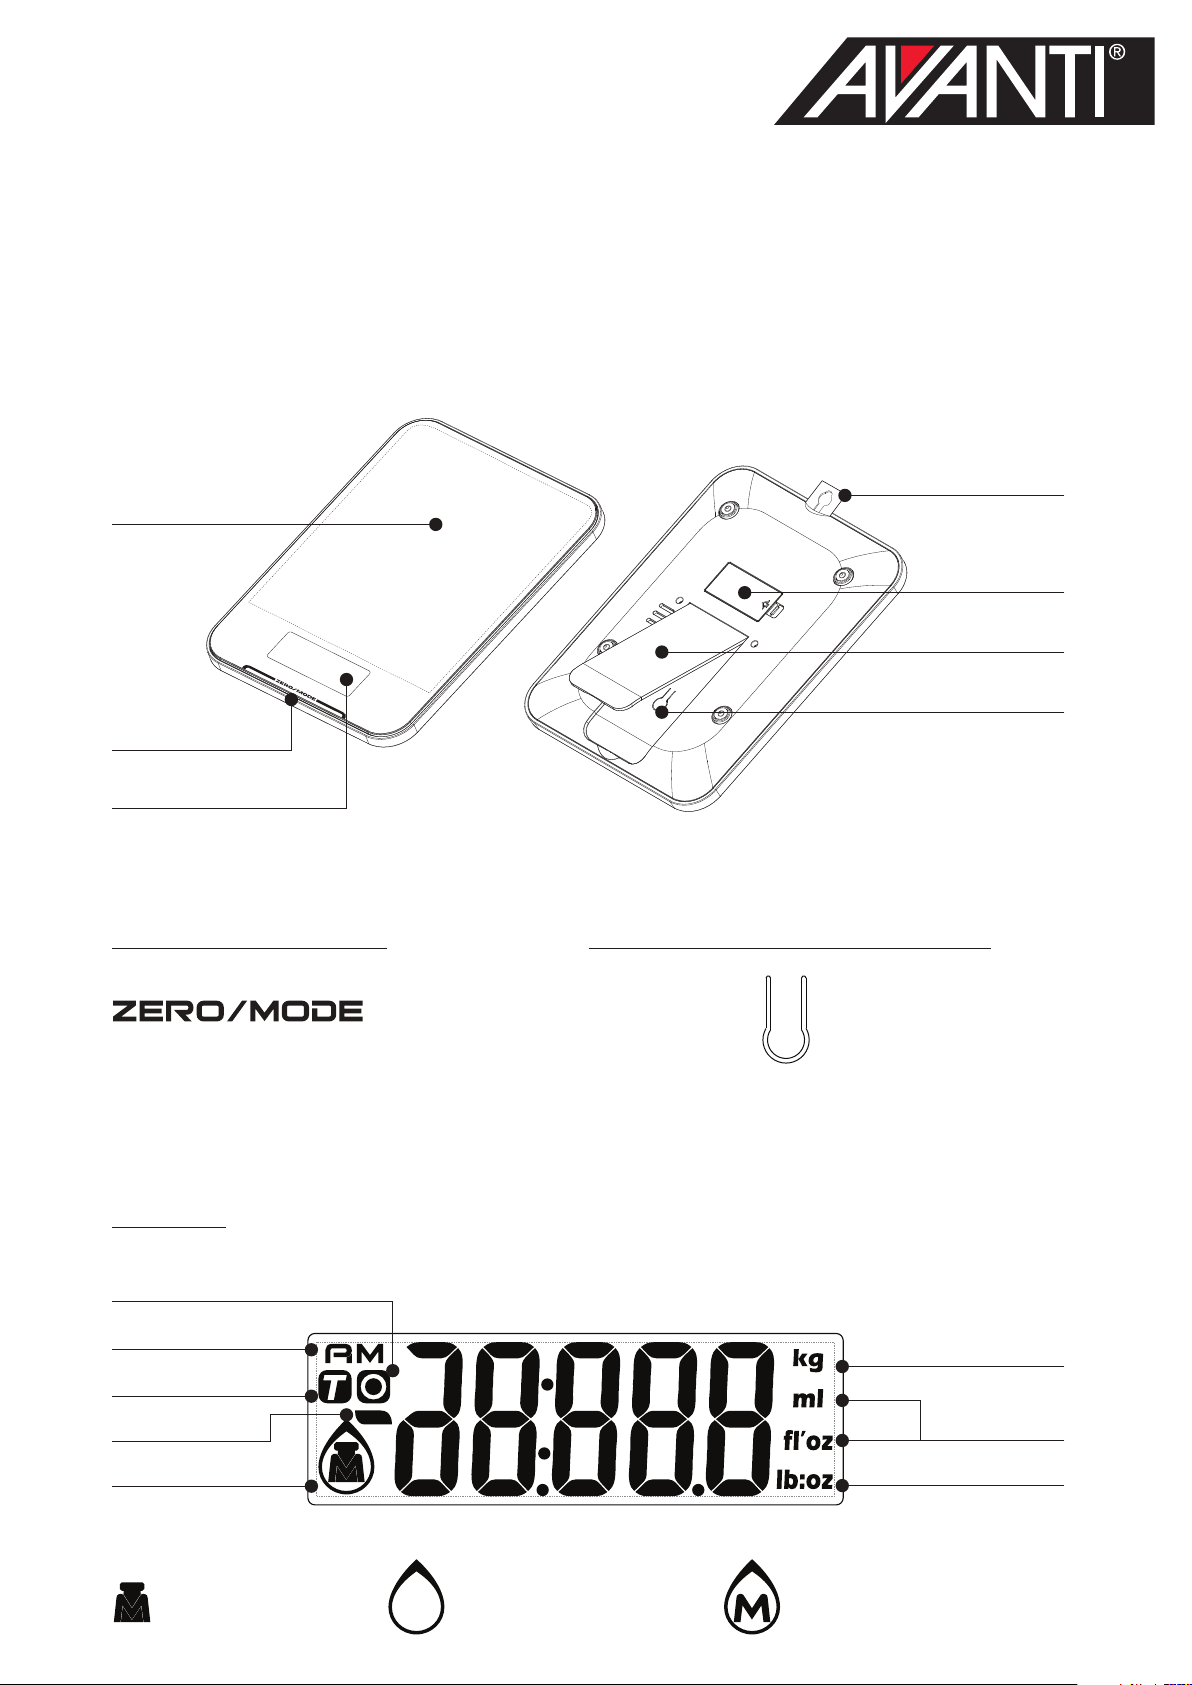
USER GUIDE
Zero Function will automatically be in use and the Zero indicator will be displayed.
ZERO AND TARE FUNCTIONS
To weigh dierent items consecutively without removing from the scale, use the Zero
and Tare Functions.
ZERO FUNCTION
If total weight of the load being measured is 400g (below 4% of scale’s capacity) the
TARE FUNCTION
If the total weight of the items being weighed exceeds 400g (greater than 4% scale’s
capacity) the Tare Function will automatically be in use and the Tare indicator
be displayed.
will
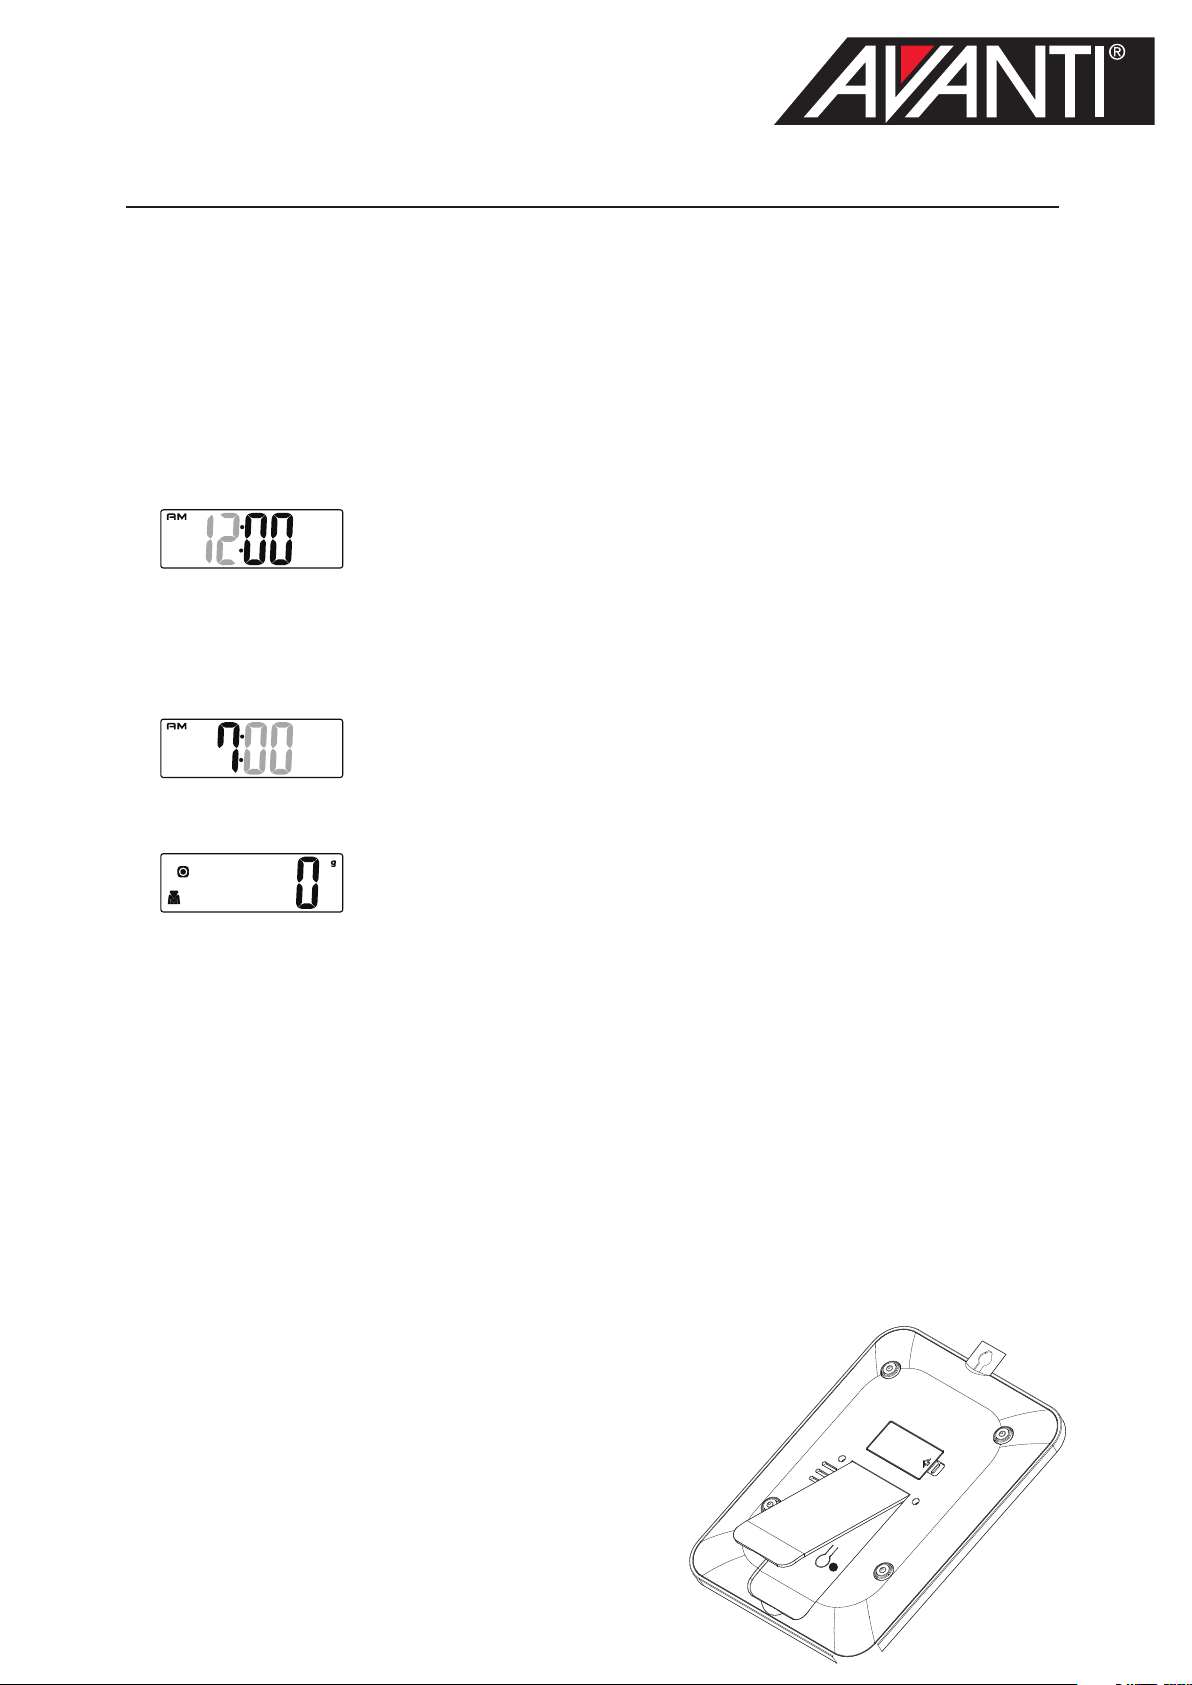
1. Press ZERO/MODE to change from Clock mode to Weighing mode and wait until
LCD display shows ‘0’.
2. Place a bowl on the scale in the center of the weighing platform. The LCD display
will show the weight of the container.
3. Press ZERO/MODE button to reset LCD display to ‘0’.
4. Place the rst load within the bowl to take a reading.
5. Without removing the load, press the ‘ZERO/MODE’ button to reset the display
to ‘0’.
6. With the rst load still in place, add the next load. The LCD display will now show
the weight of the newly added load.
7. Repeat this step until all items have been added.
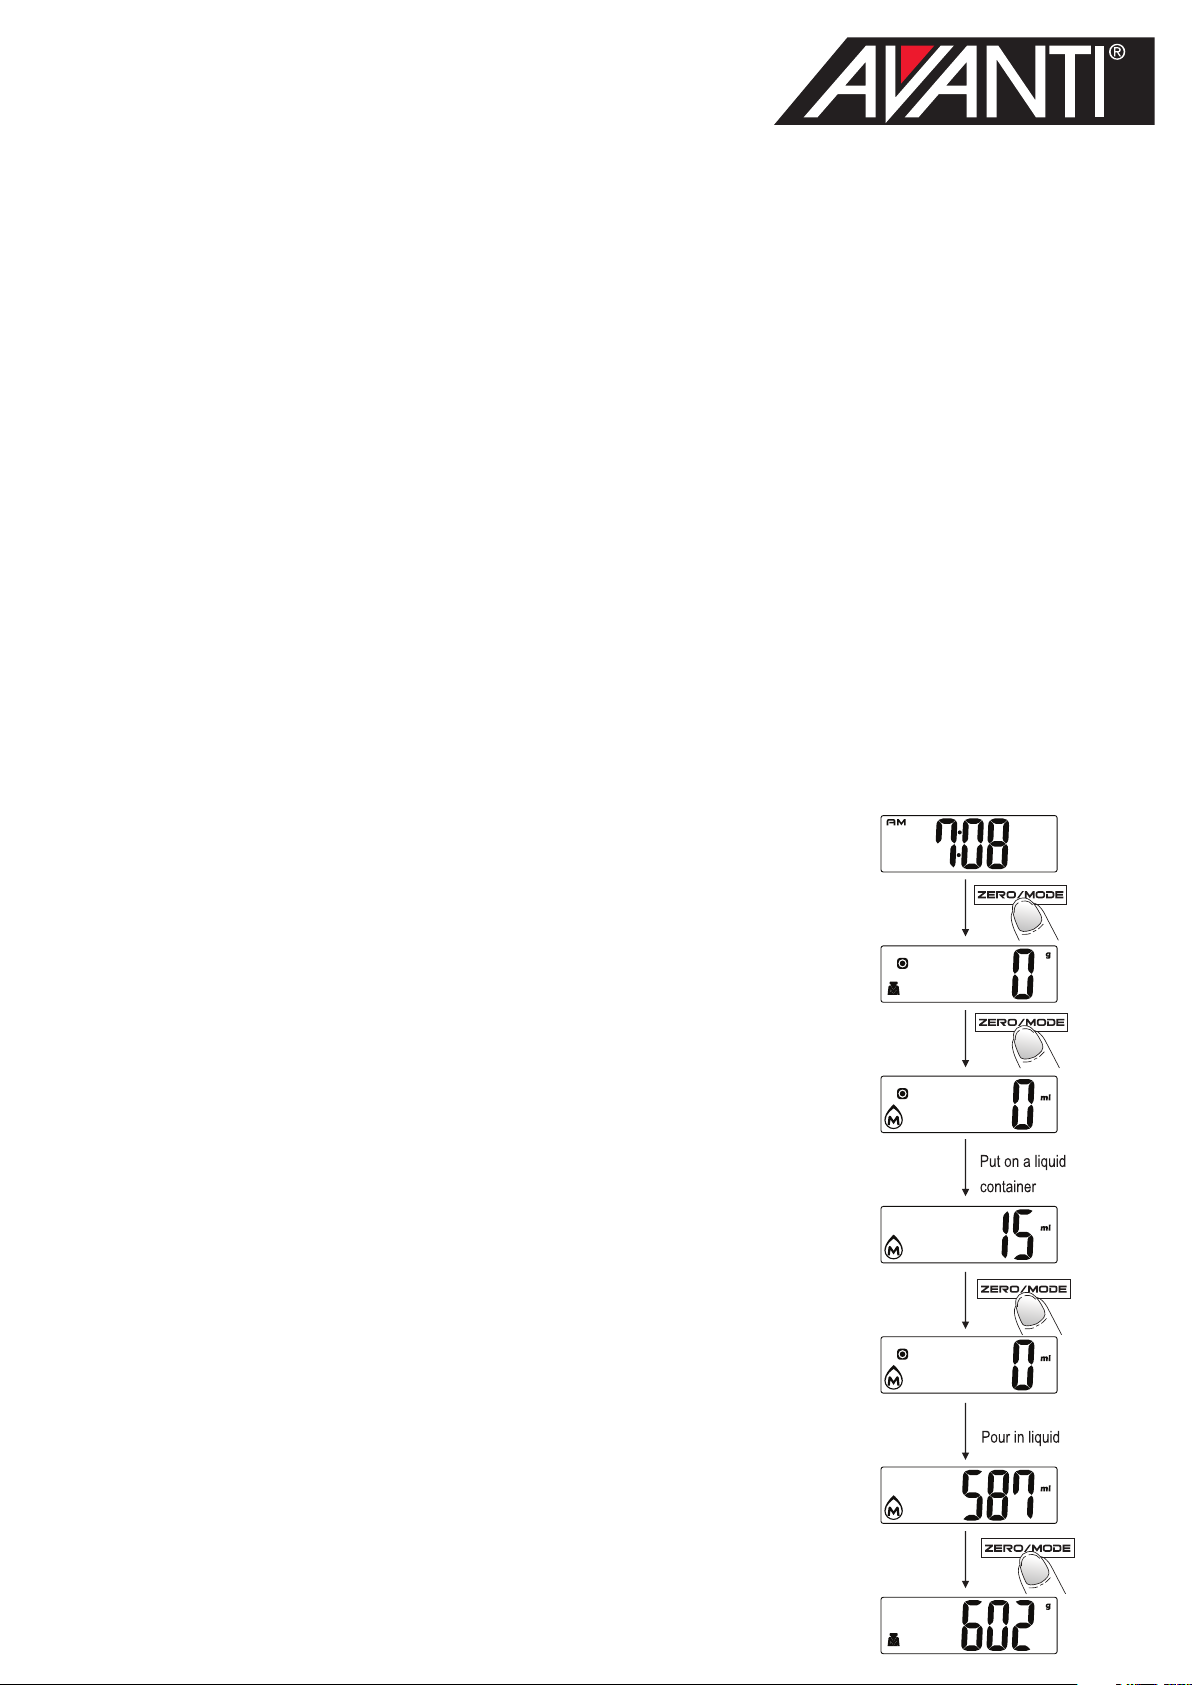
1. Press ZERO/MODE to change from Clock mode to Weighing mode and wait until
LCD display shows ‘0’.
2. Place a bowl on the scale in the center of the weighing platform. The LCD display
will show the weight of the bowl.
3. Press ZERO button to reset LCD display to ‘0’.
4. Place the rst load within the bowl to take a reading.
5. Without removing the load, press the ‘ZERO’ button to reset the display to ‘0’.
6. With the rst load still in place, add the next load. The display will now show the
weight of the newly added load.
7. Press ZERO/MODE button and the LCD display will now show the weight of the two
loads combined.
8. Press ZERO/MODE button to reset the LCD display to ‘0’.
9. Repeat steps 7 & 8 until all items have been added.