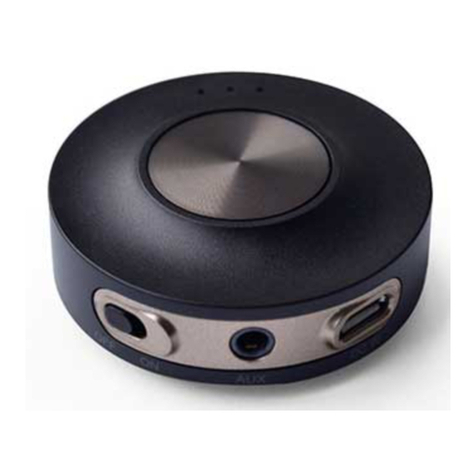
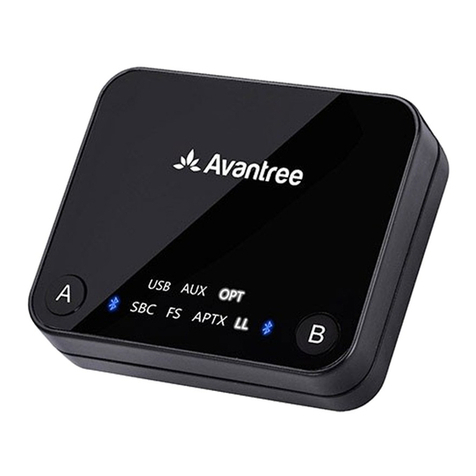
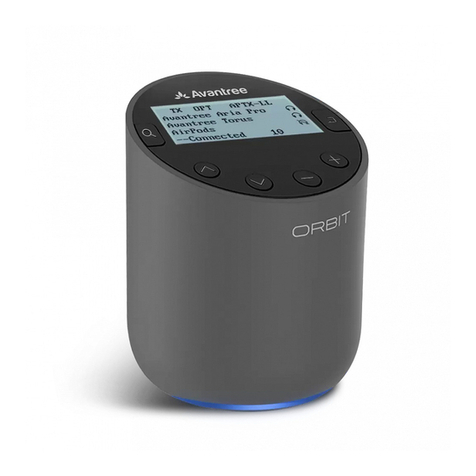
Avantree Orbit Pro User manual

Model No.: BTTC-580-P
Orbit Pro
User Manual


1
2
25
49
73
Contents
EN User Manual
DE Benutzerhandbuch
FR Guide d'utilisation
ES Manual de Usuario
IT Manuale Utente
97
ORBIT PRO
User Manual
1

2
Video Guide
Book an Appointment
Prefer to watch a video tutorial? Scan the QR code
below or visit avantree.com/orbit-pro/video for a
step-by-step guide.
You can also book a 1-on-1 setup
appointment with one of our support agents at
avantree.com/book-a-call
VIDEO GUIDE
ORBIT PRO
User Manual
EN

Box Contents
Product Introduction
Product Overview
Button Functions
LED Indicators
Use for TV Watching (Transmitter Mode)
Connecting to TV
OPTION 1: HDMI ARC (recommended)
OPTION 2: Optical port (recommended)
OPTION 3: AUX 3.5mm port
OPTION 4: RCA port
Connecting Your Headphones
Setting Up Your TV
Adding a Second Pair of Headphones
Reconnecting Your Headphones
Listening with a Soundbar (Bypass Function)
Use as Wireless Audio Receiver (Receiver Mode)
Using the Remote
Specications
FAQ
Contact Us
Table of Contents
4
5
5
6
7
7
7
8
9
10
11
12
14
16
17
18
20
22
22
23
24
3
ORBIT PRO
User Manual
EN

ORBIT PRO
User Manual
Box Contents
A B
DC
E F
ORBIT PRO
transmitter
Type C
Power Cable
Digital Optical
Audio Cable
AUX 3.5mm
Audio Cable
AUX 3.5mm to
RCA Adapter
Remote
Volume control
4
EN

Product Introduction
Product Overview
ORBIT PRO
User Manual
1
7
2
3
5 6
4
B
A
G
F
H
E
D
C
5
EN
Volume control
Volume
OPT
AUX
OPT
HDMI
AUX
OPT
OutputInput
Input
Select
AUX TX
OFF
RX
DC IN
HDMI
Input Switch
Power/Mode Switch
TX/RX Mode
Input Format
Bluetooth Codec
Connection Status
Connect/Disconnect
Volume Level
Volume
Signal LED Indicator
Select Device
Paired Status
Search For
Devices
Device Names
TX OPT APTX-LL
Avantree Aria Pro
Avantree Torus
AirPods
--Connected 10

Switch to“TX” to turn the Orbit Pro on & put it
in transmitter mode
Switch to“OPT” if connecting with your TV’s
“Optical OUT” port
Switch to“AUX” if connecting with your TV’s
3.5mm AUX or RCA output port
Switch to“HDMI”if connecting with your TV’s
HDMI ARC port
Press once to select a device to connect /
disconnect with
Press up / down to navigate the menus shown
on the LCD screen
Press & hold both buttons for 5 seconds to clear
the pairing history
Press once to adjust volume with the Remote
Press once to adjust volume
Press once to search for a device. Please make your
device’s Bluetooth is ON and in pairing mode.
Switch to“RX” to turn the Orbit Pro on & put it
in receiver mode
Switch to either "OFF" or "TX" to bypass audio
to speakers
6
EN
Button Functions
1
2
3
4
5
6
7
No.
Button Functions
ORBIT PRO
User Manual
TX
OFF
RX
AUX
OPT
HDMI

Use for TV Watching (Transmitter Mode)
The Orbit Pro must be connected to a power source
via the provided power cable in order to function. Plug
the transmitter into either:
1. A TV’s USB power port (we recommend this so that
they auto power ON / OFF in tandem with your TV), OR
2. A nearby wall outlet - 5V/500mA-2A rated USB
adapter (any phone charger should work. Please
contact support@avantree.com if you'd like us to send
you a free adapter)
7
EN
ORBIT PRO
User Manual
No.
~
LED Indicators
Connecting to TV
Indicator Status
Screen display See “Product Overview”
Red ashes every second
Solid red
No audio signal detected
Valid audio signal detected
H
A G

STEP 1
Plug your HDMI cable (not provided) into the TV’s
“HDMI ARC”port, then plug the other end into the
Orbit Pro’s HDMI port in the “Input” section.
OPTION 1: HDMI ARC (recommended)
ORBIT PRO
User Manual
8
EN
STEP 2
Switch the button to the“HDMI” position.
AUX
OPT
HDMI
Once the Orbit Pro is connected to its power source,
switch to the "TX" position. You can then connect
it to your TV's audio ports. You can choose one of 4
dierent ways to do this:
TX
OFF
RX
RGBIN
COMPONENTIN
AUDIO
(RGB/DVI)
RGB(PC)
ANTENNA/
CABLEIN
1
2
RS-232CI
N
(CONT
ROL&SE
RVICE)
VIDEO
AUDIO
VIDEO
AUDIOOUT
OPTICA
LCOAXIAL
MONO
( )
AUDIO
S-VIDEO
DIGI
TALAUDIOOUT
AVIN1
HDMI/DVIIN
3
2
1
REMOTE
CONTROLIN
AVIN2
L/MONO
R
AUDIO
VIDEO
USBIN
HDMIIN4
HDMI ARC
HDMI
AUX
OPT
(Not Provided)

STEP 1
Plug the provided optical audio cable into the TV’s
“optical OUT” or “OPT OUT” port, then plug the other
end into the transmitter’s optical port in the “Input”
section.
OPTION 2: Optical port (recommended)
ORBIT PRO
User Manual
9
EN
STEP 2
Switch the button to the“OPT” position.
AUX
OPT
HDMI
NOTE: Most TVs support audio output through only
one digital output port at a time, so if your TV’s HDMI
ARC port is in use, the optical port may be disabled.
You can either unplug the HDMI ARC, or try connecting
the transmitter via RCA / AUX.
OPT
B
RGBIN
COMPONENTIN
AUDIO
(RGB/DVI)
RGB(PC)
ANTENNA/
CABLEIN
1
2
RS-232CI
N
(CONT
ROL&SE
RVICE)
VIDEO
AUDIO
VIDEO
AUDIOOUT
OPTICA
LCOAXIAL
MONO
( )
AUDIO
S-VIDEO
DIGI
TALAUDIOOUT
AVIN1
HDMI/DVIIN
3
2
1
REMOTE
CONTROLIN
AVIN2
L/MONO
R
AUDIO
VIDEO
USBIN
HDMIIN4
DIGITAL OUT
HDMI
AUX
OPT

10
EN
ORBIT PRO
User Manual
STEP 1
Plug the provided AUX 3.5mm audio cable into the
TV’s AUX 3.5mm output port, then plug the other end
into the transmitter’s AUX 3.5mm port in the “Input”
section.
OPTION 3: AUX 3.5mm port
STEP 2
Switch the button to the“AUX” position.
AUX
C
RGBIN
COMPONENTIN
AUDIO
(RGB/DVI)
RGB(PC)
ANTENNA/
CABLEIN
1
2
RS-232CI
N
(CONT
ROL&SERVICE)
VIDEO
AUDIO
VIDEO
AUDIOOUT
OPTICALCOAXIAL
MONO
( )
AUDIO
S-VIDEO
DIGITALAUDIOOUT
AVIN1
HDMI/DVIIN
3
2
1
REMOTE
CONTROLIN
AVIN2
L/MONO
R
AUDIO
VIDEO
USBIN
HDMIIN4
AUX 3.5mm
HDMI
AUX
OPT
AUX
OPT
HDMI

11
EN
ORBIT PRO
User Manual
STEP 1
Plug the red & white RCA connectors into the TV’s
“AUDIO OUT” ports, then use the provided RCA to AUX
adapter to plug the other end into the transmitter’s
AUX 3.5mm port in the “Input”section.
OPTION 4: RCA port
STEP 2
Switch the button to the“AUX” position.
AUX
OPT
HDMI
NOTE: Double check to ensure that optical / RCA cables
are plugged into the TV’s audio OUT ports and not the
AUDIO IN / COMPONENT IN ports.
C
D
AUX RGBIN
COMPONENTIN
AUDIO
(RGB/DVI)
RGB(PC)
ANTENNA/
CABLEIN
1
2
RS-232CIN
(CONTROL&SERVICE)
VIDEO
AUDIO
VIDEO
AUDIOOUT
OPTICALCOAXIAL
MONO
( )
AUDIO
S-VIDEO
DIGITALAUDIOOUT
AVIN1
HDMI/DVIIN
3
2
1
REMOTE
CONTROLIN
AVIN2
L/MONO
R
AUDIO
VIDEO
USBIN
HDMIIN4
Audio Out
HDMI
AUX
OPT

ORBIT PRO
User Manual
Connecting Your Headphones
Now that your Orbit Pro is set up, you can connect
your headphones to the transmitter.
STEP 1
Put your Bluetooth headphones / speakers into
PAIRING mode.
STEP 2
Press the Orbit Pro’s
a device.
button once to search for
STEP 3
Press the button to select a device, then press the
button once connect it. The
12
EN
indicator shown to
the right of the device name and the “Connected”
shown on bottom of the LCD screen indicates a
successful connection.

TX
OPT APTX-LL
Avantree Aria Pro
Avantree Torus
AirPods
Connected
13
EN
ORBIT PRO
User Manual
NOTE 1: Most cases where your device & the transmitter
fail to connect happen because the device is not
properly placed into PAIRING MODE. Double check that
your device is successfully in PAIRING MODE (typically
indicated by the LED indicator alternating red & blue).
For more details, please refer to your device's online
user manual.
NOTE 2: Some smart TVs will automatically scan for and
try to pair with any Bluetooth devices in its vicinity. If your
TV prompts you to connect your Bluetooth headphones
or the Orbit Pro, please "DENY" the request so that your
device can properly pair with the transmitter.

Setting Up Your TV ( FOR OPTICAL & HDMI ARC
CONNECTIONS ONLY )
STEP 1
Using your TV’s remote control, press the SETTINGS
button and navigate to the AUDIO tab within the
settings menu. (Please note that there may be
dierences in the setting names depending on your
brand of TV).
If you connected to your TV via the optical OUT , “OPT
OUT” or HDMI ARC port, you’ll need to congure your
TV settings before you’ll receive audio.
ORBIT PRO
User Manual
14
EN
Avantree Orbit Pro
Your permission is required
to connect your device to TV.
Allow
Deny
Close

ORBIT PRO
User Manual
STEP 2
Proceed to AUDIO OUTPUT and select “OPTICAL OUT /
DIGITAL OUT/ HDMI ARC”. Many TVs will do this
automatically; skip this step as needed.
STEP 3
Set Audio Output format to“PCM / STEREO” ON or
“DOLBY” OFF.
If you’re having trouble nding these settings, you can
scan the QR code correlating to your TV’s brand OR
visit avantree.com/orbit-pro/tv-audio-settings for a
more detailed guide.
Sound
Audio Out Optical Out
Sound
Audio Out
HDMI ARC Out
Digital
Audio
Format
or
PCM/Stereo
Dolby - OFF
LG SONY SAMSUNG
15
EN

ORBIT PRO
User Manual
STEP 1
Once your rst device is successfully connected, put
your second pair of Bluetooth headphones / speakers
into PAIRING mode. Please refer to your headphones’
/speaker’s user manual for more details if necessary.
STEP 2
Press the button once to search for another device.
Press the button to select the device, then press
the button once to connect it. The shown on the
right of the second device name indicates the
successful connection.
Adding a Second Pair of Headphones
NOTE: The dual headphones support function works
with most headphones but not all. Certain true wireless
earbuds in particular do not work well with Bluetooth
transmitters' dual headphones mode.
16
EN

If your device does not automatically reconnect after
5-10 seconds, you can manually initiate reconnection
by pressing the
indicator shown to the right of the device name and
the “Connected” shown on bottom of the LCD screen
indicates a successful re-connection.
ORBIT PRO
User Manual
You typically do NOT need to re-pair your Bluetooth
headphones /speakers with the Orbit Pro every time.
Once successfully paired, they should automatically
reconnect when both devices are turned on (this may
take a few seconds).
Reconnecting Your Headphones
NOTE: If you paired your headphones with a dierent
Bluetooth device, turn Bluetooth OFF on said device(s).
Airpods in particular will always prioritize iPhones for
automatic pairing, so you'll need to turn your iPhone's
Bluetooth OFF when pairing your Airpods with the
Orbit Pro.
button to select the device,
then press the button once to connect. The
17
EN

ORBIT PRO
User Manual
Listening with a Soundbar (Bypass Function)
The Orbit Pro’s pass-through function allows you to
listen through both headphones and an external
soundbar / stereo AVR simultaneously.
STEP 2
Plug an additional optical or 3.5mm AUX cable into the
correlating audio port in the transmitter’s “OUTPUT”
section.
STEP 3
Plug the other end into your external sound system,
then you’re good to go.
STEP 1
Slide to the “TX” or "OFF" position.
18
EN
TX
OFF
RX
This manual suits for next models
1
Table of contents
Languages:
Other Avantree Transmitter manuals

Avantree
Avantree BTTC-418 User manual

Avantree
Avantree Priva User manual

Avantree
Avantree TC026 User manual
Avantree
Avantree TC026 User manual

Avantree
Avantree 2x Saturn Pros User manual

Avantree
Avantree BTTC-318 User manual
Avantree
Avantree WSTR-2403 User manual

Avantree
Avantree BTDG-50 User manual
Avantree
Avantree BTCK-310 User manual

Avantree
Avantree Priva User manual