manuals.online logo
Brands
  1. Home
  2. •
  3. Brands
  4. •
  5. Avaya
  6. •
  7. IP Phone
  8. •
  9. Avaya 1600 Series User manual

Avaya 1600 Series User manual

Page 1 of 4
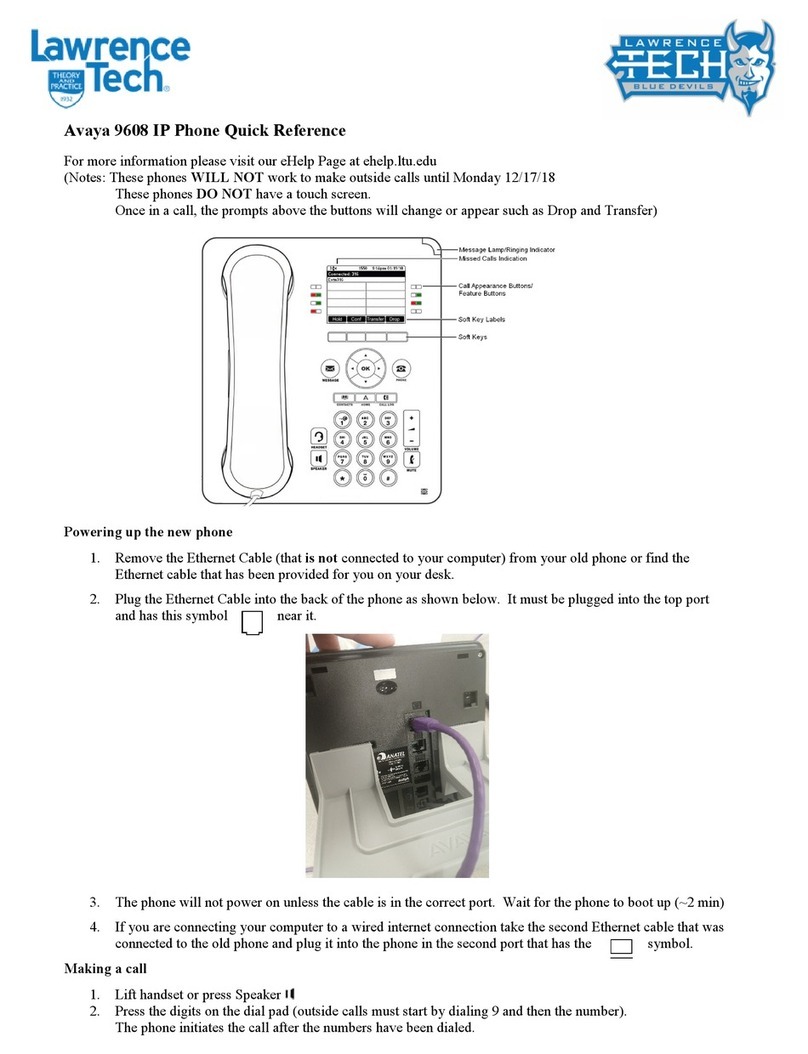
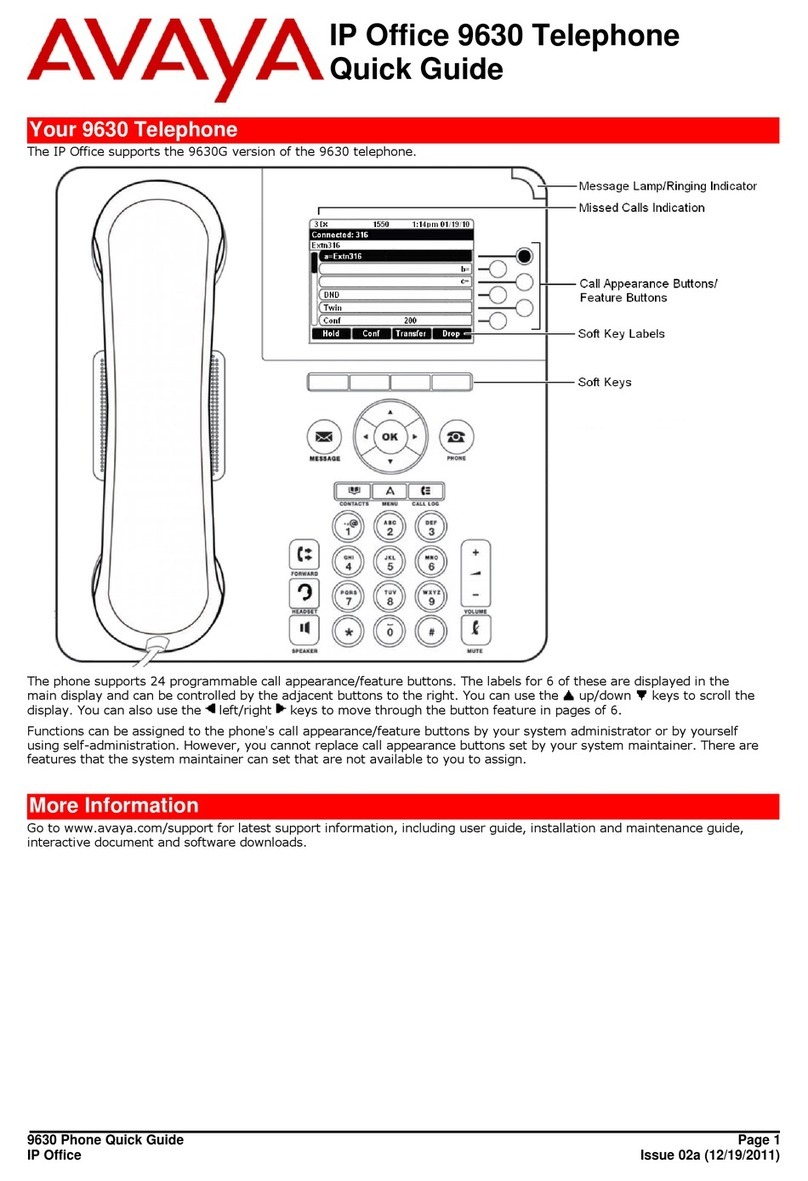
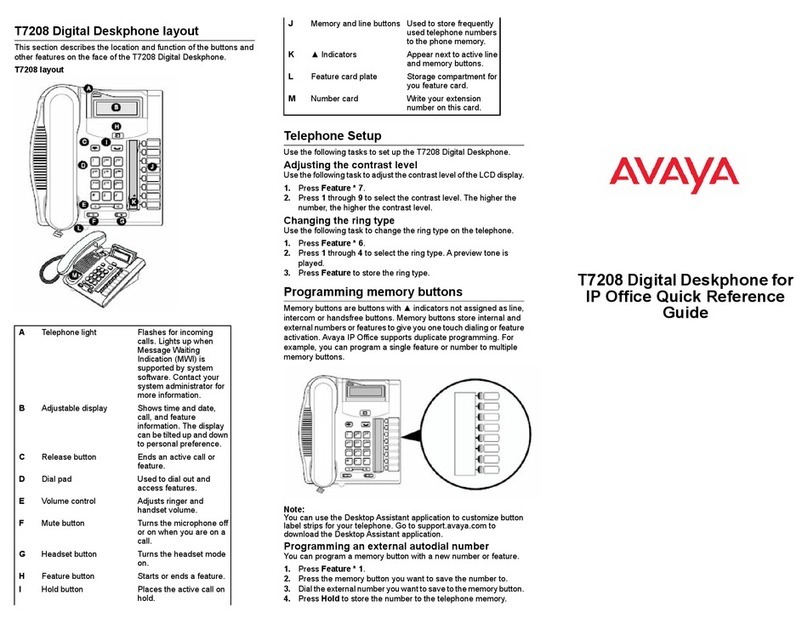
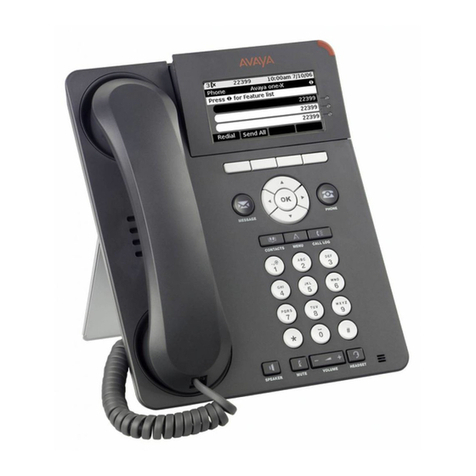
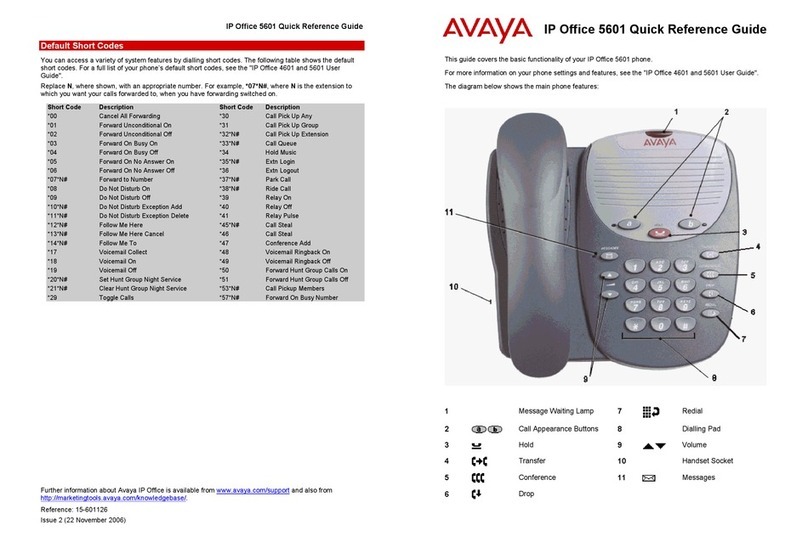
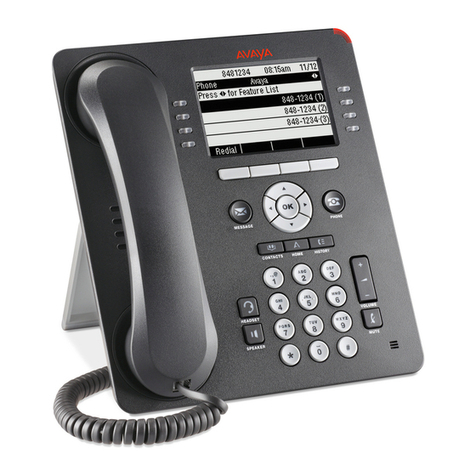
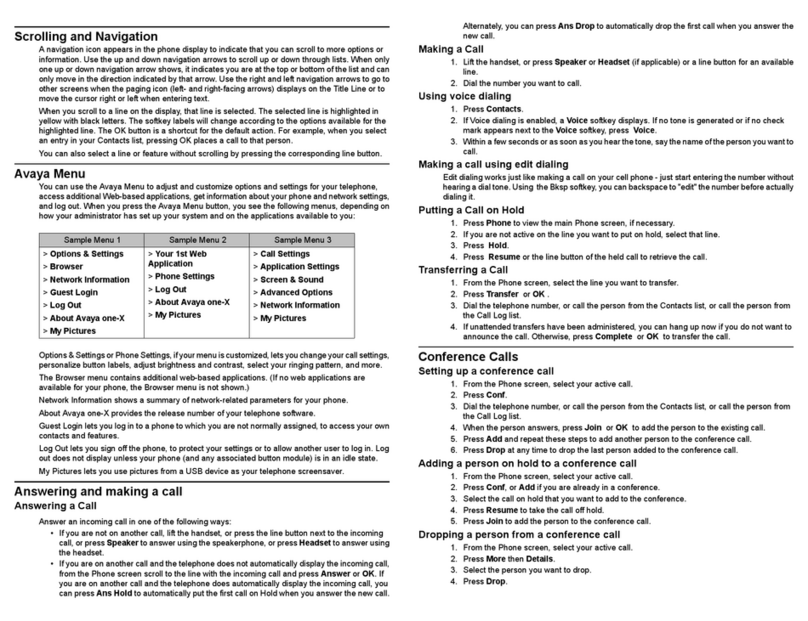
Reference Guide for the Avaya 1600 Series IP Phones –VoIP Stand Alone PBX
(Including the 1603, 1608, and the 1616 Model IP Phones)
Message Waiting
Indicator –indicates a
new voicemail message
or an incoming call
Call/Line Appearance
or Feature Buttons
with red (idle) / green
(active) lights
Soft keys - Available Features/
options appear in the last line of the
display. To use, press the
corresponding soft key button.
Phone/Exit –Exits
menu, returns display
normal.
Hold –use to place
a call on hold
Conference –use to
create a conference
call of up to 6 parties
(including yourself)
Transfer
Drop –disconnects
call or last call added
to conference call
Headset
Volume –Controls Handset,
Speakerphone, Headset, and
Ringer volume independently
Mute –
On/Off
Speaker –On/Off
Speakerphone
Navigation Pad –Arrows
& OK Button: Provides 4-
way navigation and center
Ok (select) button.
Message –Access
voicemail messages
Redial
Call Log –Logs up
to 100 entries of
Missed, Placed, and
Received calls
Contacts –Stores up
100 names and
numbers
AMenu (Avaya Menu) –
Adusts and customized
phone settings including
ringer and display.
Display - Provides information
including date & time, extension
#, and available call information
Overview of an Avaya Phone - Model Depicted is a 1616:
Dial Pad
Icon
Description
#X
Number of calls missed. Where “#”represents the number of calls missed
Call forward, Send All Calls (SAC), or EC500 is active. (Optional Feature, must be administered )
Incoming call, line is ringing
Call is active, line in use
Call is on hold
Call is on soft hold (when using Conference or Transfer feature)
Conference is active
Conference is on hold
Use the Navigation Pad to Scroll to the left for other options
Use the Navigation Pad to Scroll to the right for other options
Use the Navigation Pad to Scroll up or down for other options
Page 2 of 4
How To
Directions
Notes
Place an
INTERNAL CALL
Lift handset or press speaker,
Dial 7-digit number
OR
Dial 5-digit number
NOTE: Dependent on your
location, if unsure see your
Telecom Agency
Representative
Place an
EXTERNAL CALL
Lift handset or press speaker,
Dial the phone number
OR
Dial *99 +Local or Long distance
number
No Access Code Required.
Local calls: 7 digits
(or 10 digits)
Long distance numbers:
1 + area code + 7 digits
Hold/Retrieve a
Call
Press the HOLD button
To retrieve a call: Press the Call Appearance
(extension) button
Held Line appearance
button will flash green
When reconnected to call,
both the red and green
light will be lit steady.
Transfer a call
1. While connected to the call, press TRANSFER
button. (Call is automatically placed on hold)
2. Dial the number you want to transfer the call to.
3. When the phone rings on the other end, either:
a. Supervise the Transfer:
ANNOUNCE the call, press TRANSFER to
connect callers.
b. Blind Transfer:
Press TRANSFER again, then hang-up
To Cancel a Transfer:
Either press the Cancel
Soft Key
OR
Press the Line Appearance
that the original call is on.
Conference Call
1. While connected to a call, press the CONFERENCE
button. (The call is automatically placed on hold
and a new line is automatically activated and dial-
tone is heard.)
2. Dial Number of 2nd party –Wait for 2nd call to
connect
3. Announce conference call, then press CONFERENCE
button to add the party to the conference call.
Repeat steps to join up to
6 Parties, including
yourself
Drop
While on a call: Press DROP to disconnect call, dial-tone
will be heard. OR
While on a conference call: press DROP to disconnect
the last person added to a conference
Drop disconnects a call
and returns dial-tone
Mute
While on a call, press MUTE (the mute button lights and
microphone is turned off)
To resume the conversation: press MUTE again
Microphone turns on/off
(light on = microphone
off). Mute can be used
when on the handset,
speaker phone or headset.
Speaker
To Activate: Press the SPEAKER button (Line
appearance is activated and dial-tone is heard)
To Disconnect: Press SPEAKER button again
To change from
speakerphone
conversation to handset,
simply lift handset.
Page 3 of 4
Terminal Busy
Button (TB)/
Busy Indicator
TB Button is a Dual- function button:
A. To call an extension, press the TB button
Or, To Transfer a call to that extension: press
Transfer, then the TB button
B. The provides the status of the extension - indicator
will light red when extension is in use
TB/Busy Indicator button
is pre-programmed and
cannot be changed by the
user.
Send All Calls
(SAC)
To Activate: Press SAC button or Lift Handset, dial *03
To Cancel: Press SAC button or Lift handset, dial *86
Sends all calls
immediately to a pre-
designated number, such
as voicemail
Auto Dial (SD)
To Program an Autodial Button (SD):
1. Press PROGRAM or lift handset, dial*83.
2. Press SD button to be programmed,
3. Enter the number as you would normally dial
4. Press the”#”key, confirmation tone is heard.
To Use Autodial (SD) button: Press SD button
Auto Dial buttons Store
numbers for one touch
dialing. You can store up
to 16 digits.
Call Pick-Up
(CPU)
Call Pick-Up Group: Hear dial tone, press the CPU
Button.
Directed Call Pick-Up: Pick-up a specific extension that
is ringing.
To use: Hear dial tone, dial *45 and extension number
that you want to pick up.
Pick-Up answers a call
ringing on an extension
within your pre-designated
call pick-up group.
Button maybe labeled:
Call Pick-Up, Pick-Up,
CPU, or PU
AMENU
Button
Press the A Menu Button, then use the Navigation Pad
to scroll to the desired menu:
Screen / Sound - Adjust display, brightness, Ring
selection, etc.
Call Settings - Turns Call Timer on/off, etc.
Applications -Turns Call Log on/off, etc.
Advanced Options - Select display language, etc.
Network Info - Summary of network related
parameters
Logout - Log out of telephone for security reasons
The A MENU Button allows
the user to view, adjust
and customizes phone
settings Call Logs, as
applicable.
To Change Ring Selection:
Press A Menu Button,
press Select soft key, Scroll
the list to select a ring.
Press PLAY Soft key, then
press SAVE Soft Key.
To Exit the Menu: Press
PHONE/EXIT button
Navigation Pad
–Arrows & OK
buttons
Press Up/Down arrows on the Navigation Pad to scroll
through lists such as Contacts List, Call Log, or Features.
Press Left/Right arrows on the Navigation Pad to move
within an application and to move the cursor during
text input, or turn option on/off.
Press OK to Select or confirm a selection
Page 4 of 4
Contacts
To Add a Contact:
1. Press the CONTACTS button
If this is your first contact, skip step 2
2. Press the MORE Soft key
3. Press the NEW Soft key, Enter Name to be stored
4. Press OK button
5. Enter Telephone Number (as you would dial it)
6. Press SAVE Soft Key or OK
7. To Exit Menu, press PHONE/EXIT button.
To Edit a Contact:
1. Press CONTACTS
2. Use Navigation Pad, Scroll to contact to be edited
3. Press DETAILS Soft key
4. Press EDIT Soft key
5. Use dial pad, Edit Name, then press Save Soft key
6. Use dial pad, Edit Number, then press Save Soft key
7. To Exit the Menu, press PHONE/EXIT button.
To Delete a Contact:
1. Press CONTACTS button
2. Use Navigation Pad, Scroll to contact to be deleted
3. Press MORE Soft key
4. Press DELETE Soft Key, then press DELETE Soft key
again to confirm deletion.
5. To Exit Menu, press the PHONE/EXIT button
To Call a Contact:
1. Press CONTACTS button, then use Navigation Pad
to scroll to desired contact.
2. Press Call Soft key to dial contact.
100 names and numbers
can be stored in Contacts.
To Enter
Letters/Numbers:
Up to 14 characters
Press appropriate dial-pad
button until desired letter
appears
Pause a moment if next
letter is on the same key
Press “0” for a Space
Use BKSP Soft Key to
delete previous character.
Other Soft key options:
Details –shows name and
number stored and
provides option to Edit
contact.
More –gives other
available Soft keys, such as
New or Delete.
Call Log
To View a Call Log:
1. Press the CALL LOG button
2. Use Navigation Pad left/right arrows, to move to
the desired Call Log - All, Missed, Answered, or
Outgoing
3. Use the Navigation Pad up/down arrows to scroll
through selected Call Log.
4. To Exit the menu, press PHONE/EXIT button
To Add an Entry to the CONTACTS List:
1. Press CALL LOG,
2. Scroll to the number you want to add,
3. Press DETAILS Soft key
4. Press the +CONTACTS Soft key.
5. Edit Name (if necessary), then press OK Soft key
6. Edit Number (if necessary), press Save Soft key.
7. To Exit the menu, press PHONE/EXIT button
100 total entries can be
stored.
Other Soft key options:
Details –If available, will
display the number,
duration of the call, and
date & time.
Call –If available, Calls the
number in the entry
More –Displays other
available Soft key options.
Delete –Deletes this entry
Del All –Deletes ALL
stored entries in that Call
Log
Other manuals for 1600 Series

7

This manual suits for next models

3

Other Avaya IP Phone manuals

Avaya 4610 User manual

Avaya

Avaya 4610 User manual

Avaya IP Office 9608 User manual

Avaya

Avaya IP Office 9608 User manual

Avaya 9640 Series User manual

Avaya

Avaya 9640 Series User manual

Avaya 1200 Series User manual

Avaya

Avaya 1200 Series User manual

Avaya B189 User manual

Avaya

Avaya B189 User manual

Avaya IP Office 9508 User manual

Avaya

Avaya IP Office 9508 User manual

Avaya 4600 Series Quick start guide

Avaya

Avaya 4600 Series Quick start guide

Avaya NN43113-101 User manual

Avaya

Avaya NN43113-101 User manual

Avaya 3740 User manual

Avaya

Avaya 3740 User manual

Avaya one-X Quick Edition User manual

Avaya

Avaya one-X Quick Edition User manual

Avaya one-X 9600 Series Product manual

Avaya

Avaya one-X 9600 Series Product manual

Avaya one-X Deskphone Value Edition 1608 User manual

Avaya

Avaya one-X Deskphone Value Edition 1608 User manual

Avaya J189 SIP User manual

Avaya

Avaya J189 SIP User manual

Avaya 4620SW User manual

Avaya

Avaya 4620SW User manual

Avaya 5601 User manual

Avaya

Avaya 5601 User manual

Avaya IP Office 9608 User manual

Avaya

Avaya IP Office 9608 User manual

Avaya IP OFFICE 2420 User manual

Avaya

Avaya IP OFFICE 2420 User manual

Avaya DEFINITY 4606 User manual

Avaya

Avaya DEFINITY 4606 User manual

Avaya 4400 Series User manual

Avaya

Avaya 4400 Series User manual

Avaya 1140E Safety guide

Avaya

Avaya 1140E Safety guide

Avaya IP Office 9508 User manual

Avaya

Avaya IP Office 9508 User manual

Avaya 1692 User manual

Avaya

Avaya 1692 User manual

Avaya E169 User manual

Avaya

Avaya E169 User manual

Avaya 1408 User manual

Avaya

Avaya 1408 User manual

Popular IP Phone manuals by other brands

Polycom PENNNET 650 user guide

Polycom

Polycom PENNNET 650 user guide

Cisco MCS 7800 Series Firmware migration master guide

Cisco

Cisco MCS 7800 Series Firmware migration master guide

Yealink Yealink SIP-T20P Quick installation guide

Yealink

Yealink Yealink SIP-T20P Quick installation guide

Fujitsu IP Centrex SRS-12i Administrator's guide

Fujitsu

Fujitsu IP Centrex SRS-12i Administrator's guide

Yealink T29G Quick reference guide

Yealink

Yealink T29G Quick reference guide

EnGenius FreeStyl SIP user manual

EnGenius

EnGenius FreeStyl SIP user manual

Vodavi WIT-300H user guide

Vodavi

Vodavi WIT-300H user guide

LV switch SIP-T780 user guide

LV switch

LV switch SIP-T780 user guide

Cisco LYNKSYS CIT400 user guide

Cisco

Cisco LYNKSYS CIT400 user guide

Cisco Cisco Unified IP Phone 7960G Administrator's guide

Cisco

Cisco Cisco Unified IP Phone 7960G Administrator's guide

Yealink SIP-T9CM user manual

Yealink

Yealink SIP-T9CM user manual

Denwa Communications DW-310P user manual

Denwa Communications

Denwa Communications DW-310P user manual

Mitel NETWORKS 5010 user guide

Mitel

Mitel NETWORKS 5010 user guide

Polycom SoundStation IP 7000 user guide

Polycom

Polycom SoundStation IP 7000 user guide

ActionTec VOSKY UP101 user manual

ActionTec

ActionTec VOSKY UP101 user manual

Cisco SPA525G - Small Business Pro IP Phone VoIP quick start guide

Cisco

Cisco SPA525G - Small Business Pro IP Phone VoIP quick start guide

Htek UC601 user guide

Htek

Htek UC601 user guide

Logik L04CTAM10 instruction manual

Logik

Logik L04CTAM10 instruction manual

manuals.online logo
manuals.online logoBrands
  • About & Mission
  • Contact us
  • Privacy Policy
  • Terms and Conditions

Copyright 2025 Manuals.Online. All Rights Reserved.