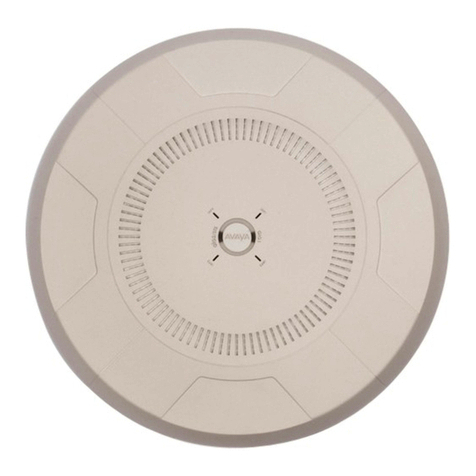
Avaya WAO9122 User manual

Installing the Avaya WLAN
Outdoor Access Point WAO9122
Release 7.0
NN47252-300
Issue 01.01
June, 2014

Avaya assumes no liability for any errors. Avaya reserves the right to make changes and corrections to the
information in this document without the obligation to notify any person or organization of such changes.
Documentation disclaimer
Documentation” means information published by Avaya in varying mediums which may include product
information, operating instructions and performance specifications that Avaya may generally make
available to users of its products and Hosted Services. Documentation does not include marketing
materials. Avaya shall not be responsible for any modifications, additions, or deletions to the original
published version of documentation unless such modifications, additions, or deletions were performed by
Avaya. End User agrees to indemnify and hold harmless Avaya, Avaya's agents, servants and employees
against all claims, lawsuits, demands and judgments arising out of, or in connection with, subsequent
modifications, additions or deletions to this documentation, to the extent made by End User.
Link disclaimer
Avaya is not responsible for the contents or reliability of any linked websites referenced within this site or
documentation provided by Avaya. Avaya is not responsible for the accuracy of any information, statement
or content provided on these sites and does not necessarily endorse the products, services, or information
described or offered within them. Avaya does not guarantee that these links will work all the time and has
no control over the availability of the linked pages.
Warranty
Avaya provides a limited warranty on Avaya hardware and software. Refer to your sales agreement to
establish the terms of the limited warranty. In addition, Avaya’s standard warranty language, as well as
information regarding support for this product while under warranty is available to Avaya customers and
other parties through the Avaya Support website: http://www.avaya.com/support or such successor site as
designated by Avaya. Please note that if you acquired the product(s) from an authorized Avaya Channel
Partner outside of the United States and Canada, the warranty is provided to you by said Avaya Channel
Partner and not by Avaya.
Licenses
THE SOFTWARE LICENSE TERMS AVAILABLE ON THE AVAYA WEBSITE, HTTP://
SUPPORT.AVAYA.COM/LICENSEINFO/ ARE APPLICABLE TO ANYONE WHO DOWNLOADS, USES
AND/OR INSTALLS AVAYA SOFTWARE, PURCHASED FROM AVAYA INC., ANY AVAYA AFFILIATE,
OR AN AUTHORIZED AVAYA RESELLER (AS APPLICABLE) UNDER A COMMERCIAL AGREEMENT
WITH AVAYA OR AN AUTHORIZED AVAYA RESELLER. UNLESS OTHERWISE AGREED TO BY
AVAYA IN WRITING, AVAYA DOES NOT EXTEND THIS LICENSE IF THE SOFTWARE WAS OBTAINED
FROM ANYONE OTHER THAN AVAYA, AN AVAYA AFFILIATE OR AN AVAYA AUTHORIZED
RESELLER, AND AVAYA RESERVES THE RIGHT TO TAKE LEGAL ACTION AGAINST YOU AND
ANYONE ELSE USING OR SELLING THE SOFTWARE WITHOUT A LICENSE. BY INSTALLING,
DOWNLOADING OR USING THE SOFTWARE, OR AUTHORIZING OTHERS TO DO SO, YOU, ON
BEHALF OF YOURSELF AND THE ENTITY FOR WHOM YOU ARE INSTALLING, DOWNLOADING OR
USING THE SOFTWARE (HEREINAFTER REFERRED TO INTERCHANGEABLY AS “YOU” AND “END
USER”), AGREE TO THESE TERMS AND CONDITIONS AND CREATE A BINDING CONTRACT
BETWEEN YOU AND AVAYA INC. OR THE APPLICABLE AVAYA AFFILIATE (“AVAYA”).
License types
Designated System(s) License (DS). End User may install and use each copy or an Instance of the
Software only on a number of Designated Processors up to the number indicated in the order. Avaya may
require the Designated Processor(s) to be identified in the order by type, serial number, feature key,
Instance, location or other specific designation, or to be provided by End User to Avaya through electronic
means established by Avaya specifically for this purpose.
Copyright
Except where expressly stated otherwise, no use should be made of materials on this site, the
Documentation, Software, Hosted Service, or hardware provided by Avaya. All content on this site, the
documentation, Hosted Service, and the Product provided by Avaya including the selection, arrangement
and design of the content is owned either by Avaya or its licensors and is protected by copyright and other
intellectual property laws including the sui generis rights relating to the protection of databases. You may
not modify, copy, reproduce, republish, upload, post, transmit or distribute in any way any content, in whole
or in part, including any code and software unless expressly authorized by Avaya. Unauthorized
reproduction, transmission, dissemination, storage, and or use without the express written consent of
Avaya can be a criminal, as well as a civil offense under the applicable law.
Third Party Components
“Third Party Components” mean certain software programs or portions thereof included in the Software or
Hosted Service may contain software (including open source software) distributed under third party
agreements (“Third Party Components”), which contain terms regarding the rights to use certain portions
of the Software (“Third Party Terms”). As required, information regarding distributed Linux OS source code
(for those Products that have distributed Linux OS source code) and identifying the copyright holders of the
Third Party Components and the Third Party Terms that apply is available in the Documentation or on
Avaya’s website at: http://support.avaya.com/Copyright or such successor site as designated by Avaya.
You agree to the Third Party Terms for any such Third Party Components
Trademarks
The trademarks, logos and service marks (“Marks”) displayed in this site, the Documentation, Hosted
Service(s), and Product(s) provided by Avaya are the registered or unregistered Marks of Avaya, its
affiliates, or other third parties. Users are not permitted to use such Marks without prior written consent
from Avaya or such third party which may own the Mark. Nothing contained in this site, the Documentation,
Hosted Service(s) and Product(s) should be construed as granting, by implication, estoppal, or otherwise,
any license or right in and to the Marks without the express written permission of Avaya or the applicable
third party.
Avaya is a registered trademark of Avaya Inc.
All non-Avaya trademarks are the property of their respective owners. Linux® is the registered trademark
of Linus Torvalds in the U.S. and other countries.
Open Source
To the extent the Company or a Subsidiary uses any code covered by an “open source” license, any such
use does not place any obligations on the non-open source code to make any public disclosure or general
availability of the non-open source code. Further, the Company and its Subsidiary comply with the
obligations imposed by the “open source” licenses, which include placing the required copyright notices on
the open source components.
Downloading Documentation
For the most current versions of Documentation, see the Avaya Support website http://support.avaya.com
or such successor site as designated by Avaya.
Contact Avaya Support
See the Avaya Support website: http://support.avaya.com for Product or Hosted Service notices and
articles, or to report a problem with your Avaya Product or Hosted Service. For a list of support telephone
numbers and contact addresses, go to the Avaya Support website: http://support.avaya.com (or such
successor site as designated by Avaya), scroll to the bottom of the page, and select Contact Avaya
Support.


Installing the Avaya WLAN Outdoor Access Point WAO9122
1
Quick Installation Guide
For Outdoor Access Point WAO9122
The WAO 9122 Hardened Wireless Access Point (WAP)
provides Avaya wireless technology in a hardened case for
installation outdoors and in other harsh environments.
This guide describes how to install the WAO 9122 on a pole
or wall and execute the initial power up of the WAP. The
pole or wall can be a structure that is installed at ground
level or on a roof. The WAO 9122 is not compatible with other Avaya mounting options. For
additional information, refer to Using the Avaya Wireless Orchestration System (NN47252-103).
This document is intended ONLY for WAO 9122 model WAPs. For other models please
see the installation guide for that model series.
You Need the Following Items
Accessory Kit (included in each WAP carton) includes:
Mounting bracket and eight attachment screws
Grounding screw
Watertight RJ connector assembly
Appropriate tools, bands, screws, and/or anchors required for the desired mounting
location (not provided with the WAP).
Antenna and low-loss outdoor-rated coaxial cables terminated with N Male to Reverse
Polarity TNC connectors . Note that some antennas include integrated cables as part of the
unit, and these do not need separate cables - an example is shown in Step 9.
Grounding wire
Workstation with a Web browser to configure the WAP.
RJ-45 Ethernet connection(s) to your wired network.
Power—WAO 9122 WAPs are powered via Power over Ethernet (PoE) using an outdoor-
rated Ethernet Cat 5e or Cat 6 cable that also carries data traffic. Only Avaya-supplied
power injectors, or 802.3af or 802.3at PoE-compliant switches, may be used to power the
WAO 9122. The WAO 9122 is powered by one injector port rated at 20W or higher.
NOTE: PoE Injectors and switches must be installed and used indoors.
1

Installing the Avaya WLAN Outdoor Access Point WAO9122
2
Choose a Suitable Location
The WAO 9122 is tested to IP65 waterproof and dust-proof requirements to protect against
severely wet and dusty environments. For optimal placement, we recommend that a predictive
survey be performed by a qualified Avaya partner.
Choose a location that is not subjected to submersion.
Direct sunlight may raise the effective ambient temperature many degrees above air
temperature. It is best to choose a location that has some protection from the sun.
The maximum cable length between the WAO 9122 and the RJ-45 Ethernet network is
100 meters. The PoE injector is not a repeater, so its location will not increase this
distance.
The WAO 9122 can operate from a Wireless Distribution System (WDS) link. However,
the unit will need to be configured via the Ethernet connection prior to mounting and
power must still be supplied via the RJ-45 Ethernet connector.
Keep the unit away from electrical devices or appliances that generate RF noise—at least
3 to 6 feet (1 to 2 meters).
Prepare the Mounting Location
Part of the mechanical installation is to ensure that the WAP is grounded to earth ground to
dissipate any static electric charge that may develop due to wind.
Determine a good electrical earth ground point near the WAP mounting location. If an
earth ground point is not available, consult an electrician to have one installed.
Before the WAP is attached to a wall or pole, secure a grounding wire and lug to the
WAP with the provided screw in the location indicated by the arrow, below.
2
3

Installing the Avaya WLAN Outdoor Access Point WAO9122
3
Attach the Mounting Plate to the WAP
The accessory kit includes a mounting plate. Mounting plate dimensions are included in
“Dimensions” on page 11. The mounting plate can be used for wall or pole mounting by
reversing the side of the plate exposed. Attach the mounting plate to the WAP using the eight
provided screws in the locations indicated below (secure in at least 4 places).
For Wall Mounting:
For Wall Mounting, position the bracket with the four slotted flanges pointed towards the WAP,
as shown in Step 3, above.
For Pole Mounting:
For Pole Mounting, position the bracket with the four slotted flanges pointed away from the
WAP, as shown below.
Mount the WAP on a Pole or Wall
5a - Pole Mounting
For pole mounting, Avaya recommends using metal straps (not included with the WAP). The
metal straps can be obtained from BAND-IT-IDEX, Inc. (www.BAND-IT-IDEX.com). See their
web site for additional contact information. Complete the following steps to mount the WAP to
a pole.
4
5

Installing the Avaya WLAN Outdoor Access Point WAO9122
4
.
Install the metal bands through the holes in the mounting
bracket.
Note that the photos below show a different mounting
bracket. The steps for installation are identical, however.
Hand tighten the Band-It strap through the pole mounting
bracket, thread it through the strap buckle and then bend
the strap back.
Using the Band-It tool, place the tool onto the strap.
Rotate the Band-It tool so that it can pull the excess strap
through the buckle and turn the crank until the strap is
very tight.
Once the strap is satisfactorily tight, rotate the Band-It tool
back so that the strap cannot slide back through the
buckle.

Installing the Avaya WLAN Outdoor Access Point WAO9122
5
Using the built in cutting tool on the Band-It tool, cut the
excess strap.
Your installation should now appear as shown here.
Using a hammer, bend back and flatten the remaining
strap.
Using a hammer, bend and flatten the two tabs on the
buckle to hold the flattened strap end in place.
The completed attachment should have the mounting
bracket firmly seated against the pole. One band should
be enough for most installations however a second band
can be used for additional mounting security.

Installing the Avaya WLAN Outdoor Access Point WAO9122
6
5b - Wall Mounting
Place the WAP in the desired location and mark the location
of the two mounting holes on the wall, as shown.
Drill and prepare the holes for the desired screw type. In
metal walls the holes may be tapped to the proper thread or
alternatively the WAP may be mounted with sheet metal
screws. For concrete walls a plastic anchor and screw are
suggested.
NOTE: Mounting screws for attaching the plate to the wall
are not provided in the kit.
The WAP should already be secured to the mounting plate (Step 4). Mount the assembly
to the wall, securing it at the two locations indicated.
Ground to Earth Ground
WARNING: This equipment must be externally grounded
using a customer-supplied ground wire before power is
applied. Contact the appropriate electrical inspection
authority or an electrician if you are uncertain that suitable
grounding is available.
The mechanical installation must ensure that the WAP is grounded
to earth ground to dissipate static electric charge that may develop
due to wind. In Step 3, you secured a grounding wire to the WAP.
After Step 3 is complete and the WAP is mounted to the wall or pole, attach the
grounding wire from the WAP to the electrical earth ground point that you located or
installed in Step 3. The photo shows an earth ground connection where the WAP is
mounted on a pole at ground level and the grounding wire is attached to a stake driven
into the ground.
Continue the installation by mounting the antenna and attaching the cables as described
in Steps 7, 8, and 9.
6

Installing the Avaya WLAN Outdoor Access Point WAO9122
7
Install an Antenna
NOTE: Be sure to configure the WAP's Radios to the proper bands (2.4 GHz and 5.0 GHz)
in Step 11. Each must match the band of the antenna to which it is connected.
Install your antenna as directed by the manufacturer.
Use low-loss outdoor-rated coaxial cables terminated with N Male to Reverse Polarity
TNC connectors for connection to the WAP antenna ports. Note that some antennas
include integrated cables as part of the unit, and these do not need separate cables.
Connect the Ethernet Cable with the Waterproof Connector
All WAO 9122 WAPs are powered directly via their Gigabit Ethernet connection.
Power: These WAPs are only powered through the GIG PoE port. Only Avaya-supplied
power injectors, or 802.3af or 802.3at PoE-compliant switches, may be used to power the
WAO 9122.
Data: Data is supplied to the Gigabit port via the same cable that powers the WAP.
NOTE: It is VERY IMPORTANT to assemble the waterproof connector properly,
following the directions below. Failure to do so may expose the WAP to the elements,
and may result in an intermittent connection causing the WAP to connect at very low
speeds!
The Ethernet cable must be terminated with a simple RJ45 plug with the tab exposed, as
shown on the left below. Do not use a plug with a tab protector boot, as shown on the
right. This will not seat properly in the waterproof connector, and the assembly will not
be watertight.
7
8

Installing the Avaya WLAN Outdoor Access Point WAO9122
8
The components of the connector are shown in the photo below in the order that they are
placed onto the Ethernet cable, and also shown in more detail as a color-coded drawing.
You will perform a few assembly steps below before sliding the parts onto the cable.
Seat the O-ring (shown in red) on the connector body (gray) at its RJ45 jack side.
Note the slots in the collar of the connector body and the matching tabs inside the
connector ring. Insert the connector body into the connector ring so that they mate.
Slide the sealing nut (shown in green) and the connector body assembly over the Ethernet
cable as shown.
Attach the split washer and split rubber grommet over the cable.
Seat the washer in the sealing nut and slide the grommet into the connector body.

Installing the Avaya WLAN Outdoor Access Point WAO9122
9
Snug all of the components together as shown, but leave the RJ45 connector protruding.
Tighten the sealing nut lightly, making sure that the RJ45 connector is rotated so that it
will seat easily in the connector body later.
Plug the RJ45 connector into the port on the bottom of the WAO 9122, making sure that its
tab clicks in place for a secure connection.
Seat the RJ45 connector correctly in the connector body.
Note the slotted track in the connector ring on the bottom of the AP and the matching
tabs inside the connector ring in the waterproof connector assembly, below. Screw the
assembly onto the WAP's connector ring so that they mate securely.
Snug all the sections of the assembly together a final time and tighten the sealing nut on
the end to 5kg but not more than 8kg torque force to insure a water tight fit.

Installing the Avaya WLAN Outdoor Access Point WAO9122
10
Connect the Antenna
The WAO 9122 has four RP-TNC connectors for the antenna.
Both of the AP's Radio1 cables (Radio1 ANT1 and Radio1 ANT2) must be attached to antenna
leads for the same frequency band (for example, 2.4GHz), and Radio1 must be set to that band
on the WAP (see Step 11). Similarly, both Radio2 cables need to go to the same frequency band
on the antenna (for example, 5GHz). For simplicity, if you are using an antenna with two
2.4GHz leads and two 5GHz leads, we suggest that you connect Radio1 (ANT1 and ANT2) to
2.4GHz on the antenna, and connect Radio2 (ANT1 and ANT2) to 5GHz. Then you must
configure the WAP to correspond in Step 11: set Radio1 to the 2.4GHz band and Radio2 to the
5GHz band.
NOTE: To use a 3x3 MIMO antenna type with the WAO 9122, connect to the +45 and -45
antenna outputs. Do not use the connector marked “V”.
NOTE: For some MIMO omni-directional antennas where each of the individual
antennas is dual-band, it does not matter which lead is connected to which connector on
the WAP.
9
RADIO1 ANT1 RADIO1 ANT2 RADIO2 ANT1 RADIO2 ANT2

Installing the Avaya WLAN Outdoor Access Point WAO9122
11
Zero-Touch Provisioning and Ongoing Management
Most customers employ the Wireless LAN Orchestration System (WOS) for the initial setup and
continuing management of Avaya devices. WOS users can readily set up their new devices for
zero-touch provisioning and ongoing maintenance via the following platforms. Wait five
minutes after powering up the WAP to automatically discover it, then use WOS via DNS (if a
DNS entry for Avaya-WOS is provisioned in the network) or perform manual discover from
WOS. Newly discovered WAPs are automatically assigned to the WOS “default” profile, and
will receive the configuration defined for that profile.
If you are not using WOS, please refer to Using the Avaya Wireless Orchestration System
(NN47252-103) to configure your WAP manually via the Express Setup menu option.
Dimensions
WAO 9122 Dimensions
Note: Depth (2.75 in) includes the height of the protrusions built into the top and bottom
of unit for screws.
10
11
9.9 in
25.1 cm
10.1 in
25.6 cm
2.75 in
7.0 cm

Installing the Avaya WLAN Outdoor Access Point WAO9122
12
Mounting Bracket Dimensions
Customer Support
Visit the Avaya Support website at https://support.avaya.com/ for the most up-to-date
documentation, product notices, and knowledge articles. You can also search for release notes,
downloads, and resolutions to issues. Use the online service request system to create a service
request. Chat with live agents to get answers to questions, or request an agent to connect you to
a support team if an issue requires additional expertise.
3.2 in
8.1 cm
11.6 in
29.5 cm
Table of contents
Other Avaya Wireless Access Point manuals

Avaya
Avaya WAP9112 User manual

Avaya
Avaya WLAN 8100 Series User manual

Avaya
Avaya WLAN 8100 Series Owner's manual

Avaya
Avaya AP-3 User manual

Avaya
Avaya AP-4 User manual

Avaya
Avaya AP-1 User manual

Avaya
Avaya AP-3 Quick guide

Avaya
Avaya AP-3 User manual

Avaya
Avaya AP-7 User manual

Avaya
Avaya AP-4 User manual

Avaya
Avaya AP-8 User manual

Avaya
Avaya WAO9132 Instruction Manual

Avaya
Avaya WAP9170 Series Instruction Manual

Avaya
Avaya AP-4 User manual

Avaya
Avaya AP-1 Quick start guide

Avaya
Avaya Wireless W110 User manual

Avaya
Avaya AP 8120 User manual

Avaya
Avaya WLAN 8100 Series User manual

Avaya
Avaya WAP9112 Instruction Manual

Avaya
Avaya AP-6 User manual