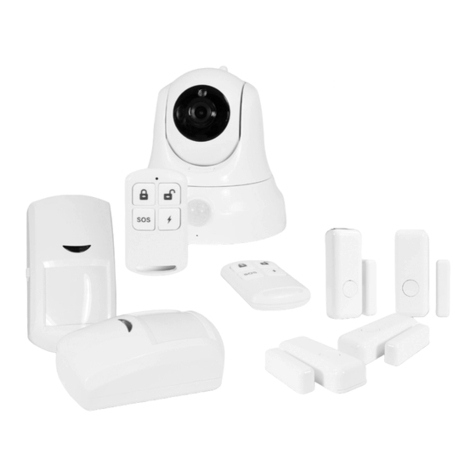
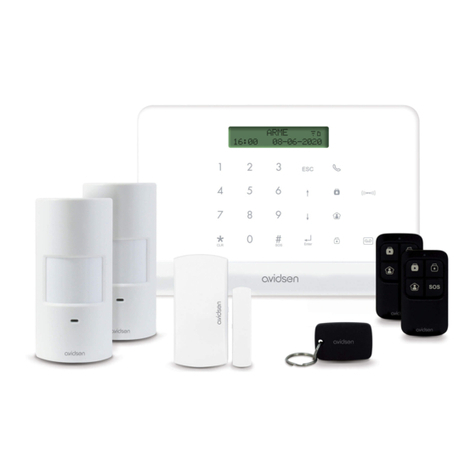
Avidsen HomeSecure 127055 User manual

CONNECTED WIRELESS ALARM
HomeSecure
The alarm system that watches over your home
Ref.127055
www.avidsen.com
V3
DÉTECTION DE
MOUVEMENT DÉTECTION D’OUVERTURE SIRÈNE INTÉGRÉE WiFi RÉSEAU MOBILE
MOTION
DETECTION OPENING DETECTION BUILT-IN SIREN WIFI MOBILE NETWORK
EN

EN3
EN 2
TABLE OF CONTENTS
A - SAFETY
INSTRUCTIONS
1 - OPERATING PRECAUTIONS 05
2 - MAINTENANCE AND CLEANING 05
3 - RECYCLING 05
B - PRODUCT
DESCRIPTION
1 - KIT CONTENTS 06
2 - CENTRAL UNIT 06
3 - MOVEMENT DETECTOR 07
4 - REMOTE CONTROL 08
5 - OPENING DETECTOR FOR
DOORS AND WINDOWS 08
6 - MEANING OF THE WARNING LIGHT 09
C - INSTALLATION
1 - CENTRAL UNIT START-UP 10
2 - INSERTING A SIM CARD 11
3 - INSTALLING THE CENTRAL UNIT 11
4 - CONNECTING TO THE WIFI NETWORK
AND AVIDSENHOME APP 12
4.1 - Installing the mobile app and creating
an account 12
5 - INSTALLING THE MOVEMENT
DETECTORS 15
6 - OPENING DETECTOR 16
7 - PAIRING ACCESSORIES
TO THE ALARM 17
7.1 - Remote controls 17
7.2 - RFID badge 17
7.3 - Detectors 18
D - CONFIGURATION
1 - MANU TREE 20
2 - SETTINGS MENU: DETAIL 20
E - USE
1 - FULLY ARMED 22
2 - PARTIALLY ARMED 22
3 - DISARMED 22
4 - ALERT TRIGGER 22
5 - SOS FEATURE 23
6 - MAKING A CALL 23
7 - LIST OF CONTROLS AVAILABLE
BY PHONE 23
8 - LIST OF CONTROLS AVAILABLE
BY SMS 24

EN3
EN 2
F - TECHNICAL
AND LEGAL
INFORMATION
1 - TECHNICAL CHARACTERISTICS 25
2 - ADDITIONAL ACCESSORIES 26
3 - WARRANTY 26
4 - HELP AND ADVICE 27
5 - DECLARATION OF CONFORMITY 27


EN5
A - SAFETY INSTRUCTIONS
1 - OPERATING PRECAUTIONS
• This product is designed exclusively for indoor
use.
• Do not allow children to operate the product.
• When drilling, take care not to damage pipes or
electric cables under the surface.
• Do not expose the product to direct sunlight.
• Do not install the product in an environment
subject to large temperature variations or
signicant humidity.
• Do not place liquids or water containers on top
of the device.
• The mains adapter must remain easily accessible.
• Do not expose the movement detectors to direct
sunlight.
• Do not daisy-chain extension cords and/or multi-
socket adapters.
• Do not install near acidic chemicals, ammonia or
sources of toxic gases.
2 - MAINTENANCE AND CLEANING
• Always unplug the product from the mains before
carrying out any maintenance.
• Never use abrasive or corrosive substances to
clean the product.
• Use a lightly damp, soft cloth.
• Never use an aerosol to spray the product as this
may damage the internal workings.
3 - RECYCLING
Disposing of used batteries in household
waste is strictly forbidden. Batteries/
accumulators containing harmful
substances are marked with symbols
(shown opposite) which indicate that it is
forbidden to discard them in the household waste.
The corresponding heavy metals are referred to as
follows: Cd= cadmium, Hg= mercury, Pb= lead.
You can dispose of these used batteries/
accumulators at local waste treatment centres
(centres for sorting recyclable materials), which
are required to accept them. Keep batteries/button
cells/accumulators out of reach of children and
store them in a safe place not accessible to them.
They could be swallowed by children or pets. Risk
of death! In the event that a battery is swallowed,
consult a doctor or go to A&E immediately. Never
short-circuit the batteries, and do not burn or
recharge them as they may explode!
This logo denotes that devices no longer
in use should not be disposed of as
household waste. They are likely to
contain hazardous substances that are
dangerous to both health and the
environment. Return the equipment to your local
distributor or use the recycling collection service
provided by your local council.
Pour en savoir plus :
www.quefairedemesdechets.fr

EN 6
B - PRODUCT DESCRIPTION
1 - CONTENTS OF THE KIT
2 - CENTRAL UNIT
1
4 5 6
7 8 9
*
CLR SOS Enter
ESC
0 #
2 3
1
2
4
3
5
6
7
8
1Digital display
2Voice call button
3Numerical keypad
4Fully armed button (when no one is home)
5RFID badge reading zone/WiFi connection
indicator light
6Partially armed button (at night)
7Disarm button
8AvidsenHome application pairing button
1x1 2x2 3x2 4x1
7x2 8x6 9x66x1
5x1
1Central unit
2Movement detector
3Remote control
4RFID badge
5Opening sensor
6230 V A/C 50Hz mains adaptor / 12 V D/C 1A
7Wall mount for movement detector
8Screws for mounting the central unit and
movement detectors
9Wall plugs for mounting the central unit and
movement detectors
1
4 5 6
7 8 9
*
CLR SOS Enter
ESC
0 #
2 3

EN7
B - PRODUCT DESCRIPTION
9
10
12
13
11
9Loudspeaker and siren
10 Anti-tamper sensor
11 SIM card slot (SIM card not included)
12 Socket for mains adaptor plug
13 On/Off switch
3 - MOVEMENT DETECTOR
6
10
9
7
8
1
2
3
5
4
1Location for the supplied wall-mounting ball
2Power indicator light
3Detection window
4Connection button
5Location of the screw to open the cover
6Tamper-proof sensor
7Not used on this model
8Batteries (included): follow the indicated polarity
when replacing them.
9Detection cell
10 Radio communication antenna

EN 8
4 - REMOTE CONTROL
5
1
2
3
4
1Fully armed button: fully arms the system when
you leave your home
2Disarm button: also turns off the siren if it is
active.
3Partially armed button: only arms some of the
detectors (typically at night while you are home).
4SOS button: immediately triggers the alarm in
case of emergency
5Removable seal revealing the screw to open the
remote control to replace the battery if necessary
5 - OPENING DETECTOR FOR DOORS AND WINDOWS
1
2
3
4
5
1Batteries (included): follow the indicated polarity when replacing it.
2Magnet position indication (on the right edge of the cover)
3Magnetic sensor
4Tamper-proof sensor
5The cover above the magnet can be removed to access the area for screw mounting if
necessary.
B - PRODUCT DESCRIPTION

EN9
6 - MEANING OF THE WARNING LIGHTS
The lighting of certain buttons on the front of the central unit indicates the status of some of its functions:
Slow ashing: connection to the mobile network*
Rapid ashing: a problem occurred while connecting to the mobile network*.
Solid light: connection to the mobile network OK*
*requires a compatible SIM card (not included)
Slow ashing: connection to the WiFi network
Rapid ashing: a problem occurred while connecting to the mobile network
Solid light: connection to the WiFi network OK
Solid light: fully armed mode
Solid light: partially armed mode
Solid light:disarmed
Flashing: a radio transmission has just been received
B - PRODUCT DESCRIPTION

EN 10
1 - CENTRAL UNIT START-UP
Warning: your central unit and its accessories have tamper-proof sensors.If you install the central unit or
its live components, make sure to temporarily switch off the built-in siren.
Power your central unit using the mains adapter provided. Flip the on/off switch on the back of the central
unit to turn it on.
To continue the start-up without arming the central unit, the internal siren must be temporarily switched off:
Enter conguration mode by entering 123456 on the keypad and then
Enter
. The central unit displays
"Main Menu - Wi-Fi AP mode".
Use the buttons to select "System Setting". Conrm with the Enter button.
The central unit displays "System Setting - Date and Time". Use the buttons to select "Siren
Setup". Conrm with the
Enter
button. The central unit displays "Siren Switch – Built_in Siren" Conrm
with the
Enter
button. The central unit displays "Built_in Siren ON". Press and conrm with Enter
to display "Built_in Siren OFF" and switch off the built-in siren for the rest of the installation.
For more simplicity, please set the display language:
Enter conguration mode by entering 123456 on the keypad and then Enter symbol. The central unit
displays "Main Menu - Wi-Fi AP mode".
Use the buttons to select "System Setting". Conrm with the
Enter
button. The central unit
displays "System Setting - Date and Time". Use the /Enter buttons to select "Language" and
then the display language of your choice. Use the ESC button to return to the previous level to change
the settings.
Do not change any of the other available settings at this time.
C - INSTALLATION

EN11
2 - INSERTING A SIM CARD
Inserting a SIM card is optional, but necessary if you want to use voice call alerts, SMS alerts, voice call
control and/or SMS control.
IMPORTANT:
• The card must be a SIM card
• The SIM card uses the 2G network, check your coverage. Notice: some operators do not systematically
use the 2G network for telephone or SMS communications (e.g. Free in France). This may result in
temporary or permanent network loss, depending on your location.
• The SIM card must not be PIN code protected. If your SIM card has a PIN code, insert it into a compatible
phone and disable the PIN code.
• The SIM card used does not use DATA. It allows you to send and receive SMS and voice calls, but to use
it with the AvidsenHome app you need internet access via WiFi.
Disconnect the power to the central unit by unplugging the mains adapter and ipping the on/off switch on
the back. Insert the SIM card into the slot on the back of the central unit before turning the power back on.
3 - INSTALLING THE CENTRAL UNIT
Before mounting the central unit on the wall, make sure that there is sufcient GSM signal reception.
Attach the mounting bracket to the wall with the supplied screws according to the diagram below.
58mm
ø6 mm
A C
B
C - INSTALLATION

EN 12
Once the central unit connections have been made (see paragraph "Connections"), mount it to the wall.
Make sure that it is securely mounted.
1
4 5 6
7 8 9
*
&/5 626 (QWHU
(6&
0 #
2 3
D E
4 - CONNECTING TO THE WIFI NETWORK AND THE AVIDSENHOME APP
Although optional, using the AvidsenHome app allows your central unit to send you remote alerts via its
WiFi connection, and allows you to fully control your alarm from your smartphone through the AvidsenHome
app. This control option requires a SIM card in your central unit, which is connected to the Internet via WiFi.
4-1 - INSTALLING THE MOBILE APP AND CREATING AN ACCOUNT
Once the central unit is connected, follow the instructions below to pair it.
Download the Avidsen Home app from the Android Play Store or Apple App Store.
C - INSTALLATION

EN13
Launch the app and log in if you already have
an account. If not, press CREER UN NOUVEAU
COMPTE (CREATE A NEW ACCOUNT) and let
the application guide you.
After accepting the privacy policy, you can create
an account with an email address or with a
phone number. Choose the method that suits
you; however, we recommend that you create your
account with an email address.
Procedure by email
Procedure by phone
In both cases, choose your country and then, after
entering your email address or phone number,
select Obtenir le code de vérication (Get
verication code).
In a few seconds, you will receive a validation code
in your email inbox or by SMS. Enter this code to
nalise registration.
Note that this email may go into your spam folder.
If you do not receive a code before the countdown
has ended, press renvoyer (return) and check the
email address or telephone number entered.
C - INSTALLATION

EN 14
To complete your registration, set a password
between 6 and 20 characters long with letters and
numbers only. Then press Terminé (Finished).
On your alarm unit, enter 123456 then press the
button. The central unit displays "Wi-Fi EZ
Mode" followed by a three minute countdown.
During the countdown, add a new HomeSecure
product to the Avidsen Home app on your
smartphone.
During the process, you will be asked to tell your
central unit which WiFi network to use to access
the Internet.
Important: system not compatible with 5GHz WiFi.
Please check the WiFi settings of your gateway
with your Internet service provider if you experience
connection difculties.
Select your 2.4 GHz WiFi network (note: your
smartphone must be connected to the WiFi network
to which the central will be connected), enter
your network password and press CONFIRMER
(CONFIRM).
During the 3 minute countdown on the central unit's
screen, press ETAPE SUIVANTE (NEXT STEP):
C - INSTALLATION

EN15
Please wait while the connection procedure takes place. This step can take several minutes.
Your Avidsen HomeSecure alarm unit has been successfully paired. You can set a name by tapping the
icon and pressing TERMINE (FINISH).
5 - INSTALLING THE MOVEMENT DETECTORS
Movement detectors detect the movement of warm objects in their eld of vision. Therefore, they should
not be installed where exposed to the sun, facing a window or in an area where the temperature is likely
to change rapidly (window or radiator).
The movement detectors are designed for an optimum installation height of 2.20 m. They are more efcient
at detecting transverse or vertical movements. They should be installed perpendicular to the direction
of passage, so that a potential intruder would arrive from the left or right and not straight in front of the
detector.
A C
B
Up
Top
view
Side
view
2.2 m
from the
oor
C - INSTALLATION

EN 16
Power on the detectors by removing the plastic tab to connect the supplied batteries.
Important: your motion detectors have an energy-saving feature. If either of the detectors transmits two
alerts in under three minutes, the detector goes into standby mode for three minutes. When testing your
installation, take this standby mode into account and, if necessary, wait three minutes out of detection
range so that the detectors can be reactivated.
6 - OPENING DETECTOR
The opening detectors are designed to protect all types of openings: doors, windows, sliding glass doors,
medicine cabinets, etc. The sensor detects the distance of the magnet supplied. The sensor is usually
placed on the frame and the magnet is placed on the moving part.
The sensor and the magnet can either be mounted with the supplied double-sided tape or with screws and
wall plugs (not supplied) depending on the type of support. The optimum distance between magnet and
sensor when closed is 5 mm.
C - INSTALLATION

EN17
7 - PAIRING ACCESSORIES TO THE ALARM
All the central unit's accessories must be paired to
it so that it can receive the information they send to
it (arming the system via remote control, opening
detected by a door sensor, etc.). Accessories can
be paired using either the AvidsenHome app or
from the central unit keypad.
For each paired accessory, the central unit will emit
a beep. If it emits two beeps, the accessory you are
trying to pair is already in the central unit's memory.
7-1 - REMOTE CONTROLS
• From the central unit
Enter conguration mode by entering 123456 on
the keypad and then Enter symbol. The central unit
displays "Menu principal - Wi-Fi AP mode" (Main
Menu - Wi-Fi AP mode).
Use the buttons to select "Accessoires"
(Accessories). Conrm with the
Enter
button.
In the "Accessoires" (Accessories) menu, select
"Télécommande " (Remote control) then press
"Ajouter" (Add). The central unit then waits for you
to press the remote control.
Number of remotes already
paired
Press any button on either remote control during
the countdown.
Repeat the process for the second remote control.
• From the app
In the app, tap your central unit in the list of paired
products.
From the alarm's main page, tap then
Next tap
Your central unit is now in pairing mode.
Press any button on either remote control during
the countdown.
Repeat the process for the second remote control.
Once your remotes are paired, you can rename
them in the app at your convenience. Tap the
default name of one of the remotes on the list to
rename it.
7-2 - RFID BADGE
• From the central unit
Enter conguration mode by entering 123456 on
the keypad and then Enter symbol. The central unit
displays "Menu principal - Wi-Fi AP mode" (Main
Menu - Wi-Fi AP mode).
Use the buttons to select "Accessoires"
(Accessories). Conrm with the
Enter
button.
C - INSTALLATION

EN 18
In the "Accessoires" (Accessories) menu, select
"Badge" then press "Ajouter" (Add). The central
unit then waits for you to swipe a badge
Number of badges
already paired
During the countdown, swipe the badge in front
of the central unit's zone. The badge reading
range is about 1 cm.
• From the app
In the app, tap your central unit in the list of paired
products.
From the alarm's main page, tap then
Next tap
Your central unit is now in pairing mode.
During the countdown, swipe the badge in front
of the central unit's zone. The badge reading
range is about 1 cm.
Once your badges are paired, you can rename
them in the app at your convenience. Tap the
default name of the badge on the list to rename it.
7-3 - DETECTORS
The same process is used to pair movement and
opening detectors. During the process, you will
be asked to select an operating mode for each
detector:
• Normal Zone: default mode
• 24H Zone: a detector set to 24H Zone will trigger
the alarm even if the central unit is disarmed.
• Entry Zone: a detector set to Entry Zone will not
immediately trigger the alarm. It will leave you
an adjustable delay before sounding the alarm
to give you time to disarm the system when you
enter your home.
• Home Zone: in Home Zone, if you arm the system
in Home Mode (typically at night), the detector will
not trigger the alarm. You would select this mode
for a movement detector on the ground oor, for
example, which would allow you to freely move
around your house at night, while monitoring the
front door and windows (which would be set to
Normal Zone).
• From the central unit
Enter conguration mode by entering 123456 on
the keypad and then Enter . The central unit displays
"Menu principal - Wi-Fi AP mode" (Main Menu
- Wi-Fi AP mode).
Use the buttons to select "Accessoires"
(Accessories). Conrm with the Enter button.
In the "Accessoires" (Accessories) menu, select
"Détect. sans l" (Wireless detection) then press
"Ajouter" (Add).
You must then choose your detector's mode:
Normal Zone / 24H Zone / Entry Zone / Home
Zone Choose and conrm the mode you want.
The central unit then waits for a detector to be
triggered.
Number of detectors
already paired
C - INSTALLATION

EN19
Movement detector: press the button on the back of
the detector during the countdown.
Opening detector: move the magnet away during
the countdown.
• From the app
In the app, tap your central unit in the list of paired
products.
From the alarm's main page, tap then
Next tap
Your central unit is now in pairing mode.
Movement detector: press the button on the back
of the detector during the countdown.
Opening detector: move the magnet away during
the countdown.
Once your detectors are paired, you can rename
them in the app at your convenience. Tap the
default name of the badge on the list to rename it.
You can also assign an operating mode to each
detector from the same location. (Delay Mode
corresponds to Entry Zone as described above)
Note: once all the accessories have been paired,
remember to reactivate the central unit's built-in
siren if necessary. See section "Central unit start-
up" above.
C - INSTALLATION

EN 20
1 - MENU TREE
The conguration menus are organised as follows
N° de tel 1 à 5 (Tel.
no. 1-5)
Wi-Fi AP mode
(AP mode WiFi)
No téléphone
(Telephone No.)
Accessoires
(Accessories)
Paramètres
(Settings)
Historique
(History)
Détect. sans ls
(Wireless detection)
...
N° de SMS 1 à 5
(SMS no. 1-5)
Mode test (Test
mode)
Contrôle par tel
(Control by phone)
Télécommande
(Remote control)
Date et heure
(Date and time)
Son Arm/Desarm
(Arm/disarm sound)
Langue
(Language)
Badge RFID (RFID
badge)
Format date (Date
Format)
...
Reset
Menu principal (Main menu)
Wi AP mode (AP mode WiFi): Manual WiFi
pairing. Use of this mode is not recommended.
See section "Connecting to the WiFi network and
the AvidsenHome app".
No téléphone (Telephone No.): To control the
alarm by voice call or SMS and to receive alerts,
you must enter the authorised phone numbers.
Enter the valid landline numbers (up to 5) and
mobile numbers that will receive SMS alerts or be
used to arm/disarm the system via SMS (up to 5).
Accessoires (Accessories): Menu for adding and
removing wireless detectors, remote controls and
RFID badges.
Paramètres (Settings): All the settings available
for the central unit (see details below).
Historique (History): Log of the latest actions and
events recorded by the central unit
2 - SETTINGS MENU: DETAIL
The Settings menu groups together all available
central unit settings, the paired accessories, the
action in the event of an alert, etc. It is organised
as follows:
Settings Date et heure (Date and time)
Format date (Date Format)
Délai ent/sortie (Entry/exit delay)
Contrôle par tel (Control by phone)
Son Arm/Desarm (Arm/disarm sound)
Al. échec GSM (GSM failure alert)
Son touches (Button sounds)
Codes accès (Access code)
Tonalités (Tones)
Durée sirène (Siren duration)
Rétroéclairage (Backlighting)
Paramètres sirène (Siren settings)
Envoi SMS Arm (Send SMS when armed)
Envoi SMS Désarm (Send SMS when
disarmed)
Répétition appel (Repeated calls)
A propos (About)
Langue (Language)
Reset
D - CONFIGURATION
Other manuals for HomeSecure 127055
1
Table of contents
Other Avidsen Security System manuals