AVT MAGIC AD1 ETI User manual

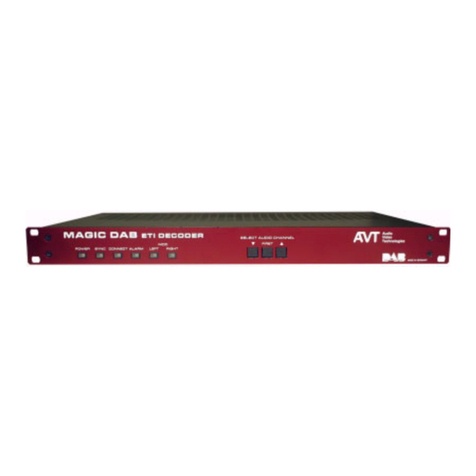
MAGIC AD1 ETI Decoder
DAB & DAB+ Audio Monitoring Decoder
Hardware/Software Manual

.

MAGIC AD1 ETI Audio Decoder
Hardware/Software Manual
To get always information on the latest software,
please register on our Homepage:
http://www.avt-nbg.de
Please click on Create an account under the Log In
section. Now you need to enter your name/com-
pany, a user name and a valid email address.
Please click on Register to receive your confirmation
email which includes the link to activate your
account.
With your account you can also download manuals
and the latest software in the Download section of
our website.


A publication of
AVT Audio Video Technologies GmbH
Nordostpark 12
90411 Nuernberg, Germany
Phone +49-911-5271-0
Telefax +49-911-5271-100
Printed in Germany, July 2010
© AVT Audio Video Technologies GmbH
All Rights reserved. Reproduction in
whole or in parts is prohibited without the
written consent of Audio Video
Technologies GmbH.
Subject to changes.
Release date: (07.10)

.

Content
INTRODUCTION 11
SAFETY 13
Introduction 13
General saftey requirements 13
Text Conventions 14
1CONSTRUCTION15
2 SYSTEM DESCRIPTION 17
2.1 Functionality 17
3 PUTTING THE MAGIC AD1 ETI DECODER INTO OPERATION 19
3.1 Mounting 19
3.2 Connection to the mains voltage 19
3.3 Earthing of the system 20
3.4 Operational elements on the front side 20
3.5 Wiring diagram 21
4 WINDOWS PC SOFTWARE 23
4.1 Hardware requirements 23
4.2 User Registration 23
4.3 Installing the Windows PC Software 23
4.4 Software update from the internet 24
4.5 Operation via the Windows PC Software 25
4.5.1 The MAGIC AD1 ETI Decoder main window 25
4.5.2 2 Mbit/s Status 26
4.5.3 ETI Status 26
4.5.4 Service Organization 27
4.5.5 Subchannels 28
4.5.6 Decoder Status 28
4.5.7 Alarm Counter Reset 29
4.6 Menu File 30
4.6.1 Submenu Operation Settings Presets 30
4.6.2 Submenu System Settings 30
4.6.3 Submenu Protocol File 30

4.6.4 Submenu Exit 31
4.7 Menu Configuration 32
4.7.1 Submenu Control Interface 32
4.7.2 Submenu MAGIC AD1 ETI Decoder 34
4.7.2.1 Operation Settings 35
4.7.2.1.1 ETI 35
4.7.2.1.2 Protocol 36
4.7.2.1.3 Relay/TTL 37
4.7.2.2 System Settings 42
4.7.2.2.1 General 42
4.7.2.2.2 Audio Interface 44
4.7.2.2.3 LAN Interface 45
4.7.2.2.4 SNMP Parameter 46
4.7.2.3 Login 48
4.7.2.4 Date and Time 50
4.7.3 Submenu Presets 51
4.7.3.1 Save as ... 51
4.7.3.2 Manage Presets 51
4.7.3.3 Activate a Preset 53
4.8 Menu Administration 54
4.8.1 Submenu Registration 54
4.8.2 Submenu File System 55
4.8.3 Submenu System Panel 56
4.8.4 Submenu Firmware Download 57
4.8.5 Submenu Set Factory Settings 58
4.9 Menu Extras 59
4.9.1 Submenu System Monitor 59
4.9.2 Submenu Protocol File Viewer 62
4.10 Menu Help 63
4.10.1 Submenu About MAGIC AD1 ETI Decoder 63
5 OPERATION VIA DISPLAY AND KEYPAD 65
5.1 Basic configuration 65
5.1.1 Setting the menu language 65
5.1.2 Setting the E1 and ETI parameters 66
5.1.3 Setting the Audio interface: Analogue or digital 66
5.1.4 Activating the ETI protocol file 67
5.2 Working with the MAGIC AD1 ETI Decoder 68
5.2.1 The Status display - Operation during a connection 68
5.2.2 Working with Presets 69

6 MAGIC AD1 ETI MULTI SOFTWARE 71
6.1 Installing the MAGIC AD1 ETI Multi Software 71
6.2 User Interface of the MAGIC AD1 ETI Multi Software 72
6.3 Submenu Control Interface 73
A1 MENU STRUCTURE 77
A1.1 System Settings 78
A1.2 Operation Settings 79
A1.3 Presets 80
A1.4 Status Information 81
A2 INTERFACES 83
A2.1 MAGIC AD1 ETI Decoder 83
A2.2 Network interfaces 84
A2.2.1 E1 (2-Mbit/s) interface 84
A2.2.2 S0 interface 84
A2.3 Control and data interfaces 86
A2.3.1 LAN interface 86
A2.3.2 TTL/RELAY interface 86
A2.3.3 DATA/PAD interface 87
A2.4 Audio interfaces 88
A2.4.1 Analogue Audio interface 88
A2.4.2 Digital AES/EBU Audio interface 88
A2.5 Headset interface 89
A3 TECHNICAL DATA MAGIC AD1 ETI 91
A4 GENERAL 95
A4.1 Order numbers 95
A4.2 Scope of delivery 95
A4.3 Declaration of conformity 95
A5 SERVICE INFORMATION 97
A5.1 Software Updates 97
A5.2 Support 97
A5.3 Repairs 97
INDEX 99
Declaration of Conformity 105


PAGE 11
Introduction
INTRODUCTION
The MAGIC AD1 ETI Decoder allows the monitoring of DAB and DAB+ sig-
nals with ETI (NA, G.704) and ETI (NI, G.703) format. The system monitors
all audio and data channels in the ETI data stream and can decode one audio
channel. Via the 2-Mbit/s output further MAGIC AD1 ETI Decoders can be
cascaded, so that several programmes can be decoded simultaneously.
The configuration of the system can be carried out via the LAN interface
unsing the Windows application software included in delivery or via the front
keypad and display of the unit. With the implemented SNMP fucntionality
the system can also be integrated into a network management system via its
LAN interface.
English
German
Menu
Select
System Settings
System Settings
Language
Sprache
Cap
Ok
Save Settings?
Yes
No
Operation Settings
Select
Operation Mode
ISDN
LAN
Audio
Audio
Audio
Audio Interface In
Audio Interface Out
Analogue
Digital
PRETALK Interface
No System
Telephone
7-kHz G.722 Auto
15-kHz 1B Auto
15-kHz 2B Auto
Handset
Headset
Phantom Power
Mikrophone Limiter
Delete
Opt.
ON AIR
HOLD
PRETALK
Select...
Call!
Beendet

PAGE 12
Introduction
Line
Ring tone
Search
Name
New Entry
Edit
Display
Delete Entry
Save as Quick Dial
Presets
Preset
Load
New
Save
Delete
Ring tone
Signal processing
Keypad 9600, no
Status information
Login
Shift
Automatic Answering
Mikrophone Amplifying
Ratio RX/TX
Sources Headset
Sources Audio Output 1
Sources Audio Output 2
Sources Transmission Signal1
Sources Transmission Signal 2
Headset Monitor
Load Audio Preset
Save Audio Preset
Mode
ON
OFF
DCK
Standard Preset
Basic Settings
Load Basic Settings
LAN Settings
DHCP
IP Adresse
sub-net mask
Default Gateway
DNS Server IP ADR
Steuer Port
Audio Port

PAGE 13
Safety
SAFETY
Introduction
The unit described has been designed to the latest technical parameters and
complies with all current national and international safety requirements. It
operates on a high level of reliability because of long-term experience in de-
velopment and constant and strict quality control in our company.
In normal operation the unit is safe.
However - especially if daily routine and technichal errors coincide - some po-
tential sources of danger for person, material and optimal operation remain.
This manual therefore contains basic safety instructions that must be ob-
served during configuration and operation. It is essential that the user reads
this manual before the system is used and that a current version of the manual
is always kept close to the equipment.
General saftey requirements
To keep the technically unavoidable residual risk to a minimum, it is abso-
lutely necessary to observe the following rules:
– Transport,storageandoperationoftheunitmustbeunder the permissible
conditions only.
– Installation, configuration and disassembly must be carried out only by
trained personal on the basis of the respective manual.
– The unit must be operated by competent and authorised users only.
– The unit must be operated in good working order only.
– Any conversions or alterations to the unit or to parts of the unit (including
software) must be carried out by trained personnel authorised by the man-
ufacturer. Any conversions or alterations carried out by other persons lead
to a complete exemption of liability.
– Only specially qualified personnel is authorised to remove and override
safety measures, and to carry out the maintenance of the system.
– External software is used at one’s own risk. Use of external softwarecan af-
fect the operation of the system.
– Use only tested and virus-free date carriers.

PAGE 14
Safety
Text Conventions
In this manual the following conventions are used as text markers:
Accentuation: product names or important terms
LCD Text
: Labelling on the front display of the system
PC Text: Labelling in the PC Software
TIP
The symbol TIP marks information which facilitates the operation of the sys-
tem in its daily use.
NOTE
The symbol Note marks general notes to observe.
ATTENTION The symbol Attention marks very important advice that is absolutely top ob-
serve. In case of non-observance malfunctions and even system errors are
possible.
!

PAGE 15
Construction
1 CONSTRUCTION
The functions of the MAGIC AD1 ETI Decoder are implemented in a single
unit. The system is carried out as 19’’ x 1 U unit and has an integrated power
supply.
FIG. 1 FRONT SIDE: MAGIC AD1 ETI DECODER

PAGE 16
Construction

PAGE 17
System description
2 SYSTEM DESCRIPTION
The functional elements of the system are pictures in Fig. 2.
FIG. 2 FUNCTIONAL ELEMENTS OF THE MAGIC AD1 ETI DECODER
2.1 Functionality
With the MAGIC AD1 ETI Decoder an ETI output signal of an Ensemble Mul-
tiplexer can be monitored. The system allows a simultaneous monitoring of
all DAB & DAB+ Audio data streams. The system can be connected anywhere
in the 2-Mbit/s signal (NA, G.704 and NI, G. 703) to be monitored or it can be
connected in parallel with the signal path. All Audio programmes in the data
stream are monitored and an individual programme can be extracted and de-
coded. Additionally, the internal protocol file can be activated to store upcom-
ing error messages.
In case of a power breakdown the E1 signal is automatically looped back via
a relay.
The currently decoded Audio signal is available at the analogue or the digital
Audio outputs. If the digital AES/EBU Audio interface is used, two separate
Sample Rate Converters are available for automatic clock synchronisation.
For external clocking a clock input and a clock output are available.
Additionally, the ETI Decoder incorporates a Headphone interface for moni-
toring the Audio programm that is currently selected to be decoded.

PAGE 18
System description
The configuration and operation can be carried out via the front keypad and
the illuminated display.
Configuration and control is especially comfortable with the MAGIC AD1ETI
Windows PC software which is included in delivery and which communi-
cates with the system via the LAN interface.
An external alarm signalling can be carried out via six programmable TTL
contacts. Two relays are available for status indication.
With the implemented SNMP fucntionality the system can also be integrated
into a network management system via its LAN interface.

PAGE 19
Putting the system into operation
3 PUTTING THE MAGIC AD1 ETI DECODER
INTO OPERATION
3.1 Mounting
With its dimensions (W ×H ×D) of 440 mm ×44,5 mm (1 U) ×260 mm the
MAGIC AD1 ETI System can be used either as desktop device or mounted in
19 inch racks. Corresponding19“ mounting brackets are included in delivery.
When mounting the unit please keep in mind that the bending radius of the
connected cables is always greater than the minimum allowed value.
When the MAGIC AD1 ETI Decoder is installed in a rack, please make sure
that there is sufficient ventilation: it is recommended to keep a spacing of ca.
3 cm from the openings. In general, the ambient temperature of the system
should be within the range of +5°C and +45°C. These threshold are especially
to observe if the system is inserted in a rack. The system works without ven-
tilation.
During operation humidity must range between 5% and 85%.
3.2 Connection to the mains voltage
The system can be operated with mains voltage in the range from 90 V to
253 V via the internal power supply and the mains type appliance cable. The
line frequency can vary from 45 Hz to 65 Hz. The maximum power consump-
tion is 15W. The rack must be earthed according to the EMC regulations. The
earthing can be carried out via the earthing screw on the back side of the unit.
The unit has a circuit closer. After plugging in the mains type appliance cable
and pressing the circuit closer, the system boots within a few seconds. In
stand-by mode the AVT logo is shown on the display
1
.
TIP
The temperature of the system can be indicated on the display (
Menu
Status
information
)
ATTENTION Incorrect ambient temperature and humidity can cause functional defi-
ciencies.
Operation outside the threshold values indicated above leads to a loss of war-
ranty claim.
1
Depending on the delivery status all menus are possibly displayed in German. The configuration
of the menu language is described in CHAPTER 5.1.1.
!

PAGE 20
Putting the system into operation
3.3 Earthing of the system
For EMC reasons an earthing via the earthing screw must be carried out in ei-
ther case.
3.4 Operational elements on the front side
The system has an illuminated graphical display with a resolution of 160 x 32
pixel and 19 operating buttons.
On the right next to the display there are two softkeys whose current func-
tions are indicated on the display. In the middle there are two cursor buttons
(upwards/downwards) as well as an
OK
button. The numerical pad supports
in addition to the numerical characters
0...9
, the ’
*
’- and ’
#
’-key. For text en-
tries the numerical pad can also be used as a normal keypad.
During a connection additional functions are possible that are explained in
chapter 5 - “Operation via display and keypad“.
FIG. 3 OPERATIONAL ELEMENTS ON THE FRONT SIDE
ATTENTION Earthing
A lacking earthing can cause functional deficiencies within the unit. Because
of the “pending“ potential, unlike the protective earth conductor potential,
slight electric shocks can occur by touching the rack. These are absolutely not
dangerous, however they can be avoided totally by earthing.
!
Softkeys
Keypad for dailing/
text entry
Confirm entry
Graphical
display Status window/
cursor buttons/
Headset level
up/down
Table of contents
Other AVT Media Converter manuals

AVT
AVT MAGIC ACX DANTE WAN BRIDGE User manual

AVT
AVT MAGIC AE1 DAB+ User manual
AVT
AVT MAGIC AE4 User manual

AVT
AVT MAGIC ACX Dante WAN User manual

AVT
AVT MAGIC EEC User manual

AVT
AVT MAGIC DAB Operating and installation instructions

AVT
AVT MAGIC AE1 DAB+ User manual

AVT
AVT MAGIC AE4 User manual

AVT
AVT MAGIC AE1 DAB Mounting instructions
AVT
AVT MAGIC AE4 User manual