Avtek Education Video User manual

A V T E K
Instrukcja obsługi .................................................................. 2
User manual ......................................................................... 3
Gebrauchsanleitung ............................................................. 4
Mode d'emploi ....................................................................... 5
EN
DE
FR
PL
AVTEK Education
Video
Ekran elektryczny
Electric Screen
Leinwand, elektrisch
Écran électrique

Ekran elektryczny
Instrukcja obsługi
Należy zapoznaćsięz informacjami na opakowaniu i obudowie ekranu.
Napięcie: 100 V ~ 120 V, 60 Hz
lub 220 V ~ 240 V, 50 Hz
Pobór mocy: 210 W (maksymalnie)
(Rys. przewody - od góry:)
Brązowy – pod napięciem (zwijanie)
Czarny – pod napięciem (rozwijanie)
Niebieski – neutralny
Żółto-zielony – uziemienie
Ekran można zawiesićna ścianie lub pod sufitem. Rodzaj instalacji zależy
od indywidualnych potrzeb użytkownika. W każdym przypadku należy
jednak dopilnować, aby zostały użyte właściwe akcesoria.
Do montażu ściennego lub sufitowego na powierzchni drewnianej należy
użyćwkrętów ø5 x 60 mm.
Aby zainstalowaćekran na ścianie ceglanej, betonowej lub gipsowej,
należy użyćwkrętów ø6 x 60 mm i odpowiednich dla rodzaju ściany kotw
lub plastikowych kołków.
Montażna suficie:
(W razie potrzeby najpierw zainstaluj pierścienie zaczepów bo obu
stronach obudowy.)
Zmierz odległość między zaczepami na końcach obudowy ekranu. Nawierć
w suficie oddalone od siebie o takąsamąodległość otwory na haczyki,
upewniwszy sięnajpierw, czy łącząca je linia przebiega równolegle do ściany.
Wkręć w wywiercone otwory odpowiedniej wielkości haczyki i zawieśna
nich ekran na znajdujących sięna jego końcach zaczepach.
Sposób montażu na suficie
Ekran należy zainstalowaćw taki sposób, aby przy pełnym jego rozwinięciu
każdy z odbiorców byłw stanie widziećgo w całości.
Montażna ścianie:
Zmierz odległość między otworami okućdo montażu ściennego, następnie
zaznacz na ścianie oddalone od siebie o tęodległość punkty. Wywierćw nich
otwory na wkręty, zwracając szczególnąuwagę, aby łącząca je linia
przebiegała poziomo. W każdy z otworów wkręć odpowiedni wkręt i zawieś
ekran na otworach znajdujących sięw okuciach na końcach jego obudowy.
Za pomocąlinijki sprawdź, czy ekran jest równomiernie oddalony od ściany.
Sposób montażu na ścianie
Podłącz przewód zasilający do gniazdka (najpierw upewnij się, że gniazdko
ma właściwe napięcie). Ułóżprzewód zasilający tak, aby nikt nie mógłsię
o niego potknąć ani go pociągnąć, z dala od gorących przedmiotów
i powierzchni. Jeżeli istnieje potrzeba użycia przedłużacza, powinien on
posiadaćtakie same parametry dot. dopuszczalnego natężenia prądu.
Rozwijanie ekranu (Rys. 2)
Ustaw przełącznik w położeniu < =>. Arkusz ekranu rozwinie się, a gdy
całkowicie wysunie sięz obudowy, silnik automatycznie zatrzyma się.
Zwijanie ekranu (Rys. 3)
Ustaw przełącznik w położeniu < ->. Arkusz ekranu zwinie się, a gdy
całkowicie schowa sięw obudowie, silnik automatycznie zatrzyma się.
Aby ręcznie zatrzymaćzwijanie/rozwijanie arkusza ekranu,
ustaw przełącznik w położeniu < O >.
Rozwijanie ekranu
Naciśnij dolny przycisk pilota. Arkusz ekranu rozwinie się, a gdy całkowicie
wysunie sięz obudowy, silnik automatycznie zatrzyma się.
Zwijanie ekranu
Naciśnij górny przycisk pilota. Arkusz ekranu zwinie się, a gdy całkowicie
schowa sięw obudowie, silnik automatycznie
zatrzyma się.
Aby ręcznie zatrzymaćprzewijanie
ekranu w pozycji częściowo rozwiniętej,
naciśnij na pilocie środkowy przycisk.
Górny ogranicznik — Pozwala wyregulowaćpunkt
zatrzymania siędolnej listwy ekranu przy pełnym jego zwijaniu.
Jeżeli przy zwijaniu ekranu jego dolna listwa ma zatrzymywać
siębliżej obudowy, obróćpokrętło „Upper Limit” w kierunku
przeciwnym do ruchu wskazówek zegara.
Dolny ogranicznik — Pozwala wyregulowaćpunkt
zatrzymania siędolnej listwy ekranu przy pełnym jego
rozwijaniu. Jeżeli przy rozwijaniu ekranu jego dolna listwa ma
zatrzymywaćsięniżej, obróćpokrętło „Lower Limit”
w kierunku przeciwnym do ruchu wskazówek zegara.
Dane techniczne układu elektrycznego
Instalacja
Korzystanie z ekranu
Obsługa za pomocąpilota bezprzewodowego (Rys. 4)
Obsłu
g
a za
p
omoc
ą
p
ilota
p
rzewodowe
g
o
(
R
y
s. 1
)
Regulacja
Rys. 1 Rys. 2 Rys. 3
Rys. 4

Electric Screen
User Manual
Please refer to the label on carton box &screen housing.
Voltage: 100V~120V, 60Hz
or 220V~240V, 50Hz
Power: 210W (MAX)
The screen can be wall mounted or ceiling mounted, users can choose the
mounting method according to their needs. Whichever method of mounting
is used, insure the right equipment is used.
For wall mounting or ceiling mounting on a wooden surface use ø5x60mm
wood screws.
For mounting on a brick, concrete or plaster surface use ø6x60mm screws
with screw anchors or wall plugs.
Ceiling Mounting:
(Install the “U” shape bolt first if necessary)
Measure the distance between D-rings / U-bolts,drill holes for screw
hooks the same distance apart, making sure the holes are in line with
each other and parallel with the wall.
Screw the appropriate screw hooks into the holes and hang the screen by
the D-rings / U-bolts.
Ceiling mounting method
Install the screen so that when fully extended the audience can see the
whole screen.
Wall Mounting:
Measure the distance from the holes in the wall mounting brackets, mark
out the same distance on the wall and drill holes for the screws, making
sure the holes are level. Screw an appropriate screw into each hole, hang
the screen from the screws with the holes in the brackets. Check the screen
is evenly spaced from the wall with a ruler.
Wall mounting method
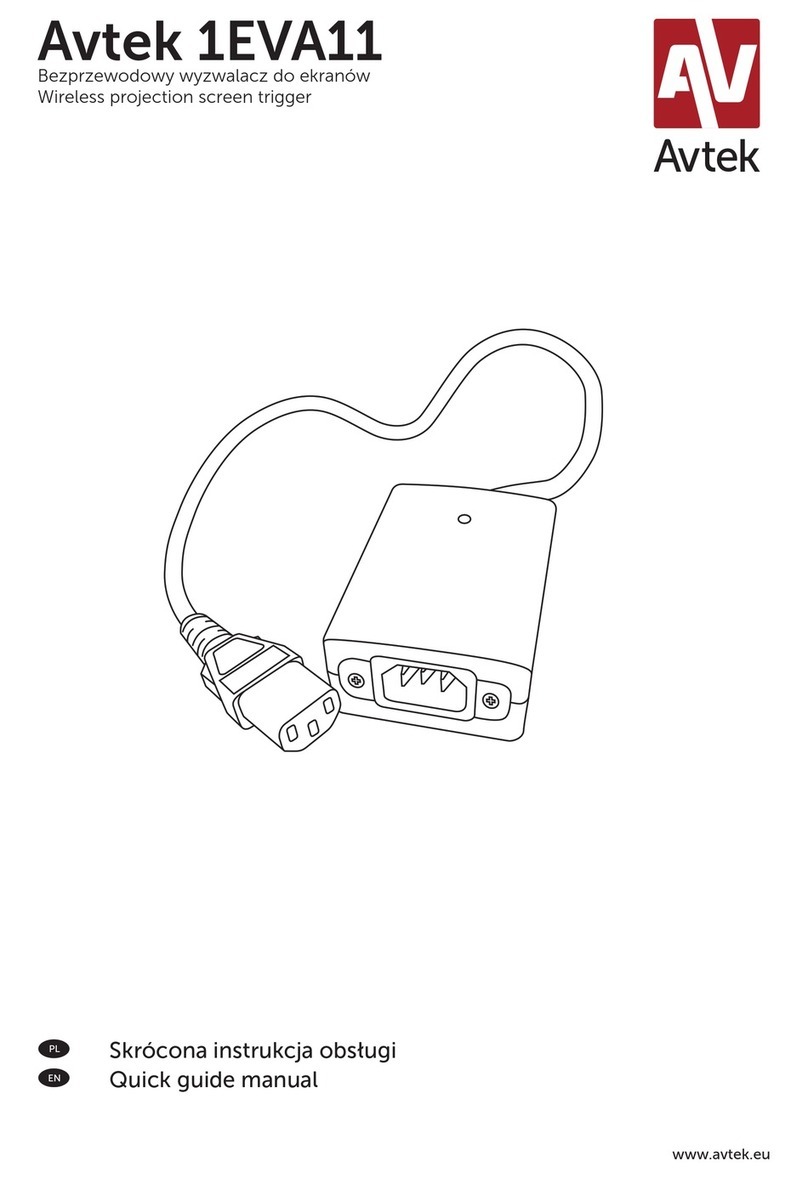
Plug power cord into mains socket. (Make sure the correct voltage is supplied.)
Position the cord so that it will not be tripped over, pulled or contact hot
surfaces. If an extension cords is needed then use a cord with the same
current rating.
To lower the projection surface (Fig. 2)
Toggle the switch to position < =>, the projection surface will lower itself,
when it is fully extended it will stop automatically.
To retract the projection surface (Fig. 3)
Toggle the switch to position < ->, the projection surface will retract into its
case, when it is fully retracted it will stop automatically.
To stop the projection surface manually at an intermediate
position, toggle the switch to the < O >position.
To lower the projection surface
Press the bottom button on the control unit, the projection surface will lower
itself, when it is fully extended it will stop automatically.
To retract the projection surface
Press the top button on the control unit, the projection surface will retract into
its case, when it is fully retracted it will stop
automatically.
To stop the projection surface
Manually at an intermediate position, press the
middle button on the control unit.
Upper limit—Adjust the stopping level of slat when fully
retract. Turn ”upper limit” switch in counterclockwise direction
let the slat go closer to the casing.
Lower limit—Adjust the stopping level of slat when fully
extend. Turn ”lower limit” switch in counterclockwise direction
let the slat go closer to the ground.
Product Electrical Specification
Instalation Method
Screen Operation
Wired control unit o
p
eration
(
Fi
g
. 1
)
Wired control unit operation (Fig. 4)
Adjusting method

Leinwand, elektrisch
Gebrauchsanweisung
Siehe Informationen auf der Verpackung und auf dem Leinwandgehäuse.
Spannung: 100 V ~ 120 V, 60 Hz
oder 220 V ~ 240 V, 50 Hz
Leistungsabnahme: 210 W (maximal)
(Abb. Leitungen – von oben:)
Braun – unter Spannung (Einrollen)
Schwarz – unter Spannung (Ausrollen)
Blau – neutral
Gelb-grün – Erdung
Die Leinwand kann an der Wand oder unter der Decke angebracht werden.
Die Installationsart hängt von individuellen Wünschen des Benutzers ab. In
jedem Fall muss jedoch sichergestellt werden, dass angemessenes
Zubehör verwendet wird.
Zur Wand- oder Deckenmontage auf einer Holzoberfläche Schrauben ø5 x
60 mm verwenden.
Um die Leinwand an einer Ziegel-, Beton- oder Gipswand anzubringen,
Schrauben ø6 x 60 mm und für die jeweilige Wandart entsprechende Dübel
verwenden.
Deckenmontage:
Bei Bedarf zunächst an den Gehäuseenden Hakenösen anbringen.
Den Abstand zwischen den Ösen an den Gehäuseenden messen. In die
Decke im selben Abstand Löcher für Haken bohren und dabei zunächst
sichergehen, ob die Line, die sie verbindet parallel zur Wand verläuft.
In die gebohrten Löcher entsprechend große Haken eindrehen und daran
die Leinwand an den an ihr befindlichen Ösen aufhängen.
Art der Deckenmontage
Die Leinwand so installieren, dass sie bei vollständigem Ausgerollt-Sein
von jedem Zuschauer komplett gesehen werden kann.
Wandmontage:
Den Abstand zwischen den Öffnungen der Beschläge zur Wandmontage
messen und anschließend auf der Wand Punkte in diesem Abstand markieren.
Dort Löcher für die Schrauben bohren und besonders darauf achten, dass die,
sie verbindende Linie, horizontal verläuft. In jedes der Löcher eine entsprechende
Schraube drehen und die Leinwand an den Löchern aufhängen, die sich in den
Beschlägen an den Enden des Gehäuses befinden. Mit Hilfe eines Lineals
überprüfen, ob die Leinwand gleichmäßig von der Wand entfernt ist.
Art der Wandmontage
Das Netzkabel an die Steckdose anschließen (zunächst überprüfen, ob die
richtige Spannung vorliegt). Das Netzkabel so legen, dass niemand darüber
stolpern oder daran ziehen kann, weit weg von heißen Gegenständen und
Flächen. Bei Benutzung eines Verlängerungskabels sollte dies die
zugelassene Spannung bezüglich die gleichen Parameter besitzen.
Ausrollen der Leinwand (Abb. 2)
Den Schalter in Stellung < => schalten. Die Projektionsfläche rollt sich aus
und der Motor schaltet sich automatisch ab, wenn sie komplett ausgerollt ist
Einrollen der Leinwand (Abb. 3)
Den Schalter in Stellung < ->. schalten. Die Projektionsfläche wird eingerollt
und der Motor schaltet sich automatisch ab, wenn sie komplett eingerollt ist.
Zum manuellen Anhalten des Ein-/Ausrollens der Leinwand,
den Schalter auf < O >.stellen.
Ausrollen der Leinwand
Den unteren Knopf der Fernbedienung drücken. Die Projektionsfläche rollt
sich aus und der Motor schaltet sich automatisch ab, wenn sie komplett
ausgerollt ist.
Einrollen der Leinwand
Den oberen Knopf der Fernbedienung drücken. Die Projektionsfläche wird
eingerollt und der Motor schaltet sich automatisch ab, wenn sie komplett
eingerollt ist.
Zum manuellen Anhalten des
Ein-/Ausrollens den mittleren Knopf der
Fernbedienung drücken.
Obere Begrenzung — Erlaubt die Regulierung der Lage der
unteren Leinwand-Leiste bei ihrem vollständigen
Eingerollt-Sein. Wenn beim Einrollen die untere Leiste dichter
an dem Gehäuse anhalten soll, den Drehschalter „Upper
Limit“ entgegen dem Uhrzeigersinn drehen.
Untere Begrenzung — Erlaubt die Regulierung der Lage der
unteren Leinwand-Leiste bei ihrem vollständigen
Ausgerollt-Sein. Wenn beim Ausrollen die untere Leiste weiter
unten anhalten soll, den Drehschalter „Lower Limit“ entgegen
dem Uhrzeigersinn drehen.
Technische Angaben des elektrischen Aufbaus
Installation
Benutzung der Leinwand
Steuerung mit der Fernbedienung (Abb. 4)
Steuerun
g
mit der Kabelfernbedienun
g
(
Abb. 1
)
Regulierung
Abb. 1 Abb. 2 Abb. 3
Abb. 4

Écran électrique
Mode d'emploi
Il est nécessaire de prendre connaissance des informations
sur l'emballage et le boîtier de l'écran.
Tension :100 V ~ 120 V, 60 Hz
ou 220 V ~ 240 V, 50 Hz
Consommation : 210 W (maximum)
Dessin des câbles, partant du haut :
Brun : sous tension (enroulement)
Noir : sous tension (déroulement)
Bleu : neutre
Jaune-vert : mise à la terre
L'écran peut être suspendu au mur ou au plafond. Le type d'installation
dépend des besoins personnels de l'utilisateur. Dans tous les cas il faut
s'assurer que les accessoires utilisés sont appropriés.
Pour le montage mural ou au plafond sur une surface en bois, utiliser des
vis ø5 x 60 mm.
Afin d'installer l'écran sur un mur en brique, en béton ou en plâtre, utiliser
des vis ø6 x 60 mm et des ancres ou des chevilles en plastique
appropriés au type de mur.
Montage au plafond :
(En cas de nécessité, installer d'abord les anneaux d'attache de chaque
côté du boîtier)
Mesurer la distance entre les attaches aux extrémités du boîtier de l'écran.
Percer dans le plafond des ouvertures pour les crochets à la même distance en
s'assurant d'abord que la ligne qui les relie est parallèle au mur.
Visser des crochets de taille appropriée dans chaque ouverture percée et y
suspendre l'écran par les attaches se trouvant à ses extrémités.
Mode de montage au plafond
L'écran doit être installé de manière qu'après son déroulement complet
chaque spectateur puisse le voir en entier.
Montage mural :
Mesurer la distance entre les ouvertures des ferrements pour le montage
mural, ensuite marquer sur le mur des points éloignés de cette distance. Y
percer les trous pour les vis en s'assurant que la ligne qui les relie est bien
horizontale. Visser une vis appropriée dans chaque trou et suspendre
l'écran à l'aide des ouvertures qui se trouvent dans les ferrements aux
extrémités de son boîtier. Vérifier à l'aide d'une règle si l'écran est
uniformément éloigné du mur.
Mode du montage mural
Brancher le câble d'alimentation à une prise (s'assurer d'abord si la tension
dans la prise est appropriée). Placer le câble d'alimentation de manière que
personne ne puisse trébucher ou le tirer, loin des objets et des surfaces
chauds. S'il est nécessaire d'utiliser une rallonge, elle doit avoir les mêmes
paramètres concernant l'intensité de courant admise.
Déroulement de l'écran (Dessin 2)
Mettre l'interrupteur sur la position < =>. La feuille de projection va se
dérouler et lorsqu'elle est complètement sortie du boîtier, le moteur de l'écran
s'arrête automatiquement.
Enroulement de l'écran (Dessin 3)
Mettre l'interrupteur sur la position <->. La feuille de projection va
s'enrouler et lorsqu'elle disparait complètement dans le boîtier, le moteur de
l'écran s'arrête automatiquement.
Pour arrêter manuellement l'enroulement/déroulement
de la feuille de l'écran, mettre l'interrupteur sur la position < O >.
7
Déroulement de l'écran
Appuyer sur le bouton inférieur de la télécommande. La feuille de l'écran se
déroule et lorsqu'elle est complètement sortie du boitier, le moteur s'arrête
automatiquement.
Enroulement de l'écran
Appuyer sur le bouton supérieur de la télécommande. La feuille de l'écran s'enroule
et lorsqu'elle disparait complètement dans le boîtier,
le moteur s'arrête automatiquement.
Pour arrêter manuellement le
déroulement de l'écran en position
partiellement déroulée, appuyer sur le bouton
du milieu de télécommande.
Limiteur supérieur — Il permet de régler le point d'arrêt de
la latte inférieure de l'écran lors de son enroulement total. Si
lors de l'enroulement de l'écran, sa latte inférieure doit
s'arrêter plus près du boîtier, tourner la manette „Upper Limit”
en sens inverse horaire.
Limiteur inférieur— Il permet de régler le point d'arrêt de la
latte inférieure de l'écran lors de son déroulement total. Si
lors du déroulement de l'écran sa latte inférieure doit s'arrêter
plus bas, tourner la manette „Lower Limit” en sens inverse
horaire.
Données techni
q
ues du s
y
stème électri
q
ue
Installation
Utilisation de l'écran
Utilisation à l'aide d'une télécommande sans fil
(Dessin 4)
Utilisation à l'aide d'une télécommande (Dessin 1)
Ré
g
la
g
e
Des. 1 Des. 2 Des. 3
Des. 4
A V T E K
http://www.avtek.eu
Table of contents
Languages:
Other Avtek Projection Screen manuals
Popular Projection Screen manuals by other brands

Elite Screens
Elite Screens Starling Tab-Tension Series user guide

Grandview
Grandview PT-L Series instruction manual

VASTEX
VASTEX C-100 Assembly, operating, and maintenance instructions

Elite Screens
Elite Screens YardMaster Manual Series user guide

displayit
displayit Elements Assembly instructions

EPV
EPV PowerMax Tension Series user guide