manuals.online logo
Brands
  1. Home
  2. •
  3. Brands
  4. •
  5. Grandview
  6. •
  7. Projection Screen
  8. •
  9. Grandview LF-Mxx User manual

Grandview LF-Mxx User manual

GRANDVIEW REPRODUCING GENUINE COLORS
Model LF-Mxx
GRANDVIEW REPRODUCING GENUINE COLORSGRANDVIEW REPRODUCING GENUINE COLORS
Thank you for purchasing a Grandview projection screen.
Before use, please read instructions carefully. After installation, store instructions for future reference.
Instruction Manual for
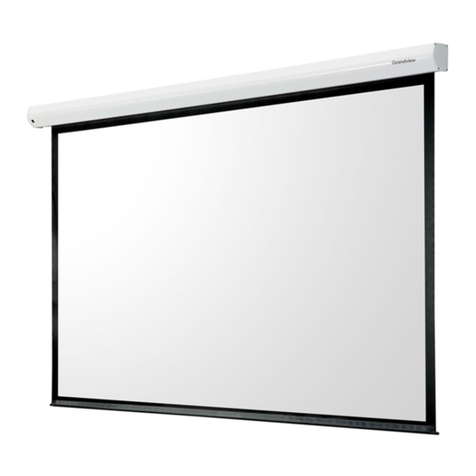
Large-Flat Series Tab-Tension Cinema Screen
ISO9001:2000
International Certification
Grandview Crystal Screen Canada Ltd.
#11- 3751 North Fraser Way,
Marine Way Business Centre,
Burnaby, BC, Canada V5J 5G4
Tel: 1-604-412-9777 Fax: 1-604-412-9796
Website: www.grandviewscreen.ca
Guangzhou Grandview Crystal Screen Co., Ltd.
P.O. 511400 Federal Ind. Zone No. 363, Yushan West Road,
Shiqiao, Panyu District, Guangzhou, Guangdong, China
Tel: +8620-8489-9499 Fax: +8620-8480-3343
Website: www.grandviewscreen.com
1
230V/120V/100V 50Hz/60Hz 90W/80W
230V/120V/100V 50Hz/60Hz 160W/156W
String
Screen Fabric
Rod
Description
Optional
Instruction Manual(1pc)
C2 Mounting Bracketfor screen sizes
larger than 150" (2pcs)
C1 Mounting Bracketfor screen
sizes up to 150"(2pcs)
10 x 30 mmscrew and anchor (4pcs)
5 (1pc)Allen Key
Voltage VFrequency Hz Watts WApplication
Large-Flat Motorized Screen Power Specifications
Applies up to 150" Large-Flat
motorized screen
Applies to 180" and up Large-Flat
motorized screen
Metal Casing
Accessories
End Cap
The ceiling or wall for fixture installation must be secure to prevent the screens from falling.
While installing electrical motors, please hire professionals or your local dealer to ensure safety. A
misconnection may lead to fire or leaks.
Keep all infrared wireless products away from fluorescent lighting as it may cause malfunctions.
Please read the following as any damage to the screen surface will affect the quality of the picture:
1.Avoid contact or touching the screen surface as it may cause scratches or tears.
2.Do not write or draw on the surface
3.Clean the screen with a soft cloth and luke warm water. Do not use any detergent or cleaning products.
Roll up the screen after every use. Ensure that the screen is level when installing; do not pull on the sides
or fold the screen.
To prevent unnecessary damage, the operating and maintenance of the screen should be done by adults.
used
Ignoring the safety warnings may
lead to injuries and/or damaging
the product.
Refrain from hanging anything on the
screen as it may cause the screen to
fall.
Do not connect any electrical
attachments or remote controls.
Fixtures should be installed in asecure
place to avoid accidents or thescreen
falling.
Roll up the screen after every use.
Leaving it hanging for a long period
of time may cause the fabricto loosen.
Please contact your local dealer for
repair s or maintenance. Please contact
our company if you have any further
questions. Avoid taking apart the
fixtures yourself. Loose parts may
cause the screen to fall.
Warnings
Do not take apart and replace with unknown parts. If there are any problems, please contact your local dealer.
Product specifications are subject to change.
6
5 x 40mm Tapping screw & cap ( 8sets )
2
5
Installation
Installation Without Brackets
AA
AA
2
3
45
This projection screen should be installed at the best possible viewing position for the audience.Take out
all the parts from the packaging and follow the accessories guideline to ensure you have all parts. The
parts needed will vary depending on which installation you choose touse. For installation on a wood wall
or ceiling, use the 5 x 40 screws. For installation on a drywall, use the 10 x 30 screws with anchors.
Wall Mount
Using a tape measure, measure the distance between the two keyholes on the casing ( Figure 1 ). According
to the measurement, drill identical holes of the appropriate size ( use a smaller drill bit than the actual screws)
on the wall and ensure that it is level ( Figure 2 and 3 ). Screw in the appropriate screws, either the 5 x 40 for
wood walls or the 10 x 30 plus anchors for drywalls, leaving enough space at the end to hang the casing
( Figure 4 ). To ensure that the screen is level, use a leveler to check ( Figure 5 ).
Ceiling Mount
Measure the distance between the two rings for hanging on the casing ( Figure 1 ). According to the measurement,
drill identical holes of the appropriate size (use a smaller drill bit than the actual hook screws) on the ceiling and
ensure that it is level ( Figure 2 and 3 ). Screw in the hook screws (not provided), and lift the screen into the hooks
screws to hang ( Figure 4 ). To ensure that the screen is level, use a leveler to check ( Figure 5 ).
A
A
2
3
45
How to adjust tension situation of the string
If the string is loose which is caused by bump on transportation or faulty operation ( Figure 1 ), please rotate
the String Adjustment Knob clockwisely to make string tensional ( Figure 2 ). If the string is over-tensional,
please press the String Releasing Button and then rotate the String Adjustment Knob counter-clockwisely to
suitable tensional situation ( Figure 3 ).
String Adjustment Knob
String Releasing
Button
Figure 1 Figure 2 Figure 3
34
Instructions
To ensure extra durability and safety installation brackets have been included. The necessity of brackets
will vary depending on the location of installation. For installations of sizes up to 150", use the C1 bracket.
For installations of over 150", use C2.
Installation With Brackets
Installation For Sizes Up to 150"
The screen can be installed either on the wall or with a hidden installation. The wall installation uses 2 holes
on the C1 brackets while the hidden installation uses all 3. Measure the distance between the holes that will
be used on the left and right brackets. Using the measured distance, drill the appropriate holes in the wall
(and ceiling if necessary). Install the brackets, then lift and match up the screen's end caps to the brackets.
Insert the two screws to join the bracket and screen casing for both sides.
Installation For Sizes Over 150"
Using the C2 brackets, the screen can installed from theceiling. Measure the distance between the holes
on the left and right brackets. Using the measured distance,drill the appropriate holes in the ceiling. Install
the brackets, then lift and match up the screen's endcaps to the brackets. Insert the screws to join the
bracket and screen casing for both sides.
With mounting bracket installation( )Optional
Hidden installation
(Suitable for all sizes)
150 inches and under hidden
wall mount installation
150 inches and up installation
Hanger
Without mounting bracketinstallation
Wall m ount (Suitable for all sizes) Ceiling mount (Suitable for all sizes)
2. Automatic remote control(Please see section on Remote Control).
Picture 1 Picture 2 Picture 3
Drop Limit
Retraction Limit
Grandview projection screensare controlled by a manual switch or an automatic remote control.
1. Manual switch control
a. T
b. Connect to a power source (Please make sure it is the right voltage)
c. ; it will come down slowly. When it is all the way down, it
will stop automatically.
d. Turn the switch to 1 to the screen; it will go up into the metal casing. When it is all the way up, it
will stop automatically.
e. To stop any time while the screen is in motion, turn the switch to 0.
ear off the glue cloth fixed on the bottom rod,ensure the bottom rod is not stuck by the casing.
Turn the switch to position 2 to lower the screen
position lower
Attention:
> Please make sure there isno dust or dirt on the fabric surface before rolling it back to the casing
> The recommened working time is less than 50 seconds. The motor will enter overheating protection
status and stop working for everycontinuous 4 minuters operation, user would need to wait for a while
until the motor cool down beforeoperating again.
> There is no lube needed for the motor. Please be noticed that the appropriate setting is optimized which
requires no further adjustment, please consultthe after sales team before adjusting the limits.
This manual suits for next models

2

Other Grandview Projection Screen manuals

Grandview HideAway HH3 User manual

Grandview

Grandview HideAway HH3 User manual

Grandview CB-Sxx User manual

Grandview

Grandview CB-Sxx User manual

Grandview EL-Pxx User manual

Grandview

Grandview EL-Pxx User manual

Grandview Fast Fold User manual

Grandview

Grandview Fast Fold User manual

Grandview Sky-Show User manual

Grandview

Grandview Sky-Show User manual

Grandview EDGE R3 PE-L Series Instruction Manual

Grandview

Grandview EDGE R3 PE-L Series Instruction Manual

Grandview CB-UY92 User manual

Grandview

Grandview CB-UY92 User manual

Grandview Tripod User manual

Grandview

Grandview Tripod User manual

Grandview GRIP084V User manual

Grandview

Grandview GRIP084V User manual

Grandview LF-VMF-77 User manual

Grandview

Grandview LF-VMF-77 User manual

Grandview Dynamique R3 User manual

Grandview

Grandview Dynamique R3 User manual

Grandview Liberty Flash Series User manual

Grandview

Grandview Liberty Flash Series User manual

Grandview GRUC070V User manual

Grandview

Grandview GRUC070V User manual

Grandview Motorised Rising Screen User manual

Grandview

Grandview Motorised Rising Screen User manual

Grandview Legacy Series User manual

Grandview

Grandview Legacy Series User manual

Grandview FC-FHMF Series User manual

Grandview

Grandview FC-FHMF Series User manual

Grandview Smart Screen User manual

Grandview

Grandview Smart Screen User manual

Grandview CB-Pxx User manual

Grandview

Grandview CB-Pxx User manual

Grandview Cyber Series CB-MIxx User manual

Grandview

Grandview Cyber Series CB-MIxx User manual

Grandview Portable X-Press Series User manual

Grandview

Grandview Portable X-Press Series User manual

Grandview Pull Up Portable Screen User manual

Grandview

Grandview Pull Up Portable Screen User manual

Grandview Dynamique R3 User manual

Grandview

Grandview Dynamique R3 User manual

Grandview Elegant EL-M Series User manual

Grandview

Grandview Elegant EL-M Series User manual

Grandview CB-UMxx Series User manual

Grandview

Grandview CB-UMxx Series User manual

Popular Projection Screen manuals by other brands

Severtson Pro Frame X Series instruction manual

Severtson

Severtson Pro Frame X Series instruction manual

Steelcase Activity Projection Screen Assembly

Steelcase

Steelcase Activity Projection Screen Assembly

EluneVision EV-S-1.0 user guide

EluneVision

EluneVision EV-S-1.0 user guide

Screen Int MAJOR PRO-C manual

Screen Int

Screen Int MAJOR PRO-C manual

Da-Lite DUAL MASKING ELECTROL Instruction book

Da-Lite

Da-Lite DUAL MASKING ELECTROL Instruction book

Draper Access XL Installation & operating instructions

Draper

Draper Access XL Installation & operating instructions

NoFlyStore Gold.05 installation instructions

NoFlyStore

NoFlyStore Gold.05 installation instructions

Da-Lite Viewshare tensioned Advantage Electrol Instruction book

Da-Lite

Da-Lite Viewshare tensioned Advantage Electrol Instruction book

Elite Screens Yard Master 2 Series user guide

Elite Screens

Elite Screens Yard Master 2 Series user guide

SCREENLINE COPERNICO BIFORMAT instructions

SCREENLINE

SCREENLINE COPERNICO BIFORMAT instructions

Da-Lite UTB Contour Instruction book

Da-Lite

Da-Lite UTB Contour Instruction book

SGM LS-6.67 manual

SGM

SGM LS-6.67 manual

Elite Screens EVANESCE TAB-TENSION Series Replacement instructions

Elite Screens

Elite Screens EVANESCE TAB-TENSION Series Replacement instructions

Jason.L Flyby Echo Assembly instructions

Jason.L

Jason.L Flyby Echo Assembly instructions

AVstumpfl DECOFRAME manual

AVstumpfl

AVstumpfl DECOFRAME manual

EliteProAV TensionPro TP200 XHW2 user guide

EliteProAV

EliteProAV TensionPro TP200 XHW2 user guide

Klip Xtreme KPS-30 Series user guide

Klip Xtreme

Klip Xtreme KPS-30 Series user guide

Stewart Filmscreen Luxus ScreenWall Series owner's manual

Stewart Filmscreen

Stewart Filmscreen Luxus ScreenWall Series owner's manual

manuals.online logo
manuals.online logoBrands
  • About & Mission
  • Contact us
  • Privacy Policy
  • Terms and Conditions

Copyright 2025 Manuals.Online. All Rights Reserved.