8
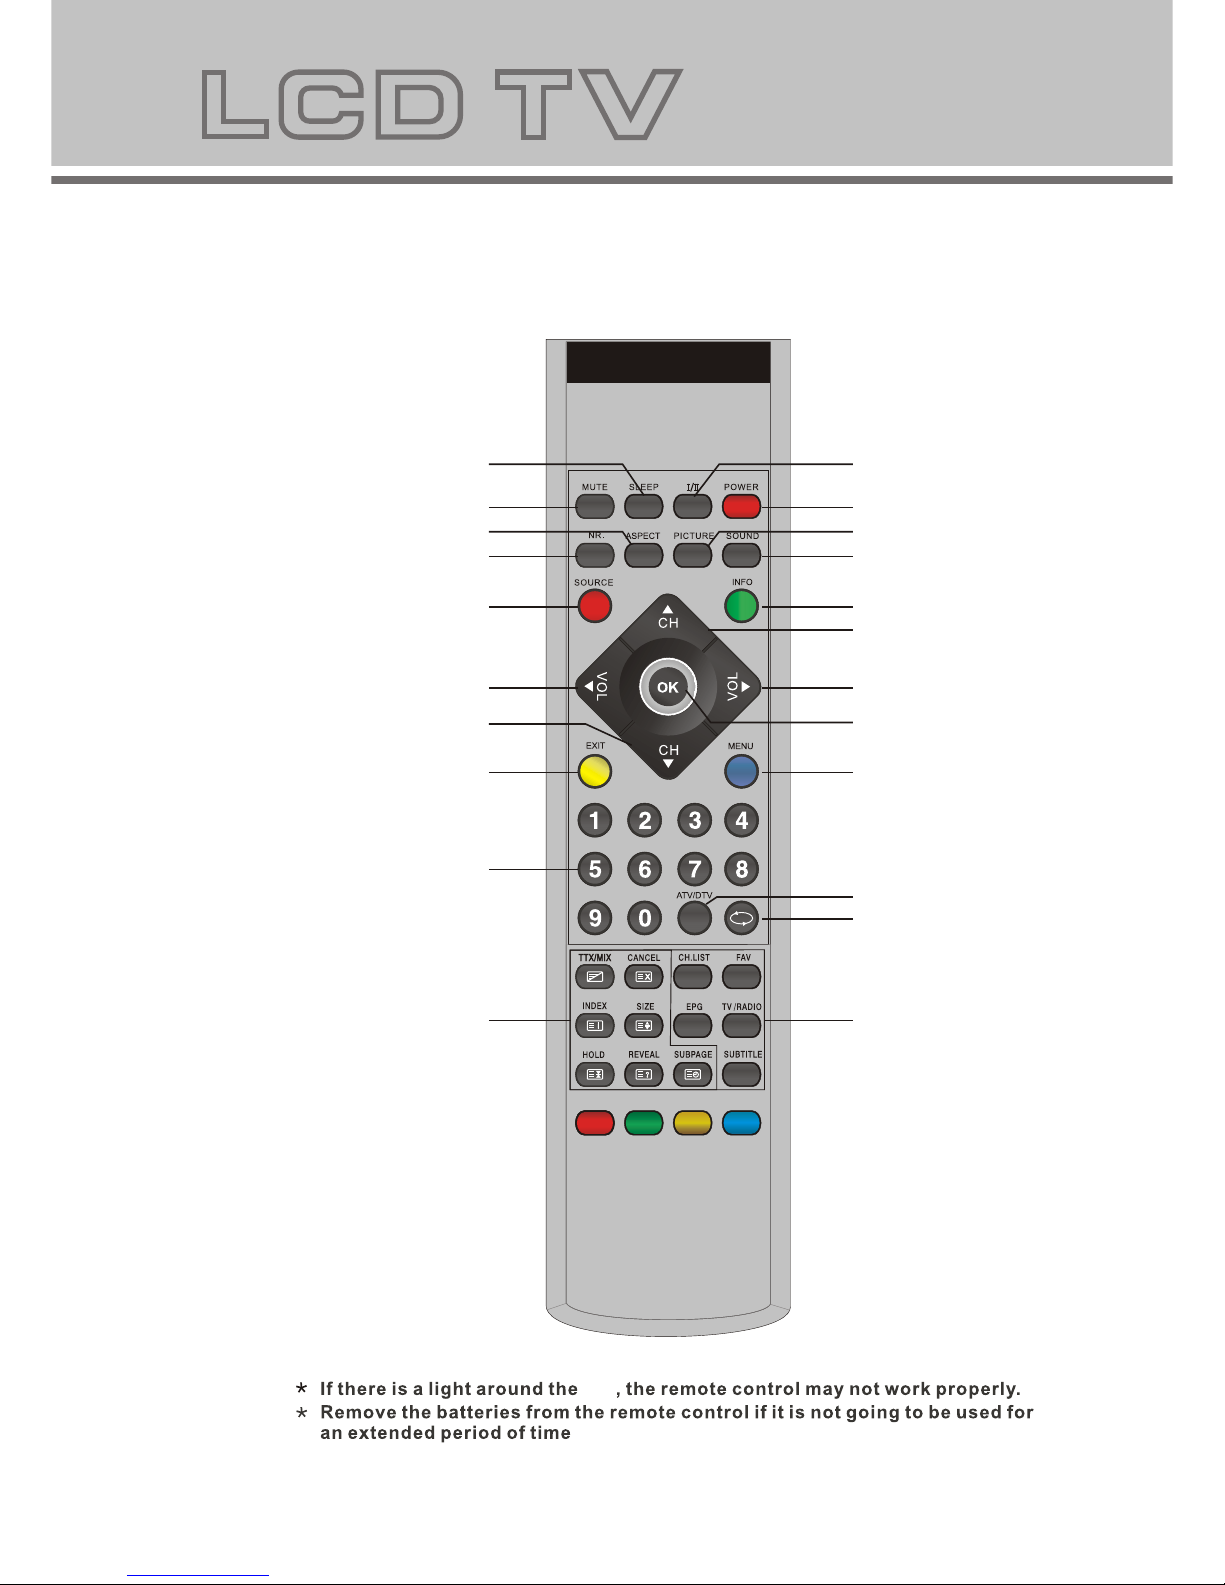
Remote control functions
9
Connecting to antenna or radio network
Cable TV network
Or
The rear of TV
RF(75 )
TV
TV
TV
TV
TV
TV
POWER: Power on/off button; press once to turn the TV on and press again to turn the TV off.
:Press the button to choose a different audio function.
SLEEP: Scheduled power off time button, which allows the customer to set the TV power off time according to the
preset times displayed.
MUTE: Mute button, press once to disable the speaker and press again to enable the speaker.
Noise reduction (NR.): Picture noise reduction button, which allows the customer to select different 3D noise
reduction mode.
ASPECT: Picture size scale button, which allows the customer to scale the picture between different sizes.
PICTURE: Picture mode button of TV, which allows customer to select different picture modes.
SOUND: Sound mode button of TV, which allows customer to select different sound modes.
INFO: Display the information of current source.
SOURCE: Signal source selection button, which allows the user to select the signal source input
(DTV/TV/AV1/AV2/S-VIDEO/YPBPR/PC/HDMI1/HDMI2).
MENU: Press to display the OSD menu or return up menu.
EXIT: To return to the screen.
Volume (VOL) +/-: Volume up and down button, which allows the customer to increase or decrease the volume.
Channel(CH) +/-: Channel up and down button, which allows the customer to increase or decrease the channel.
OK: To confirm the choice with the highlighted menu item. To display the channel list in the no-menu state.
0,1~9: TV channel selection button, which allows the customer to select the channel.
ATV/DTV: Switch button which allows the user to switch ATV/DTV.
:Channel revert button of TV, which allows the customer to watch the last TV channel.
CH.LIST: Which allows to list all program.
FAV: Press the FAV to start the "Favourite List" for select your favourite program.
EPG: To show the Electronic Program Guide.
TV/RADIO: Switch between the TV service and Radio.
SUBTITLE: Press the Subtitle to enable/disable subtitle.
TTX/MIX: press TTX/MIX to enter teletext state and display teletext page.If want to display image and teletext
page at the same time, press this button again. If want to exit teletext state, press this button again. When
teletext pageis displayed on the screen, you can select relevant function by using the remote control.
SUBPAGE: is refer to the subpage of teletext page, i.e. subcode page. When it is pressed, the screen display the
requirement of subpage code entry. If there is no subpage, it will not be displayed. In most case, there is no
subpage.
HOLD: press it once to keep the display of the page, and press it again to exit hold state.
CANCEL: do not display the content of the page, but only the channel image. Press it again to display the content
of the page again. or button on the remote control can be used to display the content of previous or next
page.Number buttons on the remote control can be used to get to a certain page. Press the red, green, blue and
yellow button on the remote control, the page of relevant color displayed on the lower part of the screen will be
displayed.
SIZE: press it once to enlarge the content on the upper part of the page, and press it the second time to enlarge
the content on the lower part of the page, and the third time to resume normal display of all the contents on the
page.
REVEAL: press it once to display the hide text, press it again to close the display of hide text.
INDEX: press it once to display the index for all the teletext page.
FAST TEXT (For possible future reference):The RED, GREEN, YELLOW & CYAN buttons are used for quick
access to color coded pages transmitted by FAST TEXT broadcast.
Example: RED selects CITY INFORMATION, CYAN selects TRAVEL INFORMATION, GREEN selects WEATHER
INFORMATION, YELLOW selects TV PROGRAMING.
Teletext operation