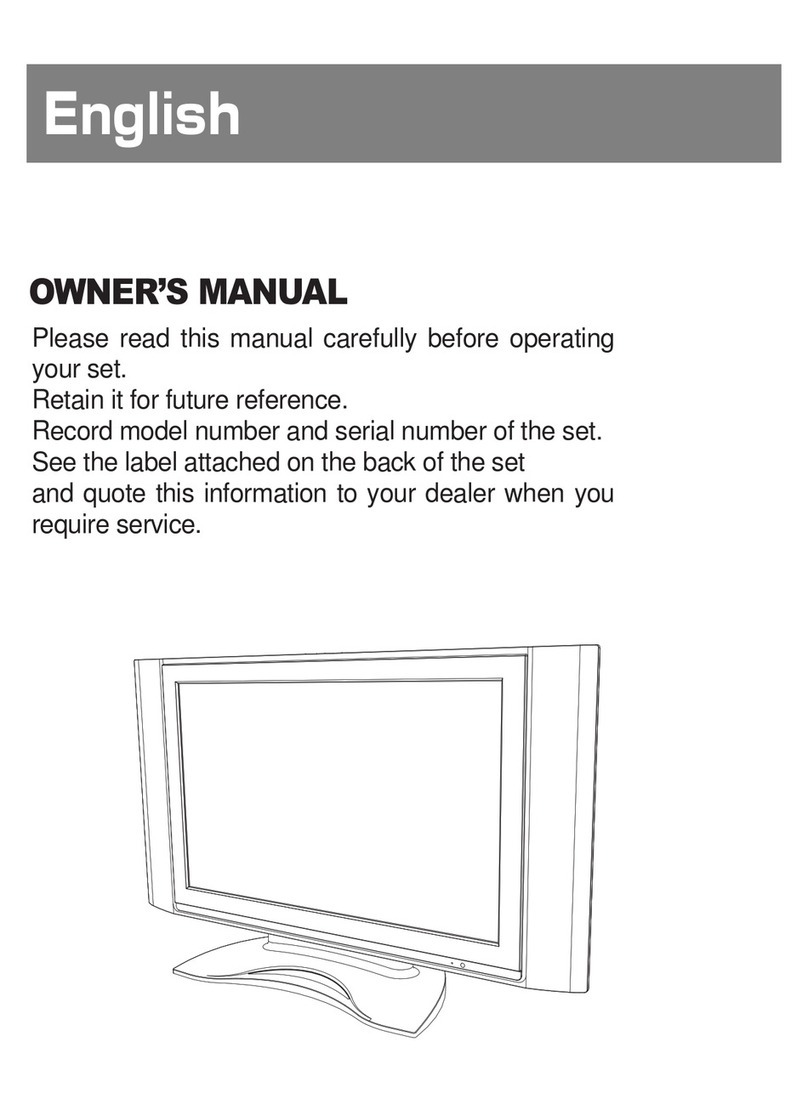
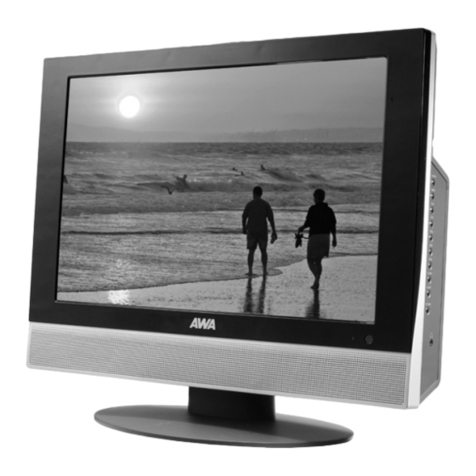
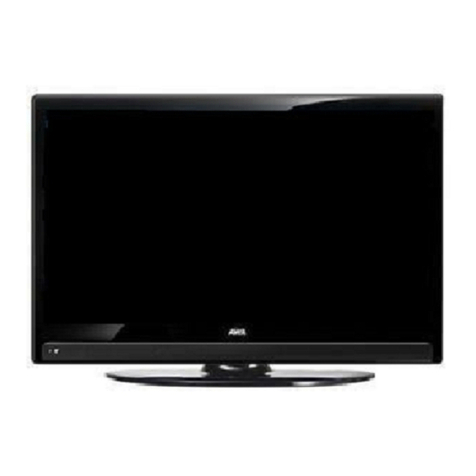
AWA TFTD94G User manual


Please read this manual carefully before operating
your set.
Retain it for future reference.
Record model number and serial number of the set.
See the label attached on the back of the set
and quote this information to your dealer when you
require service.
OWNERÕS MANUAL
TFTD94G


Table of Contents
Important Safety instructions
First step
Safety instructions
LCD TV Overview
Local Key Controls
Connection Panel Overview
Remote Control Key Functions
Using the remote control
Accesories
Equipment Connections and Setup
VCR Setup
DTV Setup
DVD Setup
PC Setup
DVI Setup
Basic Features Setup and Operation
Turning on the TV
Checking features
Setting Sleep Timer
Picture & Sound
Auto picture control
Adjusting picture appearance
Auto Sound Control
Adjusting Sound: Balance
Setting up TV stations
Auto programme tuning
Manual programme tuning
Programme edit
CANAL+ SET-TOP Box use only
Teletext
Teletext
Special teletext functions
Selecting CLOCK for the menus
Special Features
Selecting language for the menus
Selecting COLOR TEMP. for the menus
Selecting PC CONTROL for the menus
Setting picture format
Picture In Picture(PIP) function
Twin picture function
Multi PIP
Others
Troubleshooting check list
Specification
4
5
10
10
11
12
13
14
15
16
16
17
19
19
20
21
21
22
22
23
24
26
28
29
30
30
31
32
32
33
33
34
35
36
37

1) Read all of these instructions.
2) Save these instructions for later use.
3) Follow all warnings and instructions marked on the product.
4) Follow all instructions.
5) Do not use the TV near water.
6) Clean only with dry cloth.
7) Do not block any ventilation openings. Install in accordance with the manufacturer’s instructions.
8) Do not install near any heat sources such as radiators. heat registers, stoves, or other apparatus
(including amplifiers) that produce heat.
9) Do not defeat the safety purpose of the polarized or grounding-type plug. A polarized plug has two blades
with one wider than the other. A grounding type plug has two blades and a third grounding prong.
The wide blade or the third prong are provided for your safely. If the provided plug does not fit into your
outlet. Consult an electrician for replacement of the obsolete outlet.
10) Protect the power cord from being walked on or pinched particularly at plugs, convenience receptacles,
and the point where they exit from the apparatus.
11) Only use attachments/accessories specified by the manufacturer.
12) Do not place the TV on an unstable cart, stand or table. The TV may fall, causing
serious damage to the TV.
13) Unplug this apparatus during lightning storms or when unused for long periods of time.
14) Refer all servicing to qualified service personnel. Servicing is required when the
apparatus has been damaged in any way, such as power-supply cord or plug is damaged, liquid has been
moisture, does not operate normally, or has been dropped.
15) The apparatus shall not be exposed to dripping or splashing and that no objects filled with liquids, such as
vases, shall be placed on the apparatus.
Important Safety Instruction
OWNERÕS MANUAL
Explanation of Safety Related Symbols
Shock Hazard Marking and Associated Graphical Symbols
WARNING : To Reduce The risk of fire or electric shock, do not expose this the TV to rain or moisture.
WARNING : To Reduce The risk of fire or electric shock, do not
expose this the TV to rain or moisture.
CAUTION
RISK OF ELECTRIC SHOCK DO NOT OPEN
CAUTION
RISK OF ELECTRIC SHOCK DO NOT OPEN
This symbol is intended to alert the user to the presence of uninsulated Òdangerous voltageÓ
within the productÕs enclosure that may be of sufficient magnitude to constitute a risk of
electric shock to persons.
This symbol is intended to alert the user to the presence of important operating and
maintenance(servicing) instructions in the literature accompanying the appliance.
CAUTION : TO REDUCE THE RISK OF ELECTRIC SHOCK,
DO NOT REMOVE COVER (OR BACK). NO USER-
SERVICEABLE PARTS INSIDE. REFER SERVICING
TO QUALIFIED SERVICE PERSONNEL.
OWNERÕS MANUAL
Safety Instructions
NOTES
Do not place the TV where it
might be exposed to dust.
¥ This may cause a fire hazard !
When unpacking or moving the
TV two people will be necessary
to lift it safely.
NOTES
Do not cover the ventilation of the
TV.
¥ This may cause a fire hazard !
Ensure good ventilation around the TV.
The distance between the TV and the
wall should be more than 10cm.
¥ It makes internal temperature
increaseand causes a fire.
Indoor Installation
The violation of this instruction may cause light injuries or
damage of the product.
¥ Take care of danger that may happen under specific condition.
The violation of this instruction may cause
serious injuries and even death.
Disconnect from the main and
remove all connections before
moving.
Only use the TV on a level and stable
surface.
¥ It may fall down or be upset.
* Safety instructions have two kinds of information as illustrated below.
When installing the monitor on a table, be careful
not to place it near the edge.
¥ This may cause the monitor to fall
causing serious injury to a child or adult
and serious damage to the monitor.
¥ Surely use a fitting table or rack.
Do not place the TV close to sources
of steam or oil such as a humidifier.
¥ This may cause a fire hazard
or an electric shock hazard !
WARNING
NOTES
NOTES
NOTES
Do not place the TV directly on a carpet, rug or place where ventilation is restricted.
¥ This would cause its internal temperature to increase and might cause a fire hazard !
NOTES
Do not place inflammable
materials beside the TV
¥ This may cause a fire
hazard !
Do not place the TV in direct sunlight or near heat
sources such as radiators, fires and
stove etc.
¥ This may cause a fire hazard !
WARNING NOTES

OWNERÕS MANUAL
Safety Instructions
WARNING
WARNING
Do not use the TV in a damp place such as a bathroom where
it is likely to get wet.
¥ This may cause a fire or an electric shock hazard !
In case of using a receiver (VCR,
Digital Set Top Box), do not place
an antenna in the vicinity of power
lines.
¥ This may cause an electric shock.
In case of using a receiver (VCR, Digital
Set Top Box), contact your service
center to construct an antenna because
it needs skilled man.
¥ This may cause an electric shock.
WARNING
Earth wire should be connected.
¥ If the earth wire is not connected,
there is possible a danger of
electric shock caused by the
current leakage.
¥ If grounding methods are not
possible, a separate circuit breaker should be
employed and installed by a qualified electrician.
¥ Do not connect ground to telephone wires, lightning
rods or gas pipe.
The main plug should be inserted fully into the
power outlet to avoid a fire hazard !
¥ This may cause a fire hazard !
Outdoor Installation
Power
In case of using a receiver (VCR, Digital Set Top Box), there should be enough
distance between an outside antenna and power lines to keep the former from touching
the latter even when the antenna falls.
¥ This may cause an electric shock hazard.
In case of using a receiver (VCR, Digital Set Top Box), Bend antenna
cable between inside and outside building to prevent rain from flowing in.
¥ This may cause water damaged inside the TV and could give an electric shock.
NOTES
NOTES

OWNERÕS MANUAL
Safety Instructions
Do not place
heavy objects on
the power cord
¥ This may cause a
fire or an electric
shock hazard !
Do not use
too many
plugs on the
main multi-
outlet.
¥ It may result in overheating of the
outlet and causes a fire hazard !
Never touch
the power plug
with a wet hand
¥ This may cause
an electric
shock hazard !
NOTES
Prevent dust collecting on the power plug pins or
outlet.
¥ This may cause a fire hazard !
Hold the plug firmly when unplugging. If you pull the cord
the cord may be damaged.
¥ This may cause a fire hazard !
Female End
3-prong
Power Cord
Male End
3-prong
Power Cord
(option)
Power Outlet
NOTES
WARNING
WARNING
Power
Using
Do not place anything containing liquid on top of the TV such as
flowerpot, cup, cosmetics or candle.
¥ This may cause a fire hazard !
Dispose of used batteries carefully
and safely.
¥ In the case of a battery being
swallowed by a child please
consult a doctor immediately.
If water is spilt into the monitor unplug
it from the main supply outlet
immediately and consult your Service
Agent.
¥ This may cause an electric shock
hazard !
Ensure the power cord does not
come into contact with sharp or hot
objects such as a heater.
¥ This may cause a fire or an electric
shock hazard !
Do not plug in when the power
cord or the plug is damaged or
the connecting part of the
power outlet is loose.
¥ This may cause a fire or an
electric shock hazard !
NOTES

OWNERÕS MANUAL
Safety Instructions
NOTES
NOTES
In case of impact shock or
damage to the monitor switch it
off and unplug it from the outlet
and contact your service center.
¥ This may cause a fire or an electric
shock hazard !
Do not allow any objects to fall
into the TV.
¥ This may cause an electric shock
hazard !
Do not drop the TV or allow impact shock.
¥ This may cause mechanical failure or injury !
WARNING
WARNING
In the event that an image does not appear on the screen please switch it
off and unplug it from the main supply and contact your Service Centre.
¥ This may cause a fire or an electric shock hazard !
WARNING
In the unlikely event of smoke or
a strange smell from the TV,
switch it off ,unplug it from the
wall outlet and contact your
dealer or service centre.
¥ This may cause a fire or an
electric shock hazard !
Do not use water while
cleaning the TV
¥ This may damage to the TV
or an electric shock hazard.
In the event of a lightning or
thunder storm unplug the TV and
aerial from the wall outlet.
¥ This will prevent damage to the
monitor and possible electric shock.
Do not attempt to service the TV
yourself.
Contact your dealer or service
center.
¥ This may cause damage to
the TV and could give an
electric shock as well as invalidating the
warranty !
Using
Cleaning
Others

OWNERÕS MANUAL
Safety Instructions
WARNING
NOTES
NOTES
Do not watch the TV while
driving or walking.
¥ This may cause an accident.
Do not place heavy objects on the
TV.
¥ This may cause serious injury to a
child or adult.
The distance between eyes
and the screen should be
about 1.5m.
¥ If not, eyes will
strain.
Unplug the TV from the wall outlet
when it is left
unattended and
unused for long
periods of time.
¥ Accumulated dust
may cause a fire or
an electric shock from
deterioration or electric leakage.
Only use the specified batteries.
¥ This make cause damaged the TV
or could give an electric shock.
Others

OWNERÕS MANUAL
Local Key Controls
Connection Panel Overview
1. DVI IN : Digital Video Interface.
2. RGB-DTV / PC INPUT : PC or DTV Video
Source Input.
3. PC AUDIO INPUT : Connect the audio cable
from the PC to the PC AUDIO IN of the set.
4. L. R : Audio(L / R) Input incase of S-VIDEO
or COMPONENT mode.
*SCART
*RCA
5. Y, Pb, Pr : Component video signal input.
6. S-VIDEO : Connect the output of the A/V
Source to the S-VIDEO input.
7. AV2 : Composite input of A/V Source.
8. AV1 : Composite input of A/V Source.
9. TUNER : RF ANTENNA INPUT.
10. A.C POWER : POWER CORD INPUT.
1. POWER button : switches TV set on or off.
2. MENU button : Displays a menu.
3. SELECT button : Selects the A/V source.
4. VOLUME( / ) : Adjusts the volume / Adjusts menu
settings.
5. PR( / ) :Selects a programme or menu item.

OWNERÕS MANUAL
Remote Control Key Functions
- When using the remote control aim it at the remote control sensor on the TV
1. POWER
Turns the TV on from standby or off to standby mode.
2. MUTE
Turns the sound on and off.
3. NUMBER
Selects programme numbers.
4. MENU
Displays a main menu.
5. TV/AV
Selects TV, AV1, AV2, S-VIDEO, COMPONENT, RGB-DTV,
RGB-PC, RGB-DVl mode.
6. SLEEP
Sets the sleep timer.
7. ENTER
Accepts your selection or displays the current mode.
8. VOL+/-
Adjusts the sound level./ Adjusts the menu settings.
9. PR +/-
Selects next programme or menu items.
10. APC
Recalls your prefered picture settings.
11. ASC
Recalls your prefered sound settings.
12. ARC
Selects a screen mode- 16:9, 4:3, ZOOM, panorama
13. REVIEW
Returns to the previously viewed programme.
14. PIP
Displays a PIP(Picture In Picture) screen.
15. MULTI PIP
Displays a still picture of TV signal on main screen.
16. MULTI MEDI
Selects component, RGB-DTV, RGB-PC, RGB-DVI.
17. MTS
Selects the language during dual language broadcast, selects the sound output.
18. PIP CH+/-
Selects a programme when RF signal is displayed in PIP mode.
19. SWAP
Switches a main picture for sub picture in PIP mode.
20. INPUT
Selects the AV source of sub picture in PIP mode.
21. SIZE
Selects the size of sub picture(Double Window or Small Window).
22. POSITION / UPDATE
Selects a position of PIP screen. / Displays the updated teletext page.
23. STILL / HOLD
In case of non PIP mode, Displays the still main picture.
In case of PIP mode, Displays the still sub picture.
/ Stops the automatic page change.
24. TEXT
Switchs to teletext.
25. MODE
Change LIST and FLOF.
26. MIX
Displays the teletext pages superimposed on the TV picture.
27. SUB PAGE
Selects sub page in teletext mode.
28. INDEX
Selects the index page.
29. REVEAL
Displays the concealed information.
1
2
4
7
10
12
5
8
11
6
9
13
3
14
15
16
17
18 20
23
26
25
19
21
22
24
27
28
29

OWNERÕS MANUAL
Installing batteries
¥ Open the battery compartment cover on the back of the
remote control and insert the batteries with correct
polarity, match Ò+Ó with Ò+Ó, and match Ò-Ó with Ò-Ó.
¥ Install two 1.5V ÒAAAÓ alkaline batteries.DonÕt mix used
batteries with new batteries.
Using the remote control
TV/AV select button on the remote control
Each press of this button changes the mode as shown below
MULTI MEDI select button on the remote control
Each press of this button changes the mode as belows.
Remote Control Key Functions
AV1
TV
RGB-DVI
AV2
RGB-PC
S-VIDEO
COMPONENT
RGB-DTV
COMPONENT
RGB-DVI
RGB-DTV
RGB-PC

OWNERÕS MANUAL
Using the remote control
Make sure these are no objects
between the remote control and
its sensor.
DonÕt place the remote control
near a heater or damp place.
Strong impact on the remote
control may cause operation
failure.
Signal from the remote control
may be disturbed by sun light or
other strong light. In this case,
turn the set to other direction.
Notes for using the remote control
Accesories
Option
Accesories

OWNERÕS MANUAL
¥ Connect an antenna or a coaxial Cable between the ANTENNA jack on the rear of the
TV and the ANTENNA OUT jack on the VCR.
¥ Connect the RCA Jack of the VCR to the RCA Jack1 or Jack2 of the set.
¥ Press the PLAY button on the VCR.
¥ When connecting the S-VIDEO VCR to the S-VIDEO socket, the picture quality will be
further improved.
¥ Connect the S-VIDEO socket of the VCR to the S-VIDEO socket of the set.
¥ Connect the audio cable from the S-VIDEO VCR to the AUDIO sockets of the set.
¥ Select the S-VIDEO by pressing the TV/AV button repeatedly.
¥ Press the PLAY button on the VCR. The VCR playback picture appears on the screen
¥ To avoid picture noise (interference), leave an adequate distance (20 inches or more)
between the VCR and TV.
VCR Setup
Tips
2Insert a video tape into the VCR and press the PLAY button on the VCR. See VCR
ownerÕs manual.
1Press TV/AV button on the remote control and select AV1 or AV2.
(When connecting with the S-Video, select the S-VIDEO.)
To watch VCR
Connection of external equipment
*SCART
*RCA

OWNERÕS MANUAL
DTV Setup(SET-TOP BOX)
- To watch digital broadcast programs, purchase/connect a digital SET-TOP BOX.
How to connect a DTV
¥ You can use either the Monitors COMPONENT
(DVD/DTV/INPUT) inputs or the single RGB-DTV/PC
INPUT for video connections, depending on your Set
Top Box connectors. Then, make the corresponding
Audio connections.
¥ DTV input is available to 480/576i, 480/576p, 720p,
1080i mode.
Connection of external equipment
2Tune to the digital SET-TOP BOX.
(Refer to the ownerÕs manual for the digital SET-TOP BOX.)
1Press TV/AV button on the remote control to select COMPONENT or RGB DTV.
To watch SET-TOP BOX

OWNERÕS MANUAL
DVD Setup
Component input jacks on the TV Y PBPR
Video output jacks of DVD player
Y Pb Pr
Y B-Y R-Y
Y Cb Cr
Y PBPR
How to connect a DVD (digital video disk player)
¥ Connect DVD video inputs to Y, Pb, Pr of COMPONENT (DVD/DTV INPUT) and audio inputs to Audio
jacks of AV INPUT.
¥ Component Input is available to 480/576i, 480/576p, 720p, 1080i mode.
How to use
¥ Press TV/AV button on the remote control of the TV to select COMPONENT. Use the DVD player
according to its ownerÕs manual.
¥ Turn on the DVD player, and insert a DVD.
¥ Component Input ports
Connect DVD player jacks to TV Component input jacks as indicated below.
PC Setup
- You can easily connect the LCD TV to your PC for outstanding image and sound.
Setup Instructions to Connect a PC to your TV
¥ To setup this TV in your PC window environment, select Normal, Standard or Default TV. This TV does
not support Plug and Play function
¥ The screen does not display when the resolution is over UXGA.
¥ Connect the signal cable from the TV Output port on the PC to the RGB1 (PC/DTV INPUT) port on the
TV.
¥ Connect the audio cable from the PC to the Audio ports of the TV.
¥ If your PC computer is equipped with a sound card, adjust the sound output on the PC.
¥ Select the display resolution of the PC to 1360 x 768 for the best picture. This TV resolution is 1360 x 768.

OWNERÕS MANUAL
PC Setup
¥ Avoid keeping a fixed image on the TV screen for a long period of time. The fixed image may become
permanently imprinted on the screen; use a screen saver when possible.
¥ Change the resolution of PC to displayable mode and connect to RGB1 Input (PC/DTV Input) jacks of the TV.
Tips
PC Setup
¥ First, turn on the PC computer and press the ON/OFF button on the TV to apply power to it. Second,
turn on the display by pressing the button on the TV or by pressing the POWER button on the TV
remote control.
¥ Use the TV/AV button on the remote control to select the RGB-PC input source.
¥ Set the resolution output of the PC to WXGA or under (1360 x 768, 60Hz).
DVI Setup(Under PC mode Only)
- You can easily connect the LCD TV to your PC for outstanding image and sound.
Setup Instructions to Connect a PC to your TV
¥ To setup this TV in your PC window environment, select Normal, Standard or Default TV. This TV does
not support Plug and Play function
¥ The screen does not display when the resolution is over UXGA.
¥ Connect the signal cable from the monitor Output port on the PC to the DVI-JN port on the Monitor.
¥ Connect the audio cable from the PC to the Audio ports of the TV.
¥If your PC computer is equipped with a sound card, adjust the sound output on the PC.
¥ Select the display resolution of the PC to 1360 x 768 for the best picture. This TV resolution is 1360 x 768.

OWNERÕS MANUAL
DVI Setup
TV Image Display Specifications (RGB-PC, RGB-DVI)
720*400
640*480
800*600
1024*768
1280*768
832*624
1360*768
Vertical
Frequency (Hz)
70
85
60
67
72
75
85
56
60
72
75
60
70
75
60
75
60
Resolution Tips
¥ Synchronization input form :
separate
¥ Dos mode may not work depending
on a video card if using a DVI cable.
DVI Setup(Under PC mode Only)
¥ Avoid keeping a fixed image on the TV screen for a long period of time. The fixed image may become
permanently imprinted on the screen; use a screen saver when possible.
¥ Change the resolution of PC to displayable mode and connect to DVI-D Input jacks of the TV.
Tips
PC Setup
¥ First, turn on the PC computer and press the ON/OFF button on the TV to apply power to it. Second,
turn on the display by pressing the button on the TV or by pressing the POWER button on the TV
remote control.
¥ Use the TV/AV button on the remote control to select the RGB-DVI input source.
¥ Set the resolution output of the PC to WXGA or under (1360 x 768, 60Hz).

OWNERÕS MANUAL
¥ Adjusting volume level
The volume(+) button increases the sound and the volume(-) button reduces the level of sound.
Turning on the TV just after installation
Turning on the TV (power cord is still connected)
- When using the remote control, aim it at the sensor on the TV.
Turning on the TV
Tips
1
2
Connect power cord correctly. At this moment, the TV is switched to Standby mode.
Press the POWER button on the TV or press the POWER Button or associated with TV
button on the remote control and then the TV will be turn on.
1If the TV is turned off with the remote control button or POWER ON/OFF button on the TV.
Press the POWER button on the TV or press the POWER button on the remote control and
then the TV will be turn on.
2Press the VOL+/- button.
¥ Each press will cycle through the menus shown below.
Checking features
- Use the remote control to make adjustments.
- Select VIDEO input source.
< Picture menu > < Sound menu >
< Tuning menu >< Etc menu > < Clock menu >
1Press the MENU button.
Table of contents
Other AWA LCD TV manuals

AWA
AWA MHDV4601-O3 User manual

AWA
AWA MSDV1911-O3-D0 User manual

AWA
AWA MSDV3203-F4 User manual

AWA
AWA MHDV3720-O3 User manual

AWA
AWA MSDV3268-05-D0 User manual

AWA
AWA JTM32K212A-TUser's Manu User manual

AWA
AWA MHDV3902Y-O3 User manual

AWA
AWA MSDV2203-F3-D0 User manual

AWA
AWA CL-40KDF10S User manual

AWA
AWA LTD-1920 User manual