axing EoC 10-01 User manual

Hersteller
AXING AG
Gewerbehaus Moskau
8262 Ramsen
EWR-Kontaktadresse
Bechler GmbH
Am Rebberg 44
78239 Rielasingen
Stand 2019-03-11
Technische Verbesserungen, Änderungen im Design, Druckfehler und Irrtümer
vorbehalten.
Hiermit erklärt die AXING AG, dass die gekennzeichneten Produkte den
geltetenden Richtlinien entsprechen. Sie finden die vollständige EU-
Konformitätserklärung zum Download indem Sie auf www.axing.com im
Suchfeld den Artikel eingeben.
WEEE Nr. DE26869279 | Elektrische und elektronische Komponenten nicht
mit dem Restmüll, sondern separat entsorgen.
Sicherheitshinweise:
NICHT in der Nähe von Wasser oder in feuchten Räumen, z. B. feuchten
Kellern oder in der Nähe von Schwimmbecken verwenden.
Das Gerät NICHT im Freien verwenden. Alle Verbindungen müssen sich
innerhalb eines Gebäudes befinden.
Gerät von Feuchtigkeit, Staub oder ätzenden Flüssigkeiten fernhalten.
Das Gerät NICHT während eines Gewitters installieren, verwenden oder
warten. Bei Gewitter besteht die Gefahr eines Stromschlags.
AUSSCHLIESSLICH geeignete Zubehörteile an das Gerät anschließen.
Sicher stellen, dass alle Kabel an den korrekten Port angeschlossen sind.
Ethernet-, Antennen- und Stromkabel sorgfältig verlegen, so dass nie-
mand darauf treten oder darüber stolpern kann.
Die Lüftungsschlitze des Geräts NICHT abdecken, da eine ungenügende
Luftzufuhr zur Beschädigung des Geräts führen kann.
KEINE Gegenstände auf das Gerät legen. Das Gerät so platzieren, dass
NIEMAND auf das Gerät treten kann.
Vor Wartung oder Demontage immer das Ethernet- und Stromkabel vom
Gerät trennen.
Bei Beschädigung Stromzufuhr zum Gerät unterbrechen.
KEINE Reparaturversuche unternehmen. Kontaktieren Sie Ihren Händler,
um ein neues Gerät zu bestellen.
Das Gerät oder die Einheit NICHT öffnen. Nach dem Öffnen oder
Entfernen von Verkleidungen bestehen Risiken, z. B. durch gefährlich
hohe Spannung. Dieses Gerät ist AUSSCHLIESSLICH durch qualifiziertes
Servicepersonal zu warten oder zu deinstallieren. Kontaktieren Sie Ihren
Händler für weitere Informationen.
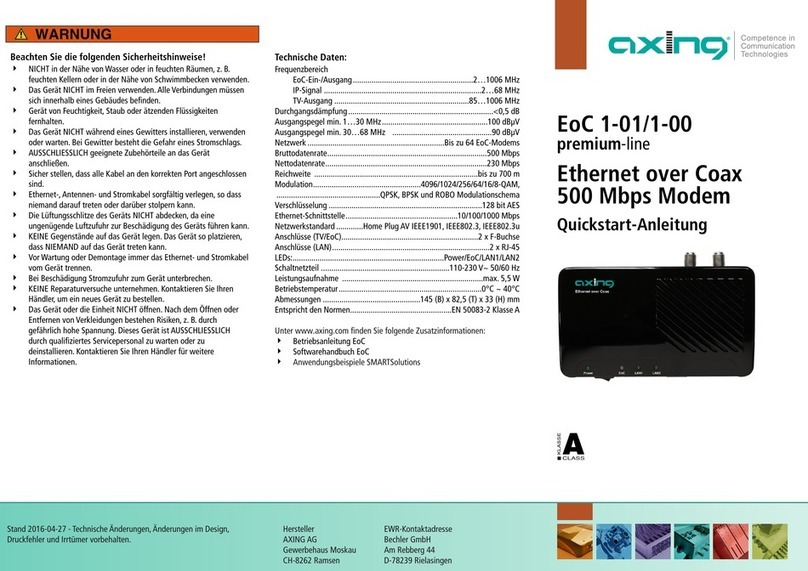
EoC 10-01
premium-line
Ethernet over Coax
Master
Quickstart-Anleitung
Technische Daten:
Typ EOC01001
Frequenzbereich 5…1218 MHz
Anschlüsse (TV | EoC) 2 × F-Buchse
Frequenzbereich TV-Bypass 85…1218 MHz
Frequenzbereich Daten-Übertra-
gung
5…65 MHz
Maximale erlaubte Dämpfung im
Koaxnetz
80 dB
Datenrate (brutto) 720 Mbps
EoC-Standard ITU-T G.9960/G.9961 G.hn over Coax
Ethernet-Standards IEEE 802.3u 100BaseT Fast Ethernet
IEEE 802.3ab 1000BaseT Gigabit
Ethernet
WiFi IEEE 802.11b/g/n
Anschlüsse (LAN) 2 × RJ 45
Datenschnittstelle 100 | 1000 Mbps
Anzahl Geräte im EoC-Netzwerk 1 × EoC 10-01 | ≤ 31 EoC 10-02
Betriebsspannung 12 VDC
Leistungsaufnahme <5 W
Betriebsspannung über Koax 60 VAC +/- 20%
Betriebsspannung über LAN (PoE) 37~57 V
Externes Schaltnetzteil 100…240 V~/50/60Hz | 12 V=/1 A
Umgebungstemperaturbereich
(gemäß EN 60065)
0°C…40°C
Maße (B × H × T) ca. 178 x 136 x 35 mm

Verwendungsbereich:
Der EoC 10-01 Ethernet over Coax Master verbindet mehrere EoC 10-02
Endpoints über vorhandene Koaxialleitungen mit dem Internet.
Der Vorteil einer Ethernet over Coax Lösung ist, dass keine Netzwerkkabel
verlegt werden müssen. Die Übertragung erfolgt im Rückkanal des Koaxialka-
bel-Netzwerks.
Lieferumfang:
9EoC 10-02
9CAT5 Ethernet-Kabel
Verbindet den LAN-Anschluss mit einem Internet-Modem.
912 VDC Steckernetzteil zur Spannungsversorgung
Hardware-Verbindungen:
Verwenden Sie einen geeigneten Aufstellungsort für den EoC 10-01 in der
Nähe des Internet-Modems mit dem es verbunden werden soll. Das Gerät
muss von Wärmequellen ferngehalten werden.
Vergewissern Sie sich, dass das Koaxialkabelnetz richtig geerdet ist.
Verwenden Sie ein Koaxialkabel um den EoC+RF-Anschluss mit dem
Einspeisepunkt (Verteiler, Weiche, terrestrischer Eingang eines Multischalters
etc.) zu verbinden.
Verwenden Sie ggf. ein weiteres Koaxialkabel, um am RF-Anschluss terrestri-
sche oder CATV-Signale einzuspeisen.
Verwenden Sie das Ethernet-Kabel, um den LAN1/LAN2-Anschluß mit dem
Internet-Modem zu verbinden.
Anschlüsse auf der Rückseite:
Anschluss
Taste Typ Funktion
A DC IN 12V DC Verbindung zum Steckernetzteil
B LAN2 (links) SFP Anschluss für 100/1000Mbps SFP-Transceiver
CLAN2
(rechts) RJ-45 100/1000 Base-T Gigabit Ethernet Anschluss,
mit PoE-Funktion.
D LAN1 RJ-45 100/1000 Base-T Gigabit Ethernet Anschluss
E Reset – Reset-Taste
F EoC+RF F EoC-Anschluss
G RF F Anschluss für Terrestrik oder CATV, um ein TV-Si-
gnal einzuspeisen.
Hinweis: LAN2 kann entweder am SFP-Anschluss oder am RJ45-Anschluss
angeschlossen werden.
Reset bzw. auf Werkeinstellung zurücksetzen:
Die Reset-Taste für 1 Sekunde drücken.
Das EoC 10-01 wird neu gestartet.
Die Reset-Taste für 5 Sekunden drücken, bis die nicht gekennzeichnete LED
zwischen Diagnosis-LED und SFP-LED leuchtet.
Alle konfigurierten Netzwerkdaten des EoC 10-01 werden auf Werkeinstel-
lung zurückgesetzt (z. B. IP-Adresse = 192.168.1.1).
Die Reset-Taste für 10 Sekunden drücken, bis die nicht gekennzeichnete
LED und die Diagnosis-LED leuchtet.
Alle konfigurierten Werte des EoC 10-01 und der angeschlossenen
EoC 10-02 werden auf Werkeinstellung zurückgesetzt.
Spannungsversorgung:
Der Schalter auf der Seite des EoC 10-01 hat zwei Positionen:
DC IN: Das EoC 10-01 läuft mit lokaler Versorgung.
Verbinden Sie das Steckernetzteil mit dem DC IN 12V-Anschluss und stecken
Sie das Steckernetzteil in eine Steckdose.
LINE: Das EoC 10-01 läuft mit Fernspeisung
Versorgen Sie das EoC 10-01 über das mit RF+Data oder RF verbundene
Koaxialkabel (typisch 60 VAC, 48V~90V, 50/60 Hz AC) .
Oder versorgen Sie das EoC 10-01 über die LAN2-Ethernet-Verkabelung
(Power over Ethernet PoE, gemäß IEEE 802.3af or 802.3at, es werden Mode
A und B unterstützt).
LED Anzeigen:
Label Status
An Blinkt
Power Stromversorgung an N/A
LAN1 Grün = LAN1 aktiv Emfang/Senden
Orange = LAN1 = 1Gbps.
LAN2
Grün LAN2 RJ-45 aktiv
Emfang/Senden
Orange LAN2 RJ-45 1Gbps.
leuchtet vermindert wenn LAN2 mit
SFP
Link/Act Data+RF aktiv Emfang/Senden
Quality
Grün = hohe EoC-Datenrate
Orange = mittlere EoC-Datenrate
Rot = niedere EoC-Datenrate
Diagnosis Diagnose der EoC-Verbindung zu den
EoC 10-02
nicht
gekenn-
zeichnet
Rücksetzen auf Werkeinstellungen
aktiv Bootloader aktiv
SFP SFP-Anschluss aktiv
Konfiguration:
Die Konfiguration der Geräte erfolgt über die grafische Benutzeroberfläche
der integrierten Webschnittstelle. Für den Zugriff auf die Benutzeroberfläche
benötigen sie einen handelsüblichen PC/Laptop inklusive Netzwerkschnitt-
stelle und die aktuelle Version des installierten Webbrowsers.
Die Werks-IP-Adresse des EoC 10-01 lautet 192.168.1.1 die Subnetzmaske
lautet 255.255.255.0. Ihr PC muss sich im selben IPv4 Netzwerkabschnitt
befinden.
Das EoC 10-01 zeigt ein Fenster zur Passwort-Eingabe an. Der werkseitige
Benutzername und das Passwort lauten admin.
Ändern Sie das Passwort nach der ersten Inbetriebnahme.
Hinweis: Sie finden die vollständige Betriebsanleitung zum Download
indem Sie auf www.axing.com im Suchfeld den Artikel eingeben.
A B C D E F G

Manufacturer
AXING AG
Gewerbehaus Moskau
8262 Ramsen
EEA contact address
Bechler GmbH
Am Rebberg 44
78239 Rielasingen
State of the art 2019-03-11
Technical improvements, changes in design, printing- and other errors expected.
Herewith AXING AG declares that the marked products comply with the valid
guidelines. You can call up the complete EU declaration of conformity for
download by entering the article in the search field at www.axing.com.
WEEE Nr. DE26869279 | Electrical and electronic components must not be
disposed of as residual waste, it must be disposed of separately.
Safety advices:
Do NOT use the device near water or in rooms with high humidity such
as humid cellars or near swimming pools.
Do NOT use the device outdoors.All connections must be located inside
a building.
Keep the device away from moisture, dust or corrosive liquids.
Do NOT install the device, use it or perform maintenance during a thun-
derstorm. There is a risk of electric shock during thunderstorm.
Connect ONLY appropriate accessories to the device.
Make sure that all cables are connected to the correct port.
Carefully lay the Ethernet, antenna and electric cables to ensure that
nobody can step on or stumble over them.
Do NOT cover the ventilation slots of the device since insufficient air
supply may result in damage to the device.
Do NOT place any objects on the device. Position the device in a place
where NOBODY can step on it.
Prior to maintenance or dismounting work, disconnect the Ethernet and
electric cable from the device.
In case of damage, interrupt the power supply.
Do NOT try to repair the device. Contact your local retailer to order a
new device.
Do NOT open the device or unit. Opening the device or removing its
covers causes risks, for example due to high voltage. This device should
ONLY be repaired or uninstalled by qualified service.
EoC 10-01
premium-line
Ethernet over Coax
Master
Quick start guide
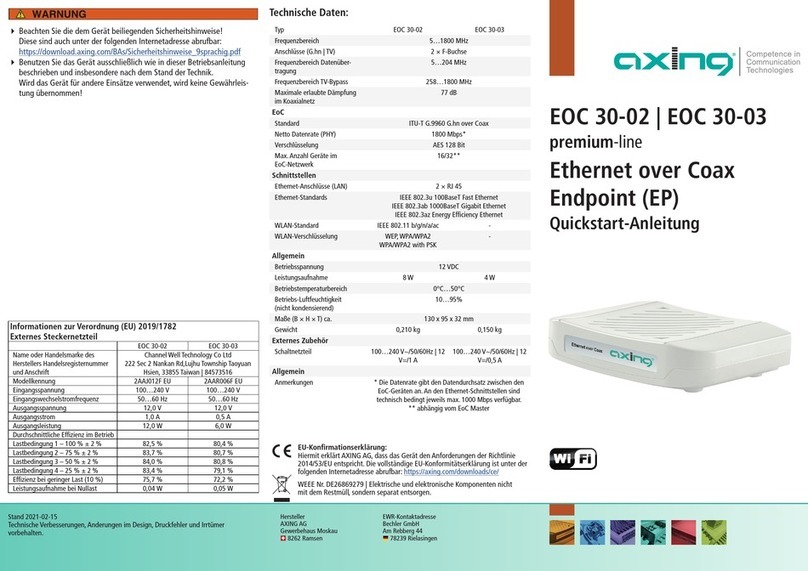
Technical data:
Typ EOC01001
Frequency range 5…1218 MHz
Connectors (TV | EoC) 2 × F female
Frequency range TV bypass 85…1218 MHz
Frequency range transmission 5…65 MHz
Maximum allowed attenuation in
coax network
80 dB
Data rate (gross) 720 Mbps
EoC standard ITU-T G.9960/G.9961 G.hn over Coax
Ethernet standards IEEE 802.3u 100BaseT Fast Ethernet
IEEE 802.3ab 1000BaseT Gigabit
Ethernet
WiFi IEEE 802.11b/g/n
Connectors (LAN) 2 × RJ 45
Data interface 100 | 1000 Mbps
Number of devices in EoC network 1 × EoC 10-01 | ≤ 31 EoC 10-02
Operation voltage 12 VDC
Power consumption <5 W
Operation voltage over Coax 60 VAC +/- 20%
Operation voltage over LAN (PoE) 37~57 V
External switching power supply 100…240 V~/50/60Hz | 12 V=/1 A
Ambient temperature range (acc. to
EN 60065)
0°C…40°C
Dimensions (W × H × D) appr. 178 x 136 x 35 mm

Field of application:
The EoC 10-01 connects EoC 10-02 endpoints, with the internet. For the
network an established coaxial cable network is used.
The advantage of an ethernet over coax solution is, that no network cables
must be laid. The data is transmitted through the low-attenuation return path
of the coax network.
Scope of delivery:
9EoC 10-01
9CAT5 ethernet cable
Connects from LAN port to Internet modem
912 VDC power adapter for power supply LED Indicators:
Label Status
ON Flashing
Power Powered by DC12V N/A
LAN1 Green = LAN1 port is active Data traffic active
Orange = LAN1 = 1Gbps.
LAN2
Green = LAN2 RJ-45 port is active
Data traffic active
Orange = LAN2 RJ-45 links at 1Gbps.
Diminished if LAN2 links at SFP
Link/Act Data+RF port is active Data traffic active
Quality
Green = high EoC throughput
Orange = medium EoC throughput
Red = low EoC throughput
Diagnosis EoC 10-01 is diagnosing EoC
connection toward/from EP
Not labeled Forcing to default settings via reset
button. Bootloader mode
SFP SFP port is active
Configuration:
The device is configured via the graphical user interface of the integrated
web interface. To access the user interface, you need a standard PC/lap-
top with a network interface and the actual version of the installed web
browser.
The factory default IP address of is 192.168.1.1 and the default subnet
mask is 255.255.255.0. To access the EoC with default IP, your PC should be
within the same IPv4 network.
The EoC 10-01 will prompt you a window for password authorization. The
both factory default username and password is ‘admin’.
After the first log-in, the password should be changed.
Note: You can call up the detailed operation instructions for download by
entering the article in the search field at www.axing.com.
Hardware connections:
Select a convenient location for the EoC near the internet modem to which
it will be connected. The device should be kept away from excessive heat.
Please make sure the coaxial network is well grounded.
Use a coaxial cable to connect the EoC+RF port to the feeding in point of
the coax network (splitter, combiner, terrestrial input of a multiswitch etc.).
Optional use another coaxial cable to feed in terrestrial or CATV signals to
the RF port.
Connect the LAN1/LAN2 port to the internet modem.
Ports on the rear panel:
Port Name Type Function
A DC IN 12V DC Connect to the power adapter plug
B LAN2 (left) SFP Connector for 100/1000Mbps SFP transceiver
C LAN2 (right) RJ-45 100/1000 Base-T Gigabit Ethernet port, built-in
PoE PD function.
D LAN1 RJ-45 100/1000 Base-T Gigabit Ethernet port
E Reset – Reset button
F EoC+RF F EoC port
G RF F Connect to terrestrial antenna or CATV to feed
in TV signal. Otherwise terminate with CFA 8-00
Note: LAN2 link could be connected either at SFP or RJ45 socket.
Reset or settings to factory default:
While EoC 10-01 is on, press the reset button for 1 second.
The EoC 10-01 will reboot.
Press the reset button for lasting 5 seconds until the unlabeled LED (bet-
ween Diagnosis LED and SFP LED) lights up.
All NMU settings are set to factory default (for example, the IP address will
be set to 192.168.1.1).
Press the reset button for lasting 10 seconds until the unlabeled LED and
the diagnosis LED will light up.
All NMU, all Master and all EP settings are set to factory default.
A B C D E F G
Power Supply:
The DC switch on the side has two positions:
DC IN: The EoC 10-01 runs in local power mode.
Connect the power adapter to the DC IN 12V port and connect it to a wall
outlet.
LINE: The EoC 10-01 runs in line power mode
Powering EoC 10-01 via the coaxial cable connected to port ‘RF+Data’ or
port ‘RF’ from coax is necessary (typical 60 VAC input (range 48V~90V,
50/60 Hz AC).
Alternatively powering EoC 10-01 via the port ‘LAN2’ Ethernet cabling (Po-
wer over Ethernet or PoE acc. to IEEE 802.3af or 802.3at, it supports mode
A and B).
Other manuals for EoC 10-01
1
Table of contents
Languages:
Other axing Modem manuals

axing
axing Premium EoC 10-02 User manual

axing
axing EoC 1-01 User manual

axing
axing EoC 1-11 User manual

axing
axing EoC 2-01 Premium Line User manual

axing
axing CMTS 2-00 User manual

axing
axing CMTS 1-00N User manual

axing
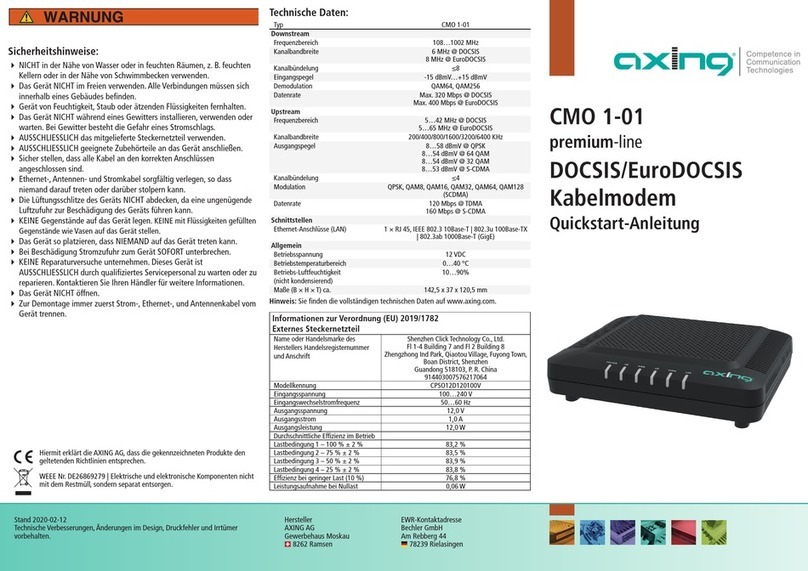
axing premium-line CMO 1-01 User manual

axing
axing EOC 1-31 User manual

axing
axing EoC 2-98 premium User manual

axing
axing EOC 1-32 User manual
Popular Modem manuals by other brands

SoftBank
SoftBank C02SW manual

Teledyne
Teledyne 6712 Assembly, installation and operation manual

Comtech EF Data
Comtech EF Data CDM-710G Installation and operation manual

Psion
Psion NEO PX3008 quick start guide

Cisco
Cisco DPQ2160 Quick reference guide

NetComm
NetComm Vodafone MachineLink 3G Configuration guide