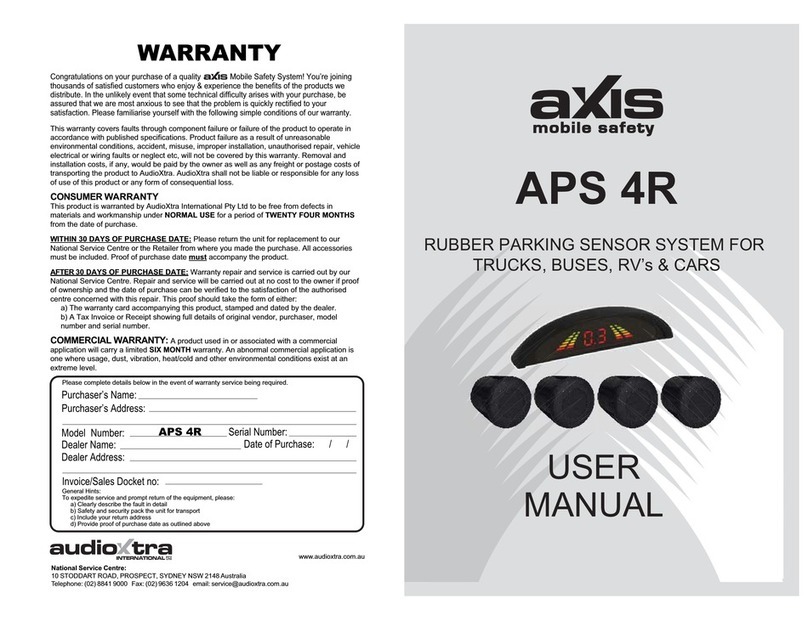
Axis APS400 User manual

MOBILE SAFETY
APS400
4 SENSOR PARKING SYSTEM
with 1*)).851&>
63(&,),&$7,216
*(1(5$/
'HWHFWLRQ5DQJH aP
5DWHG9ROWDJH 9'&
2SHUDWLQJ5DQJH 9'&
2SHUDWLQJ&XUUHQW P$
2WARRANTY
YEAR
&21752/%2;
6HQVLWLYLW\$GMXVW <HV
&RQWURO%R[$GMXVW ',36ZLWFK)URQWRU5HDU
',36ZLWFK%X]]HU$ODUP/HYHO
',36ZLWFK7RZ%DU6SDUH7\UH'LVWDQFH
6(16256
6HQVRU6L]H PP
6HQVRU&DEOH/HQJWK P
&RORXU %ODFN3DLQWDEOH
6HQVRU,QVWDOODWLRQ )URQWRU5HDU6XUIDFH0RXQW
)RU0HWDO6XUIDFHVXVH$365
'HWHFWLQJ'LVWDQFH P)URQW
P5HDU
8OWUDVRQLF)UHTXHQF\ .+]
:RUNLQJ7HPSHUDWXUHWR&
,1&/8'('
6HQVRUV
/(''LVSOD\ZLWK%XLOW,Q%X]]HU
&RQWURO%R[
%XPSHU&XWWHU
[$QJOHG6HQVRU0RXQW$GDSWHUV
,QVWDOODWLRQ+DUGZDUH
/('',63/$<
$XGLEOH%X]]HU %XLOW,Q
,QYHUWLEOH'LVSOD\ <HVIRU'DVK5RRI5HDU0RXQWLQJ
3UR[LPLW\$OHUW 9LVXDO'LUHFWLRQ,QGLFDWRUV
1XPHULFDO'LVWDQFH,QGLFDWRU
%XLOW,Q%X]]HU%HHS6RXQG
)XQFWLRQ%XWWRQ 0XWH,QYHUW6SHHG6HW
'LPHQVLRQV [[PP

2
AB
C D
A
B
C
D
6HnsoU
Control box
Display
Reversing light
GENERAL INSTALLATION DIAGRAM
Control box Display
Speed signal (WHITE) Front installation
only
Foot brake (YELLOW) Front installation
onlyGround (BLACK)
Power (RED) 5HDUReversing light circuit RU
FRQQHFWWR$FFHVVRU\FLUFXLWIRU
IURQWLQVWDOODWLRQ
Sensitivity adjustment
*
+
NOTE: Two wiring options for front installation.
See page 3 for instructions on setting speed trigger
Foot brake/Brake light positive signal - See page 3 for operating front sensors from foot brake
*
+
$
%
&
'
3RZHU

3
* NOTE FOR FRONT INSTALLATION
A: If the signal speed is set, when the real speed becomes lower than the set speed,
the system will activate. If the real speed is higher than set speed, the system will not
power on.
B: If the signal speed is not set when the foot brake is pressed, the system will only
work for 15 seconds. If there is an obstacle though, the system will start working
automatically.
Switch-off speed programming (when speed pulse wire is connected to speed
pulse input). Press the programming/mute button and keep it pressed. After 10
seconds the message SP (Speed Signal) appears, then release the button after the
PHVVDJH63ÀDVKHV'ULYHWKHYHKLFOHWRWKHUHTXLUHGVSHHGDQGFRQ¿UPWKHVSHHG
by pressing the key on top of the display unit. At this point the switch-off speed will
have been stored. Do not interrupt the power supply to the control unit during the
switch-off speed storing phase. Once the switch-off speed has been stored, this can
be selected or changed by repeating the procedure. While no sensors are alarming,
the decimal point indicator on the display will appear when the vehicle speed drops
below the set speed. This means the parking sensors are ready. To delete the speed
setting (back to default - works with footbrake if yellow wire connected), press the
programming/mute button and keep it pressed. After 15 seconds SH appears. Then
UHOHDVHWKHEXWWRQDQGSUHVVWKLVEXWWRQDJDLQWRFRQ¿UPVHWWLQJ7KHSDUNLQJVHQVRU
will now work under braking function.
SPEED SIGNAL FORMAT. This product is designed to be compatible with PWM
formats which suits most vehicles. Some newer vehicles with CAN systems may
UHTXLUHDFRPSDWLEOH&$1%86LQWHUIDFH
DISPLAY FUNCTION
ORIENTATION:
Press Mute button for 10 seconds to select orientation of display
)8,QVWDOOHGDWIURQWXS
%8,QVWDOOHGDWEDFNXS
M: Installed at back-up to read information from mirror
88: Installed on dashboard
0400mθdanger area
1005mθalarm area
2511mθsafety area
0400mθdanger area
1005mθalarm area
2511mθsafety area
Function Button -
Mute/Invert/Speed Set
LED DISPLAY

4
DISPLAY STATUS
Alarm area
Danger area
Dangerarea
Safetyarea 110-250cm
50-100cm
40cm
<40cm
BiĊĊBiĊĊ
BiĊBiĊ
BiĊBiĊ
BiĊĊ
DIP SWITCH
Function
Dip switch1 Select front or back system
UP
off back system 0.3-2.5m
DOWN
on 0.3-1.0m
front system
Control box
Dip Switch
1 2 3
*
*
Function:
Buzzer Initial Alarm Control
UP
start to alarm at 0.5m Yellow LED light
on
ight
Dip switch 2
(for front system
only)
Function:
anti-hook
UP
off
cancel the function
DOWN
on
start the function
Dip switch 3
(for rear system
only)
The system will regard the towbar
as an obstacle, The display will
show the actual distance
The system will not regard the
towbar as an obstacle, the display
will show 20cm less than the
actual distance
DOWN
off
start to alarm at mRed LED l

5
SENSOR INSTALLATION DIAGRAM
Installation distancedLDgram
Bestpositionforsensors Bestpositionforsensors
0.6-0.8m 0.3-0.4m
0.5-0.8m
Installationwhen vertical to the ground. Installation when bumper is sloping to the ground.
Installationdiagram
Installation diagram for sensors with direction markings
up
up
up
up
up
Fix the position of sensors. No obstacle should be detected at 90° from the top view otherwise
the system will false alarm.

6
ADVISED POSITION TO INSTALL THE SENSOR
Smooth slope Smooth round objects Objects absorbing
wave, e.g.cotton
Objects hard to be detectedHJFORWKLQJ
ABCD
should be in line.
B. 0.5-0.8m vertical to the ground.
0.55m is recommended.
C. Vertical, tidy surface without
metal components is preferred.
A.Four drill holes A.B.C.D

7
SELECT DRILLING POSITION FOR SENSOR A & D
SELECT DRILLING POSITION FOR SENSOR B & C
sensor 8 - 13cm from the edge.
Preferred distance is 11cm
A
For best detection angle, position A & D
AD
AB
A. Measure the distance between
sensor A and D
Divide distance by 3 and mark sensor B & C
A. Choose suitable drilling positions
for A and D sensor and mark
D

8
DRILLING
SENSOR INSTALLATION
OTHERS
䎻༦⌘᧘ཪ
Mount the display on the dashboard, above the
mirror, or at rear of cabin in view of mirror
A. Use a small drill bit to locate position
B. Drill with the bumper cutter supplied
A. Insert the sensors into the holes and secure
B. Arrange wiring neatly and securely

9
CONTROL BOX INSTALLATION
2.5m
Install control box inside the boot. Keep
away from heat, moisture and vibration.
NOTE: Control box is not waterproof.

10
PARKING SENSOR SYSTEM
MAIN FEATURES
ALARM MODE
This system consists of ultrasonic sensors, a control unit and display. This system
detects the distance between the vehicle and obstructions by ultrasonic sensors
installed at the rear or front of the vehicle. The distance and direction of the
obstruction will be displayed on the LED with three step signals.
• LED display • Direction Indicators from left, middle and right channels
• “BiBi” sound alarm • Lines warn of the distance to obstacles

11
INSTALLATION STEPS
TEST
NOTE
1. Carefully choose position for sensors
2. Select drilling position for sensor A & D
3. Select drilling position for sensor B & C
4. Locate the position and drill
5. Install the sensors and hide the wires
6. Install the display
7. Install the control box (NOTE: The control box is not waterproof)
1. Adjust the direction and orientation of sensors. Neaten the wiring after
installation.
2. Connect the power wire to the reversing light circuit.
3. Connect the wires between control box and display
4. After starting the car, the buzzer will sound “BiBi” on power up. Insert one
sensor into the control box port. Within 1.0m of the sensor, it should
detect normally.
Disconnect this sensor from the control box and use the same method to check
other sensors. Then insert all sensors into matching ports.
The car must be off during the installation
Performance may be affected in heavy rain, gravel roads, bumpy roads, hot or
moist weather, or if the sensor is covered by ice or mud.
Other ultrasonic or electric waves (eg voltage reducers) may affect the
performance of the system.
The sensors should be installed securely but not over-tight.
Its performance may be affected if the sensors are installed in a metal bumper.
To avoid ‘Metal Resonance’ use rubber sensors in metal bumpers (APS400R)RU
VXUIDFHPRXQWVHQVRUV$367
Avoid installing the digital control box in areas of interference or moisture.
Test the system to make sure it works correctly.
This system is a reversing aid and the manufacturer accepts no responsibility
for any accident after the kit is installed.

12
WARRANTY
Congratulations on your purchase of a quality Reversing System! You’re joining
thousands of satisfied customers who enjoy & experience the benefits of the products we
distribute. In the unlikely event that some technical difficulty arises with your purchase, be
assured that we are most anxious to see that the problem is quickly rectified to your
satisfaction. Please familiarise yourself with the following simple conditions of our warranty.
This warranty covers faults through component failure or failure of the product to operate in
accordance with published specifications. Product failure as a result of unreasonable
environmental conditions, accident, misuse, improper installation, unauthorised repair, vehicle
electrical or wiring faults or neglect etc, will not be covered by this warranty. Removal and
installation costs, if any, would be paid by the owner as well as any freight or postage costs of
transporting the product to AudioXtra. AudioXtra shall not be liable or responsible for any loss
of use of this product or any form of consequential loss.
CONSUMER WARRANTY
This product is warranted by AudioXtra International Pty Ltd to be free from defects in
materials and workmanship under NORMAL USE for a period of TWENTY FOUR MONTHS
from the date of purchase.
WITHIN 30 DAYS OF PURCHASE DATE: Please return the unit for replacement to our
National Service Centre or the Retailer from where you made the purchase. All accessories
must be included. Proof of purchase date
Our goods come with guarantees that cannot be excluded under the Australian Consumer Law.
You are entitled to a replacement or refund for a major failure and for compensation for any other
reasonably foreseeable loss or damage. You are also entitled to have the goods repaired or replaced
if the goods fail to be of acceptable quality and the failure does not amount to a major failure.
must accompany the products.
AFTER 30 DAYS OF PURCHASE DATE: Warranty repair and service is carried out by our
National Service Centre. Repair and service will be carried out at no cost to the owner if proof
of ownership and the date of purchase can be verified to the satisfaction of the authorised
centre concerned with this repair. This proof should take the form of either:
a) The warranty card accompanying this product, stamped and dated by the dealer.
b) A Tax Invoice or Receipt showing full details of original vendor, purchaser, model
number and serial number.
COMMERCIAL WARRANTY: A product used in or associated with a commercial
application will carry a limited SIX MONTH warranty. An abnormal commercial application is
one where usage, dust, vibration, heat/cold and other environmental conditions exist at an
extreme level.
Model Number: Serial Number:
Dealer Name: Date of Purchase: / /
Dealer Address:
www.audioxtra.com.au
Purchaser’s Name:
Invoice/Sales Docket no:
Purchaser’s Address:
National Service Centre:
10 STODDART ROAD, PROSPECT, SYDNEY NSW 2148Australia
Telephone: (02)88419000 Fax: (02) 96361204
email:[email protected]
Please complete details below in the event of warranty service being required.
General Hints: To expedite service and prompt return of the equipment, please:
a) Clearly describe the fault in detail c) Include your return address
b) Safety and security pack the unit for transport d) Provide proof of purchase date as outlined above
CC 71M
APS400
Table of contents
Other Axis Automobile Electronic manuals