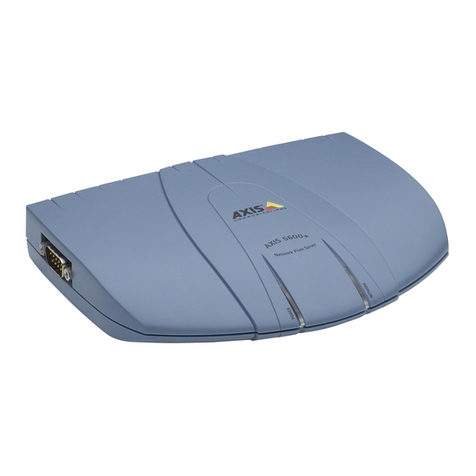
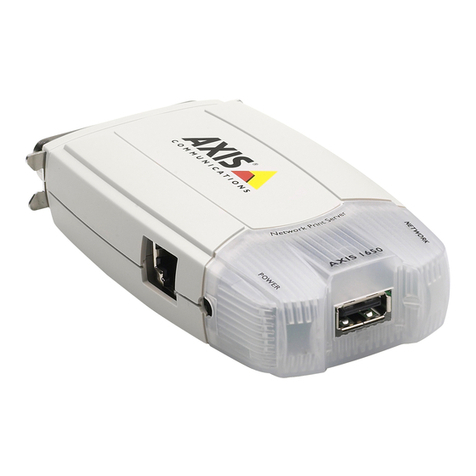
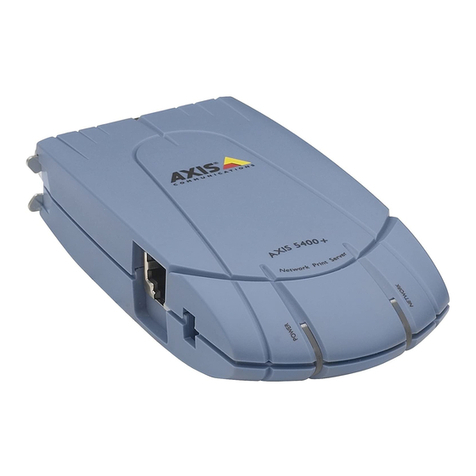
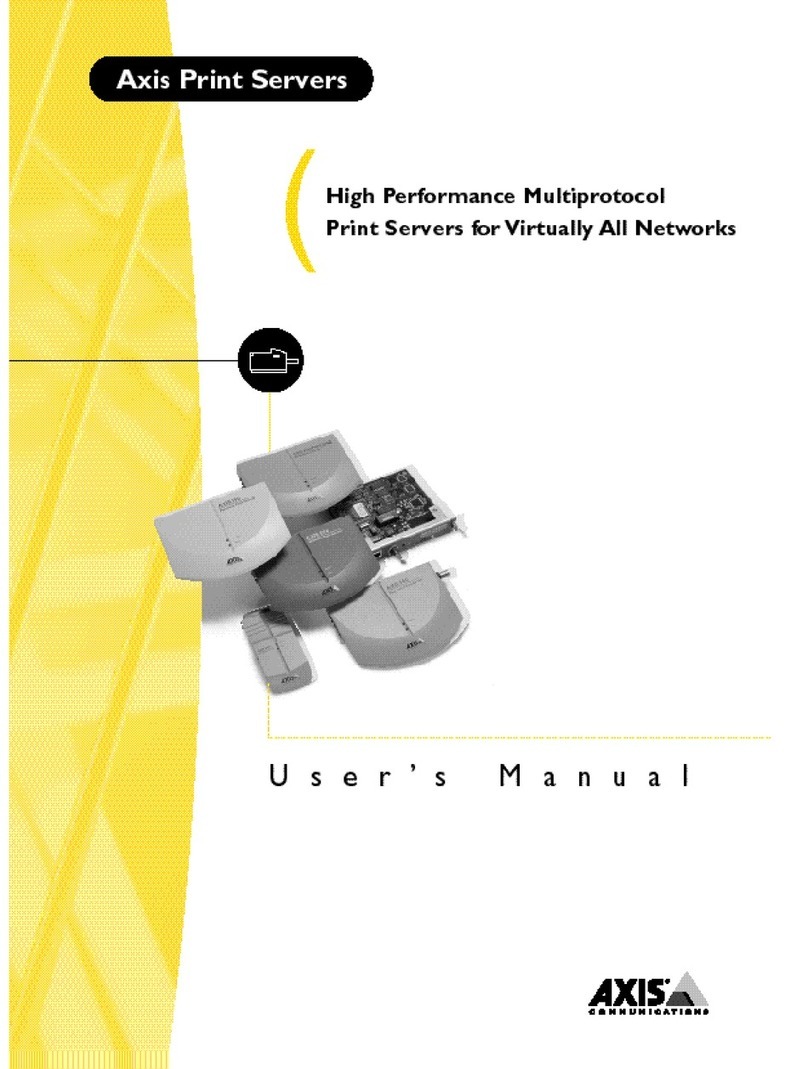
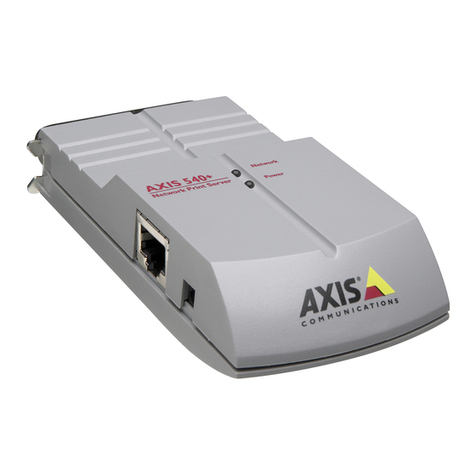
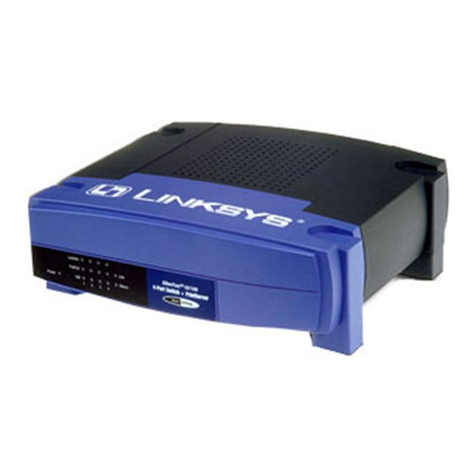
Axis OfficeBasic USB Wireless User manual

AXIS
OfficeBasic
User’s Guide
Bedienungsanleitung
Guide de l’Utilisateur
Guía del Usuario
Guida per l’Utente
Guia do Usuário
Print Server
The perfect Print Server for the small office environment with up to 50 users
The Axis logo is a registered trademark of Axis
Communications AB.All other trademarks are
owned by their respective companies.
Axis OfficeBasic Print Server User’s Guide
Part No: 16853
Revision 1.0, Date: September 1999
Copyright © Axis Communications AB, 1999
Axis OfficeBasic Print Server User’s Guide
Axis Communications
www.axis.com
Lund
Phone: +46 46 270 18 00
Boston
Phone: +1-800-444-AXIS (2947)
Miami
Phone: +1 305 629 3524
Paris
Phone: +33 1 49 69 15 50
London
Phone: +44 207 553 9200
Madrid
Phone: +34 91 803 02 44
München
Phone: +49 89 95 93 96 0
Rotterdam
Phone: +31 102 92 75 37
Tokyo
Phone: +81 3 3545 8282
Singapore
Phone: +65 250 8077
Hong Kong
Phone: +852 2836 0813
Beijing
Phone: +86 10 6801 6023
Shanghai
Phone: +86 21 6372 5659
Taipei
Phone: +886 2 2546-9668
Seoul
Phone: +822 780 9636
Sydney
Phone: +61 2 9967 5700
AXIS
OfficeBasic
Print Server
www.axis.com

AXIS OfficeBasic Hardware Inventory 1
English
Hardware Inventory
Unpack and check all the items using the following check list. Contact your dealer if
anything is missing or damaged. All packing materials are recyclable.
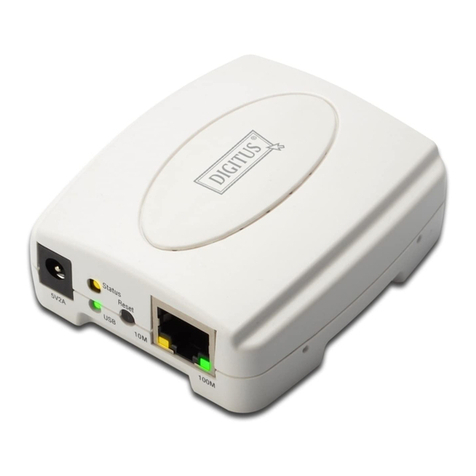
The AXIS OfficeBasic Print Server
Hardware Model Variants Part Numbers
Print Server AXIS OfficeBasic 0107-001-01
Power Supply Type
(PS-B)
Europe 13267
UK 13268
Australia 13269
USA 13270
Japan 13936
Media Title Part Numbers
CD AXIS OfficeBasic CD Rev No 1.0 or
higher
Printed Materials AXIS OfficeBasic User’s Guide 16853
Optional Accessories Title Part Numbers
Cable Printer Cable Extension 13522
Centronics to Mini-Centronics Cable 16453

Connecting the Printer to the Network AXIS OfficeBasic
2
Connecting the Printer to the Network
Caution!
1. Make sure that the printer is switched off and that the AXIS OfficeBasic external
power supply is disconnected.
2. Locate the serial number, found on the underside label of the AXIS OfficeBasic,
and write it down. You will need this number during the network configuration.
3. Connect the printer directly to the LPT1 port on the AXIS OfficeBasic. You do
not need any additional cabling.
4. Connect your AXIS OfficeBasic to the network. A category 5 twisted pair cable
or better must be used for Fast Ethernet networks.
5. Switch on the printer and connect the external power supply to the AXIS
OfficeBasic. The power indicator light comes on. If the network indicator starts
to flash, the AXIS OfficeBasic is successfully connected to the network.
6. Press and release the test button on the AXIS OfficeBasic. If the AXIS
OfficeBasic is correctly connected to the printer, the AXIS OfficeBasic internal
test page will be printed.
TCP/IP Printing - Windows 95/98,
NT 4.0 and 2000
The AXIS Print System software is a utility that allows you to install TCP/IP printer
ports in Windows 95, Windows 98, Windows NT 4.0 and Windows 2000
environments. It allows you to install, configure and manage your networked printer
ports, as easily as any local printer port. During installation, AXIS Print System assists
you to set the IP address of the AXIS OfficeBasic using the integrated AXIS IP
Installer.
For peer-to-peer printing, AXIS Print System must be installed on all printing clients,
while it is only necessary to install it on the server for client-server printing.
1. Install the AXIS Print System software from the AXIS OfficeBasic CD.
2. Use the Installation Wizard that is available from the AXIS Print System user
interface, to install your TCP/IP printers. If you need help, please see the AXIS
Print System’s built-in Help system or refer to the User’s Manual.
Make sure that the AXIS OfficeBasic external power supply is marked with the correct mains
voltage! Refer to Hardware Inventory, on page 1.
English
AXIS OfficeBasic TCP/IP printing in Windows NT 3.5x 3
TCP/IP printing in Windows NT 3.5x
In order to install TCP/IP printer ports in Windows NT 3.5x environments you
should use AXIS IP Installer and AXIS Print Monitor. AXIS IP Installer is a
Windows utility that allows you to set the IP address of your AXIS OfficeBasic and
AXIS Print Monitor is a Windows utility that allows you to install network print
server.
For peer-to-peer printing, AXIS Print Monitor must be installed on all printing
clients, while it is only necessary to install it on the server for client-server printing.
1. Install AXIS IP Installer and AXIS Print Monitor on your client. Both utilities are
available on the AXIS OfficeBasic CD.
2. Set the IP address of the AXIS OfficeBasic using AXIS IP Installer.
3. Use the Add Printer Wizard, available in your Windows operating system, to
install your TCP/IP printers. The AXIS Print Monitor’s built-in Help system
describes, in step-by-step fashion, how this operation is performed. It can be
started from the AXIS Utilities folder.
Note:
Refer to the AXIS OfficeBasic User’s Manual for a more comprehensive description
of the AXIS IP Installer and the AXIS Print Monitor.
NetBIOS/NetBEUI Printing - Windows 95/98,
NT and 2000
In order to install NetBIOS/NetBEUI printer ports in your Windows environment
you should use AXIS Print Monitor. It is a windows utility that allows you to install
network print server in the same simple fashion as local printer ports.
For peer-to-peer printing, AXIS Print Monitor must be installed on all printing
clients, while it is only necessary to install it on the server for client-server printing.
Important!
1. Install the AXIS Print Monitor software. It is available on the AXIS OfficeBasic
CD.
As the AXIS OfficeBasic emulates the behavior of a local printer port, you must select the My
Computer alternative when performing the instructions in the Add Printer Wizard.
As AXIS Print Monitor is an integral part of AXIS Print System, you should NOT install an
independent version of AXIS Print Monitor if AXIS Print System is already installed on your client.
English
Management and Configuration AXIS OfficeBasic
4
2. Use the Add Printer Wizard, available in your Windows operating system, to
install your NetBIOS/NetBEUI printers. The AXIS Print Monitor’s built-in
Help system describes, in step-by-step fashion, how this operation is performed.
It can be started from the AXIS Utilities folder.
Note:
Refer to the AXIS OfficeBasic User’s Manual for a more comprehensive description
of the AXIS Print Monitor.
Management and Configuration
Using any standard Web browser
Having assigned an IP address to your AXIS OfficeBasic, you can configure and
manage your print server from any standard Web browser.
Access your AXIS OfficeBasic, simply by entering the host name or the IP address of
the AXIS OfficeBasic as a URL in your browser, as follows:
Examples:
From the internal home page, links to configuration, management, status and
statistics services are readily available.
Using the Test Button
The following operations can be performed by pressing the test button in different
sequences. Refer to The AXIS OfficeBasic Print Server, on page 1, to identify the test
button:
• Printing a test page - press the test button once
• Printing the parameter list - press the test button twice
• Resetting the AXIS OfficeBasic parameters to the factory default settings
(Please refer to the AXIS OfficeBasic User’s Manual for further instructions)
As the AXIS OfficeBasic emulates the behavior of a local printer port, you must select the Local
Printer (Windows 95 and Windows 98), My Computer (Windows NT) or Local printer (Windows
2000) alternative when performing the instructions in the Add Printer Wizard.
http://192.36.253.96
http://salesdept
English
AXIS OfficeBasic Lieferumfang 5
Lieferumfang
Packen Sie alle gelieferten Artikel aus, und überprüfen Sie sie anhand der folgenden
Checkliste. Falls etwas fehlt oder beschädigt ist, wenden Sie sich bitte an Ihren
Händler. Das gesamte Verpackungsmaterial ist recycling-fähig.
Der AXIS OfficeBasic Printserver
Hardware Modellvarianten Bestellnummer
Printserver AXIS OfficeBasic 0107-001-01
Netzteil-Typ (PS-B)
Europa 13267
Großbritannien 13268
Australien 13269
USA 13270
Japan 13936
Medien Titel Bestellnummer
CD- ROM Die AXIS OfficeBasic CD Ausgabe 1.0 oder
höher
Gedruckte Dokumentation AXIS OfficeBasic Bedienungsanleitung 16853
Sonderzubehör Beschreibung Bestellnummer
Kabel Druckerkabelverlängerung 13522
Centronics auf Mini-Centronics 16453
LPT1-
Druckeranschluß
Ethernet-
Anschluß
(10baseT und 100baseTX)
Test-Taste
Externer Netzanschluß
Betriebsanzeige Netzwerkanzeige
Deutsch

Anschließen des Druckers an das Netzwerk AXIS OfficeBasic
6
Anschließen des Druckers an das Netzwerk
Vorsicht!
1. Vergewissern Sie sich, daß der Drucker ausgeschaltet und das externe Netzteil des
AXIS OfficeBasic nicht angeschlossen ist.
2. Notieren Sie die Seriennummer, die auf dem Aufkleber an der Unterseite des
AXIS OfficeBasic zu finden ist. Sie benötigen diese Nummer bei der
Netzwerkkonfiguration.
3. Schließen Sie den Drucker direkt an den LPT1-Anschluß des AXIS OfficeBasic
an.
4. Schließen Sie den AXIS OfficeBasic an das Netzwerk an. Für Fast
Ethernet-Netzwerke muß ein Twisted Pair-Kabel der Kategorie 5 oder höher
verwendet werden.
5. Schalten Sie den Drucker ein, und schließen Sie das externe Netzteil an den
AXIS OfficeBasic an. Die Netzanzeige leuchtet auf. Wenn die Netzwerkanzeige
zu blinken beginnt, ist der AXIS OfficeBasic korrekt an das Netzwerk
angeschlossen.
6. Drücken Sie die Taste "Test" am AXIS OfficeBasic, und lassen Sie sie wieder los.
Daraufhin wird eine Testseite ausgedruckt. Wenn der AXIS OfficeBasic richtig
an den Drucker angeschlossen ist, wird die interne Testseite des AXIS
OfficeBasic gedruckt.
Das externe Netzteil muß mit der richtigen Netzspannung gekennzeichnet sein! Weitere
Informationen hierzu finden Sie unter Lieferumfang, auf seite 5.
Deutsch

AXIS OfficeBasic Drucken über TCP/IP - Windows 95/98, NT 4.0 und 2000 7
Drucken über TCP/IP - Windows 95/98,
NT 4.0 und 2000
Vorzugsweise sollte für die Installation von TCP/IP-Druckeranschlüssen unter
Windows 95, Windows 98, Windows NT 4.0 und Windows 2000 das AXIS Print
System verwendet werden. Damit können Sie Netzwerk-Druckeranschlüsse ebenso
einfach wie beliebige lokale Druckeranschlüsse installieren, konfigurieren und
verwalten. Während der Installation hilft Ihnen das AXIS Print System mit dem
darin enthaltenen AXIS IP Installer beim Festlegen der IP-Adresse für den AXIS
OfficeBasic.
Beim Peer-to-Peer-Druck muß das AXIS Print System auf allen Clients installiert
werden, während er in Client-/Server-Netzwerken nur auf dem Server installiert sein
muß.
1. Installieren Sie die AXIS Print System-Software von der AXIS OfficeBasic CD.
2. Verwenden Sie für die Installation eines Druckers mit dem AXIS Print System
den Installationsassistenten, der von der Benutzeroberfläche des AXIS Print
System aufgerufen werden kann. Falls Sie Hilfe benötigen, schlagen Sie im
eingebauten Hilfesystem des AXIS Print Systems oder im Benutzerhandbuch
nach.
Deutsch

Drucken über TCP/IP - Windows NT 3.5x AXIS OfficeBasic
8
Drucken über TCP/IP - Windows NT 3.5x
Vorzugsweise sollte für die Installation von TCP/IP-Druckeranschlüssen unter
Windows NT 3.5x der AXIS Print Monitor und der AXIS IP Installer verwendet
werden. Der AXIS IP Installer ist ein Dienstprogramm für Windows, mit dem Sie für
den AXIS OfficeBasic eine IP-Adresse festlegen können und mit dem AXIS Print
Monitor können Sie Netzwerk-Druckeranschlüsse ebenso einfach wie beliebige lokale
Druckeranschlüsse installieren.
Beim Peer-to-Peer-Druck muß das AXIS Print Monitor auf allen Clients installiert
werden, während er in Client-/Server-Netzwerken nur auf dem Server installiert sein
muß.
1. Installieren Sie den AXIS Print Monitor und den AXIS IP Installer-Software von
der AXIS OfficeBasic CD.
2. Weisen Sie dem AXIS OfficeBasic mit Hilfe des AXIS IP Installers eine
IP-Adresse zu.
3. Verwenden Sie den Add Printer Wizard in Ihrem Windows-Betriebssystem um
Ihre TCP/IP Drucker zu installieren. Das Hilfesystem des AXIS Print Monitors
erklärt Ihnen Schritt für Schritt wie dieser Vorgang durchgeführt wird. Das
Hilfesystem kann aus dem AXIS Utilities Verzeichnis gestartet werden.
Hinweis:
Im AXIS OfficeBasic Benutzerhandbuch finden Sie eine ausführlichere beschreibung
des AXIS IP Installers und AXIS Print Monitors.
Da der AXIS OfficeBasic das Verhalten eines lokalen Druckeranschlusses emuliert, müssen Sie zur
Ausführung der Anweisungen im Assistenten für die Druckerinstallation die Option "Arbeitsplatz"
wählen.
Deutsch

AXIS OfficeBasicDrucken über NetBIOS/NetBEUI - Windows 95/98, NT und 2000 9
Drucken über NetBIOS/NetBEUI - Windows
95/98, NT und 2000
Vorzugsweise sollte für die Installation von NetBIOS/NetBEUI-Druckeranschlüssen
unter Windows der AXIS Print Monitor verwendet werden. Damit können Sie
Netzwerk-Druckeranschlüsse ebenso einfach wie beliebige lokale Druckeranschlüsse
installieren.
Beim Peer-to-Peer-Druck muß das AXIS Print Monitor auf allen Clients installiert
werden, während er in Client-/Server-Netzwerken nur auf dem Server installiert sein
muß.
Wichtig!
1. Installieren Sie den AXIS Print Monitor-Software von der AXIS OfficeBasic CD.
2. Verwenden Sie den Add Printer Wizard in Ihrem Windows-Betriebssystem um
Ihre NetBIOS/NetBEUI Drucker zu installieren. Das Hilfesystem des AXIS
Print Monitors erklärt Ihnen Schritt für Schritt wie dieser Vorgang durchgeführt
wird. Das Hilfesystem kann aus dem AXIS Utilities Verzeichnis gestartet werden.
Hinweis:
Im AXIS OfficeBasic Benutzerhandbuch finden Sie eine ausführlichere beschreibung
des AXIS Print Monitors.
Da der AXIS Print Monitor ein Bestandteil des AXIS Print Systems ist, sollten Sie KEINE
unabhängige Version des AXIS Print Monitor installieren, wenn das AXIS Print System bereits auf
dem Client installiert ist.
Da der AXIS OfficeBasic das Verhalten eines lokalen Druckeranschlusses emuliert, müssen Sie zur
Ausführung der Anweisungen im Assistenten für die Druckerinstallation die Option "Lokaler
Drucker" (Windows 95 und Windows 98), "Arbeitsplatz" (Windows NT) bzw. "Lokaler Drucker"
(Windows 2000) wählen.
Deutsch

Verwaltung und Konfiguration AXIS OfficeBasic
10
Verwaltung und Konfiguration
Verwenden eines Standard-Webbrowsers
Nachdem der AXIS OfficeBasic eine IP-Adresse erhalten hat, können Sie Ihren
Printserver mit Hilfe eines beliebigen Webbrowsers konfigurieren und verwalten.
Auf den AXIS OfficeBasic greifen Sie zu, indem Sie einfach den Host-Namen oder
die IP-Adresse des AXIS OfficeBasic als URL in Ihrem Browser, wie in folgenden
Beispielen, eingeben:
Beispiele:
Auf der internen Home Page sind Verweise auf Konfigurations-, Verwaltungs-,
Status- und Statistikdienste frei verfügbar.
Verwenden der Taste "Test"
Folgende Funktionen können durch unterschiedliches Betätigen der Taste "Test"
ausgeführt werden. Die Position der Taste "Test" wird unter Der AXIS OfficeBasic
Printserver, auf seite 5 beschrieben.
• Drucken einer Testseite - Drücken Sie die Taste "Test" einmal.
• Drucken der Parameterliste - Drücken Sie die Taste "Test" zweimal.
• Zurücksetzen der Parameter des AXIS OfficeBasic auf die werksseitigen Standar-
deinstellungen. (Weitere Informationen über die Taste "Test" finden Sie im
Benutzerhandbuch.)
http://192.36.253.96
http://salesdept
Deutsch

AXIS OfficeBasic Liste du matériel 11
Liste du matériel
Déballez et vérifiez tous les éléments fournis en vous reportant à la liste suivante. Si
l'un des éléments est manquant ou détérioré, adressez-vous à votre revendeur. Tous
les matériaux d'emballage sont recyclables.
Le serveur d’impression AXIS OfficeBasic
Matériel Modèles Références
Serveur d’impression AXIS OfficeBasic 0107-001-01
Alimentation électrique
(PS-B)
Europe 13267
Royaume-Uni 13268
Australie 13269
Etats-Unis 13270
Japon 13936
Support Titre Références
CD AXIS OfficeBasic CD Révision N° 1.0 ou
supérieure
Documentation imprimée Guide de l'utilisateur du serveur AXIS
OfficeBasic 16853
Accessoires optionnels Description Références
Câbles Prolongateur de câble d'imprimante 13522
Câble Centronics à Mini-Centronics 16453
Port Imprimante
LPT1
Connecteur
Ethernet
(10baseT et 100baseTX)
Connecteur d'alimentation
électrique externe
Voyant Alimentation Voyant Réseau
Bouton de Test
Français

Connexion de l'imprimante au réseau Ethernet AXIS OfficeBasic
12
Connexion de l'imprimante au réseau Ethernet
Attention !
1. Assurez-vous que l'imprimante est éteinte et que le boîtier d'alimentation externe
du serveur AXIS OfficeBasic est déconnecté.
2. Localisez le numéro de série figurant sur l'étiquette située sous le serveur AXIS
OfficeBasic et notez-le. Vous en aurez besoin pendant la configuration du réseau.
3. Connectez l'imprimante directement au port LPT1 du serveur AXIS OfficeBasic.
4. Connectez votre serveur AXIS OfficeBasic au réseau. Pour les réseaux Fast
Ethernet, vous devez utiliser un câble à paire torsadée de catégorie 5 ou
supérieure.
5. Mettez l'imprimante sous tension et branchez le boîtier d'alimentation électrique
externe sur le serveur AXIS OfficeBasic. Le voyant d'alimentation s'allume. Si le
voyant réseau commence à clignoter, cela signifie que le serveur AXIS OfficeBasic
est connecté au réseau.
6. Appuyez sur le bouton Test du serveur AXIS OfficeBasic pour imprimer une
page de test. Si le serveur AXIS OfficeBasic est correctement connecté à
l'imprimante, la page de test interne du serveur AXIS OfficeBasic sera imprimée.
Le boîtier d'alimentation externe que vous utilisez doit correspondre à la tension secteur !
Reportez-vous à la section Liste du matériel, à la page 11.
Français

AXIS OfficeBasic Impression TCP/IP - Windows 95/98, NT 4.0 et 2000 13
Impression TCP/IP - Windows 95/98,
NT 4.0 et 2000
L'outil AXIS Print System est l'utilitaire conseillé pour l'installation des ports
d'imprimante TCP/IP dans les environnements Windows 95, Windows 98,
Windows NT 4.0 et Windows 2000. Il vous permet d'installer, de configurer et de
gérer des ports d'imprimante connectés en réseau aussi aisément que n'importe quel
port d'imprimante local. Au cours de l'installation, AXIS Print System vous aide à
définir l'adresse IP du serveur AXIS OfficeBasic à l'aide de l'outil AXIS IP Installer.
Pour l'impression en mode poste à poste, le logiciel AXIS Print System doit être
installé sur tous les clients d'impression. En revanche, pour l'impression
client-serveur, il est uniquement nécessaire de l'installer sur le serveur.
1. Installez le logiciel AXIS Print System depuis le AXIS OfficeBasic CD.
2. Pour installer une imprimante à l'aide du logiciel AXIS Print System, utilisez
l'Assistant d'installation disponible à partir de l'interface utilisateur. Si vous avez
besoin d'aide, lancez le système d'aide intégré du logiciel AXIS Print System ou
reportez-vous au manuel d'utilisation.
Français

Impression TCP/IP - Windows NT 3.5x AXIS OfficeBasic
14
Impression TCP/IP - Windows NT 3.5x
L'outil AXIS Print Monitor et l'outil AXIS IP Installer sont les utilitaires conseillés
pour l'installation des ports d'imprimante TCP/IP dans les environnements
Windows NT 3.5x. AXIS Print Monitor vous permet d'installer des ports
d'imprimante connectés en réseau aussi aisément que n'importe quel port
d'imprimante local. AXIS IP Installer est un utilitaire Windows vous permettant de
définir l'adresse IP de votre serveur AXIS OfficeBasic.
Pour l'impression en mode poste à poste, le logiciel AXIS Print Monitor doit être
installé sur tous les clients d'impression. En revanche, pour l'impression
client-serveur, il est uniquement nécessaire de l'installer sur le serveur.
1. Installez le logiciel AXIS Print Monitor et le logiciel AXIS IP Installer depuis le
AXIS OfficeBasic CD.
2. Définissez l’adresse IP de l’AXIS OfficeBasic à l’aide d’AXIS IP Installer.
3. Utilisez l’assistant Ajout d’impremante disponible dans votre système
d’exploitation Windows, pour installer vos impremantes TCP/IP. L’Aide intégrée
dans l’outil AXIS Print Monitor décrit les étapes à soivre pour réaliser cette
opération. L’Aide peut être lancée depuis le dossier “Axis Utilities”.
Remarque :
Reportez-vous au manuel de l’utilisateur AXIS OfficeBasic pour une information
détaillée sur les outils AXIS IP Installer et AXIS Print Monitor.
Etant donné que le serveur AXIS OfficeBasic émule le comportement d'un port d'imprimante
locale, vous devez sélectionner Poste de travail (My Computer) lorsque vous suivez les instructions
dans l'Assistant ajout d'imprimante.
Français

AXIS OfficeBasic Impression NetBIOS/NetBEUI - Windows 95/98, NT et 2000 15
Impression NetBIOS/NetBEUI - Windows 95/98,
NT et 2000
L'outil AXIS Print Monitor est l'utilitaire conseillé pour l'installation des ports
d'imprimante NetBIOS/NetBEUI dans les environnements Windows. Il vous permet
d'installer des ports d'imprimante connectés en réseau aussi aisément que n'importe
quel port d'imprimante local.
Pour l'impression en mode poste à poste, le logiciel AXIS Print Monitor doit être
installé sur tous les clients d'impression. En revanche, pour l'impression
client-serveur, il est uniquement nécessaire de l'installer sur le serveur.
Important !
1. Installez le logiciel AXIS Print Monitor depuis le AXIS OfficeBasic CD.
2. Utilisez l’assistant Ajout d’impremante disponible dans votre système
d’exploitation Windows, pour installer vos impremantes NetBIOS/NetBEUI.
L’Aide intégrée dans l’outil AXIS Print Monitor décrit les étapes à soivre pour
réaliser cette opération. L’Aide peut être lancée depuis le dossier “Axis Utilities”.
Remarque :
Reportez-vous au manuel de l’utilisateur AXIS OfficeBasic pour une information
détaillée sur l’outil AXIS Print Monitor.
AXIS Print Monitor étant une partie intégrante d'AXIS Print System, vous ne devez PAS installer
une version indépendante du logiciel AXIS Print Monitor si AXIS Print System est déjà installé sur
votre poste client.
Etant donné que le serveur AXIS OfficeBasic émule le comportement d'un port d'imprimante
locale, vous devez sélectionner Imprimante locale (Local Printer) (Windows 95 et Windows 98),
Poste de travail (My Computer) (Windows NT) ou Imprimante locale (Local Printer) (Windows
2000) lorsque vous suivez les instructions dans l'Assistant ajout d'imprimante.
Français

Gestion et configuration AXIS OfficeBasic
16
Gestion et configuration
Utilisation d’un navigateur Web standard
Si vous avez attribué une adresse IP à votre serveur AXIS OfficeBasic, vous pouvez le
gérer et le configurer à partir d'un navigateur Web standard.
Pour accéder à votre serveur AXIS OfficeBasic, il vous suffit d'entrer le nom d'hôte ou
l'adresse IP du serveur AXIS OfficeBasic comme URL dans votre navigateur, de la
façon suivante :
Exemples :
Les liens vers les services de configuration, de gestion, d'état et de statistiques sont
disponibles à partir de la page d'accueil interne.
Utilisation du bouton Test
Les opérations suivantes peuvent être exécutées en appuyant sur le bouton Test en
différentes séquences. Veuillez vous reporter à la section Le serveur d’impression AXIS
OfficeBasic, à la page 11 pour identifier l'emplacement du bouton Test.
• Impression d'une page de test - Appuyez une fois sur le bouton Test
• Impression de la liste des paramètres - Appuyez deux fois sur le bouton Test
• Restauration des valeurs usine par défaut des paramètres du serveur AXIS Office-
Basic (Veuillez vous reporter au manuel d'utilisation pour plus d'informations sur
le bouton Test)
http://192.36.253.96
http://deptventes
Français

AXIS OfficeBasic Inventario de Hardware 17
Inventario de Hardware
Desembale y compruebe todos los componentes, utilizando la siguiente lista de
verificación. Póngase en contacto con su distribuidor si falta algún elemento o está
defectuoso. Todo el material de embalaje es reciclable.
Servidor de impresora AXIS 5400
Hardware Variantes de Modelo Referencias
Servidor de Impresora AXIS OfficeBasic 0107-001-01
Tipo de fuente de
alimentación
(PS-B)
Europa 13267
R.U. 13268
Australia 13269
EE.UU. 13270
Japón 13936
Media Título Referencias
CD AXIS OfficeBasic CD Rev No 1.0 o
superior
Material impreso AXIS OfficeBasic Guía del usuario 16853
Accesorios opcionales Descripción Referencias
Cables Extensión de cable de impresora 13522
Cable de Centronics a Mini-Centronics 16453
Conector
de impresora LPT1
Conector para
Ethernet
(10baseT y 100baseTX)
Conector de fuente de
alimentación externa
Indicador de alimentación Indicador de red
Botón de prueba
Español

Conexión de la impresora a la red Ethernet AXIS OfficeBasic
18
Conexión de la impresora a la red Ethernet
Precaución!
1. Asegúrese de que la impresora está apagada y de que el alimentador del AXIS
OfficeBasic está desconectado.
2. Localice el número de serie , que se encuentra en la etiqueta inferior del AXIS
OfficeBasic, y escríbalo. Necesitará este número durante el proceso de
configuración de la red.
3. Conecte la impresora directemente al puerto LPT1 del AXIS OfficeBasic.
4. Conecte el AXIS OfficeBasic a la red. Debe utilizarse un cable de par trenzado de
la categoría 5 o mejor para redes Fast Ethernet.
5. Encienda la impresora y conecte la fuente de alimentación externa al AXIS
OfficeBasic. Se enciende la luz indicadora de corriente. Si el indicador de red
comienza a parpadear, esto indica que el AXIS OfficeBasic está conectado
correctamente a la red.
6. Pulse y suelte el botón de prueba del AXIS OfficeBasic para imprimir una página
de prueba. Si el AXIS OfficeBasic está conectado correctamente a la impresora, se
imprimirá la página de prueba interna del AXIS OfficeBasic.
El alimentador externo que utiliza debe llevar indicada la tensión correcta de la red. Consulte
Inventario de Hardware, en la página 17.
Español

AXIS OfficeBasic Impresión TCP/IP - Windows 95/98, NT 4.0 y 2000 19
Impresión TCP/IP - Windows 95/98,
NT 4.0 y 2000
AXIS Print System es la utilidad preferida para instalar puertos de impresora TCP/IP
en entornos Windows 95, Windows 98, Windows NT 4.0 y Windows 2000. Permite
instalar, configurar y administrar los puertos de impresora de red, de forma tan fácil
como cualquier puerto de impresora local. Durante la instalación, AXIS Print System
le asiste para configurar la dirección IP del AXIS OfficeBasic usando el AXIS IP
Installer integrado.
Para impresiones de igual a igual, AXIS Print System ha de estar instalado en todos los
clientes de impresión, mientras que para impresiones cliente-servidor, sólo es
necesario instalarlo en el servidor.
1. Instale el software de AXIS Print System del AXIS OfficeBasic CD.
2. Para instalar una impresora con el AXIS Print System, use el Asistente de
Instalación disponible en la interfaz de usuario del AXIS Print System. Si necesita
ayuda, consulte la Ayuda del sistema de AXIS Print System o el Manual de
Usuario.
Español
Other manuals for OfficeBasic USB Wireless
4
Table of contents
Languages:
Other Axis Print Server manuals
Popular Print Server manuals by other brands

Brother
Brother MFC-8460N Network manual

Linksys
Linksys WPSM54G - Wireless-G PrintServer With Multifunction Printer Support Print... user guide

TP-Link
TP-Link TL-WPS510U user guide

D-Link
D-Link DPR-1061 Quick installation guide

Atlantis Land
Atlantis Land NetServer Pro A02-PSU-W54 manual

Brother
Brother HL-4040CN Network user's guide