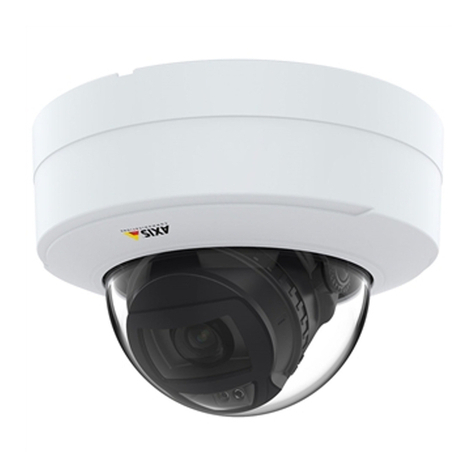
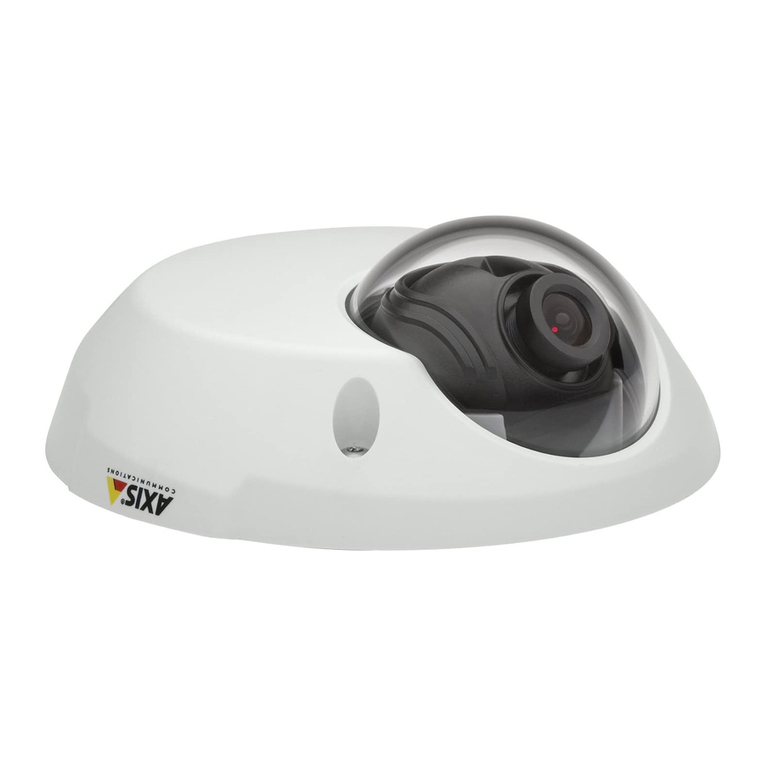
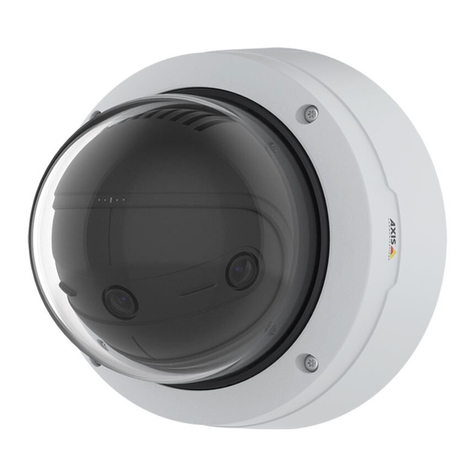
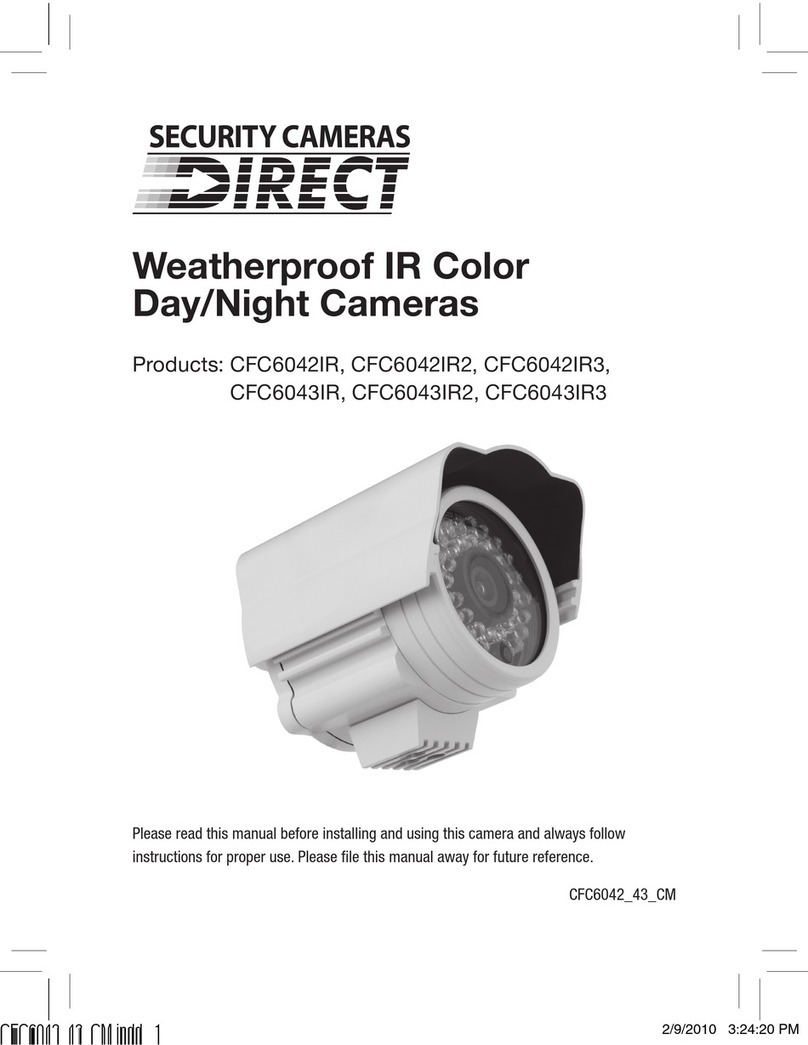
Axis 231D User manual

AXIS 231D/232D
Network Dome Camera
Installation Guide
Installation instructions are also available in German, French, Spanish and Italian in this manual
ENGLISH DEUTSCH FRANCAIS ESPAÑOL ITALIANO

AXIS COMMUNICATIONS
<Product Name> Quick User’s Guide
2 About This Document
This manual is intended for administrators and users of the
AXIS 231D/232D Network Dome Camera, and is applicable
for software release 4.00. It includes instructions for
installing the AXIS 231D/232D on your network. Previous
experience of networking will be of use when installing
and using this product. Some knowledge of UNIX or
Linux-based systems would also be beneficial, for
developing shell scripts and applications. Later versions of
this document will be posted to the Axis Website, as
required. See also the product’s online help, available via
the Web-based interface.
Safety Notices Used In This Manual
Caution! - Indicates a potential hazard that can damage the
product.
Important! - Indicates a hazard that can seriously impair
operation.
Do not proceed beyond any of the above notices until you
have fully understood the implications.
Intellectual Property Rights
Axis AB has intellectual property rights relating to
technology embodied in the product described in this
document. In particular, and without limitation, these
intellectual property rights may include one or more of the
patents listed at http://www.axis.com/patent.htm and one
or more additional patents or pending patent applications
in the US and other countries.
This product includes software developed by the OpenSSL
Project for use in the OpenSSL Toolkit:
http://www.openssl.org/
Legal Considerations
Camera surveillance can be prohibited by laws that vary
from country to country. Check the laws in your local
region before using this product for surveillance purposes.
Electromagnetic Compatibility (EMC)
This equipment generates, uses and can radiate radio
frequency energy and, if not installed and used in
accordance with the instructions, may cause harmful
interference to radio communications. However, there is no
guarantee that interference will not occur in a particular
installation.
If this equipment does cause harmful interference to radio
or television reception, which can be determined by turning
the equipment off and on, the user is encouraged to try to
correct the interference by one or more of the following
measures: Re-orient or relocate the receiving antenna.
Increase the separation between the equipment and
receiver. Connect the equipment to an outlet on a different
circuit to the receiver. Consult your dealer or an
experienced radio/TV technician for help. Shielded (STP)
network cables must be used with this unit to ensure
compliance with EMC standards.
USA - This equipment has been tested and found to
comply with the limits for a Class A computing device
pursuant to Subpart B of Part 15 of FCC rules, which are
designed to provide reasonable protection against such
interference when operated in a commercial environment.
Operation of this equipment in a residential area is likely to
cause interference, in which case the user at his/her own
expense will be required to take whatever measures may be
required to correct the interference.
Europe - This digital equipment fulfills the
requirements for radiated emission according to limit A of
EN55022/1998, and the requirements for immunity according
to EN55024/1998 residential, commercial, and light industry.
Japan - This is a class B product based on the standard of the
Voluntary Control Council for Interference from Information
Technology Equipment (VCCI). If this is used near a radio or
television receiver in a domestic environment, it may cause
radio interference. Install and use the equipment according to
the instruction manual.
Australia - This electronic device meets the requirements of
the Radio communications (Electromagnetic Compatibility)
Standard 1998 AS/NZS 3548.
Liability
Every care has been taken in the preparation of this manual;
Please inform your local Axis office of any inaccuracies or
omissions. Axis Communications AB cannot be held responsible
for any technical or typographical errors and reserves the right
to make changes to the product and manuals without prior
notice. Axis Communications AB makes no warranty of any
kind with regard to the material contained within this
document, including, but not limited to, the implied warranties
of merchantability and fitness for a particular purpose. Axis
Communications AB shall not be liable nor responsible for
incidental or consequential damages in connection with the
furnishing, performance or use of this material.
Trademark Acknowledgments
Acrobat, Adobe, Boa, Ethernet, IBM, Internet Explorer, Linux,
Macintosh, Microsoft, Mozilla, Netscape Navigator, UNIX,
Windows, WWW are registered trademarks of the respective
holders. Java and all Java-based trademarks and logos are
trademarks or registered trademarks of Sun Microsystems, Inc.
in the United States and other countries. UPnP is a certification
mark of the UPnPTM Implementers Corporation. Axis
Communications AB is independent of Sun Microsystems Inc.
Axis Customer Services
Should you require any technical assistance, please contact
your Axis reseller. If your questions cannot be answered
immediately, your reseller will forward your queries through
the appropriate channels to ensure a rapid response. If you are
connected to the Internet, you can:
• download user documentation and firmware updates
• find answers to resolved problems in the FAQ database.
Search by product, category, or phrases
• report problems to Axis support staff by logging in to your
private support area
• visit the Axis Support Web at www.axis.com/techsup/
Safety Notice - Battery Replacement
The AXIS 231D/232D uses a 3.0V CR2032 Lithium battery as
the power supply for its internal real-time clock (RTC). This
battery will, under normal conditions, last for a minimum of 5
years. Low battery power affects the operation of the RTC,
causing it to reset at every power-up. A log message will appear
when battery replacement is required.
The battery should not be replaced unless required!
If the battery does need replacing, please observe the following
points:
Caution!
• Danger of Explosion if battery is incorrectly replaced
• Replace only with the same or equivalent battery, as
recommended by the manufacturer.
• Dispose of used batteries according to the manufacturer's
instructions.

AXIS 231D/232D - Table of contents 3
Installing the AXIS 231D/232D . . . . . . . . . . . . . . . . . . . . . . . . . . . . . . . . . . . . . . . . . . . . . . . . . . . . 5
Hardware Inventory . . . . . . . . . . . . . . . . . . . . . . . . . . . . . . . . . . . . . . . . . . . . . . .5
Exterior Ceiling Mounting . . . . . . . . . . . . . . . . . . . . . . . . . . . . . . . . . . . . . . . . . . . . . 6
Inset Ceiling Mounting . . . . . . . . . . . . . . . . . . . . . . . . . . . . . . . . . . . . . . . . . . . . . . . . 7
Installing on a Network . . . . . . . . . . . . . . . . . . . . . . . . . . . . . . . . . . . . . . . . . . . . . . . 8
AXIS Media Control (AMC) . . . . . . . . . . . . . . . . . . . . . . . . . . . . . . . . . . . . . . . . . .8
Manual Installation using AXIS IP Utility . . . . . . . . . . . . . . . . . . . . . . . . . . . . . . . . . 9
Manual Installation using ARP and Ping in Windows . . . . . . . . . . . . . . . . . . . . . . 10
Manual Installation using ARP and Ping in UNIX/Linux . . . . . . . . . . . . . . . . . . . . 11
AXIS Internet Dynamic DNS Service . . . . . . . . . . . . . . . . . . . . . . . . . . . . . . . . . . . . 12
AXIS 231D/232D installieren . . . . . . . . . . . . . . . . . . . . . . . . . . . . . . . . . . . . . . . . . . . . . . . . . . . . . 13
AXIS 231D/232D montieren . . . . . . . . . . . . . . . . . . . . . . . . . . . . . . . . . . . . . . . .13
Aufputzmontage . . . . . . . . . . . . . . . . . . . . . . . . . . . . . . . . . . . . . . . . . . . . . . . . . . . . 14
Unterputzmontage . . . . . . . . . . . . . . . . . . . . . . . . . . . . . . . . . . . . . . . . . . . . . . . . . . 15
Netzwerkeinbindung . . . . . . . . . . . . . . . . . . . . . . . . . . . . . . . . . . . . . . . . . . . . . . . . . 16
AXIS Media Control (AMC) . . . . . . . . . . . . . . . . . . . . . . . . . . . . . . . . . . . . . . . . .16
Manuelle Installation mit AXIS IP Utility . . . . . . . . . . . . . . . . . . . . . . . . . . . . . . . . 17
Manuelle Installation mit ARP und Ping unter Windows . . . . . . . . . . . . . . . . . . . 18
Manuelle Installation mit ARP und Ping unter UNIX/Linux . . . . . . . . . . . . . . . . . . 19
AXIS Internet Dynamic DNS Service . . . . . . . . . . . . . . . . . . . . . . . . . . . . . . . . . . . . 20
Installation de l’ AXIS 231D/232D . . . . . . . . . . . . . . . . . . . . . . . . . . . . . . . . . . . . . . . . . . . . . . . . . 21
Montage de l’AXIS 231D/232D . . . . . . . . . . . . . . . . . . . . . . . . . . . . . . . . . . . . . .21
Montage à l’extérieur du plafond . . . . . . . . . . . . . . . . . . . . . . . . . . . . . . . . . . . . . . 22
Montage encastré dans un plafond . . . . . . . . . . . . . . . . . . . . . . . . . . . . . . . . . . . . . 23
Installation dans un réseau . . . . . . . . . . . . . . . . . . . . . . . . . . . . . . . . . . . . . . . . . . . 24
AXIS Media Control (AMC) . . . . . . . . . . . . . . . . . . . . . . . . . . . . . . . . . . . . . . . . .24
Installation manuelle à l’aide de l’utilitaire AXIS IP . . . . . . . . . . . . . . . . . . . . . . . . 25
Installation manuelle à l'aide d’ARP et Ping sous Windows . . . . . . . . . . . . . . . . . 26
Installation manuelle à l'aide d’ARP et Ping sous UNIX/Linux . . . . . . . . . . . . . . . 27
AXIS Internet Dynamic DNS Service . . . . . . . . . . . . . . . . . . . . . . . . . . . . . . . . . . . . 28
Instalación de la AXIS 231D/232D . . . . . . . . . . . . . . . . . . . . . . . . . . . . . . . . . . . . . . . . . . . . . . . . . 29
Montaje de la AXIS 231D/232D . . . . . . . . . . . . . . . . . . . . . . . . . . . . . . . . . . . . .29
Montaje exterior en el techo . . . . . . . . . . . . . . . . . . . . . . . . . . . . . . . . . . . . . . . . . . 30
Montaje empotrado en el techo . . . . . . . . . . . . . . . . . . . . . . . . . . . . . . . . . . . . . . . . 31
Instalación en una red . . . . . . . . . . . . . . . . . . . . . . . . . . . . . . . . . . . . . . . . . . . . . . . 32
AXIS Media Control (AMC) . . . . . . . . . . . . . . . . . . . . . . . . . . . . . . . . . . . . . . . . .32

4 AXIS 231D/232D - Table of contents
Instalación manual utilizando AXIS IP Utility . . . . . . . . . . . . . . . . . . . . . . . . . . . . .33
Instalación manual utilizando ARP y Ping en Windows . . . . . . . . . . . . . . . . . . . . .34
Instalación manual utilizando ARP y Ping en UNIX/Linux . . . . . . . . . . . . . . . . . . .35
AXIS Internet Dynamic DNS Service . . . . . . . . . . . . . . . . . . . . . . . . . . . . . . . . . . . . .36
Installazione di AXIS 231D/232D . . . . . . . . . . . . . . . . . . . . . . . . . . . . . . . . . . . . . . . . . . . . . . . . . .37
Montaggio di AXIS 231D/232D . . . . . . . . . . . . . . . . . . . . . . . . . . . . . . . . . . . . . 37
Montaggio a soffitto in esterni . . . . . . . . . . . . . . . . . . . . . . . . . . . . . . . . . . . . . . . . .38
Montaggio a soffitto in interni . . . . . . . . . . . . . . . . . . . . . . . . . . . . . . . . . . . . . . . . .39
Installazione su una rete . . . . . . . . . . . . . . . . . . . . . . . . . . . . . . . . . . . . . . . . . . . . . .40
AXIS Media Control (AMC) . . . . . . . . . . . . . . . . . . . . . . . . . . . . . . . . . . . . . . . . 40
Installazione manuale mediante AXIS IP Utility . . . . . . . . . . . . . . . . . . . . . . . . . . .41
Installazione manuale mediante ARP e Ping in Windows . . . . . . . . . . . . . . . . . . .42
Installazione manuale mediante ARP e Ping in UNIX/Linux . . . . . . . . . . . . . . . . . .43
AXIS Internet Dynamic DNS Service . . . . . . . . . . . . . . . . . . . . . . . . . . . . . . . . . . . . .44

Installing the AXIS 231D/232D 5
ENGLISH
Installing the AXIS 231D/232D
Please observe the following before installing the AXIS 231D/232D Network Dome
Camera.
•Handle the camera carefully, avoid striking, shaking, etc. The camera could be damaged by improper handing or
storage.
•Do not disassemble the camera, there are no user serviceable parts inside. To prevent electric shock, do not
remove screws or covers. Also, refer to the Axis Warranty Agreement packed with the unit.
•Do not block cooling holes on the bracket. This camera has a cooling fan inside. Blocking the cooling holes may
cause the camera to overheat and malfunction.
•This product is designed for indoor use or locations where it is protected from rain and moisture. To operate the
camera in these conditions, use the outdoor housing accessories.
•Do not use strong or abrasive detergents when cleaning the casing. Use a mild detergent and wipe gently.
•Never position the camera directly towards the sun or other bright objects. Whether the camerais in use or not,
never aim it at the sun or other extremely bright objects.
Hardware Inventory
Check the items supplied with your AXIS 231D/232D against the following list:
Optional accessories are available for mounting on ceiling, wall, corner and pole, for both
indoor and outdoor use. For more information, please visit the Axis Web site at
http://www.axis.com
Before you begin
If the AXIS 231D/232D is to be mounted in a position where it is difficult to access, it is
recommended that you set the IP address and get the camera up and running before
completing the hardware installation.
Item Title/Variants
Network Dome Camera AXIS 231D/232D
Connection Module
Connection Module Cable
Indoor Power Supply with
power cable Europe
UK
Australia
USA/Japan
Korea
Mounting Kits Hard Ceiling Mount for Indoor Use
Inset Ceiling Mount for Indoor Use
This document AXIS 231D/232D User’s Manual
Warranty Document
The power supply is country
specific, please check that the
type of power supply you are
using is correct.

6 Installing the AXIS 231D/232D
Exterior Ceiling Mounting
Follow these instructions to mount the dome camera:
1. Using the supplied drill template, drill three holes in the hard ceiling and secure the
bracket to the ceiling with three screws.
2. Connect the connection module cable to the connection module.
3. Connect the Ethernet cable and connection module to the AXIS
231D/232D.
4. Connect the power cable and check that the power and network
LEDs light up (green).
5. Mount the dome body to the bracket and rotate it clockwise.
Make sure the screw hole on the side of dome is aligned with the
bracket. Tighten the fixing screw to secure the dome.
6. Attach and secure the Decoration ring to the bracket.
7. The hardware installation is now complete, proceed to Installing on a Network, on
page 8 to install the AXIS 231D/232D on your network.
Decoration
ring
Network
connector
Fixing
screw
Connection
module
connector
Network LED
Power LED

Installing the AXIS 231D/232D 7
ENGLISH
Inset Ceiling Mounting
Follow these instructions to mount the dome camera:
1. Place the decoration ring on the ceiling and mark the three screw holes and the inner
circle of the decoration cover.
2. Cut the hole in the ceiling according to the markings.
3. Insert the mounting bracket in the ceiling with the holders folded in. Once in place,
fold out the holders over the inner ceiling and secure the bracket by tightening the
screws.
4. Connect the Ethernet cable and connection module to the AXIS
231D/232D.
5. Connect the power cable and check that the power and network
LEDs light up (green).
6. Push the dome body up into the installed bracket and twist it
clockwise to lock it into the bracket.
7. Make sure the screw hole on the side of dome is aligned with the
bracket. Tighten the fixing screw to secure the dome.
8. The hardware installation is now complete, proceed to the next
section to install the AXIS 231D/232D on your network.
Decoration ring
Fixing screw
Ceiling
Network
connector
Connection
module
connector
Network
Indicator
Power
Detail-networkconnector:
Indicator
AXIS 231D mounted in bracket

8 Installing the AXIS 231D/232D
Installing on a Network
The AXIS 231D/232D is designed for installation on an Ethernet network. This involves
assigning an IP address to the dome camera, either manually or via an automated network
service (DHCP). Select one of the following procedures depending on your network:
Notes:
•The AXIS 231D/232D has a default IP address - 192.168.0.90
•DHCP is enabled by default
•The AXIS 231D/232D supports Universal Plug and Play (UPnP) in Windows Me and XP. UPnP is enabled by
default. Note that UPnP must be installed on your workstation. To do this, open the Control Panel from the
Start Menu and select Add/Remove Programs. Select Add/Remove Windows Components and open the
Networking Services section. Click Details and then select UPnP as the service to add. Refer to the Windows
help files for more information.
AXIS Media Control (AMC)
AXIS Media Control (AMC) - an ActiveX component required for Microsoft Internet
Explorer, installed automatically on first use.
AMC must be installed for viewing live images in Microsoft Internet Explorer. If your
working environment restricts additional software components, you can configure your
AXIS 213 to use a Java applet for updating the images. See the online help files under Live
View Config | Layout | Default Viewer for Internet Explorer. Or use another supported
Web browser.

Installing the AXIS 231D/232D 9
ENGLISH
Manual Installation using AXIS IP Utility
Follow these instructions to set the IP address manually using AXIS IP Utility:
1. Acquire an unused IP address for your
AXIS 231D/232D. (AXIS IP Utility
detects the subnet your computer is
connected in. The AXIS 231D/232D must
be installed on the same subnet).
2. Connect a standard RJ-45 network cable
to your AXIS 231D/232D and connect it
to the network.
3. Connect the power to the AXIS
231D/232D.
4. Start AXIS IP Utility on your computer.
5. Enter the serial number:
6. Enter the IP address acquired for your AXIS 231D/232D and click Set IP.
7. When prompted by AXIS IP Utility, restart the Network Dome Camera by
disconnecting and reconnecting the external power supply.
8. A message confirming that the IP address has been set will be displayed, click OK.
9. Click View Home Page to access the AXIS 231D/232D Web pages.
10.Enter a new password for the root user (administrator).
11.If required, accept the installation of AMC onto your workstation. See AXIS Media
Control (AMC), on page 8 for more information.
12.The installation is now complete.
If you need additional information, refer to the AXIS 231D/232D User’s Manual which is
available from the Axis web site at http://www.axis.com
AXIS IP Utility is a Windows software application that installs the AXIS 231D/232D to your local
network using a static IP address.
•Download the AXIS IP Utility software to your computer, free of charge from the Support
pages at http://www.axis.com/techsup/software
•Double-click the setup.exe file and follow the on-screen instructions to install the software
on your computer.
The serial number/MAC address (S/N) is located on the label on the AXIS 231D/232D

10 Installing the AXIS 231D/232D
Manual Installation using ARP and Ping in Windows
Assign your product with a unique IP address from a computer on your network, as
follows:
1. Acquire an unused IP address for the AXIS 231D/232D from your network
administrator.
2. Connect a standard network cable to your AXIS 231D/232D and connect it to the
network.
3. Locate the serial number/MAC Address (S/N) found on the label on the AXIS
231D/232D.
4. From a computer on your network, open a Command Prompt, i.e. from the Windows
Start menu, select Run... and type cmd in the field. Click OK.
5. Enter the commands:
Syntax:
Example
6. Connect the power to the AXIS 231D/232D.
7. When ‘Reply from 192.168.0.125: ...’ is displayed (approximately 10-15 seconds),
type Ctrl+C to close the ARP Ping session.
8. Start a Web browser and enter the IP address in the Address/Location field.
9. Press Enter.
10.Enter a new password for the root user (administrator).
11.If required, accept the installation of AMC onto your workstation. See AXIS Media
Control (AMC), on page 8 for more information.
12.The installation is now complete.
If you need additional information, refer to the AXIS 231D/232D User’s Manual which is
available from the Axis web site at http://www.axis.com
arp -s <IP address> <MAC address>
ping -l 408 -t <IP address> Note: The ping command is
followed by -l (lower case L)

Installing the AXIS 231D/232D 11
ENGLISH
Manual Installation using ARP and Ping in UNIX/Linux
Assign your product with a unique IP address from a computer on your network, as
follows:
1. Acquire an unused IP address for the AXIS 231D/232D from your network
administrator.
2. Connect a standard network cable to your AXIS 231D/232D and connect it to the
network.
3. Locate the serial number/MAC Address (S/N) found on the label on the AXIS
231D/232D.
4. Connect the power to the AXIS 231D/232D.
5. Once ‘Reply from 192.168.0.125: ...’ (or similar) is displayed (approximately 10-15
seconds), type CTRL+C to close the ARP Ping session.
6. Start a Web browser and enter the IP address in the Address/Location field.
7. Press Enter.
8. Enter a new password for the root user (administrator).
9. The installation is now complete.
If you need additional information, refer to the AXIS 231D/232D User’s Manual which is
available from the Axis web site at http://www.axis.com
Syntax:
arp -s <IP Address> <MAC Address> temp
ping -s 408 <IP address>
Example:
arp -s 192.168.0.125 00:40:8c:18:10:00 temp
ping -s 408 192.168.0.125

12 Installing the AXIS 231D/232D
AXIS Internet Dynamic DNS Service
AXIS Internet Dynamic DNS Service provides a one-click procedure that makes the AXIS
231D/232D available on your local network and over the Internet. On installation, the
AXIS 231D/232D will receive a URL (web address), which can then be used to access it. The
Network Dome Camera can be unregistered from the service at any time.
Please visit www.axiscam.net for more details on AXIS Internet Dynamic DNS Service.
Requirements
To use the AXIS Internet Dynamic DNS Service, the following is required:
• A DHCP server connected to the network
• An Internet connection that does not require a proxy server for HTTP access.
Installation Procedure
1. Connect the AXIS 231D/232D to your local network, using a standard (RJ-45)
network cable.
2. Connect the power to the Network Dome Camera.
3. Wait for the Power indicator on the AXIS 231D/232D to show a steady green,
whereupon it will have received a dynamic IP address from a DHCP server on your
network.
4. Wait 60 seconds and push the control button on the dome camera once. The Power
indicator will blink amber while it connects to the AXIS Internet Dynamic DNS
service. When the registration process is complete, the indicator will return to steady
green.
5. Visit www.axiscam.net where you will be guided through the remainder of the
installation. Please have the serial number of your product ready and follow the
instructions on the screen.
6. Enter a new password for the root user (administrator).
7. If required, accept the installation of AMC onto your workstation. See AXIS Media
Control (AMC), on page 8 for more information.
8. The installation is now complete.
If you need additional information, refer to the AXIS 231D/232D User’s Manual which is
available from the Axis web site at http://www.axis.com
Please note that this procedure will send the AXIS 231D/232D’s IP address, firmware version, prod-
uct type and serial number to the Axis Internet Dynamic DNS Service.
No personal information will be transferred.
The serial number/MAC address (S/N) is located on the label on the underside of the AXIS 231D/232D

AXIS 231D/232D installieren 13
DEUTSCH
AXIS 231D/232D installieren
Beachten Sie Folgendes, bevor Sie die AXIS 231D/232D-Netzwerkkuppelkamera installieren.
•Behandeln Sie die Kamera vorsichtig. Setzen Sie sie weder Schlageinwirkungen noch Schüttelbewegungen usw. aus.
Durch unsachgemäße Behandlung oder Lagerung kann die Kamera beschädigt werden.
•Die Kamera darf nicht demontiert werden. Sie enthält keine zu wartenden Komponenten. Lösen Sie weder Schrauben
noch Abdeckungen, um elektrische Schläge zu vermeiden. Lesen Sie die Axis-Garantievereinbarung im Lieferumfang
des Geräts.
•Blockieren Sie nicht die Lüftungsöffnungen an der Halterung. Im Inneren dieser Kamera befindet sich ein Lüfter. Das
Blockieren der Lüftungsöffnungen kann zu einer Überhitzung und Fehlfunktionen führen.
•Dieses Produkt ist für eine Nutzung in Innenräumen vorgesehen. Es kann in Außenbereichen eingesetzt werden, wenn
es vor Regen und Feuchtigkeit geschützt wird. Verwenden Sie bei einer Nutzung der Kamera in Außenbereichen das
entsprechende Zubehör.
•Setzen Sie beim Reinigen des Gehäuses keine intensiven oder scheuernden Reinigungsmittel ein. Wischen Sie das
Gehäuse vorsichtig mit einem sanften Reinigungsmittel ab.
•Setzen Sie die Kamera niemals direkter Sonneneinstrahlung oder anderen hellen Lichtquellen aus. Richten Sie die
Kamera bei einer Nutzung oder Nichtnutzung nie auf die Sonne oder andere überdurchschnittliche helle Objekte.
AXIS 231D/232D montieren
Die AXIS 231D/232D-Netzwerkkuppelkamera wird mit einem Wandmontagesatz für Auf- oder
Unterputzmontage geliefert.
Zusätzliches Zubehör ist erhältlich für Decken-, Wand-, Ecken- und Mastmontage im Innen-
und Außenbereich. Nähere Informationen erhalten Sie auf der Axis-Website unter
http://www.axis.com.
Vorbereitungen
Wenn das Modell AXIS 231D/232D an einer schwer zugänglichen Position angebracht wird,
empfiehlt es sich, die IP-Adresse festzulegen und die Kamera betriebsbereit zu machen, bevor
die Hardwareinstallation erfolgt.

14 AXIS 231D/232D installieren
Aufputzmontage
1. Halten Sie die mitgelieferte Bohrschablone an und bohren Sie drei Löcher in die Wand.
Befestigen Sie die Halterung mit drei Schrauben.
2. Schließen Sie das Verbindungsmodulkabel am Verbindungsmodul
an.
3. Schließen Sie Ethernet-Kabel und Verbindungsmodul an AXIS
231D/232D an.
4. Schließen Sie das Netzkabel an und vergewissern Sie sich, dass die
LEDs für Stromversorgung und Netzwerk (grün) aufleuchten.
5. Setzen Sie die Kuppel in die Halterung ein und drehen Sie sie im
Uhrzeigersinn. Stellen Sie sicher, dass das Schraubenloch an der
einen Kuppelseite an der Halterung ausgerichtet ist. Ziehen Sie die
Befestigungsschraube an, um die Kuppel zu sichern.
6. Bringen Sie die Ringblende an der Halterung an und befestigen Sie sie mit drei
Schrauben.
7. Die Hardwareinstallation ist damit abgeschlossen. Fahren Sie mit dem nächsten
Abschnitt fort, um AXIS 231D/232D in das Netzwerk einzubinden.
Ring-
blende
Befestigungs-
schraube
Verbindungsmodulkabel
Netzwerkkabel
:LEDs für:
Stromversorgung
Netzwerk

AXIS 231D/232D installieren 15
DEUTSCH
Unterputzmontage
1. Setzen Sie die Ringblende an der Decke an und zeichnen Sie die drei Schraubenlöcher
sowie der Innenring der Ringblende an.
2. Öffnen Sie die Decke anhand der Markierungen.
3. Führen Sie die Montagehalterung mit eingeklappten Haltern in die Decke ein. Klappen
Sie anschließend die Halter über das innere Deckenstück und sichern Sie die Halterung,
indem Sie die Schrauben anziehen.
4. Überprüfen Sie Netzwerk- und Stromanschlüsse wie folgt:
5. Führen Sie das Verbindungsmodulkabel von der Kuppel zum
externen Verbindungsmodul.
6. Schließen Sie Ethernet-Kabel und Verbindungsmodul an AXIS
231D/232D an.
7. Schließen Sie das Netzkabel an und vergewissern Sie sich, dass die
LEDs für Stromzufuhr und Netzwerk (grün) aufleuchten.
8. Drücken Sie die Kuppel in die montierte Halterung und drehen Sie
sie im Uhrzeigersinn, um sie in der Halterung zu befestigen.
9. Stellen Sie sicher, dass das Schraubenloch an der einen Kuppelseite
an der Halterung ausgerichtet ist. Ziehen Sie die Befestigungss-
chraube an, um die Kuppel zu sichern.
10.Die Hardwareinstallation ist damit abgeschlossen. Fahren Sie mit dem nächsten
Abschnitt fort, um AXIS 231D/232D in das Netzwerk einzubinden.
Netzwerkanschluss
mit LEDs für
Verbindungsmodulkabel
Stromversorgung
und Netzwerk
LEDs für:
Netzwerk
Stromversorgung
Ringblende
Befestigungs-
Decke
schraube

16 AXIS 231D/232D installieren
Netzwerkeinbindung
AXIS 231D/232D ist für die Einbindung in ein Ethernet-Netzwerk vorgesehen. Dazu muss die
Kuppelkamera entweder manuell oder über einen automatischen Netzwerkdienst (DHCP) eine
IP-Adresse zugewiesen werden. Wählen Sie je nach Ihrem Netzwerk eines der folgenden Ver-
fahren aus:
Hinweise:
•AXIS 231D/232D besitzt folgende Standard-IP-Adresse: 192.168.0.90
•DHCP ist standardmäßig aktiviert.
AXIS Media Control (AMC)
AXIS Media Control (AMC; AXIS-Mediensteuerung) ist eine ActiveX-Komponente, die für
Microsoft Internet Explorer benötigt und bei der ersten Verwendung automatisch installiert
wird.
AMC muss installiert sein, damit direkt übertragene Bilder in Microsoft Internet Explorer gese-
hen werden können. Falls Ihr Arbeitsumfeld weitere Softwarekomponenten nicht zulässt, kön-
nen Sie Ihren AXIS 231D zum Aktualisieren der Bilder für eine Java-Softwarekomponente
konfigurieren. Hinweise entnehmen Sie der Online-Hilfe für Internet Explorer unter Live View
Config | Layout | Default Viewer. Sie können ebenfalls einen anderen unterstützten Web-
browser verwenden.

AXIS 231D/232D installieren 17
DEUTSCH
Manuelle Installation mit AXIS IP Utility
So legen Sie die IP-Adresse manuell mithilfe von AXIS IP Utility fest:
1. Lassen Sie sich eine freie IP-Adresse für
AXIS 231D/232D zuweisen.
(AXIS IP Utility erkennt das Subnetz, in
das Ihr Computer eingebunden ist. AXIS
231D/232D muss in dasselbe Subnetz
eingebunden sein.)
2. Schließen Sie ein Standard-RJ
45-Netzwerkkabel an AXIS 231D/232D an,
um das Gerät ins Netzwerk einzubinden.
3. Schließen Sie AXIS 231D/232D an das
Stromnetz an.
4. Starten Sie AXIS IP Utility auf Ihrem Computer.
5. Geben Sie die Seriennummer ein:
6. Geben Sie die IP-Adresse für AXIS 231D/232D ein und klicken Sie auf Set IP.
7. Wenn AXIS IP Utility Sie dazu auffordert, starten Sie die Netzwerkkuppelkamera durch
Trennen und erneutes Anschließen der externen Stromversorgung neu.
8. Es erscheint eine Meldung zur Bestätigung, dass die IP-Adresse festgelegt wurde. Klicken
Sie auf OK.
9. Klicken Sie auf View Home Page um die AXIS 231D/232D-Webseiten aufzurufen.
10.Geben Sie ein neues Passwort für den Benutzer root (Administrator) ein.
11.Bestätigen Sie ggf. die AMC-Installation auf Ihrem Arbeitsplatz. Einzelheiten finden Sie
unter AXIS Media Control (AMC), auf Seite 16.
12.Die Installation ist damit abgeschlossen.
Zusätzliche Informationen entnehmen Sie dem Benutzerhandbuch für AXIS 231D/232D, das
Sie von der Axis-Website unter http://www.axis.com herunterladen können.
AXIS IP Utility ist eine Windows-Anwendung, mit der AXIS 231D/232D über eine statische
IP-Adresse in Ihrem lokalen Netzwerk installiert wird.
•Laden Sie die Software AXIS IP Utility kostenlos von den Support-Seiten unter
http://www.axis.com/techsup/software herunter.
•Doppelklicken Sie auf die Datei setup.exe und befolgen Sie die Bildschirmanweisungen zur Installa-
tion der Software auf Ihrem Computer.
Die Seriennummer/MAC-Adresse (S/N) steht auf dem Aufkleber auf AXIS 231D/232D.

18 AXIS 231D/232D installieren
Manuelle Installation mit ARP und Ping unter Windows
Weisen Sie Ihrem Produkt wie folgt eine eindeutige IP-Adresse von einem Computer Ihres
Netzwerks aus zu:
1. Lassen Sie sich von Ihrem Netzwerkadministrator eine freie IP-Adresse für AXIS
231D/232D zuweisen.
2. Schließen Sie ein Standard-Netzwerkkabel an AXIS 231D/232D an, um das Gerät ins
Netzwerk einzubinden.
3. Die Seriennummer/MAC-Adresse (S/N) steht auf dem Aufkleber auf AXIS 231D/232D.
4. Öffnen Sie auf einem Computer im Netzwerk eine Befehlszeile. Wählen Sie dazu im Win-
dows-Startmenü den Eintrag Ausführen aus und geben Sie den Befehl cmd ein. Klicken
Sie auf OK.
5. Geben Sie die Befehle ein:
Syntax:
Beispiel
6. Schließen Sie AXIS 231D/232D an das Stromnetz an.
7. Bei ‘Reply from 192.168.0.125: ...’ (ca. 10-15 s) – drücken Sie Strg+C zum Beenden der
ARP Ping-Sitzung.
8. Öffnen Sie einen Webbrowser und geben Sie die IP-Adresse im Adressfeld ein.
9. Drücken Sie die Eingabetaste.
10.Geben Sie ein neues Passwort für den Benutzer root (Administrator) ein.
11.Bestätigen Sie ggf. die AMC-Installation auf Ihrem Arbeitsplatz. Einzelheiten finden Sie
unter AXIS Media Control (AMC), auf Seite 16.
12.Die Installation ist damit abgeschlossen.
Zusätzliche Informationen entnehmen Sie dem Benutzerhandbuch für AXIS 231D/232D, das
Sie von der Axis-Website unter http://www.axis.com herunterladen können.
arp -s <IP-Adresse> <MAC-Adresse>
ping -l 408 -t <IP-Adresse> Hinweis: Auf den Ping-Befehl
folgt -l (kleines L).

AXIS 231D/232D installieren 19
DEUTSCH
Manuelle Installation mit ARP und Ping unter UNIX/Linux
Weisen Sie Ihrem Produkt wie folgt eine eindeutige IP-Adresse von einem Computer Ihres
Netzwerks aus zu:
1. Lassen Sie sich von Ihrem Netzwerkadministrator eine freie IP-Adresse für AXIS
231D/232D zuweisen.
2. Schließen Sie ein Standard-Netzwerkkabel an AXIS 231D/232D an, um das Gerät ins
Netzwerk einzubinden.
3. Die Seriennummer/MAC-Adresse (S/N) steht auf dem Aufkleber auf AXIS 231D/232D.
4. Schließen Sie AXIS 231D/232D an das Stromnetz an.
5. Bei ‘Reply from 192.168.0.125: ...’ (oder so ähnlich, ca. 10-15 s) – drücken Sie Strg+C
zum Beenden der ARP Ping-Sitzung.
6. Öffnen Sie einen Webbrowser und geben Sie die IP-Adresse im Adressfeld ein.
7. Drücken Sie die Eingabetaste.
8. Geben Sie ein neues Passwort für den Benutzer root (Administrator) ein.
9. Die Installation ist damit abgeschlossen.
Zusätzliche Informationen entnehmen Sie dem Benutzerhandbuch für AXIS 231D/232D, das
Sie von der Axis-Website unter http://www.axis.com herunterladen können.
Syntax:
arp -s <IP Address> <MAC Address> temp
ping -s 408 <IP-Adresse>
Beispiel:
arp -s 192.168.0.125 00:40:8c:18:10:00 temp
ping -s 408 192.168.0.125

20 AXIS 231D/232D installieren
AXIS Internet Dynamic DNS Service
AXIS Internet Dynamic DNS Service bietet ein denkbar einfaches Verfahren, mit dem AXIS
231D/232D im lokalen Netzwerk sowie über das Internet verfügbar gemacht wird. Bei der
Installation erhält AXIS 231D/232D eine URL-Adresse (Webadresse), über die ein Zugriff
ermöglicht wird. Die Netzwerkkuppelkamera kann jederzeit vom Dienst abgemeldet werden.
Unter www.axiscam.net erhalten Sie nähere Informationen zum AXIS Internet Dynamic DNS
Service.
Voraussetzungen
Für die Nutzung des AXIS Internet Dynamic DNS Service gelten folgende Voraussetzungen:
• ein DHCP Server mit Netzwerkanschluss,
• ein Internetanschluss, der keinen Proxyserver für den HTTP-Zugang benötigt.
Installation
1. Verbinden Sie AXIS 231D/232D über ein Standard-RJ 45-Netzwerkkabel mit dem
lokalen Netzwerk.
2. Schließen Sie die Netzwerkkuppelkamera an das Stromnetz an.
3. Warten Sie, bis die Stromversorgungsanzeige an AXIS 231D/232D durchgehend grün
leuchtet, d.h. das Gerät hat eine dynamische IP-Adresse von einem DHCP-Server im
Netzwerk erhalten.
4. Warten Sie 60 s. Drücken Sie daraufhin einmal die Steuertaste an der Kuppelkamera. Die
Stromversorgungsanzeige blinkt gelb, während eine Verbindung mit dem AXIS Internet
Dynamic DNS Service hergestellt wird. Nach Abschluss der Registrierung wechselt die
Anzeige wieder auf Dauergrün.
5. Auf der Website www.axiscam.net werden Sie durch den restlichen Installationsprozess
geführt. Halten Sie die Seriennummer Ihres Produkts bereit und befolgen Sie die
Anweisungen am Bildschirm.
6. Geben Sie ein neues Passwort für den Benutzer root (Administrator) ein.
7. Bestätigen Sie ggf. die AMC-Installation auf Ihrem Arbeitsplatz. Einzelheiten finden Sie
unter AXIS Media Control (AMC), auf Seite 16.
8. Die Installation ist damit abgeschlossen.
Zusätzliche Informationen entnehmen Sie dem Benutzerhandbuch für AXIS 231D/232D, das
Sie von der Axis-Website unter http://www.axis.com herunterladen können.
Hinweis: Bei diesem Vorgang werden IP-Adresse, Firmwareversion, Produkttyp und Seriennummer
von AXIS 231D/232D an den Axis Internet Dynamic DNS Service übermittelt.
Es werden keine persönlichen Daten übertragen.
Die Seriennummer/MAC-Adresse (S/N) steht auf dem Aufkleber auf der Unterseite des AXIS 231D/232D
Other manuals for 231D
4
This manual suits for next models
1
Table of contents
Languages:
Other Axis Security Camera manuals

Axis
Axis 01924-003 User manual

Axis
Axis P1405-E User manual

Axis
Axis Q35 Series User manual

Axis
Axis P32-VE SERIES User manual

Axis
Axis Q6032-E PTZ User manual

Axis
Axis P5522 User manual

Axis
Axis P9106-V User manual

Axis
Axis XP40-Q1765 User manual

Axis
Axis Q6032-C User manual

Axis
Axis AXIS 2420 W/Lens User manual