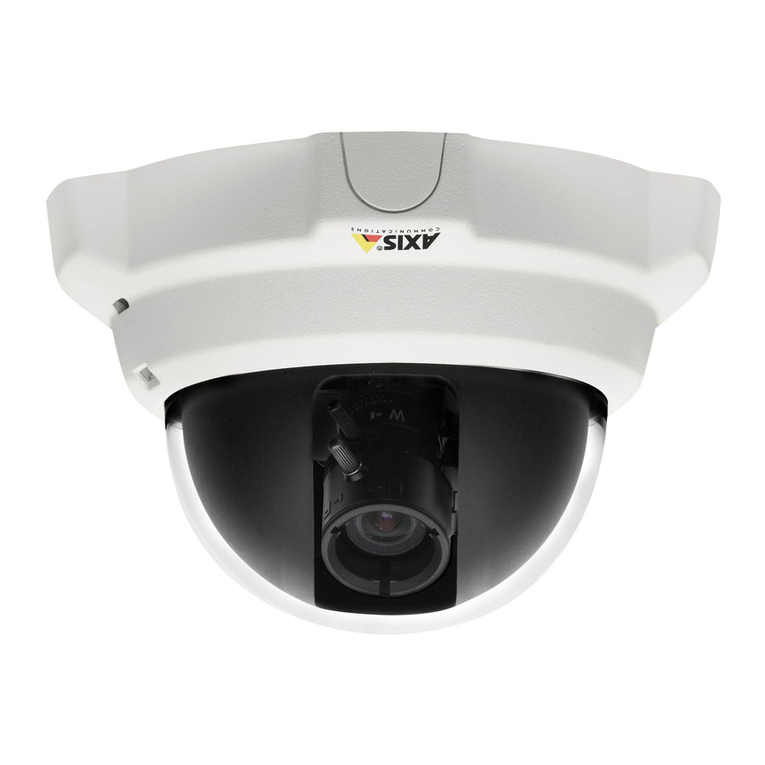
Axis P1368-E User manual

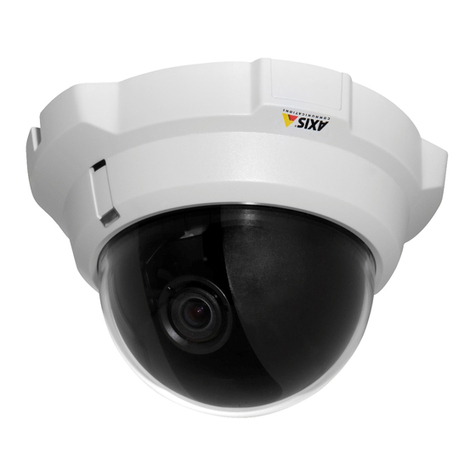
AXIS P1368-E Network Camera
Installation Guide
Available from A1 Security Cameras

Available from A1 Security Cameras

English EN
France: Français FR
Deutschland: Deutsch DE
Italia: Italiano IT
España: Español ES
日本:日本語 JA
中文:简体中文 ZH
Available from A1 Security Cameras

Legal considerations
Video and audio surveillance can be regulated by laws that
vary from country to country. Chec the laws in your local
region before using this product for surveillance purposes.
This product includes the following licences:
•one (1) AAC decoder license
•one (1) H.264 decoder license
To purchase further licenses, contact your reseller.
Liability
Every care has been ta en in the preparation of this
document. Please inform your local Axis ofce of any
inaccuracies or omissions. Axis Communications AB cannot
be held responsible for any technical or typographical errors
and reserves the right to ma e changes to the product and
manuals without prior notice. Axis Communications AB
ma es no warranty of any ind with regard to the material
contained within this document, including, but not limited
to, the implied warranties of merchantability and tness for
aparticular purpose. Axis Communications AB shall not
be liable nor responsible for incidental or consequential
damages in connection with the furnishing, performance
or use of this material. This product is only to be used for
its intended purpose.
Intellect al property rights
Axis AB has intellectual property rights relating to
technology embodied in the product described in this
document. In particular, and without limitation, these
intellectual property rights may include one or more of
the patents listed at www.axis.com/patent.htm and one or
more additional patents or pending patent applications in
the US and other countries.
This product contains licensed third-party software. See
the menu item “About” in the product’s user interface for
more information.
This product contains source code copyright Apple Computer,
Inc., under the terms of Apple Public Source License 2.0
(see www.opensource.apple.com/apsl). The source code is
available from https://developer.apple.com/bonjour/
Eq ipment modications
This equipment must be installed and used in
strict accordance with the instructions given in the
user documentation. This equipment contains no
user-serviceable components. Unauthorized equipment
changes or modications will invalidate all applicable
regulatory certications and approvals.
Trademark acknowledgments
AXIS COMMUNICATIONS, AXIS and VAPIX are registered
trademar s or trademar applications of Axis AB in various
jurisdictions. All other company names and products are
trademar s or registered trademar s of their respective
companies.
Apple, Boa, Apache, Bonjour, Ethernet, Internet Explorer,
Linux, Microsoft, Mozilla, Real, SMPTE, Quic Time, UNIX,
Windows, Windows Vista and WWW are registered
trademar s of the respective holders. Java and all
Java-based trademar s and logos are trademar s or
registered trademar s of Oracle and/or its afliates.
UPnPTM is acertication mar of the UPnPTM Implementers
Corporation.
SD, SDHC and SDXC are trademar s or registered trademar s
of SD-3C, LLC in the United States, other countries or both.
Also, miniSD, microSD, miniSDHC, microSDHC, microSDXC
are all trademar s or registered trademar s of SD-3C, LLC
in the United States, other countries or both.
Reg latory information
Europe
This product complies with the applicable CE mar ing
directives and harmonized standards:
• Electromagnetic Compatibility (EMC) Directive
2014/30/EU. See Electromagnetic compatibility (EMC)
4.
• Low Voltage (LVD) Directive 2014/35/EU. See afety 5.
• Restrictions of Hazardous Substances (RoHS) Directive
2011/65/EU. See Disposal and recycling 5.
Acopy of the original declaration of conformity may be
obtained from Axis Communications AB. See Contact
information 5.
Electromagnetic compatibility (EMC)
This equipment has been designed and tested to fulll
applicable standards for:
• Radio frequency emission when installed according to
the instructions and used in its intended environment.
• Immunity to electrical and electromagnetic phenomena
when installed according to the instructions and used
in its intended environment.
USA
This equipment has been tested using an unshielded
networ cable (UTP) and found to comply with the limits
for aClass Adigital device, pursuant to part 15 of the FCC
rules. This equipment has also been tested using ashielded
networ cable (STP) and found to comply with the limits for
aClass Adigital device, pursuant to part 15 of the FCC rules.
These limits are designed to provide reasonable protection
against harmful interference when the equipment is
operated in acommercial environment. This equipment
generates, uses, and can radiate radio frequency energy
and, if not installed and used in accordance with the
instruction manual, may cause harmful interference to
radio communications. Operation of this equipment in
aresidential area is li ely to cause harmful interference
in which case the user will be required to correct the
interference at his own expense.
Canada
This digital apparatus complies with CAN ICES-3 (Class A).
The product shall be connected using ashielded networ
cable (STP) that is properly grounded. Cet appareil
numérique est conforme àla norme NMB ICES-3 (classe A).
Le produit doit être connecté àl'aide d'un câble réseau
blindé (STP) qui est correctement mis àla terre.
Europe
This digital equipment fullls the requirements for RF
emission according to the Class Alimit of EN 55032. The
product shall be connected using ashielded networ cable
(STP) that is properly grounded. Notice! This is aClass A
product. In adomestic environment this product may cause
RF interference, in which case the user may be required
to ta e adequate measures.
This product fullls the requirements for immunity
according to EN 61000-6-1 residential, commercial and
light-industrial environments.
This product fullls the requirements for immunity
according to EN 61000-6-2 industrial environments.
This product fullls the requirements for immunity
according to EN 55024 ofce and commercial
environments.
Australia/New Zealand
This digital equipment fullls the requirements for RF
emission according to the Class Alimit of AS/NZS CISPR 32.
Available from A1 Security Cameras

The product shall be connected using ashielded networ
cable (STP) that is properly grounded. Notice! This is a
Class Aproduct. In adomestic environment this product
may cause RF interference, in which case the user may be
required to ta e adequate measures.
Japan
この装置は、クラスA 情報技術装置です。この装
置を家庭環境で使⽤すると電波妨害 を引き起こす
ことがあります。この場合には使⽤者が適切な対
策を講ずるよう要求され ることがあります。 本
製品は、シールドネットワークケーブル(STP)を
使⽤して接続してください。また適切に接地し
てください。
Korea
이기기는 업무용(A급) 전자파적합기기로서 판매
자또는 사용자는 이점을 주의하시기 바라며, 가
정외의 지역에서 사용하는 것을 목적으로 합니다.
적절히 접지된 STP (shielded twisted pair) 케이블
을사용하여 제품을 연결 하십시오.
Safety
This product complies with IEC/EN/UL 62368-1, safety of
audio/video and IT equipment, and IEC/EN/UL 60950-22,
Safety of Information Technology Equipment. The product
shall be grounded either through ashielded networ cable
(STP) or other appropriate method.
Disposal and recycling
When this product has reached the end of its useful life,
dispose of it according to local laws and regulations. For
information about your nearest designated collection point,
contact your local authority responsible for waste disposal.
In accordance with local legislation, penalties may be
applicable for incorrect disposal of this waste.
Europe
This symbol means that the product shall not be
disposed of together with household or commercial waste.
Directive 2012/19/EU on waste electrical and electronic
equipment (WEEE) is applicable in the European Union
member states. To prevent potential harm to human health
and the environment, the product must be disposed of in
an approved and environmentally safe recycling process.
For information about your nearest designated collection
point, contact your local authority responsible for waste
disposal. Businesses should contact the product supplier for
information about how to dispose of this product correctly.
This product complies with the requirements of
Directive 2011/65/EU on the restriction of the use of
certain hazardous substances in electrical and electronic
equipment (RoHS).
China
This product complies with the requirements of
SJ/T 11364-2014, Mar ing for the restriction of hazardous
substances in electrical and electronic products.
电
气
实
装
部
分
X00000
0: 表示该有毒有害物质在该部件所有均质材料中
的含量均在GB/T 26572标准规定的限量要求以下。
X: 表示该有毒有害物质至少在该部件的某一均质
材料中的含量超出GB/T 26572标准规定的限量要
求。
Contact information
Axis Communications AB
Emdalavägen 14
223 69 Lund
Sweden
Tel: +46 46 272 18 00
Fax: +46 46 13 61 30
www.axis.com
Warranty information
For information about Axis’ product warranty and thereto
related information, go to www.axis.com/warranty/
S pport
Should you require any technical assistance, please contact
your Axis reseller. If your questions cannot be answered
immediately, your reseller will forward your queries through
the appropriate channels to ensure arapid response. If you
are connected to the Internet, you can:
• download user documentation and software updates
• nd answers to resolved problems in the FAQ database.
Search by product, category, or phrase
• report problems to Axis support staff by logging in to
your private support area
• chat with Axis support staff
• visit Axis Support at www.axis.com/support
Learn more!
Visit Axis learning center www.axis.com/academy/ for
useful trainings, webinars, tutorials and guides.
有毒有害物质或元素
部
件
名
称
铅
(Pb)
汞
(Hg) 镉
(Cd) 六价
铬
(Cr-
(VI))
多溴
联苯
(PB-
B)
多溴
二苯
醚
(PB-
DE)
Available from A1 Security Cameras
Installation Guide
Pa kage ontents ............................................ 11
Produ t overview ............................................ 12
How to install the produ t ..................................... 14
Install the hardware .............................................. 14
How to access the product ......................................... 20
How to reset to fa tory default settings ........................... 22
Further information .......................................... 23
Optional accessories .............................................. 23
Te hni al spe i ations ....................................... 24
SD card slot .................................................... 24
Buttons ....................................................... 25
Connectors .................................................... 25
Operating conditions ............................................. 28
Power consumption .............................................. 28
Safety information .......................................... 29
Hazard levels ................................................... 29
Other message levels ............................................. 29
Safety instru tions .......................................... 30
Transportation .................................................. 30
Battery ....................................................... 30
Contenu de l’emballage ....................................... 33
Vue d'ensemble du produit .................................... 34
Comment installer le produit ................................... 36
Installation du matériel ........................................... 36
Comment accéder au produit ....................................... 42
Comment restaurer les paramètres par défaut ...................... 44
Informations omplémentaires .................................. 45
Accessoires en option ............................................. 45
Cara téristiques te hniques .................................... 46
Emplacement pour carte SD ........................................ 46
Boutons ...................................................... 47
Connecteurs ................................................... 47
Conditions d’utilisation ............................................ 50
Consommation électrique .......................................... 50
Informations sur la sé urité .................................... 51
Niveaux de risques ............................................... 51
Autres niveaux de message ......................................... 51
Consignes de sé urité ........................................ 52
Transport ...................................................... 52
Batterie ....................................................... 52
Lieferumfang .............................................. 55
Produktübersi ht ............................................ 56
Installieren des Produkts ...................................... 58
6
Available from A1 Security Cameras

AXIS P1368-E Network Camera
Die Hardware installieren .......................................... 58
Zugriff auf das Produ t ............................................ 65
Zurü ksetzen auf die werksseitigen Standardeinstellungen .............67
Weitere Informationen ....................................... 68
Optionales Zubehör .............................................. 68
Te hnis he Daten ........................................... 69
SD-Karteneinschub .............................................. 69
Tasten ........................................................ 70
Anschlüsse .................................................... 70
Betriebsbedingungen ............................................. 73
Leistungsaufnahme .............................................. 73
Si herheitsinformationen ...................................... 75
Gefährdungsstufen ............................................... 75
Weitere Nachrichtenstufen ......................................... 75
Si herheitsanweisungen ....................................... 76
Transport ...................................................... 76
Batterie ....................................................... 76
Contenuto della onfezione .................................... 79
Panorami a del dispositivo ..................................... 80
Come installare il dispositivo ................................... 82
Installazione dell'hardware ......................................... 82
Come accedere al dispositivo ....................................... 88
Modalità di ripristino dei valori predeniti di fabbri a ................90
Ulteriori Informazioni ........................................ 91
Accessori opzionali ............................................... 91
Spe i he te ni he .......................................... 92
Slot per scheda SD ............................................... 92
Pulsanti ....................................................... 93
Connettori ..................................................... 93
Condizioni di funzionamento ....................................... 96
Consumo energetico .............................................. 96
Informazioni di si urezza ...................................... 97
Livelli di pericolo ................................................ 97
Altri livelli di messaggio ........................................... 97
Informazioni di si urezza ...................................... 98
Trasporto ...................................................... 98
Batteria ....................................................... 98
Contenido del paquete ........................................ 101
Informa ión general del produ to ............................... 102
Cómo instalar el produ to ..................................... 104
Instalación del hardware .......................................... 104
Cómo acceder al producto ......................................... 110
Cómo restable er los ajustes predeterminados de fábri a ..............112
7
Available from A1 Security Cameras
Installation Guide
Más informa ión ............................................ 113
Accesorios opcionales ............................................. 113
Espe i a iones té ni as ...................................... 114
Ranura para tarjetas SD ........................................... 114
Botones ....................................................... 115
Conectores .................................................... 115
Condiciones de funcionamiento ..................................... 118
Consumo de energía .............................................. 118
Informa ión de seguridad ..................................... 119
Niveles de peligro ............................................... 119
Otros niveles de mensaje .......................................... 119
Instru iones de seguridad ..................................... 120
Transporte ..................................................... 120
Batería ....................................................... 120
パパ
パッッ
ッケケ
ケーー
ージジ
ジのの
の内内
内容容
容....................................... 123
製製
製品品
品のの
の概概
概要要
要............................................. 124
製製
製品品
品のの
の取取
取りり
り付付
付けけ
け方方
方法法
法..................................... 126
ハードウェアのインストール ................................. 126
製品のアクセス方法 ........................................ 133
工工
工場場
場出出
出荷荷
荷時時
時のの
の設設
設定定
定にに
にリリ
リセセ
セッッ
ットト
トすす
するる
る方方
方法法
法....................... 135
関関
関連連
連情情
情報報
報.............................................. 136
オプションアクセサリー ..................................... 136
技技
技術術
術仕仕
仕様様
様.............................................. 137
SDカードスロット .......................................... 137
ボタン ................................................... 138
コネクター ................................................ 138
動作条件 ................................................. 141
消費電力 ................................................. 141
安安
安全全
全情情
情報報
報.............................................. 143
危険レベル ................................................ 143
その他のメッセージレベル ................................... 143
安安
安全全
全手手
手順順
順.............................................. 144
輸送 ..................................................... 144
バッテリー ................................................ 144
包包
包装装
装内内
内容容
容.............................................. 147
产产
产品品
品概概
概述述
述.............................................. 148
如如
如何何
何安安
安装装
装产产
产品品
品........................................... 150
安装硬件 ................................................. 150
如何访问产品 .............................................. 156
如如
如何何
何重重
重置置
置为为
为出出
出厂厂
厂默默
默认认
认设设
设置置
置.................................. 158
更更
更多多
多信信
信息息
息.............................................. 159
可选附件 ................................................. 159
技技
技术术
术规规
规格格
格.............................................. 160
8
Available from A1 Security Cameras

AXIS P1368-E Network Camera
SD 卡插槽 ................................................. 160
按钮 ..................................................... 160
接口 ..................................................... 161
工作条件 ................................................. 163
功耗 ..................................................... 163
安安
安全全
全信信
信息息
息.............................................. 165
危险等级 ................................................. 165
其他消息等级 .............................................. 165
安安
安全全
全说说
说明明
明.............................................. 166
运输 ..................................................... 166
电池 ..................................................... 166
9
Available from A1 Security Cameras
10
Available from A1 Security Cameras
Installation G ide

AXIS P1368-E Network Camera
Package contents
•AXIS P1368-E Networ Camera
•4–pin I/O connector bloc for connecting external devices
•2–pin RS485/422 connector bloc (x2)
•Wall mount
•Torx screwdriver T20
•Torx screwbit T30
•Mounting tool for RJ45
•IK10 tool
•Desiccant bag
• Printed materials
- Installation Guide (this document)
- Extra serial number label (2x)
- AVHS Authentication ey
EN
11
Available from A1 Security Cameras
AXIS P1368-E Network Camera
Product overview
1Weather shield
2Top cover
3Window
4Intrusion alarm magnet
5afety wire
6Cable tie anchor
7IK10 tool
8Intrusion alarm sensor
9Cable cover
10 pring loaded thumb screw (4x)
11 Optic unit
12 Lens
NONO
NOTICETICE
TICE
Do not lift the product in the cable cover.
12
Available from A1 Security Cameras
AXIS P1368-E Network Camera
EN
13 tatus LED
14 Network LED
15 Power LED
16 micro D card slot
17 I/O connector
18 R 485/422 connector
19 Control button
20 Network connector (PoE)
21 Audio out
22 Audio in
23 Cable gasket M20 (2x)
24 Iris connector
13
Available from A1 Security Cameras
AXIS P1368-E Network Camera
ow to install the product
Install the hardware
NONO
NOTICETICE
TICE
•Due to local regulations or the environmental and electrical conditions in which the
product is to be used, ashielded networ cable (STP) may be appropriate or required.
All cables connecting the product to the networ and that are routed outdoors or in
demanding electrical environments shall be intended for their specic use. Ma e sure that
the networ devices are installed in accordance with the manufacturer’s instructions.
For information about regulatory requirements, see Regulatory information 4
•Be careful not to scratch, damage or leave ngerprints on the window because this could
decrease image quality.
The Axis product can be installed with the cables routed through or along the wall.
Read all the instructions before installing the product.
Install the Wall Mo nt
CAUTION
Ma e sure that the screws and plugs are appropriate for the material (e.g. wood, metal,
drywall, stone) and that the material is strong enough to support the combined weight
of the camera, housing, and wall mount.
1. Prepare the wall for installation of the wall mount. Use the wall brac et as atemplate
and mar the holes before drilling the holes.
2. Route the networ cable through the wall brac et. Leave approximately 30 cm (11.8 in) of
cable for connecting the camera.
3. If connecting an auxiliary device, for example an I/O, audio, or external power device, to
the camera, repeat the step above as applicable to the specic device.
4. Fasten the wall brac et to the wall by tightening the screws.
Note
•For detailed instructions, see the wall mount’s Installation Guide supplied in the pac age
and available on www.axis.com
Install the camera
1. Loosen the bottom cover screws and lift the top cover.
NONO
NOTICETICE
TICE
•If more than one cable is used, each cable must be routed through aseparate cable gas et.
•Only open ahole in cable gas ets that will be used and if acable gas et is torn, replace it
with anew cable gas et. Leaving acable gas et open or using atorn cable gas et could
cause water to seep in and damage the product.
14
Available from A1 Security Cameras
AXIS P1368-E Network Camera
2. Select which cable gas et to use and pull the tab to open ahole for the networ cable.
1Bottom cover
2Bottom cover screw T20 (4x)
3Cable gasket M20 (2x)
4Tab
3. Push the networ cable through the cable gas et.
EN
NONO
NOTICETICE
TICE
If the networ cable has apremounted networ connector, remove the cable gas et and
use the connector guard to prevent tearing of the cable gas et. Avoid using networ
cables with capped networ connectors because they could cause tearing of the cable
gas et despite using the connector guard.
4. Pull the networ cable bac slightly so that the cable gas et adjusts itself on the cable.
15
Available from A1 Security Cameras
AXIS P1368-E Network Camera
NONO
NOTICETICE
TICE
Not pulling the cable bac could cause water to seep in and damage the product.
5. Ma e sure that the cable gas et is tted properly.
6. If connecting an auxiliary device, for example an I/O, audio, or external power device, to
the camera, repeat the steps above as applicable to the specic device.
NONO
NOTICETICE
TICE
Mount the connectors after the cables are pushed through the cable gas et.
1Bottom cover
2crew T20 (4x)
3Wall bracket
4Bracket adjustment screw T30
7. Put the bottom cover on the wall mount and tighten the screws (torque 2Nm).
16
Available from A1 Security Cameras

AXIS P1368-E Network Camera
8. If applicable, connect external I/O devices or audio devices to the camera.
EN
9. If using an SD card for local storage, insert the card into the camera’s SD card slot.
10. Connect the networ cable.
11. Ma e sure that the camera LEDs indicate the correct condition. See LED Indicators on
page 24.
12. Loosen the brac et adjustment screw to aim the camera to the point of interest. For
information about how to view the video stream, see How to access the product on
page 20
13. On delivery, the lens is positioned correctly for IK10. If you move or replace the lens,
you need to reposition the optical assembly to ensure IK10, see How to position the
lens for IK10 on page 20.
17
Available from A1 Security Cameras
AXIS P1368-E Network Camera
1afety hook
2Desiccant bag
14. Remove the plastic wrapper from the desiccant bag.
15. Remove the protective strip from the adhesive and attach the desiccant bag to the
top cover.
16. Close the housing. Alternately tighten the bottom cover screws afew turns at atime
until they are tight (torque 1.5 Nm). This will compress the bottom cover gas et evenly.
NONO
NOTICETICE
TICE
Do not pinch any cables when closing the housing.
17. If required, loosen the screws on the weather shield, adjust its position and tighten
the screws.
18
Available from A1 Security Cameras

AXIS P1368-E Network Camera
How to set p corridor format
EN
1Lock screw (2x)
2Optic unit
1. Loosen the two loc screws.
2. Rotate the optic unit.
3. Tighten the loc screws.
4. Go to the Stream tab on the product’s webpage and rotate the view 90°.
19
Available from A1 Security Cameras
AXIS P1368-E Network Camera
How to position the lens for IK10
1IK10 tool
2Optic unit
3pring loaded thumb screw (4x)
1. Zoom the lens to its widest position.
2. Attach the IK10 tool to the bottom cover.
3. Loosen the spring loaded thumb screws.
4. Move the lens so that it touches the tool.
5. Tighten the thumb screws.
How to access the prod ct
AXIS IP Utility and AXIS Camera Management are recommended methods for nding Axis products
on the networ and assigning them IP addresses in Windows®. Both applications are free and can
be downloaded from www.axis.com/support
The product can be used with the following browsers:
20
Available from A1 Security Cameras
Other manuals for P1368-E
2
Table of contents
Languages:
Other Axis Security Camera manuals

Axis
Axis Q6034-C PTZ User manual

Axis
Axis P1367-E User manual

Axis
Axis M32-LVE Series User manual

Axis
Axis P5415-E PTZ User manual

Axis
Axis M5055 User manual

Axis
Axis Q2901-E User manual

Axis
Axis Q6318-LE User manual

Axis
Axis P3224-LV Mk II User manual

Axis
Axis TQ1809-LE User manual

Axis
Axis M30 Series User manual