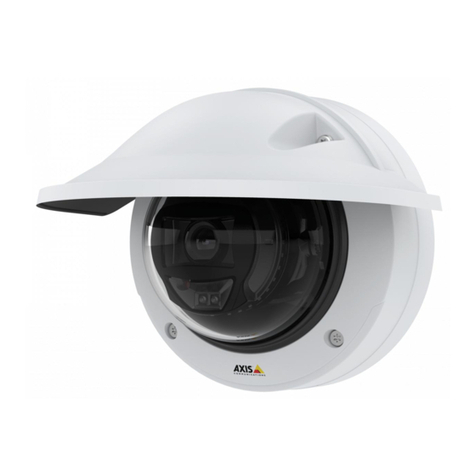
Axis Q3505-VE Mk II User manual

AXISQ3505–VEFixedDomeNetworkCamera
ENGLISH
InstallationGuide

LegalConsiderations
Videoandaudiosurveillancecanberegulatedbylawsthat
varyfromcountrytocountry.Checkthelawsinyourlocal
regionbeforeusingthisproductforsurveillancepurposes.
Thisproductincludesone(1)H.24decoderlicenseand
one(1)AACdecoderlicense.Topurchasefurtherlicenses,
contactyourreseller.
Liaility
Everycarehasbeentakeninthepreparationofthis
document.PleaseinformyourlocalAxisofceofany
inaccuraciesoromissions.AxisCommunicationsABcannot
beheldresponsibleforanytechnicalortypographicalerrors
andreservestherighttomakechangestotheproductand
manualswithoutpriornotice.AxisCommunicationsAB
makesnowarrantyofanykindwithregardtothematerial
containedwithinthisdocument,including,butnotlimited
to,theimpliedwarrantiesofmerchantabilityandtnessfor
aparticularpurpose.AxisCommunicationsABshallnot
beliablenorresponsibleforincidentalorconsequential
damagesinconnectionwiththefurnishing,performance
oruseofthismaterial.Thisproductisonlytobeusedfor
itsintendedpurpose.
IntellectualPropertyRights
AxisABhasintellectualpropertyrightsrelatingto
technologyembodiedintheproductdescribedinthis
document.Inparticular,andwithoutlimitation,these
intellectualpropertyrightsmayincludeoneormoreof
thepatentslistedatwww.axis.com/patent.htmandoneor
moreadditionalpatentsorpendingpatentapplicationsin
theUSandothercountries.
Thisproductcontainslicensedthird-partysoftware.See
themenuitem“About”intheproduct’suserinterfacefor
moreinformation.
ThisproductcontainssourcecodecopyrightAppleComputer,
Inc.,underthetermsofApplePublicSourceLicense2.0
(seewww.opensource.apple.com/apsl).Thesourcecodeis
availablefromhttps://developer.apple.com/bonjour/
EquipmentModications
Thisequipmentmustbeinstalledandusedin
strictaccordancewiththeinstructionsgiveninthe
userdocumentation.Thisequipmentcontainsno
user-serviceablecomponents.Unauthorizedequipment
changesormodicationswillinvalidateallapplicable
regulatorycerticationsandapprovals.
TrademarkAcknowledgments
AXISCOMMUNICATIONS,AXIS,ETRAX,ARTPECandVAPIX
areregisteredtrademarksortrademarkapplicationsofAxis
ABinvariousjurisdictions.Allothercompanynamesand
productsaretrademarksorregisteredtrademarksoftheir
respectivecompanies.
Apple,Boa,Apache,Bonjour,Ethernet,InternetExplorer,
Linux,Microsoft,Mozilla,Real,SMPTE,QuickTime,UNIX,
Windows,WindowsVistaandWWWareregistered
trademarksoftherespectiveholders.Javaandall
Java-basedtrademarksandlogosaretrademarksor
registeredtrademarksofOracleand/oritsafliates.
UPnPTMisacerticationmarkoftheUPnPTMImplementers
Corporation.
SD,SDHCandSDXCaretrademarksorregisteredtrademarks
ofSD-3C,LLCintheUnitedStates,othercountriesorboth.
Also,miniSD,microSD,miniSDHC,microSDHC,microSDXC
arealltrademarksorregisteredtrademarksofSD-3C,LLC
intheUnitedStates,othercountriesorboth.
RegulatoryInformation
Europe
ThisproductcomplieswiththeapplicableCEmarking
directivesandharmonizedstandards:
•ElectromagneticCompatibility(EMC)Directive
2004/108/EC.SeeElectromagneticCompatibility(EMC)
onpage2.
•LowVoltage(LVD)Directive200/95/EC.Seeafety
onpage3.
•RestrictionsofHazardousSubstances(RoHS)Directive
2011/5/EU.SeeDisposalandRecyclingonpage3.
Acopyoftheoriginaldeclarationofconformitymaybe
obtainedfromAxisCommunicationsAB.SeeContact
Informationonpage3.
ElectromagneticCompatiility(EMC)
Thisequipmenthasbeendesignedandtestedtofulll
applicablestandardsfor:
•Radiofrequencyemissionwheninstalledaccordingto
theinstructionsandusedinitsintendedenvironment.
•Immunitytoelectricalandelectromagneticphenomena
wheninstalledaccordingtotheinstructionsandused
initsintendedenvironment.
USA
Thisequipmenthasbeentestedusingashieldednetwork
cable(STP)andfoundtocomplywiththelimitsfora
ClassBdigitaldevice,pursuanttopart15oftheFCC
Rules.Theselimitsaredesignedtoprovidereasonable
protectionagainstharmfulinterferenceinaresidential
installation.Thisequipmentgenerates,usesandcan
radiateradiofrequencyenergyand,ifnotinstalledand
usedinaccordancewiththeinstructions,maycause
harmfulinterferencetoradiocommunications.However,
thereisnoguaranteethatinterferencewillnotoccurin
aparticularinstallation.Ifthisequipmentdoescause
harmfulinterferencetoradioortelevisionreception,which
canbedeterminedbyturningtheequipmentoffandon,
theuserisencouragedtotrytocorrecttheinterferenceby
oneormoreofthefollowingmeasures:
•Reorientorrelocatethereceivingantenna.
•Increasetheseparationbetweentheequipmentand
receiver.
•Connecttheequipmentintoanoutletonacircuit
differentfromthattowhichthereceiverisconnected.
•Consultthedealeroranexperiencedradio/TV
technicianforhelp.
Theproductshallbeconnectedusingashieldednetwork
cable(STP)thatisproperlygrounded.
Canada
ThisClassBdigitalapparatuscomplieswithCanadian
ICES-003.Theproductshallbeconnectedusingashielded
networkcable(STP)thatisproperlygrounded.
CetappareilnumériquedelaclasseBestconfomeàla
normeNMB-003duCanada.Leproduitdoitêtreconnecté
àl'aided'uncâbleréseaublindé(STP)quiestcorrectement
misàlaterre.
Europe
ThisdigitalequipmentfulllstherequirementsforRF
emissionaccordingtotheClassBlimitofEN55022.The
productshallbeconnectedusingashieldednetworkcable
(STP)thatisproperlygrounded.
Thisproductfulllstherequirementsforemissionand
immunityaccordingtoEN50121-4andIEC223-4railway
applications.

Thisproductfulllstherequirementsforimmunity
accordingtoEN1000--1residential,commercialand
light-industrialenvironments.
Thisproductfulllstherequirementsforimmunity
accordingtoEN1000--2industrialenvironments.
Thisproductfulllstherequirementsforimmunity
accordingtoEN55024ofceandcommercialenvironments
Australia/NewZealand
ThisdigitalequipmentfulllstherequirementsforRF
emissionaccordingtotheClassBlimitofAS/NZSCISPR22.
Theproductshallbeconnectedusingashieldednetwork
cable(STP)thatisproperlygrounded.
Japan
この装置は、クラスB情報技術装置です。この装置
は、家庭環境で使用することを目的としています
が、この装置がラジオやテレビジョン受信機に近
接して使用されると、受信障害を引き起こすこと
があります。取扱説明書に従って正しい取り扱い
をして下さい。本製品は、シールドネットワーク
ケーブル(STP)を使用して接続してください。また
適切に接地してください。
Korea
이기기는가정용(B급)전자파적합기기로서주로
가정에서사용하는것을목적으로하며,모든지
역에서사용할수있습니다.적절히접지된STP
(shieldedtwistedpair)케이블을사용하여제품
을연결하십시오.
Safety
ThisproductcomplieswithIEC/EN/UL0950-1and
IEC/EN/UL0950-22,SafetyofInformationTechnology
Equipment.Theproductshallbegroundedeitherthrougha
shieldednetworkcable(STP)orotherappropriatemethod.
DisposalandRecycling
Whenthisproducthasreachedtheendofitsusefullife,
disposeofitaccordingtolocallawsandregulations.For
informationaboutyournearestdesignatedcollectionpoint,
contactyourlocalauthorityresponsibleforwastedisposal.
Inaccordancewithlocallegislation,penaltiesmaybe
applicableforincorrectdisposalofthiswaste.
Europe
Thissymbolmeansthattheproductshallnotbe
disposedoftogetherwithhouseholdorcommercialwaste.
Directive2012/19/EUonwasteelectricalandelectronic
equipment(WEEE)isapplicableintheEuropeanUnion
memberstates.Topreventpotentialharmtohumanhealth
andtheenvironment,theproductmustbedisposedofin
anapprovedandenvironmentallysaferecyclingprocess.
Forinformationaboutyournearestdesignatedcollection
point,contactyourlocalauthorityresponsibleforwaste
disposal.Businessesshouldcontacttheproductsupplierfor
informationabouthowtodisposeofthisproductcorrectly.
Thisproductcomplieswiththerequirementsof
Directive2011/5/EUontherestrictionoftheuseof
certainhazardoussubstancesinelectricalandelectronic
equipment(RoHS).
China
Thisproductcomplieswiththerequirementsofthe
legislativeactAdministrationontheControlofPollution
CausedbyElectronicInformationProducts(ACPEIP).
ContactInformation
AxisCommunicationsAB
Emdalavägen14
2239Lund
Sweden
Tel:+442721800
Fax:+4413130
www.axis.com
Support
Shouldyourequireanytechnicalassistance,pleasecontact
yourAxisreseller.Ifyourquestionscannotbeanswered
immediately,yourresellerwillforwardyourqueriesthrough
theappropriatechannelstoensurearapidresponse.Ifyou
areconnectedtotheInternet,youcan:
•downloaduserdocumentationandsoftwareupdates
•ndanswerstoresolvedproblemsintheFAQdatabase.
Searchbyproduct,category,orphrase
•reportproblemstoAxissupportstaffbylogginginto
yourprivatesupportarea
•chatwithAxissupportstaff(selectedcountriesonly)
•visitAxisSupportatwww.axis.com/techsup/
LearnMore!
VisitAxislearningcenterwww.axis.com/academy/for
usefultrainings,webinars,tutorialsandguides.


AXISQ3505–VEFixedDomeNetworkCamera
SaetyInormation
ReadthroughthisInstallationGuidecarefullybeforeinstallingtheproduct.KeeptheInstallation
Guideforfuturereference.
HazardLevels
DANGERIndicatesahazardoussituationwhich,ifnotavoided,willresultin
deathorseriousinjury.
WARNINGIndicatesahazardoussituationwhich,ifnotavoided,couldresult
indeathorseriousinjury.
CAUTIONIndicatesahazardoussituationwhich,ifnotavoided,couldresult
inminorormoderateinjury.
NO NO
NOTICE TICE
TICEIndicatesasituationwhich,ifnotavoided,couldresultindamage
toproperty.
OtherMessageLevels
ImportantIndicatessignicantinformationwhichisessentialfortheproduct
tofunctioncorrectly.
NoteIndicatesusefulinformationwhichhelpsingettingthemostout
oftheproduct.
5
ENGLISH

AXISQ3505–VEFixedDomeNetworkCamera
SaetyInstructions
NO NO
NOTICE TICE
TICE
•TheAxisproductshallbeusedincompliancewithlocallawsandregulations.
•StoretheAxisproductinadryandventilatedenvironment.
•AvoidexposingtheAxisproducttoshocksorheavypressure.
•Donotinstalltheproductonunstablebrackets,surfacesorwalls.
•UseonlyapplicabletoolswheninstallingtheAxisproduct.Excessiveforcecouldcause
damagetotheproduct.
•Donotusechemicals,causticagents,oraerosolcleaners.Useacleanclothdampened
withpurewaterforcleaning.
•Useonlyaccessoriesthatcomplywithtechnicalspecicationoftheproduct.Thesecanbe
providedbyAxisorathirdparty.
•UseonlysparepartsprovidedbyorrecommendedbyAxis.
•Donotattempttorepairtheproductbyyourself.ContactAxissupportoryourAxis
resellerforservicematters.
Transportation
NO NO
NOTICE TICE
TICE
•WhentransportingtheAxisproduct,usetheoriginalpackagingorequivalenttoprevent
damagetotheproduct.
Battery
TheAxisproductusesa3.0VBR/CR2032lithiumbatteryasthepowersupplyforitsinternal
real-timeclock(RTC).Undernormalconditionsthisbatterywilllastforaminimumofveyears.
LowbatterypoweraffectstheoperationoftheRTC,causingittoresetateverypower-up.When
thebatteryneedsreplacing,alogmessagewillappearintheproduct’sserverreport.Formore
informationabouttheserverreport,seetheproduct´ssetuppagesorcontactAxissupport.
Thebatteryshouldnotbereplacedunlessrequired,butifthebatterydoesneedreplacing,contact
Axissupportatwww.axis.com/techsupforassistance.
WARNING
•Riskofexplosionifthebatteryisincorrectlyreplaced.
•ReplaceonlywithanidenticalbatteryorabatterywhichisrecommendedbyAxis.
•Disposeofusedbatteriesaccordingtolocalregulationsorthebatterymanufacturer's
instructions.
6

AXISQ3505–VEFixedDomeNetworkCamera
DomeCover
NO NO
NOTICE TICE
TICE
•Becarefulnottoscratch,damageorleavengerprintsonthedomecoverbecausethis
coulddecreaseimagequality.Ifpossible,keeptheprotectiveplasticonthedomecover
untiltheinstallationiscomplete.
•Donotcleanadomecoverthatlookscleantotheeyeandneverpolishthesurface.
Excessivecleaningcoulddamagethesurface.
•Forgeneralcleaningofthedomecoveritisrecommendedtouseanon-abrasive,
solvent-freeneutralsoapordetergentmixedwithpurewaterandasoft,cleancloth.Rinse
wellwithpurelukewarmwater.Drywithasoft,cleanclothtopreventwaterspotting.
•Neveruseharshdetergents,gasoline,benzeneoracetoneetc.andavoidcleaningthe
domecoverindirectsunlightoratelevatedtemperatures.
7
ENGLISH

8

AXISQ3505–VEFixedDomeNetworkCamera
InstallationGuide
ThisInstallationGuideprovidesinstructionsforinstallingAXISQ3505–VEFixedDomeNetwork
Cameraonyournetwork.Forotheraspectsofusingtheproduct,seetheUserManualavailable
atwww.axis.com
InstallationSteps
1.Makesurethepackagecontents,toolsandothermaterialsnecessaryfortheinstallation
areinorder.Seepage9.
2.Studythehardwareoverview.Seepage10.
3.Studythespecications.Seepage13.
4.Installthehardware.Seepage16.
5.Accesstheproduct.Seepage19.
PackageContents
Foroptionalaccessoriesseeaxis.com
•AXISQ3505–VEFixedDomeNetworkCamera
•SecureTorxL-key
•I/Oconnector
•Extracablegaskets
-CableGasketM20
-CableGasketM20–3mm
•Weathershield
•AXISConduitAdapterU-Shape30mmA
•InstallationandManagementSoftwareCD
•Printedmaterials
-InstallationGuide(thisdocument)
-Drilltemplate(2x)
-Extraserialnumberlabel(2x)
-AVHSAuthenticationkey
RecommendedTools
•ResitorxkeyTR20
9
ENGLISH

AXISQ3505–VEFixedDomeNetworkCamera
HardwareOverview
Note
3–9mmlens:Pressingthelenstoohardwhilecleaningmaycausethelenstomove
down.Ifthishappenswhilethecameraisinoperation,re-calibratetheopticsbyclicking
CaliratefromtheServerMaintenancewebpage(SystemOptions>Maintenance).
8911
13
19
14
15
16
12345
617 18 7
12
10
20
1.Networkconnector
2.Controlbutton
3.I/Oconnector
4.Audioout
5.Audioin
6.Dcardslot
7.AC/DCconnectorforpoweraccessory
8.Mountingbracket
9.idelidcoveringsideholeinmountingbracket
10.Conduitadaptor
11.Lockingclip
12.Networkcable
13.Unitcasing
14.Cameraunit
15.Domecover
10

AXISQ3505–VEFixedDomeNetworkCamera
16.Weathershield
17.tatusLed
18.Functionbutton
19.pring
20.HeaterCaution! Caution!
Caution!Theheatermaybehot
LEDIndicators
LEDColorIndication
UnlitConnectionandnormaloperation
AmberSteadyduringstartup.Flashesduringrmwareupgrade.
Amber/redFlashesamber/redifnetworkconnectionisunavailable
orlost.
RedFlashesredforrmwareupgradefailure.
Status
GreenShowssteadygreenfor10secondsfornormaloperation
afterrestart.
Note
•TheStatusLEDcanbeconguredtoashwhileaneventisactive.
•TheStatusLEDcanbeconguredtoashforidentifyingtheunit.GotoSetup>System
Options>Maintenance.
StatusLEDBehaviorandBuzzerSignalforLevellingAssistant
ForinformationontheFunctionbuttonusedforlevellingthecamera,seeConnectorsandButtons.
ColorBuzzerCameraposition
FixedgreenContinuousbeepLevel
FlashinggreenFastintervalAlmostlevel
FlashingorangeMediumintervalNotlevel
FlashingredSlowintervalFarfromlevel
ConnectorsandButtons
Forspecicationsandoperatingconditions,seepage13.
11
ENGLISH

AXISQ3505–VEFixedDomeNetworkCamera
NetworkConnector
RJ45EthernetconnectorwithPoweroverEthernet(PoE).
NO NO
NOTICE TICE
TICE
Theproductshallbeconnectedusingashieldednetworkcable(STP)oranopticalber
cable.Allcablesconnectingtheproducttothenetworkshallbeintendedfortheir
specicuse.Makesurethatthenetworkdevicesareinstalledinaccordancewith
themanufacturer’sinstructions.Forinformationaboutregulatoryrequirements,see
ElectromagneticCompatibility(EMC)onpage2.
I/OConnector
Usewithexternaldevicesincombinationwith,forexample,tamperingalarms,motiondetection,
eventtriggering,timelapserecordingandalarmnotications.Inadditiontothe0VDCreference
pointandpower(DCoutput),theI/Oconnectorprovidestheinterfaceto:
•Digitaloutput–ForconnectingexternaldevicessuchasrelaysandLEDs.Connected
devicescanbeactivatedbytheVAPIX®ApplicationProgrammingInterface,output
buttonsontheLiveViewpageorbyanActionRule.Theoutputwillshowasactive
(shownunderSystemOptions>Ports&Devices)ifthealarmdeviceisactivated.
•Digitalinput–Analarminputforconnectingdevicesthatcantogglebetweenanopen
andclosedcircuit,forexample:PIRs,door/windowcontacts,glassbreakdetectors,
etc.Whenasignalisreceivedthestatechangesandtheinputbecomesactive(shown
underSystemOptions>Ports&Devices).
AudioConnector
TheAxisproducthasthefollowingaudioconnectors:
•Audioin(pink)–3.5mminputforamonomicrophone,oraline-inmonosignal(left
channelisusedfromastereosignal).
•Audioout(green)–3.5mmoutputforaudio(linelevel)thatcanbeconnectedto
apublicaddress(PA)systemoranactivespeakerwithabuilt-inamplier.Astereo
connectormustbeusedforaudioout.
SDCardSlot
AmicroSDcard(notincluded)canbeusedforlocalrecordingwithremovablestorage.Formore
information,seepecicationsonpage13.
NO NO
NOTICE TICE
TICE
Topreventcorruptionofrecordings,theSDcardshouldbeunmountedbeforeremoval.To
unmount,gotoSetup>SystemOptions>Storage>SDCardandclickUnmount.
12

AXISQ3505–VEFixedDomeNetworkCamera
ControlButton
Thecontrolbuttonisusedfor:
•Resettingtheproducttofactorydefaultsettings.Seepage20.
•ConnectingtoanAXISVideoHostingSystemserviceorAXISInternetDynamicDNS
Service.Formoreinformationabouttheseservices,seetheUserManual.
FunctionButton
Thefunctionbuttonhasmultiplefunctions:
•AsLevellingAssistant–Thisfunctionhelpstoensurethecameraislevel.Pressthe
buttonforabout2secondstostartthelevellingassistantandpressagaintostop.The
statusLED(seepage11)andbuzzersignalassistlevellingofthecamera.Thecamerais
levelwhenthebuzzerbeepscontinuously.
•ToviewtheStatusLED–PressthebuttononcetolightuptheStatusLEDs.Pressagain
toturnthemoff.TheLEDswillturnoffautomaticallyafter10seconds.
Multicale(soldseparately)
ThemulticablecanbepurchasedfromanAxisresellerforconnectingexternalequipmenttothe
Axisproduct.Thecableprovidesthefollowingconnectors:
Audioconnector-SeeConnectorsonpage14
I/Oconnector-SeeConnectorsonpage14
Powerconnector-ConnectorforACandDCpowerforconnectiontotheAXIST8051Power
ConverterAC/DCtoDC(notincluded)wires.
WiresSpecications
Red+DCorAC
Black–DCorAC
Specications
ProductClassicationTemperatureHumidity
AXISQ3505–VEIEC0529IP
andIP7
NEMA250
4X-rated
–40°Cto55°C
(–40°Fto131°F)
10-100%RH(non-condensing)
13
ENGLISH

AXISQ3505–VEFixedDomeNetworkCamera
Connectors
I/OConnector
4–pinterminalblockfor:
•Auxiliarypower(DCoutput)
•DigitalInput
•DigitalOutput
•0VDC(-)
12 3 4
FunctionPinNotesSpecications
0VDC(-)10VDC
DCoutput2Canbeusedtopowerauxiliaryequipment.
Note:Thispincanonlybeusedaspowerout.
12VDC
Maxload=50mA
Digitalinput–Connecttopin1toactivate,
orleaveoating(unconnected)todeactivate.
0tomax30VDC Congurable
(Inputor
Output)
3–
4
Digitaloutput–Connectedtopin1when
activated,oating(unconnected)when
deactivated.Ifusedwithaninductiveload,
e.g.arelay,adiodemustbeconnectedin
parallelwiththeload,forprotectionagainst
voltagetransients.
0tomax30VDC,open
drain,100mA
14

AXISQ3505–VEFixedDomeNetworkCamera
12 Vmax 50 mA
1
2
3
4
3.I/Oconguredasinput
4.I/Oconguredasoutput
AudioConnector
3.5mmaudio
connectors(stereo)
123
1Tip2Ring3Sleeve
Audio
Input
Microphone/Linein
BalancedMicrophone
Hot(+)In/Unbalance
MicrophoneIn/LineIn
BalancedMicrophone
Cold(-)In
Ground
Audio
Output
Lineout(mono)Ground
15
ENGLISH

AXISQ3505–VEFixedDomeNetworkCamera
SDCardSlot
SupportsmicroSDcardswithupto4GBofstorage.Forbestrecordingperformance,use
amicroSDHCUHS-IormicroSDXCUHS-Icard.Intemperaturesbelow–25°Cuseindustrial
gradeSDcard.
InstalltheHardware
RoutetheCales
Note
SeeHardwareOverviewonpage10.
Dependingonwhetheryouwanttoroutethecablesthroughoralongthewall,followtherelevant
instructionsbelow.Toroutecablesthroughthewall:
1.Usingthedrilltemplatedrill4holesformountingthebracket,andoneortwoholesas
requiredforroutingthecableorcablesinthewall.
2.Routethenetworkcable(andthemulticableifrequired)throughthewallandthrough
theholeorholesinthemountingbracket.
Thecablescanberoutedalongthewallandthroughthesideholeonthemountingbracket.Todo
thisdetachthelockingclipandsidelidinthemountingbracketafterattachingmountingbracket
towall(seeAttachMountingBrackettoWallonpage17).Useanappropriateconduitadaptoras
required(seewww.axis.comforoptionalaccessories).SeeHardwareOverviewonpage10.
MountingBracket
Themountingbrackethas4mountingpatterns.Themountingpatternsfollowthestandardforthe
followingmountingoptions:
•:4"squarebox
•:standard-sizedUSdoublegangjunctionbox
16

AXISQ3505–VEFixedDomeNetworkCamera
•:4"octagonbox
•:standard-sizedUSsinglegangjunctionbox
AttachMountingBrackettoWall
1.Attachthemountingbracket(seeMountingBracketonpage16)tothewallwith
appropriatescrews.
2.ToroutethecablesseeRoutetheCablesonpage16.
3.Windthenetworkcablealongthegroovesonthemountingbracketkeepingtheextra
cablelengththatmayberequiredlater.
ConnecttheCalesandAttachUnitCasingtoMountingBracket
1.InserttheSDmemorycardinthecameraunit(optional).
2.Pushthenetworkcablethroughtheblackcablegasketinoneoftheholesintheunit
casing,usingtheconnectorguardprovided.Pullthenetworkcablebackslightlyso
thatthecablegasketadjustsitselfonthecable.Itisrecommendedtoroutethecable
throughtheholefarthestfromthenetworkconnectorinthecameraunit(seeimage
below).
NO NO
NOTICE TICE
TICE
Notpullingthecablebackcouldcausewatertoseepinanddamagetheproduct.
17
ENGLISH

AXISQ3505–VEFixedDomeNetworkCamera
3.Tightenthe4tamperproofscrewstoattachtheunitcasingtothemountingbracket
usingtheResitorxkeyTR20.
4.Connectthecabletothecameraunit.
5.Pullthespringsasideintheunitcasingandattachcameraunittotheunitcasing.
AdjustCameraAngle
1
2
3
4
1.Linesonopticholderthatindicateanincrementinthetiltangleby10°
2.malllinesonopticmountthatindicateapanincrementof3°
3.Linesonopticmountthatindicateapanincrementof15°
4.Linesonlenscovertohelpensurecameraislevel
1.Pan,tiltandrotatethecameratocovertheareaundersurveillance.Itispossibletopan
30°,andtilttoanangleof90°.
2.Panandrotatethelenstoadjustimage.Usethe2linesonthelenscovertoensure
thecameraislevel.Usethefunctionbuttontoactivatelevellingaid.SeeFunction
Buttononpage13.
AttachDomeCover
1.Makesurethegasketinthedomecoveriscleanandsitssecurelyinplace.
18

AXISQ3505–VEFixedDomeNetworkCamera
2.Slipthegroovesintheblackshield,overthescrewsoneithersideofthecamera’soptic
holder.Alignthescrewsinthedomecoverwiththeholesintheunitcasingandtighten
usingtheResitorxkeyTR20.
3.Removetheprotectivelmfromthedomecover.
Cameraunit:AXIQ3505–V
CompletetheInstallation
1.Ifrequired,attachtheweathershieldtothecamerabeforeyouattachthedomecover.
Todothisremovethetwoscrewsinthedomecover.
2.Makesuretherubbergasketsitssecurelyonthedomecover,attachthedomecoverto
theunitcasingbytighteningthe4screws.
Theinstallationisnowcomplete.
AccesstheProduct
UsethetoolsprovidedontheInstallationandManagementSoftwareCDtoassignanIPaddress,
setthepasswordandaccessthevideostream.Thisinformationisalsoavailablefromthesupport
pagesonwww.axis.com/techsup/
Focus&Zoom
IfyouhaveselectedOpticalzoomforinstallation,followtheinstructionsbelowtosetfocus
andzoom.Seeformoreinformation.
Tosetfocusandzoom:
1.GotoVideo&Audio>Focus&Zoom.
2.OntheBasictab,setthezoomlevelusingtheslider.Thebuttons<and>movethezoom
positiononestepineitherdirection.Thebuttons<<and>>movethezoompositionin
multiplestepsineitherdirection.
19
ENGLISH

AXISQ3505–VEFixedDomeNetworkCamera
3.ClickPerformautofocustofocusthecameraautomatically.
4.Ifmoreadjustmentsareneeded,gototheAdvancedtab.
Note
•Movementsinfrontofthecamerashouldbeavoidedduringautomaticfocusing.
OntheAdvancedtab,focuscanbeadjustedmanually:
1.ClickOpeniristoopentheiristoitsmaximumposition.Thisgivesthesmallestdepthof
eldandprovidesthebestconditionsforfocusing.
2.FocusissetintheFocuswindow.Usethemousetomoveandresizethefocuswindow.
3.ClickintheFocuspositionbartofocusonadesiredlocation.Thebuttons<and>move
thefocuspositiononestepineitherdirection.Thebuttons<<and>>movethefocus
positioninmultiplestepsineitherdirection.
4.Whensatised,clickEnaleiristoenabletheiris.
SetZoomandFocus-OpticalZoomforMonitoring
TosetFocus&ZoomwhenyouhaveselectedOpticalzoomformonitoring:
GotoPTZ>PresetPositionsandfollowtheonlineinstructionstosetthefocus.Inordertobeable
toretainthisfocuspositionafterrestartingthecamera,enteranameforthispresetintheCurrent
positioneldandselecttheUsecurrentpositionasHomeoption.Ifyoucalibratetheoptics
whileinthisOpticalzoomformonitoringmode,selectthispresetfromtheAvailalepositions
drop-downlistinthePresetPositionswebpage.ClickGotoandSave.
Tosetlimitsforfocusandzoom:
GotoVideo&Audio>Focus&Zoom.
SelectaZoomtelelimitvaluetolimitthecamera’smaximumzoom.Thedigitalzoomlevelis
indicatedwiththeletterD.Tocheckthezoomtelelimit,clickGoto.
SettheFocusnearlimittopreventthecamerafromfocusingonobjectsthataretooclose.
Itispossibletosetfocusandzoomfromthispage,butthefocuswillbelostwhenthecamerais
restarted.
ResettoFactoryDefaultSettings
Important
Resettofactorydefaultshouldbeusedwithcaution.Aresettofactorydefaultwillreset
allsettings,includingtheIPaddress,tothefactorydefaultvalues.
20
Other manuals for Q3505-VE Mk II
1
This manual suits for next models
1
Table of contents
Other Axis Security Camera manuals