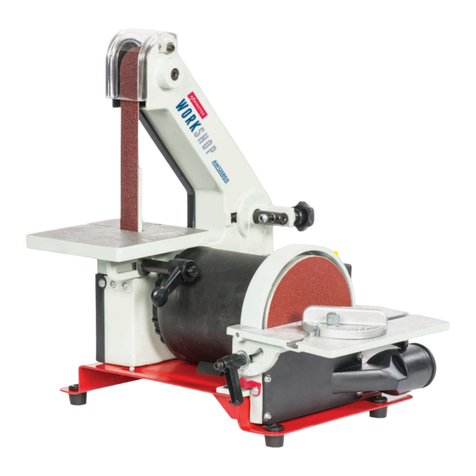
Axminster BS100 User manual

BS100 100mm
Belt Sander
Code 508210
AXMINSTER
SERIES
Trade

2/ 16
INDEX
1 Description and main features ..................................................3
1.1 Forward...................................................................................................................3
1.2 Who should use the instruction ..............................................................................3
1.3 Intended use and limitation of use…………………………………………………….3
2 Safety regulations.......................................................................4
2.1 Forward...................................................................................................................4
2.2 Labels on the machine ...........................................................................................4
2.3 Workers’ qualifications and dress...........................................................................5
2.4 Basic safety requirements ......................................................................................5
2.5 Special safety regulations for abrasive finishing machines....................................7
2.6 Safety regulations for set-up...................................................................................7
2.7 Safety regulations for operation .............................................................................8
2.8 Safety regulations for maintenance........................................................................8
3 Specifications of machines ....................................................... 8
3.1Identification Data ...................................................................................................8
3.2 Sound level .............................................................................................................8
3.2.1 Test conditions ...............................................................................................9
3.2.2 Result of measurement ..................................................................................9
4 Transportation of machines ......................................................9
4.1 Transportation and store ........................................................................................9
4.2 Transportation before unpacking..........................................................................10
4.3 Confirmation after unpacking................................................................................10
4.4 Transportation after unpacking.............................................................................10
5 Installation of machines...........................................................11
5.1 Preparation before installation..............................................................................11
5.1.1 Requirement of operating site ......................................................................11
5.1.2 Requirements of electrical power.................................................................11
5.2 Installation.............................................................................................................11
5.2.1 Minimum installation space for the machine................................................11
5.2.2 Installation ....................................................................................................12
5.2.3 Connection of electrical supply..........................................................................12
5.2.4 Connection of dust collection ............................................................................12
6 Trial running and operation.....................................................13
6.1 Structure ...............................................................................................................13
6.2 Operation components .........................................................................................13
6.3 Trial running..........................................................................................................14
6.4 Operation ..............................................................................................................14
6.5 Adjusting ...............................................................................................................15
6.5.1 Angle Adjust .................................................................................................15
6.5.2 Belt slant Adjust............................................................................................15
6.5.3 Changing the belt .........................................................................................15
7 Maintenance ..............................................................................16
7.1 Troubleshooting............................................................................................................. 16

3/ 16
1Description and main features
1.1 Forward
The instruction provides the caution proceeding,operation and services instruction for belt
grinder including the following models: JSG75, JSG75A, JSG100, JSG100A, JSG150,
JSG150A, JSG220 and JSG220A.
The incorrect operation and services may cause accidents. Before using the machine,
user should read the operation manual carefully; understand all markings and instructions
in order to protect himself and the machine rightly. Install, use and maintain the machine
according to the requirement of the instruction. The manufacturer declines all
responsibility for damage caused by negligence and/or the non-observance of the
instructions described in the instruction.
Please hand on the operation manual to the end user, and the user should be trained to
use the machine before using.
In order to explain the special instructions of the machine, some figures in the manual are
incomplete. But the operator must remember that place all guards and covers in their
functional places. Otherwise it may cause hazardous situations.
Illustration and specifications are not bonding all details. The items not specified in the
manual should be regarded as prohibited.
The designs are subject to modification without notice.
This instruction is an integral part of the machine and must accompany
the machine whenever it is resold or moved.
If you have any question, please contact with our company.
1.2 Who should use the instruction
The instruction is the necessary information for the personnel involved in using the
machine, whatever their duties:
The person involved in transporting and handling the machine.
The person involved in operating the machine.
The person involved in maintaining the machine.
The person involved in demounting the machine.
1.3 Intended use and limitation of use
Belt grinder is mainly used to conduct surface polishing and grinding of metal in factories,
so as to enhance the roughness and glossiness of spare parts surface. It enjoys high
efficiency and superior performance in grinding. It is an ideal substitute for polishing
machines.
This machine is only used for general metals grinding within the range of grinding capacity.
Metals with low ignition points such as aluminum, magnesium, etc., are prohibited to be
machined.
Warning: The machine is not designed to be used in explosive environment.

4/ 16
2 Safety regulations
2.1 Forward
The section of the instruction contains requirements that will help you use the machine
safely.
The requirements concerning the installation, operation and maintenance of the machine
will be repeated in the instruction, along with further information that is not included in the
safety section.
2.2 Labels on the machine
Here below you will find the warning and danger signs that art attached to the machine
and illustrated in the instruction.
-Always observe all the specifications and
instructions of the instructions!
-Unqualified personal is prohibited to work with the
equipment!
-The safety operating instructions of the machine
must always be guaranteed.
- For information on the safe of the machine, see
the instruction handbook
- Wearing safety glasses and eye protection.
- Don’t touch the belts when the machine is running!
- Keep other no-using workzone guards closed
when grinding workpiece!
- Hoist point of the machine.
-Rotation label.

5/ 16
2.3Workers’ qualifications and dress
Only an expert skilled in the field or a worker instructed and trained by such expert may
operate the machine, regardless of the sex. While working on the machine the operator
must get familiar with these instructions and comply with any safety rules, regulations and
provisions in force in the respective country.
For health, the workers must wear gloves, working clothes and safety shoes when
working.
In addition, persons who are under the influence of alcohol, tire or the like, are forbidden to
operate or maintain the machine.
Experience shows that injuries are caused by various personal articles, e.g. rings,
watches, bracelets, necktie etc. Therefore take them off before starting the work. Wear
hair protection and fasten hair properly. Wear suitable tight cloth, footwear, gloves that are
recommended or prescribed by labour-safety regulations of all countries.
2.4Basic safety requirements
Most accidents happen because of failure to adhere to simple safety regulations.
A simply but extremely important rule is:
Don’t attempt to maintain or clean the machine when it is powered or running.
If normal safety precautions are overlooked or ignored, personal injury to the operator
may result. Safety equipment such as guards, goggles, dust masks and hearing protection
can reduce your potential for injury. But even the best guard won’t make up for poor
judgment, carelessness or inattention. Always use common sense and exercise caution in
the workshop. If a procedure feels dangerous, don’t try it. Figure out an alternative
procedure that feels safer. Remember: your personal safety is your responsibility.
The proprietor of the machine must ensure that:
- Those persons who are concerned have been trained for their particular job and in
regard to the safety regulations;
- The safety regulations are adhered to;
- The safety regulations are posted in the respective working area.
Please pay attention to the following single safety regulations:
-For your own safety, read the instruction manual before operating the machine.
Learning the machine’s application, limitations, and specific hazards will greatly
minimize the possibility of accidents and injury.
-Never use the machine outdoors or expose it to rain and damp.
-This machine was designed for certain applications only. We strongly recommend
that the machine not be modified and/or used for any application other than that for
which it was designed. If you have any questions relative to a particular application,
do not use the machine until you have first contacted us if it can or should be
performed on the product. Technical modifications of the machine must only be done
by our company or with the explicit approval from us. Otherwise our company will not
be liable for modifications or any resulting damage.
-Never use the machine exceeding the limits established by the technical data.
-Good lighting conditions, clean environment and enough space shall be kept to
operate and maintain the machine conveniently and prevent tripping or placing arms,
hands, and fingers in danger.
-Before starting the machine, make sure that all safety devices are in their active
positions and check their functioning. Don’t attempt to use the machine when any
safety device is suspended or removed.
-If there is any defect during starting or operation, especially those concerning the
safety devices, the operator should stop the machine and inform his superior or the
6/ 16
person in charge of service.
-In the case that you are not going to work on the machine, turn off the machine.
-Before doing any maintenance work inside the machine or cleaning the machine,
switch off the machine and unplug the plug from power supply
-Do not neglect performance of regular inspections in accordance with the instructions
for use.
-Use certified safety equipments regarding to PPE directives. Splinters or air-borne
debris can cause irritation, injury and/or illness.
-Dress properly. Do not wear tie, gloves, or loose clothing. Remove watch, rings, and
other jewelry. Roll up your sleeves. Clothing or jewelry caught in moving parts can
cause injury.
-Do not use the machine in a dangerous environment. The use of power tools in damp
or wet locations or in rain can cause shock or electrocution.
-Maintain all tools and machines in peak condition. Keep tools sharp and clean for
best and safest performance. Follow instruction oflubricating and changing
accessories. Poorly maintained tools and machines can further damage the tool or
machine and/or cause injury.
-Check for damaged parts. Before using the machine, check for any damaged parts.
Check for alignment of moving parts, binding of moving parts, breakage of parts and
any other conditions that may affect its operation. A guard or any other part that is
damaged should be properly repaired or replaced. Damaged parts can cause further
damage to the machine and/or injury.
-Keep children and visitors away. Workshop is a potentially dangerous environment.
Children and visitors may be injured.
-Reduce the risk of unintentional starting. Make sure that the switch is in the “OFF”
position before plugging in the power cord. In the event of a power failure, switch the
switch to the “OFF”position.
-Check to see that all guards are in place, secured, and working correctly to prevent
injury.
-Remove adjusting keys andwrenches before starting the machine. Tools, scrap
pieces, and other debris can be thrown at high speed, causing injury.
-Use recommended accessories. The use of accessories and attachments not
recommended by our company may cause damage to the machine or injury to the
user.
-Make sure your extension cord is in good condition. When using an extension cord,
be sure to use one heavy enough to carry the running current.An undersized cord
will cause a drop in line voltage, resulting in loss of power and overheating. Refer to
EN 60204-1:2006 for the correct size depending on the cord length and full-load
rating on the nameplate.
-Secure the workpiece. Use clamps or a vise to hold the workpiece when practical.
Loss of control of the workpiece can cause injury.
-Feed the workpiece against the direction of the rotation of the belt. Feed it from the
other direction will cause the workpiece to be thrown out a high speed.
-Don’t force the workpiece on the machine. Damage to the machineand/or injury may
result.
-Don’t overreach. Loss of balance can make you fall into a working machine, causing
injury.
-Never stand on the machine. Injury could occur if you accidentally contact the
running belt.
-Don’t leave the machine until it comes to a complete stop. A child or visitor could be
injured.
-Turnthe machine to ‘OFF’position and disconnect the machine from the power
source before installing or removing accessories, before adjusting or changing set-up
can cause injury.
-Make the machine childproof with padlocks. The accidental start-up can cause injury.

7/ 16
-Stay alert, watch what you are doing, and use common sense. Do not use the
machine when you are tired or under the influence of drugs, alcohol or medication. A
moment of inattention while operating the machine may result in injury.
-The dust generated by certain products can be injurious to your health. Always
operate machinery in well-ventilated areas, and provide for proper dust removal. Use
dust collection systems whenever possible.
2.5 Special safety regulations for abrasive finishing machines
Warning: Failure to follow these rules may result in serious
personal injury
-Don’t operate the machine until it is assembled and installed according to the
instructions.
-Obtain training from the supervisor, instructor, or another qualified person if you are
not familiar with the operation of this machine.
-Follow all technical requirements and recommended electrical connections.
-Use the guards whenever possible. Check to see that they are in place, secured and
working correctly.
-Check the belt for wear and tension. If the belt is damaged or can’t be tensioned
properly, replace it.
-Check for correct belt installation and insure that the belt is tracking properly.
-Keep arms, hands and figures away from abrasive surfaces.
-Avoid awkward operations and hand positions where a sudden slip could cause a
hand to contact the sanding surface.
-Never wear gloves or hold the workpiece with a rag when sanding.
-Never start the machine with the workpiece against the sanding surface.
-Never start the machine before clearing the all objects (tools, scrap pieces, etc.)
from the machine.
-Maintain minimum clearance between the table and the sanding surface.
-Use a backstop when using the belt finishing machine in a horizontal position.
-Feed the workpiece against the rotation of the sanding surface. Hold the workpiece
securely on the table.
-Use a dust collection system. Or at least wear the mask during operation.
-Clean the machine and dust collection system thoroughly before and after sanding
metal.
-Do not sand workpieces shorter than 7” or thinner than 1/32”
-Properly support long or wide workpieces.
-Disconnect the machine from the power source before installing or removing
accessories, before adjusting or changing set-ups, or when repairing.
-Disconcect the machine from the power source and clean the table/work area before
leaving the machine. Lock the switch in the ‘OFF’ position to prevent unauthorized
use.
2.6 Safety regulations for set-up
If there is no way of avoiding that the safety devices be suspended or removed during
set-up, the machine must only be used by specially authorized personnel. The persons
must ensure that personal injury and machine damage are prevented.
Turn off the power supply immediately and shut down the machine when the abnormal
conditions happen.
All safety items must be checked whether or not they are in their active positions and

8/ 16
check their functioning.
Function tests shall be done before commissioning. These include the verification of
running conditions of belts, running speed and stop button.
2.7 Safety regulations for operation
Do not put the machine into operation before you get acquainted with the contents of the
instructions for use.
-Only use the machine when it is in perfect conditions. Make sure that electric cables
are not damaged. Make sure all electrical components in perfect conditions.
-Before starting-up the machine, make sure that all parts have been properly mounted
and secured and no foreign objects are putted on the machine. Make sure that no
person is working on the machine before starting-up.
-Do not put the machine into operation with the guards removed.
-Do not remove safety devices such as guards.
-During machine operation, listen whether you hear abnormal noise. If any happens,
stop the machine, find out the cause and solve it in time.
-For JSG150A/220A, the speed adjustment must be done only when the machine
stops.
-Always keep the working area clean.
-It is not recommended to work on the machine during a storm.
2.8 Safety regulations for maintenance
Any maintenance work must be done by a qualified staff in accordance with the
instructions issued by the machine manufacturer. Never do maintenance works before
you get acquainted with the instructions for maintenance thoroughly.
-Before you start to perform any maintenance work, always unplug the plug from
power supply.
-Do not clean the machine even if the machine is completely out of operation, unless
the plug is taken off from power supply.
-While changing electrical parts of the equipment, unplug the plug from power supply
firstly. Faultyparts should be replaced only with products having the same
specifications as the original ones.
-Do not remove guards.If there is no way of avoiding that the safety devices be
suspended or removed during maintenance, the machine must only be used by
specially authorized personnel. The persons must ensure that personal injury and
machine damage are prevented.
-Do not use the machine before all safety devices removed for the purposes of
maintenance are put in their places again.
-Always keep the maintenance area clean.
-Never put any tool or any other objects on the machine during maintenance.
3 Specifications of machines
3.1 Identification Data
Every machine we produce is fitted with a name plate with its serial number. The number
is also punched on the machine.
An exact description of the machine model and serial number will facilitate rapid and
effective replies from us.

9/ 16
3.2 Sound level
3.2.1 Test conditions
The test was conducted when the machine is running with load. The motors work at their
rated conditions.
3.2.2 Result of measurement
For the noise test, new band belt is used. The material is Q235, with the dimension of
40X60mm.
The background pressure level of the test locations is 51.2dB (A).
The sound pressure level in the operator’s position of the machine is 89.7dB (A).
The sound power level of the machine is 100.3dB (A)
The values given are those of emissions and do not necessarily mean any safe working
values. Although there is a correlation between the value of emissions and the levels of
exposure, these values cannot be used for reliable determination whether or not
additional measures are necessary. The factors influencing actual levels of workers’
exposure include the properties of the working area, other sources of noise, e.g. the
number of machines and the other neighboring procedures. Also the highest permissible
levels of exposure may vary in different countries. This information should help the
machine user to evaluate the risk and the risk rate in a better manner.
The environment noise is recommended to be less than 65dB (A).
4 Transportation of machines
4.1 Transportation and store
The measures of anti-rust and shockproof should be taken during packing. The machine
endures transportation and store in -25~55°C ambient temperature.
Be care of not making machine exposed to rain or damaging the packing during
transportation and store.
- While transporting or handling the machine, be careful and let theactivity
be done by qualified personnel especially trained for thekind of activity!
- While the machine is being loaded or unloaded, make sure that no person
or subject gets pressed by the machine!
- Select proper transportation device according to the weight of the
machine. The weight of the machine you select please refer to Chapter 3.
-Make sure the lifting capacity of transportation device is competent for
the weight of the machine.

10 / 16
4.2 Transportation before unpacking
As standard, the machine is packed in a robust wooden box. The following figure shows
the method can be used to transport the packing box.
Fig. 4-1 transportation sketch (Before unpacking)
4.3 Confirmation after unpacking
When open the packing box, please pay attention to the following items. If you have any
question, please contact directly with our company.
1) the machine is damaged in transportation or not
2) accessories and documents is complete or not
3) the specifications on machine label is consistent with the contract or not
4.4 Transportation after unpacking
Carefully unpack the machine and all loose items from the shipping container(s). Please
use heavy duty fiber belt to lift up the machine regarding to Fig.4-2.
Fig. 4-2 Transportation sketch with a crane (After unpacking)
- The machine or its individual parts may only be lifted by means of an
approved lifting device with verified lifting capacity (>500kg).
-Make sure that no person or subject gets pressed by the machine!
- Tighten all locks before operating.
- Always keep proper footing & balance while moving this machine, and
onlyuse heavy-duty fibrebelt to lift up the machine.

11 / 16
Remove the protective coating from all unpainted surfaces. After cleaning, cover the
unpainted surfaces with a good quality household floor paste wax.
5 Installation of machines
5.1 Preparation before installation
5.1.1 Requirement of operating site
Themachine is designed for operation on the following site:
-The height above sea level doesn’t exceed 1000m.
-The temperature range of air shall be 5℃~40℃.
-The relative humidity doesn’t exceed 50% at a maximum temperature of +40 ℃.
Higher relative humidity may be permitted at lower temperature (e.g.90% at 20℃).
-Lighting within the workzone shall be provided with a minimum of 500lux.
-Clean environment, good ventilation and enough space shall be kept to operate and
maintain the machine conveniently.
5.1.2 Requirements of electrical power
Note: The end user should provide over-voltage protection device on the
incoming power supply when finishing installation on the spot!
Voltage
The input power supply of the machine is 1/PE, AC220V for JSG75A and
JSG100A.
The input power supply of the machine is 3/PE, AC380V for other models.
Frequency
0.99~1.01 times of rated frequency ( 50 Hz , continuous working)
0.98~1.02 times of rated frequency(50Hz, short period working)
Harmonics
The sum of 2nd-5th distorted harmonic must not exceed 10% of RMS of voltage.
An additional 2% of RMS of line voltage is allowed to for the sum of 6th-30th
harmonic.
Unbalanced voltage
Neither negative nor zero sequence component is allowed to exceed 2% of the
positive sequence component.
Short-circuited protection and incoming cable
The machine should have short-circuited protection device at the power supply end by
the end-user. The rated current is recommended as 10A, and the diameter of the
incoming line must not be less than 3×1.5mm2(Black) +1.5mm2(PE,
Green-and-Yellow).
5.2 Installation
5.2.1 Minimum installation space for the machine
If it is necessary to transport the machine after using, please protect cables
firstly and discharge the scrap iron.

12 / 16
Fig. 5-1 Min. installation space
5.2.2 Installation
The machine is delivered in a wooden case. The machine should be placed on a level
groundsill or table and secured by four bolts (M10).
Fig. 5-2 Installation dimensions
5.2.3 Connection of electrical suppl
We recommend using cable of at least H07RN 1.5mm2to connect with the plug. The user
should also provide a fuse with rated current of 10A in the supply circuit. Set up the
electrical connections according to the attached electrical drawing.
5.2.4 Connection of dust collection
Connect back dust collection outlet to dust extrusion system.
Connect front dust collection outlet to proper container or bag. When dust in the bag is
more the half of the capacity of the collection bag, please stop the machining process and
clean the bag in time.
-The machine shouldbe installed in a workshop, which has proper lighting, no
contamination and good ventilation condition.
-Ensure safety, secure and solid installation.
-Electrical installation must be done by professional electrician.
-.Make sure the protector earth lines of the machine are connected reliably

13 / 16
Fig. 5-3 Dust collection sketch
6 Trial running and operation
6.1 Structure
Belt grinder is consisted of main body and its racks. The main body can swivel and be
adjusted in a certain angle range around the racks. It is in operation by a grinding wheel
which is directly driven by a motor.
6.2 Operation components
Angle adjustment handle
Belt deviation adjustment
handle

14 / 16
6.3 Trial running
Check the following functions:
The belt moves freely by pressing the belt with hand.
The belt does not touch the grinding supports.
Make sure that the running belt has the correct rotation direction. If the rotation direction is
not correct, please change it by the plug with the function of phase changer.
6.4 Operation
-Operate the machine according to the instruction handbook!
-Stop the machine when emergency!
-Only the qualified persons should be permitted to operate the machine.
-Wear eye and ear protection at all times. If necessary, wear mask during
operation!
-The number of granularity of sand-band is to be selected higher when higher
polishing quality is needed. Otherwise the number of granularity can be lower.
-Contacting parts to be processed near sand-band slowly, then exert force
evenly.
- Keep other no-using workzone guards closed when grinding!
Belt tension release lever
Plug, stop&start button
-Before using the machine, the insulation resistance between parts and outside
cover must be measured. Refer to EN 60204-1:2006 for detail information.
-Ensure the stability of the machine before using the machine.
-Turn the band wheel and other parts by hand to watch whether it feels
smoothly and deftly, and listen whether there is bumping sound. After making
sure that all parts are in normal conditions, the machine can be started.

15 / 16
6.5 Adjusting
6.5.1 Angle Adjust
The handle of the belt grinder is in loose condition in a certain angle range, then turn the
handle firm to avoid unexpected accident.
6.5.2 Belt slant Adjust
If the belt is deviated, adjust the belt deviation by rotating the hand wheel after loosening
the screw. When finishing the belt slant adjust, fasten the screw again.
6.5.3 Changing the belt
A satisfied grinding would only be obtained when using a completely clean grinding belt.
Otherwise it must be renewed.
It can be fulfilled by moving eccentric wheel handle to compress the belt machine. After
the sand-band is dismantled and replaced, the eccentric wheel handle should restore to
its original position. Please refer to the detailed step as following:
Switch off the machine.
Ensure the belt is at a complete standstill.
Open the side guard with tools.
Loosen the belt by moving the belt tension release lever from A to B position.
Replace the belt.
Tighten the belt by moving the belt tension release lever from B to A.
Close side guard with tools.

16 / 16
7 Maintenance
Normal maintenance of the contact wheel and the steering roller is needed.
The outside cover of belt grinder and the grinding scrap and dust in outlet should be
frequently cleaned and keep these places tidy.
7.1 Troubleshooting
Trouble
Possible cause
Solution
The machine will not
start
1. Unplug from power
supply
2. Protector is tripped
3. Power cord is damaged
1. Check all plug connections
2. Replace fuse or reset circuit
breaker
3. Replace cord
Belt does not come
up to speed
1. Extension cord too light
or too long
2. Motor is not wired for
proper voltage
3. Low current
1. Replace with adequate size
and proper length cord
2. Refer to motor junction box
for proper wiring
3. Contact a qualified
electrician
Machine vibrates
excessively
1. Stand on uneven floor
2. Motor mounts are loose
3. Tension spring is worn or
broken
1. Adjust base so that it rests
evenly on the floor
2. Tighten motor mount bolts.
3. Replace spring
Abrasive belt keeps
tearing
1. Belt is running in the
wrong direction
1. The sanding belt should be
running in the same direction of
rotation label.
Sanded edge not
square
1. Table isn’t square to
sanding platen
1. Use a square to adjust table
to sanding platen
Sanding marks on
wood
1. Workpiece is held still
2. Wrong grit sanding belt
3. Feed pressure too great
4. Sanding against the
grain
1. keep workpiece moving
2. Use coarser grit for stock
removal and fine grit for
finish sanding.
3. Never force workpiece into
sanding platen
4. Stand with the grain.
- Before maintenance, unplug the plug firstly from the incoming power source.
Adjustment, lubrication and maintenance points must be carried out while
machinery is at a standstill.

Axminster Tool Centre,
Unit 10 Weycroft Avenue, Axminster, Devon EX13 5PH
axminster.co.uk
Please dispose of packaging for the product in a responsible manner. It is suitable for recycling.
Help to protect the environment, take the packaging to the local recycling centre and place into
the appropriate recycling bin.
Do not dispose of electric tools together with household waste material. In observance of European
Directive 2002/96/EC on waste electrical and electronic equipment and itsimplementation in
accordance with national law, electric tools that have reached the end of their life must be
collected separately and returned to an environmentally compatible recycling facility.
Only for EU countries
Free Three Year Guarantee on Axminster Hobby,Trade and Industrial Series woodworking and
engineering machines, Axminster Air compressors and Air Tools, and bench top grinders - no
registration necessary just proof of purchase.
We will repair or replace at our discretion and will collect only from a UK mainland address,
irrespective of the original delivery address
The Guarantee assumes that you have bought the correct machine for the required operation, in
accordance with our guidelines; have operated and maintained it in accordance with the instruction
manual; and that all cutting machines will be used with a blade which is sharp and serviceable at all
times. It does not cover consumable items purchased with the original product, including original
blades or abrasives
The Axminster guarantee is available on
Hobby,Trade, Industrial, Engineer, Air Tools & Axcnc Technology Series machines
It’s probably the most comprehensive FREE guarantee ever- buy with confidence from Axminster!
So sure are we of the quality, we cover all parts and labour free of charge for three years!
• Look for the icon and put your trust in Axminster
• No registration necessary - just keep your proof of purchase
• Optional Service Plan for Industrial Series machinery
AXMINSTER
SERIES
Hobby
Great value & easy-to-use,
perfect for use at home
Quality, precision machines
for the workshop or education
Precision CNC machines for
industry and education
AXMINSTER
SERIES
Trade
Solid, reliable machines
designed for daily use
Small machines for the home
engineer
Top performers with class leading features and
build quality for use in busy workshops
Compressors and tools for home or
workshop use,durable and great value
Normal wear and tear, misuse, abuse and neglect are excluded and the machine should not have been
modified in any way. Please do not attempt to service the product without first contacting us; we are
happy to guide you but failure to do so may invalidate the guarantee
The Guarantee is transferable from owner to owner in the first three years but you must have original
proof of purchase.Should we need to replace a machine in the first three years the guarantee will still
continue to be effective from the original purchase date
Full Terms and Conditions can be found here.This guarantee does not affect your statutory rights.
For more information visit axminster.co.uk/3years
Table of contents
Other Axminster Sander manuals

Axminster
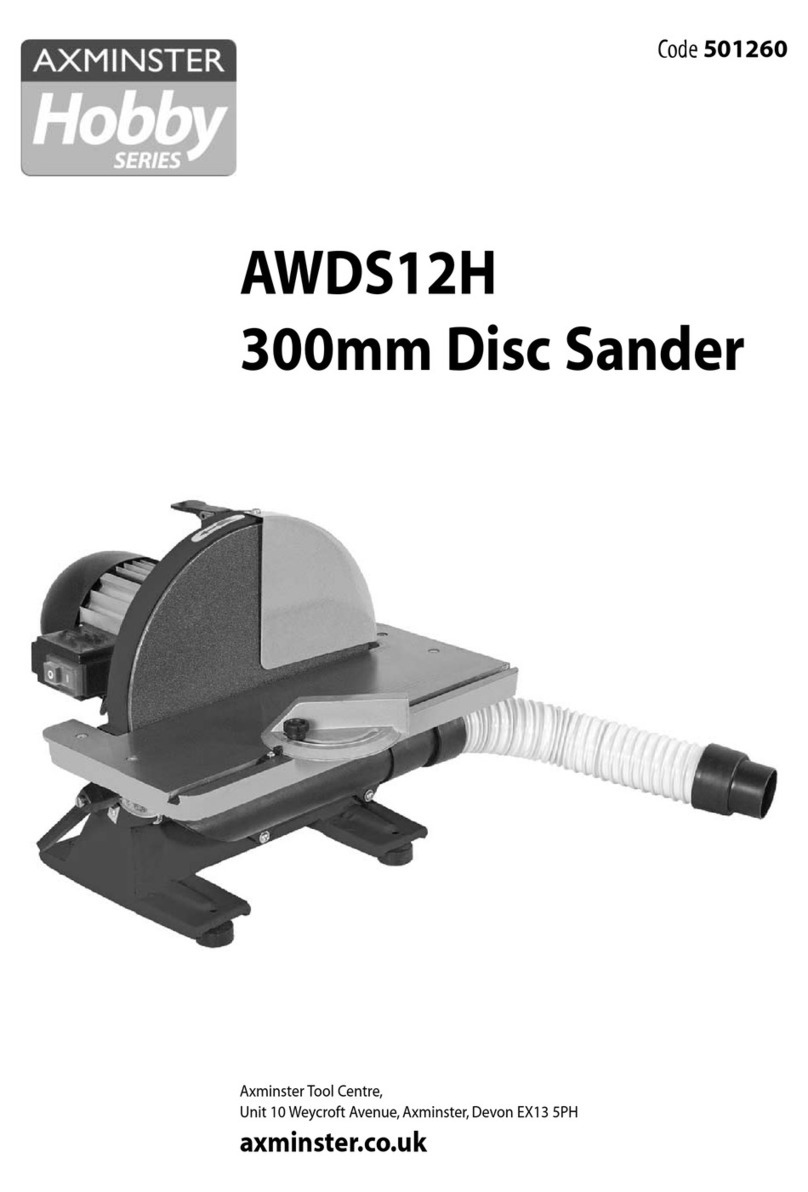
Axminster AWDS12H User manual

Axminster
Axminster Trade BS648 User manual

Axminster
Axminster WORKSHOP AW150BDS User manual

Axminster
Axminster Professional AP2260BS2 User manual

Axminster
Axminster PROFESSIONAL AP150BS User manual

Axminster
Axminster WorkShop AW125BDS User manual

Axminster
Axminster Professional AP305DS User manual

Axminster
Axminster SS-12VS User manual

Axminster
Axminster BDS-612 User manual

Axminster
Axminster AW130BD2 User manual