ESPAÑOL
9
Los aparatos han sido concebidos para su uso en edicios. Respetar las temperaturas ambiente permitidas
para el funcionamiento del aparato (informaciones técnicas).
El aparato cumple con los requisitos de compatibilidad electromagnética establecidos.
Se debe evitar superar los valores máximos establecidos en las normas. Si surge algún problema, diríjase al
servicio posventa de B3C.
LIMPIEZA
Para limpiar la balanza utilice un paño húmedo y productos de limpieza que puede adquirir en comercios. No se deben utilizar productos abra-
sivos.
MANTENIMIENTO
La balanza no requiere un mantenimiento rutinario. Sin embargo, es conveniente comprobar la precisión a intervalos periódicos. La frecuencia
dependerá del uso y del estado de la balanza. Si detecta anomalías, póngase en contacto con su distribuidor o con el servicio posventa de B3C.
NOTA
Este aparato cuenta con protección antiparásita según la directiva vigente de la CE 89/336/CEE. Las inuencias electrostáticas y electromagné-
ticas externas en la proximidad del equipo de pesaje procedentes , p. ej., de un radiotransmisor o de un teléfono móvil pueden repercutir en el
valor indicado. Una vez nalizada la interferencia, el producto se puede volver a usar correctamente, en su caso puede ser necesario conectarlo
de nuevo. En caso de perturbaciones electroestáticas permanentes le recomendamos que conecte a tierra la plataforma.
El aparato es un instrumento de medición. Las corrientes de aire, las vibraciones, cambios rápidos de temperatura y la radiación solar pueden
inuir, asimismo, en el resultado del pesaje. La balanza cumple con el tipo de protección IP 56. Se debe evitar una humedad del aire demasiado
alta, así como vapores, líquidos agresivos y un grado fuerte de suciedad.
GARANTIA – RESPONSABILIDAD
Si el material suministrado presenta un defecto atribuible a B3C, ésta estará facultada a eliminar el defecto o, alternativamente, a suministrar un
recambio.Las piezas sustituidas pasan a ser propiedad de B3C. Si la eliminación del defecto o el suministro de recambio fracasan, se aplicarán
las disposiciones vigentes.
El período de garantía es de 2 años y comienza a partir de la fecha de la compra. Conserve su factura como justicante.
La garantía no incluye en particular aquellos daños que se deriven de las siguientes causas:
Almacenamiento o uso inadecuado, montaje o puesta en marcha defectuosos por parte del comprador o de terceros, desgaste natural, modi-
caciones o alteraciones, manejo defectuoso o negligente, en particular un uso excesivo, inuencias químicas, electroquímicas, eléctricas o
humedad, en tanto éstas no se deban a
una falta por parte de B3C.
La garantía del perfecto funcionamiento conjunto de los aparatos queda anulada en el caso de que inuencias de servicio, climáticas o de otro
tipo ocasionaran una alteración importante de las condiciones o del estado del material. Siempre que SOEHNLE conceda una garantía en casos
individuales, ésta se referirá a
la ausencia de defectos del objeto de suministro durante el período de garantía.
Conserve el embalaje original para el caso de que sea necesario transportar el aparato para su de.
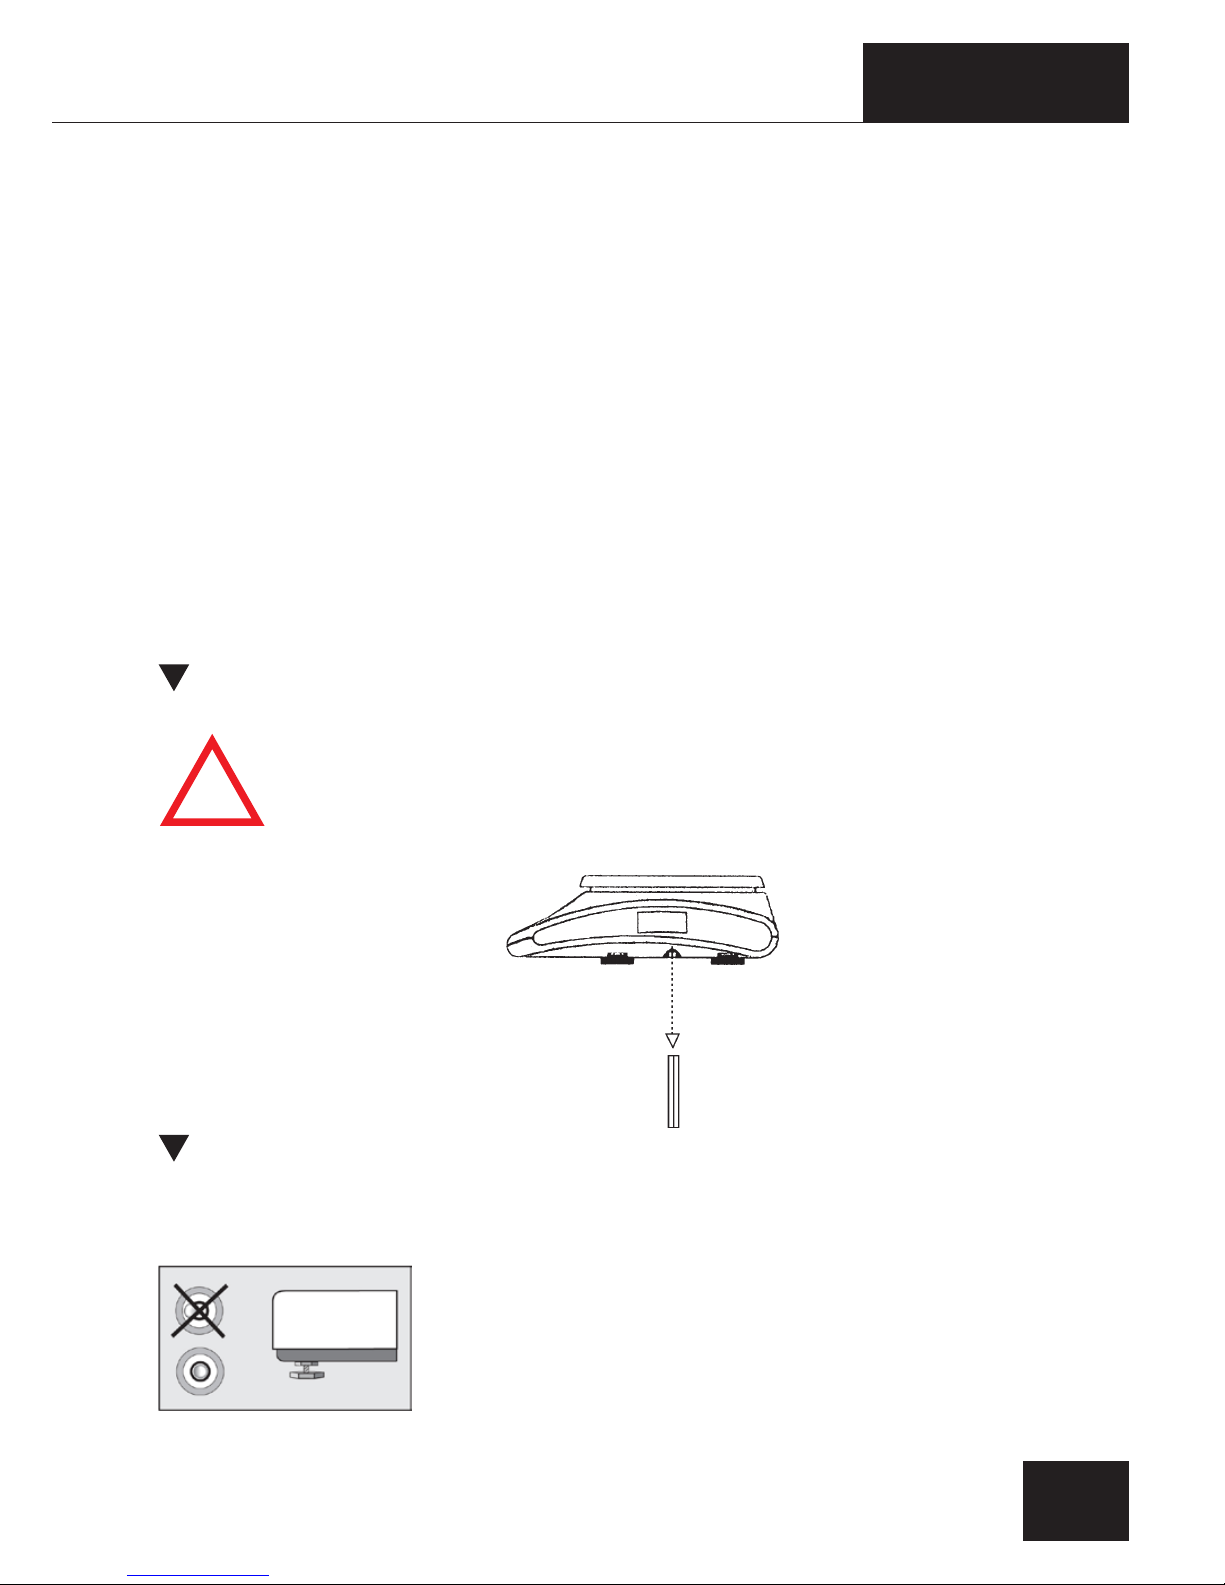
1 - PUESTA EN MARCHA DE LA BALANZA
a - Cuando se instale la balanza por primera vez, seguir las
recomendaciones descritas en el siguiente dibujo para retirar
el tornillo de seguridad.
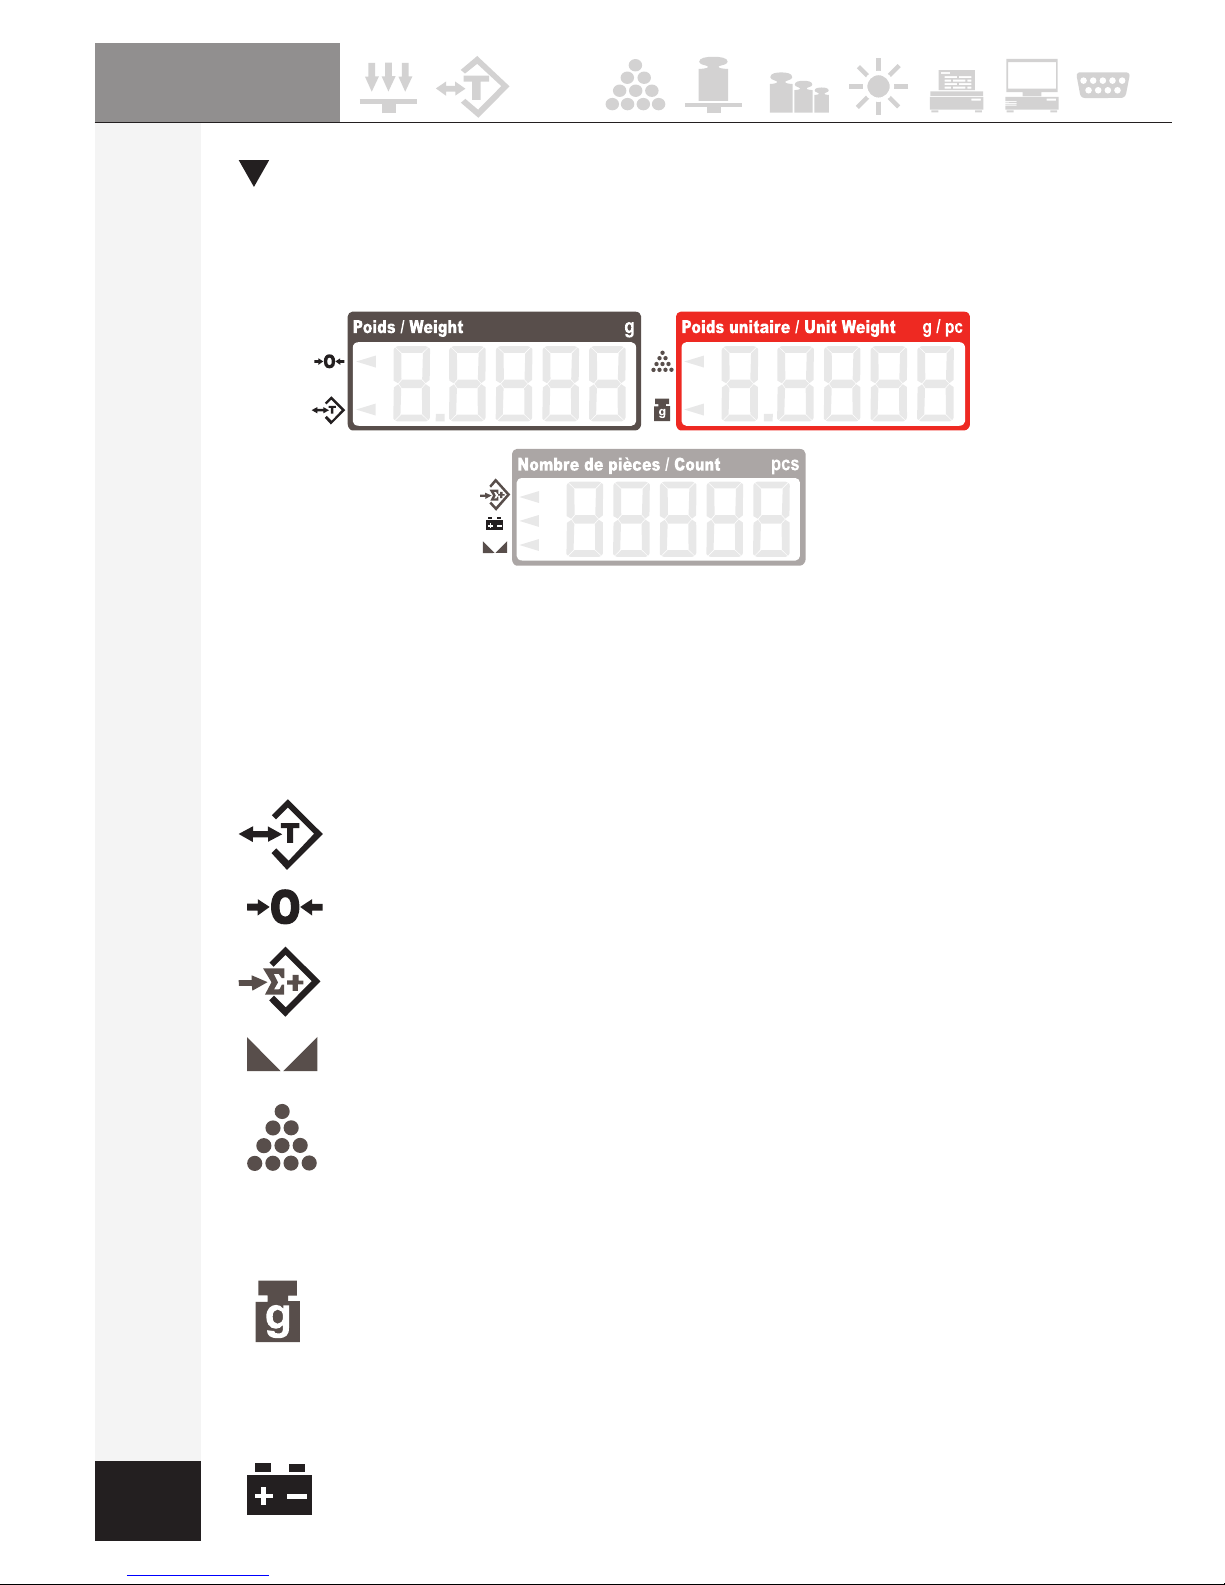
2 - NIVEL SITUADO
La balanza dispone de un indicador de nivel situado en la parte
izquierda del panel frontal. También está equipada con 4 pies regulables.
Ajustar los pies regulables hasta que la burbuja quede justo en el
centro del círculo del indicador..
!


 User manual")


