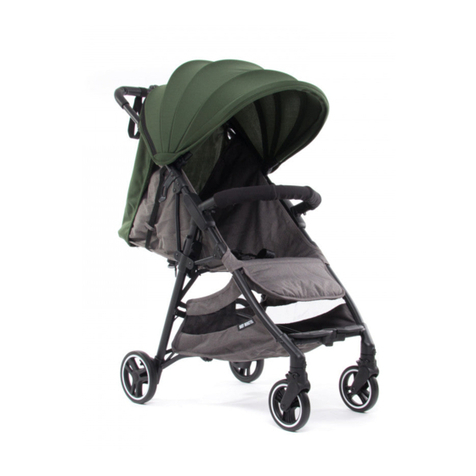
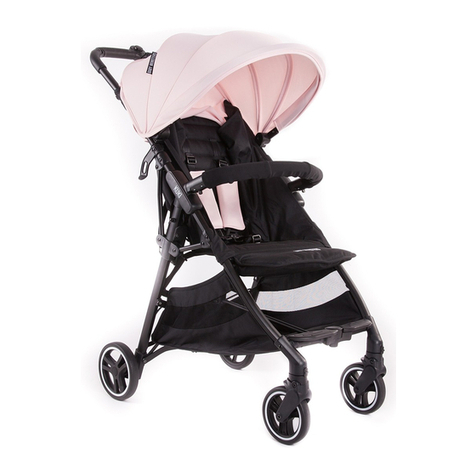
BABY MONSTERS KUKI User manual

baby_monsters

English
Instruction
Thank you for choosing a Baby Monsters product.
IMPORTANT: Please read all the instructions carefully before use and retain for future reference.
Your child’s safety may be affected if you do not follow these instructions.
This stroller is suitable for children from birth up to 22 kg.
Please ensure this instruction manual is passed on with the stroller to any other user.
SAFETY WARNINGS: Please read these carefully before using this item and retain for future use.
WARNING: Never leave the child unattended.
WARNING: Ensure that all the locking devices are engaged before use.
WARNING: To avoid injury ensure that the child is kept away when unfolding and folding this product.
WARNING: Do not let the child play with this product.
WARNING: Always use the restraint system.
WARNING: Check that the pram body or seat unit or car seat attachment devices are correctly engaged
before use.
WARNING: This product is not suitable for running or skating.
WARNING: Always apply the brakes when the pushchair is stationary, and when placing and removing
children from the seat. When the parking brake is used, always test it is properly applied by
pushing on the handle of the pushchair.
WARNING: Always use the most reclined position for new born babies.
WARNING! To avoid serious injury, DO NOT raise or recline seat with child in stroller.
WARNING: This product is designed to carry only one child at a time.
WARNING: Ensure that children are clear of moving parts before making adjustments.
WARNING: Do not allow your child to climb unassisted into or out of the pushchair.
WARNING: Do not lift and carry the pushchair with a child in it.
WARNING: NEVER run or rush across a road with your pushchair. NEVER use your pushchair in a way
for which it is not designed.
WARNING: Do not use pushchair on steep slopes, stairs, escalators and rough terrain.
WARNING: Parcels, accessories and other items (e.g. hand bags, shopping bags, etc.) that are placed on
the handles, back of the backrest or sides of the pushchair will affect the stability of the
pushchair.
WARNING: DO NOT attempt to lift the seat unit by the bumper bar. The bumper bar is NOT a carry
handle!
WARNING: Do not load the basket with a weight in excess of 2 kg.
WARNING: Never leave raincovers, hoods and aprons on indoors or in hot weather as your child might
overheat.
WARNING: Do not use replacement parts or accessories other than those approved by the manufacturer
as others may render the product unsafe.
WARNING!

1
2
1
2
3
1
2
3
4
789
6
12 10
11
13
14
15 16
5
4
PARTS LIST

c
b
a
B
A
C
F
F
E
D
1
2
ASSEMBLY
Unfolding the stroller
Attaching the Canopy
click!

C
C
D
B
b a
A
G
H
H
G
5
7
8
6
G
H
H
I
J
K
3 4
Attaching the bumper bar
Using the brakes Swivel wheel function
Attaching shoulder pads
to harness
Reclining the seat
Opening and removing the bumper bar

Q
R
P
C
A
10
12
11
B
c
b
a
O
M
N
L
M
9Adjusting the harness
Using the canopy
Folding the stroller
Removing the front wheels

English
1. Parts List
Make sure you have all the parts listed below before using your stroller.
If any parts are missing, please contact customer service.
1.Main Body 2.Bumper Bar
3.Canopy * 4.Shoulder Pad x2 *
*x1 Canopy & x2 shoulder pad included in the accessory pack.
2. Name of Parts
1.Handle push button 2.Parent’s Handle
3.Canopy 4.Canopy mount
5.Bumper Bar 6.Seat Unit
7. Shoulder straps 8.Waist Belt
9.Crotch Belt 10.Basket
11.Brake Lever 12.Footrest
13.Swivel Lock Lever 14.Recline Strap
15.Fold Latch 16.Fold Lever
1. Unfolding the stroller
Unlock the fold latch (A).
Press push button on the handle (B), and pull the handle outwards until hearing a “click” sound, the push
button should pop up when the handle has locked in place. Holding the handle, lift the seat back upwards to
unfold the stroller. Lift the full stroller, until you hear a click.
Step on the fold lever(C) to make sure the stroller is un folded completely.
WARNING! Lift and shake the stroller to make sure it is locked completely.
2. Attaching the Canopy
Push each canopy pivot (D) into each canopy mount (E) until it locks into place.
Attach the canopy on either side of the handle (F) and the back of the seat unit using the popper buttons.
Gently pull the canopy upwards to check it is secured.
3. Attaching the bumper bar
Install the bumper bar (G) onto the bumper bar mounts (H).
Make sure the bumper bar locks into position with audible clicks.
CAUTION! Pull on each side of the bumper bar to make sure it is completely attached.
4. Attaching shoulder pads to harness
Place shoulder pad (I) underneath the shoulder strap (J).
Snap in place with poppers (K).
5. Using the brakes
Press down hard on brake lever (A) to lock the rear wheels on the stroller. Check brakes are engaged by
pushing stroller forward.
Press down on brake lever (B) to release brakes.
WARNING! Always engage the brakes when the stroller is stationary, and when placing and removing
children in the stroller. Push the stroller forward to ensure the brakes are properly engaged.
6. Swivel wheel function
Some models feature swivel locks that improve handling over rough ground.
To keep wheels from swiveling, step down on the swivel lock levers (B).
Flip up the swivel locks to restore the swivel action.
7. Reclining the seat
To recline seat, press the strap release button on the adjuster (C) and allow seat to recline.
To raise the seat, hold the D-ring (D), press the release button on the adjuster (C) and slide toward the seat.
WARNING! To avoid serious injury, DO NOT raise or recline seat with child in stroller.
8. Opening and removing the bumper bar
To open the bumper bar (G), pull a locking tab (H) from either side of the bumper bar.
To remove the bumper bar (G), pull both tabs and remove the bumper bar (H) from the stroller.
NOTE: You can open the guardrail from either side.
9. Adjusting the harness
WARNING! To avoid serious injury from falling or sliding out, ALWAYS use harness, Never use a
harness if any of the straps are torn or frayed.
Instruction for attach each shoulder strap should come before insert both waist belt clips into buckle.
Place the crotch belt (L) between the baby's legs.
Insert both waist belt clips into the centre buckle (M).
Attach each shoulder strap's hook (N) to the top of the centre buckle.
Use the sliders to adjust the strap lengths so the harness fits snugly.
To undo harness press the centre button on the buckle.
10. Using the canopy
Pull canopy hoop (P) forward to extend canopy. Push canopy toward parent's handle to close.
11. Removing the front wheels
Press the release button located (Q). Pull out the wheel (R).
To Replace wheel, push wheel back into housing until you hear a Click.
12.Folding the stroller
WARNING! Remove child from stroller before folding. Ensure the basket is empty before folding.
Items left in the basket could cause damage to stroller when folding.
Close the canopy and lower the seat back to its lowest position. Push in the button on the handle (B) and
push the handle inwards. At the same time push the fold lever (C) up to unlock the frame. Fold the stroller
down and push the sides together until the fold latch (A) locks in place.
1.Cleaning
Canopy, harness, Fixed Base Seat and Basket
Hand wash with brush. Wipe away excess water with a dry cloth and dry in shaded area. For stubborn dirt,
dilute a mild detergent then apply directly to the dirty area. Wipe away the detergent and wipe with a clean
cloth.
Main body
Briskly wipe off mud dirt. To clean the main body, wipe with a damp cloth. Then wipe out any traces of
moisture on the body with a dry cloth. The main body might become moidy etc to: can become damp if not
wiped dry.
Please don’t be excessive in the sun,it could cause premature color fading of stroller plastic and
fabric.
2.Wheels and swivel mechanisms
After prolonged normal use, the wheels of your stroller
may not swivel as easily as when the stroller was new.
This is usually due to a buildup of dirt in the swivel
mechanism. Before adding lubricant, test the swivel
action to determine whether lubrication is necessary.
Using compressed air aimed at point
(a) and (b), blow dirt from the swivel mechanisms.
Periodically check that all screws, bolts and nuts are tight.
Assembling Your Stroller
Using Your Stroller

English
1. Parts List
Make sure you have all the parts listed below before using your stroller.
If any parts are missing, please contact customer service.
1.Main Body 2.Bumper Bar
3.Canopy * 4.Shoulder Pad x2 *
*x1 Canopy & x2 shoulder pad included in the accessory pack.
2. Name of Parts
1.Handle push button 2.Parent’s Handle
3.Canopy 4.Canopy mount
5.Bumper Bar 6.Seat Unit
7. Shoulder straps 8.Waist Belt
9.Crotch Belt 10.Basket
11.Brake Lever 12.Footrest
13.Swivel Lock Lever 14.Recline Strap
15.Fold Latch 16.Fold Lever
1. Unfolding the stroller
Unlock the fold latch (A).
Press push button on the handle (B), and pull the handle outwards until hearing a “click” sound, the push
button should pop up when the handle has locked in place. Holding the handle, lift the seat back upwards to
unfold the stroller. Lift the full stroller, until you hear a click.
Step on the fold lever(C) to make sure the stroller is un folded completely.
WARNING! Lift and shake the stroller to make sure it is locked completely.
2. Attaching the Canopy
Push each canopy pivot (D) into each canopy mount (E) until it locks into place.
Attach the canopy on either side of the handle (F) and the back of the seat unit using the popper buttons.
Gently pull the canopy upwards to check it is secured.
3. Attaching the bumper bar
Install the bumper bar (G) onto the bumper bar mounts (H).
Make sure the bumper bar locks into position with audible clicks.
CAUTION! Pull on each side of the bumper bar to make sure it is completely attached.
4. Attaching shoulder pads to harness
Place shoulder pad (I) underneath the shoulder strap (J).
Snap in place with poppers (K).
5. Using the brakes
Press down hard on brake lever (A) to lock the rear wheels on the stroller. Check brakes are engaged by
pushing stroller forward.
Press down on brake lever (B) to release brakes.
WARNING! Always engage the brakes when the stroller is stationary, and when placing and removing
children in the stroller. Push the stroller forward to ensure the brakes are properly engaged.
6. Swivel wheel function
Some models feature swivel locks that improve handling over rough ground.
To keep wheels from swiveling, step down on the swivel lock levers (B).
Flip up the swivel locks to restore the swivel action.
7. Reclining the seat
To recline seat, press the strap release button on the adjuster (C) and allow seat to recline.
To raise the seat, hold the D-ring (D), press the release button on the adjuster (C) and slide toward the seat.
WARNING! To avoid serious injury, DO NOT raise or recline seat with child in stroller.
8. Opening and removing the bumper bar
To open the bumper bar (G), pull a locking tab (H) from either side of the bumper bar.
To remove the bumper bar (G), pull both tabs and remove the bumper bar (H) from the stroller.
NOTE: You can open the guardrail from either side.
9. Adjusting the harness
WARNING! To avoid serious injury from falling or sliding out, ALWAYS use harness, Never use a
harness if any of the straps are torn or frayed.
Instruction for attach each shoulder strap should come before insert both waist belt clips into buckle.
Place the crotch belt (L) between the baby's legs.
Insert both waist belt clips into the centre buckle (M).
Attach each shoulder strap's hook (N) to the top of the centre buckle.
Use the sliders to adjust the strap lengths so the harness fits snugly.
To undo harness press the centre button on the buckle.
10. Using the canopy
Pull canopy hoop (P) forward to extend canopy. Push canopy toward parent's handle to close.
11. Removing the front wheels
Press the release button located (Q). Pull out the wheel (R).
To Replace wheel, push wheel back into housing until you hear a Click.
12.Folding the stroller
WARNING! Remove child from stroller before folding. Ensure the basket is empty before folding.
Items left in the basket could cause damage to stroller when folding.
Close the canopy and lower the seat back to its lowest position. Push in the button on the handle (B) and
push the handle inwards. At the same time push the fold lever (C) up to unlock the frame. Fold the stroller
down and push the sides together until the fold latch (A) locks in place.
1.Cleaning
Canopy, harness, Fixed Base Seat and Basket
Hand wash with brush. Wipe away excess water with a dry cloth and dry in shaded area. For stubborn dirt,
dilute a mild detergent then apply directly to the dirty area. Wipe away the detergent and wipe with a clean
cloth.
Main body
Briskly wipe off mud dirt. To clean the main body, wipe with a damp cloth. Then wipe out any traces of
moisture on the body with a dry cloth. The main body might become moidy etc to: can become damp if not
wiped dry.
Please don’t be excessive in the sun,it could cause premature color fading of stroller plastic and
fabric.
2.Wheels and swivel mechanisms
After prolonged normal use, the wheels of your stroller
may not swivel as easily as when the stroller was new.
This is usually due to a buildup of dirt in the swivel
mechanism. Before adding lubricant, test the swivel
action to determine whether lubrication is necessary.
Using compressed air aimed at point
(a) and (b), blow dirt from the swivel mechanisms.
Periodically check that all screws, bolts and nuts are tight.
Maintenance

English
3.Adding Lubricant
Avoid lubricating the swivel wheels whenever possible. Excessive lubrication or adding lubricant to swivel
wheels when new may cause them to develop a shimmy or wobble that may quicken their deterioration.
Add lubricant (silicon spray*) to the area required in small amounts. (Do not use cooking oil or WD-40
because oil attracts dust and would hinder the movement rather than improve it.)
* Compressed air is available in varying size cans at most hardware stores.
Difficult to steer/pulls to one side
* Remove any items hanging from the handle. Make sure weight in basket is distributed evenly.
* Check that the brakes are not in the locked position.
* After prolonged normal use the wheels of your stroller may not swivel as easily as when it was new. This is
usually due to build up of dirt in the swivel mechanism. Ensure swivel wheels are clean and free of dirt. If
this does not help, please call customer service for further instruction.
Stroller won’t fold
* Make sure the canopy is folded completely and front swivels are locked.
* Check to see that the seat belt is not caught in the side.
Difficult getting up curbs
Pulling backward makes going up a curb difficult, and could pose a safety hazard. Pull handle up to lift the
rear wheels onto the curb, then pull the stroller backward until the front wheels clear.
Manufactured by:
Baby Monsters Strollers S.L.
Clients service
+34 93773 5515
baby_monsters
Trouble Shooting
Other manuals for KUKI
1
Table of contents
Other BABY MONSTERS Stroller manuals

BABY MONSTERS
BABY MONSTERS KUKI User manual

BABY MONSTERS
BABY MONSTERS APOLOFIX User manual

BABY MONSTERS
BABY MONSTERS MARLA User manual

BABY MONSTERS
BABY MONSTERS EASY TWIN 4 User manual

BABY MONSTERS
BABY MONSTERS Compact User manual

BABY MONSTERS
BABY MONSTERS Easy Twin 2.0 User manual

BABY MONSTERS
BABY MONSTERS MARLA User manual

BABY MONSTERS
BABY MONSTERS Fresh2.0 User manual