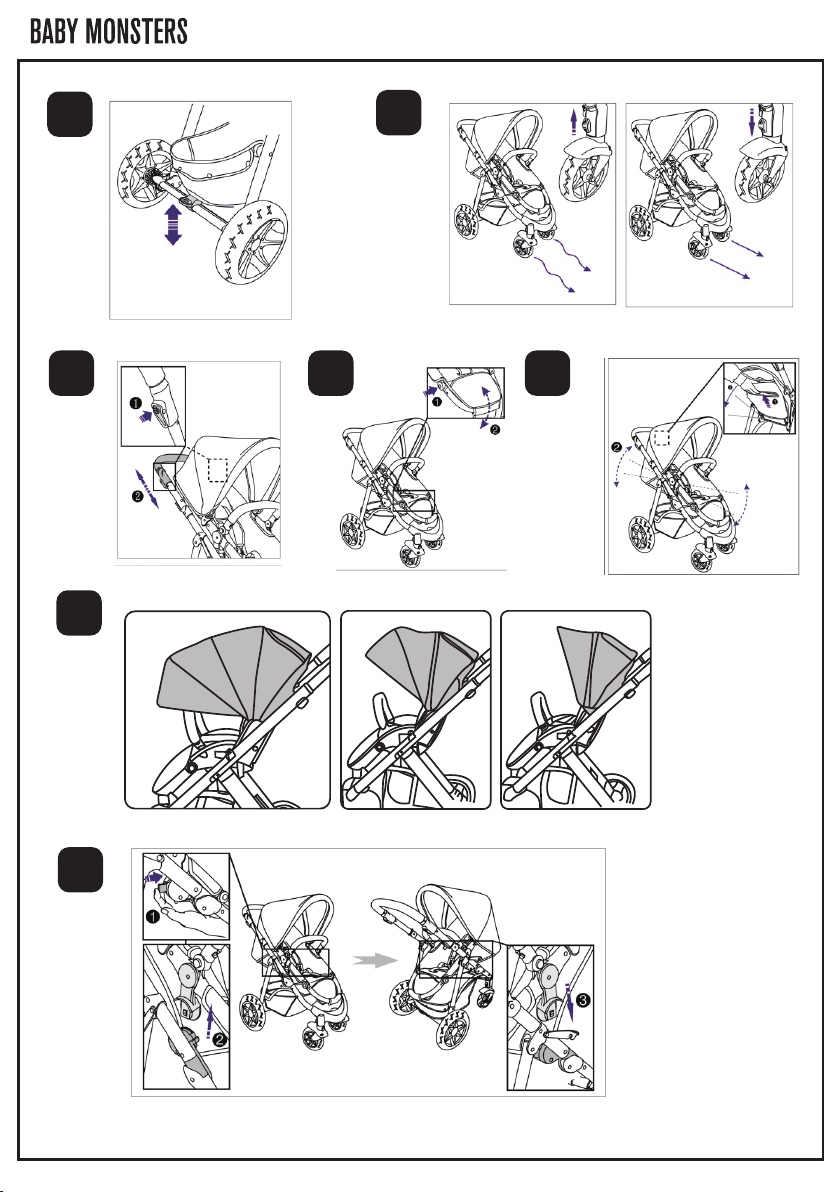
A.Abrir el carrito
Retirar todo el material del envoltorio. Colocar el chasis como está indicado.
Abrir el manual de instrucciones del carrito,
soltar el gancho de almacenaje y girar el carrito hasta que se escuche un “click”.
Bajar el bloqueo de la base hasta que la construcción haga click de seguridad.
B.Montaje de las ruedas frontales
Insertar las ruedas delanteras en los encajes de ruedas como está indicado.
Presionar el botón de desbloqueo y colocar la rueda delantera.
Presionar para asegurarse que están bien colocadas.
Para desbloquear, presionar el botón y retirarlas.
C.Ajustar las ruedas traseras.
Montar las ruedas traseras como está indicado.
Presionar el botón de desbloqueo y colocar la rueda trasera.
Presionar para asegurarse que están bien colocadas.
Para desbloquear, presionar el botón y retirarlas.
D.Colocar el dosel
Colocar el dosel enganchando el dispositivo de fijación en ambos lados de los agujeros.
Insertar firmemente en el sitio.
E.Colocar la barra de frontal
Insertar la barra frontal firmemente en el sitio.
Retirar la barra frontal
Presionar el botón de desbloqueo y tirar de la barra frontal de frente para retirarla.
ATENCIÓN! Para evitar el niño muerda la espuma
,por favor no retire la cubierta de tela de la barra frontal.
F.Retirar la barra frontal
Colocar el asiento insertándolo en los soportes de los dos lados.
Presionar hasta que los adaptadores hagan el “click” de seguridad. Empujar para asegurarse que
está correctamente colocada.
G.Montar la unidad de asiento
ATENCIÓN! Asegúrese que su hijo lleve el arnés correctamente ajustado en todo momento.
Para ajustar, insertar los dos elementos de fijación de manera segura en el cierre. Ajustar la longitud
de cada correa con hebillas.
Para soltar, presionar los dientes del dispositivo de cierre y retirar.
Su hijo debe llevar el arnés de seguridad en todo momento, no lo deje nunca sin habérselo puesto.
ATENCIÓN: Utilizar siempre los arneses correctamente.
H.Colocara su hijo en el carrito
Presionar el pedal hacía abajo para frenar el carrito.
Empujar suavemente el carrito para verificar que el freno está puesto.
Levantar el pedal para desbloquear el freno.
I.Utilizar el freno
Levantar los dispositivos de bloqueo para girar.
Bajar los dispositivos de bloqueo para que las ruedas vayan rectas.
J.Bloquear/girar la rueda delantera
Manillar ajustable: presionar el botón en ambos lados (1) para ajustar la altura del manillar (2).
Existen tres diferentes alturas de manillar para su elección.
K.Ajustar el manillar
Para ajustar el reposapiés , presionar los botones de lambos lados y levantar a la posición deseada.
L.Ajustar el soporte para los pies
Tirar suavemente de la barra de reclinación hacía arriba y reclinar el asiento en la posición deseada.
M.Reclinar el asiento
Ajustar el dosel frontal en la posición deseada.
N.Invertir la unidad de asiento
Presionar los botones hacía dentro de ambos lados como está indicado y retirar el asiento del chasis.
Girar el asiento en posición contraria y encajar los adaptadores hasta que se escuche un “click”.
Presionar para asegurarse que está colocado correctamente.
O.Plegar el carrito con el asiento de bebé colocado mirando de frente
1. Mover el bloqueo de segunda posición.
2. Presionar la palanca suavemente en ambos lados y tirar hacía arriba.
3. Empujar el manillar hacía abajo a la posición correcta.
4. Utilizar el cierre de almacenaje.
P.Pleagar el carrito con el asiento de bebé colocado mirando a los padres
1. Mover el bloqueo de segunda posición.
2. Presionar suavemente la palanca en ambos lados y tirar hacía arriba.
3. Empujar el manillar hacía abajo a la posición correcta.
4. Ajustar la reclinación del asiento y la capota hacía delante.
5. Utilizar el cierre de almacenaje.
Q.Montar el capazo
Retirar el capazo de la caja de cartón.
Para colocar el capazo basta con retirar las piezas de fijación de ambos lados y la barra de soporte central
y colocar el cuco en medio del marco para que cada pin de metal y cada clavija se ajuste correctamente
en las aberturas de cada lado del marco.
Para ajustar la capota basta apretar el botón colocado en el lado izquierdo frontal de la capota y presionar
hacía atrás o hacía adelante en la posición deseada.
Deslizar el cubrepiés sobre la parte frontal del capazo y conectar de forma segura los botones de presión
a los de la sección de la capota.
La sección de la capota en la parte frontal también se puede utilizar como asa de transporte. Asegúrese
de llevar el capazo sólo por el asa y no por ninguna otra parte de la capota.
R.Conexión con la silla
En la parte frontal de la silla, cerca del marco, de cada lado hay un botón negro.
Apretar primero el botón en el lado izquierdo y después el del lado derecho y
quitar la silla del chasis. Retirar la silla.
Retirar la barra de apoyo y de reclinación para que el capazo pueda ser acoplada a la parte superior.
Asegúrese de que haga “click” y que esté acoplado correctamente antes de seguir.
S.Adaptar la silla de coche al chasis
La silla del coche se acopla al chasis utilizando los adaptadores de asiento baby monsters.
La silla del coche no puede ser aoplada al chasis hasta que el
capazo o la silla del paseo no estén retirados.
Instertar los adaptadores de asiento en el dispositivo de fijación del chasis,
empuje hacía abajo en los adaptadores hasta que haga click y que quede bloquado en la posició.
Fijar la silla de coche por el asa de transporte
Presionar la silla de coche hacia abajo hasta que haga click y quede bloqueada en su posición.
Comprobar si la silla de coche está en la posición segura y que queda bloqueada tirando de la
barra de la silla de coche.
T.Retirar la silla de coche
Para retirar la silla de coche del chasis, presionar hacía abajo dos botones en las laterles de la en el
dispositivo de fijación del chasis (no los botones de ajuste con los que se gira el mango)
y levantar la silla de coche del chasis.
Para retirar los adaptadores del chasis, tire hacía arriba de las asas y retire los adaptadores del
dispositivo de fijación.
Ŗōʼn ATENTAMENTE.
EN CASO DE NO SEGUIR ESTAS INSTRUCCIONES,
LA SEGURIDAD DE SU HIJO PODRÍA VERSE AFECTADA.
guía del usuario
Gracias por escoger un producto BABY MONSTERS .Le recomendamos que lea atentamente las notas
importantes relativas a la seguridad descritas a continuación.
Esto le garantizará un uso seguro y duradero del producto.
1.ADVERTENCIA: LA SEGURIDAD DE SU HIJO ES RESPONSABILIDAD SUYA
2.ADVERTENCIA: Asegúrese de que el niño esté siempre bajo la supervisión de un adulto.
3.ADVERTENCIA: Antes de utilizar la unidad, asegúrese de que todos los dispositivos
de bloqueo estén activados.
4.ADVERTENCIA: A fin de evitar lesiones personales, asegúrese de que el niño se
mantenga siempre alejado del producto cuando se disponga a plegar y desplegar la unidad.
5.ADVERTENCIA: No permita que el niño juegue con este producto.
6.ADVERTENCIA: Utilice siempre el sistema de seguridad.
7.ADVERTENCIA: Antes de utilizar la unidad, compruebe que los dispositivos de
acoplamiento del chasis del cochecito para bebés o del asiento de la unidad o de
la silla para coches estén correctamente acoplados.
8.ADVERTENCIA: Este producto no es adecuado para correr o patinar.
9.Este vehículo ha sido diseñado para niños a partir de 0 años y de hasta un máximo
de 15 Kg. de peso.
10.El niño deberá mantenerse alejado de las piezas móviles del producto durante la
realización de ajustes en el mismo. Este cochecito precisa de un mantenimiento
periódico por parte del usuario.
11.No utilice accesorios o recambios que no hayan sido previamente homologados por
Baby Monsters, ya que podrían poner en peligro la seguridad de la silla de paseo.
12.Sobrecargar, plegar incorrectamente la unidad y el uso de accesorios o recambios que no
Conexión con la silla de coche (opcional)
ADVERTENCIA!
hayan sido previamente homologados por Baby Monsters podrían romper o dañar la
silla de paseo y poner enpeligro la seguridad del producto. Lea las instrucciones.
13.El producto se suministra con una cesta para el trasporte de mercancías bien
distribuidas y de hasta 3 Kg. de peso.
14.Cualquier carga adicional acoplada al manillar y/o a la parte posterior del respaldo y/o a los
latera les podría tener efectos negativos en la estabilidad de la silla de paseo.
Compruebe regularmente los tornillos, pernos y remaches para asegurarse que están bien
colocados y seguros. Reemplazar todas las partes que estén en malas condiciones. Pueden
utilizarlo durante el invierno, en la playa o en el campo; es importante efectuar una limpieza
a fondo y secar el vehículo después de utilizarlo. La sal marina y de las carreteras puede corroer
las piezas metálicas si no se retira. Después del uso en estas condiciones, debe limpiarlo con agua
fresca y secarlo cuidadosamente.
● Verificar regularmente que todos los dispositivos de bloque del chasis funcionan correctamente.
● Si cualquier parte del carrito está daňada, contacte inmediatamente con su distribuidor
local de Baby Monster y no vuelva a utilizar el carrito.
● No exponer el carrito a la luz solar durante largos periodos de tiempo, incluso la
exposición normal a la luz solar puede alterar el color del tejido.
● Un aceite suave o un spray de silicona es adecuado para utilizar como lubricante de las
piezas móviles. La vaselina es un buen lubricante para utilizar en los pedales del eje delantero.
● Remover periodicamente las articulaciones giratorias de las ruedas frontales,
limpiar y engrasar con vaselina.
● Asegúrese de que las cremalleras están totalmente cerradas o totalmente abiertas ya
que se pueden daňar.
●Utilizar siempre la capa protectora de lluvia durante mal tiempo.
● Nunca ponga ningún objeto sobre la capota ya que puede daňar el vehículo
y/o hacerlo peligroso.
●Dejar siempre el carrito en una superficie protegida dentro de casa.
●Limpiar frecuentemente las piezas de metal con un paño húmedo y enseguida secarloas.
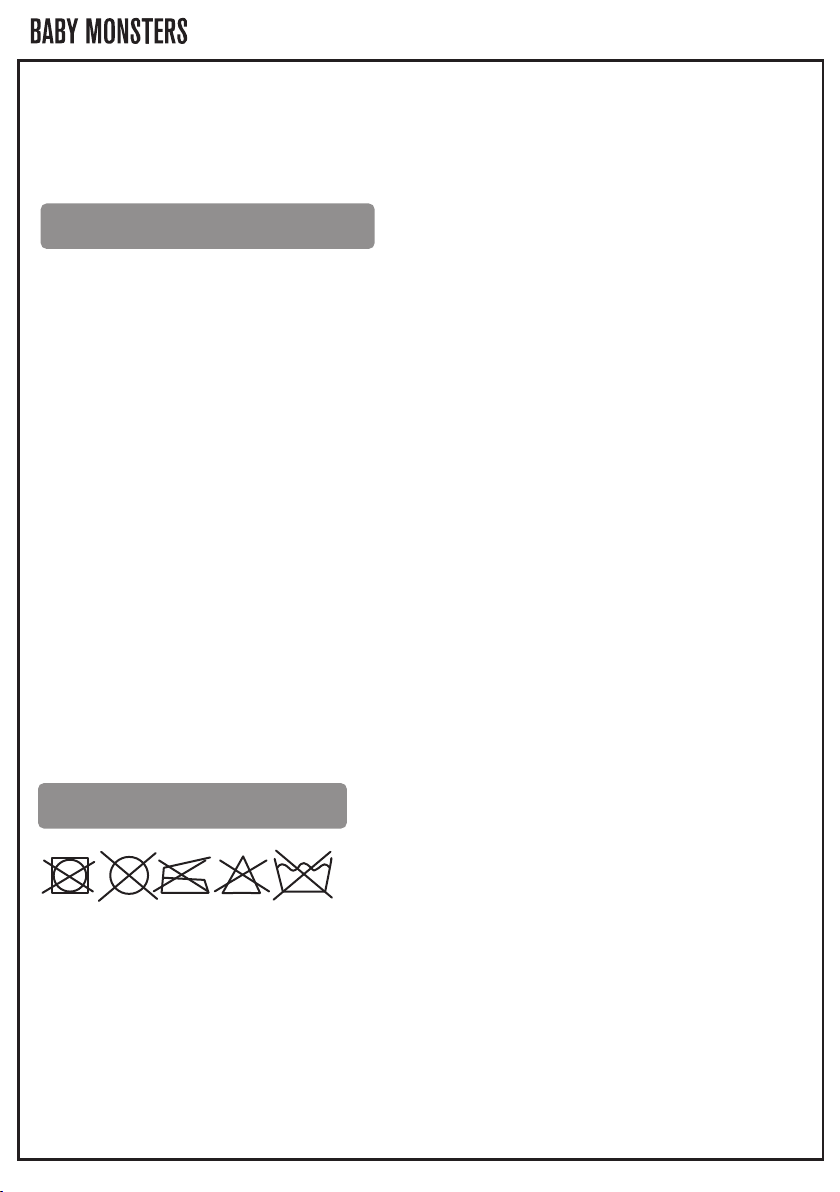
●Los tejidos se deben limpiar conforme con las indicaciones en las etiquetas.
●No lavar en la lavadora. Limpiar con esponja o lavar a mano con detergente
suave y con agua fría.
Español